Home › Forum › Ask A Member › 1929 Johnson A-45 Spark Plug Wires / Coil
- This topic has 25 replies, 8 voices, and was last updated 5 years, 2 months ago by
 Tubs.
Tubs.
-
AuthorPosts
-
December 16, 2020 at 4:17 pm #225376
Bucc,
Interesting about the glass insulators. When I did high voltage terminations with neon (15,000volt) it required a 1.5 inch clearance from a grounding surface. If a guy had to run zero clearance for a few inches the best insulator was a glass tube big enough to slide the wire (G.T.O. ) glass tube only inside the zero clearance area. Neon glass tubes come on all sizes to make an insulator, Just nick with a glass rated file & the tube will break to size required. To remove sharp edge on filed side glass polish with a torch.
I never thought neon glass would ever come up with outboards. I have seen glass tubing, smaller sizes used on one letter to the next instead of using insulated G.T.O. wire as jumpers from letter to letter in a sign. A guy could heat & make small bends for a better fit too. Neon glass has a much lower melting tempature too for easier bending too.
Bet the dielectrics ( insulating propertys ) are better now too. To do it easier look up Super Corona Dope at M.G. Chemicals for one of the best paint on insulating material, comes in small bottles & was developed for high voltage transformers to prevent arcing to ground. Isn’t that what a coil is 🙂 !!P.S. everything has a magnetic field around ti. Higher the voltage the more pressure. Now take the length of wire next to a grounded surface. The longer the surface the more capacitance or capicity the grounded surface absorbes the energy that is for other uses like a spark plug. Keep all high voltage wires from grounded surfaces as it WILL rob energy for the spark plug. Same theory as the magneto capacitor but different playing field. I know, LONG WINDED
December 16, 2020 at 6:08 pm #225385Geer, I don’t think I’ll have to go to such extremes as you did on the coil.
The copper “L” shaped connector that’s broke on one side of the coil,
still has the bottom of the bracket there, imbedded in solder. In theory,
I can just solder the plug wire on top of the broken bracket.
The coil still has good continuity and ohms readings are good.
Good luck on making coils!
Thanks!Prepare to be boarded!
December 16, 2020 at 6:15 pm #225386Jeff, interesting about the glass tubes, but guess some engineer decided to
do away with them on Johnsons.
I do have some Corona Dope in my arsenal.
Wish my plug wire would hurry and and arrive so I could get mag back together.
Between the holiday season and Covid the mail has been “slow” here in the
deep freeze.Prepare to be boarded!
December 16, 2020 at 10:25 pm #225401Bucc,
I helped a guy on Johns Old Mercury site using dual fire coils for a single cylinder Mercury. We just grounded one spark plug lead & used the other went to the spark plug. It gave him a much hotter spark, more windings. We used the corona dope for insulating the coil leads. I too have found cracked coils with good electrical values. Covered with very fine fiberglass cloth made for radio controlled aircraft & coated with corona dope. The coil worked well. It was developed for black & white T. V.’s as the scanning beam in the picture tube from arcing to ground in the cathode ray tube. Any time the balance of electrons & newtrons were at an unbalanced condition it would try to arc & balance them. I always have been into “sparky” stuff. The more danger it presented the more I liked it. Built a few bombs for new years too.December 25, 2020 at 7:08 pm #225961Finally got my 9mm plug wire from Brillman’s yesterday, so I installed
it on the A-45 Johnson today.
The one secondary coil tab was broke off and missing, so I made
a new one out of copper, soldered it on, and drilled holes in each
tab for the plug wires to poke thru to make soldering them on easier.
So for so good, as the coil still tested okay with the ohm meter
when I was done. Perhaps tomorrow I’ll see if I have “spark”.I did not fill the cavity below the coil back up with tar, but
I installed “fish” paper below and around the secondary
connections, and put a little corona dope around them.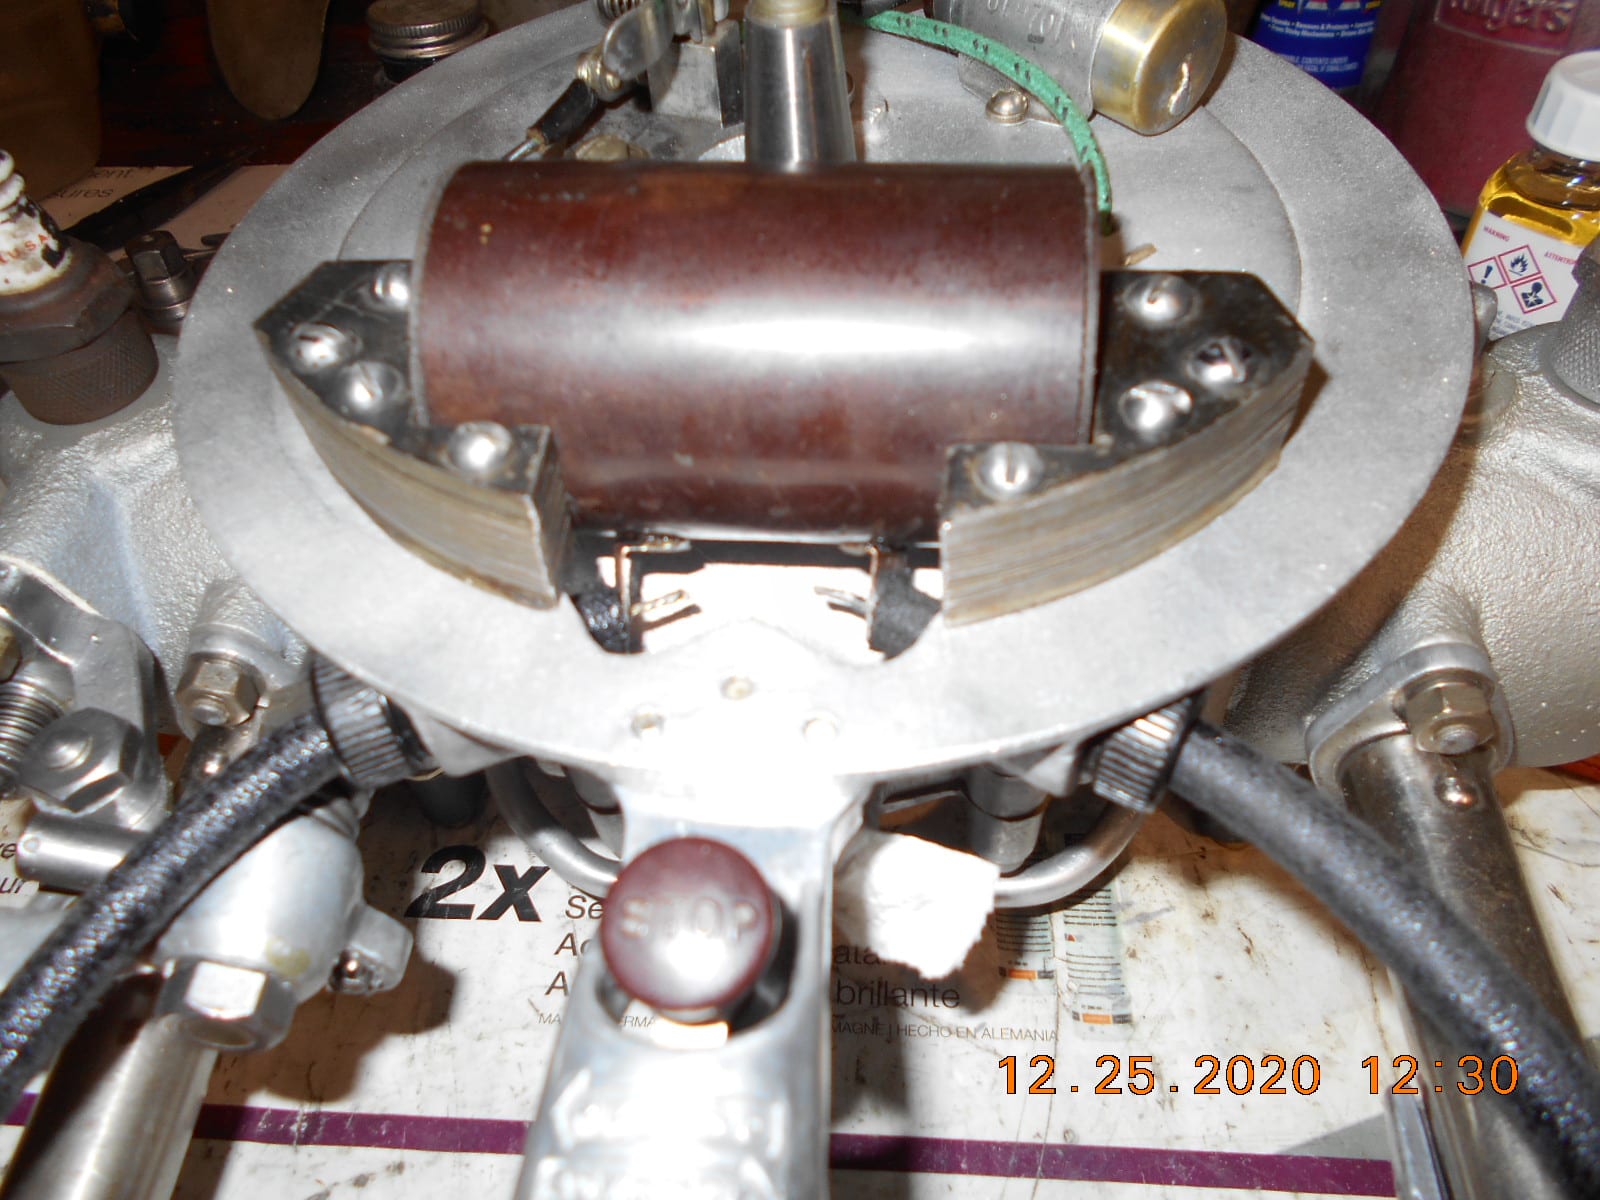
Prepare to be boarded!
December 25, 2020 at 7:38 pm #225965Buc – Brillman delivered a nice Christmas gift! Excellent work on the repair. Looking forward to the smoke!
Bob
1937 Champion D2C Deluxe Lite Twin
1954 Johnson CD-11
1955 Johnson QD-16
1957 Evinrude Fastwin 18
1957 Evinrude 3022
1958 Johnson QD-19
1958 Johnson FD-12
1959 Johnson QD-20“Every 20 minute job is only a broken bolt away from a 3-day project.”
"Every time you remove a broken or seized bolt an angel gets his wings."December 26, 2020 at 2:25 am #225970I’d be careful as to what kind of epoxy is used on the coil as the JB stuff has iron powder in it would be conductive. A clear epoxy should be OK.
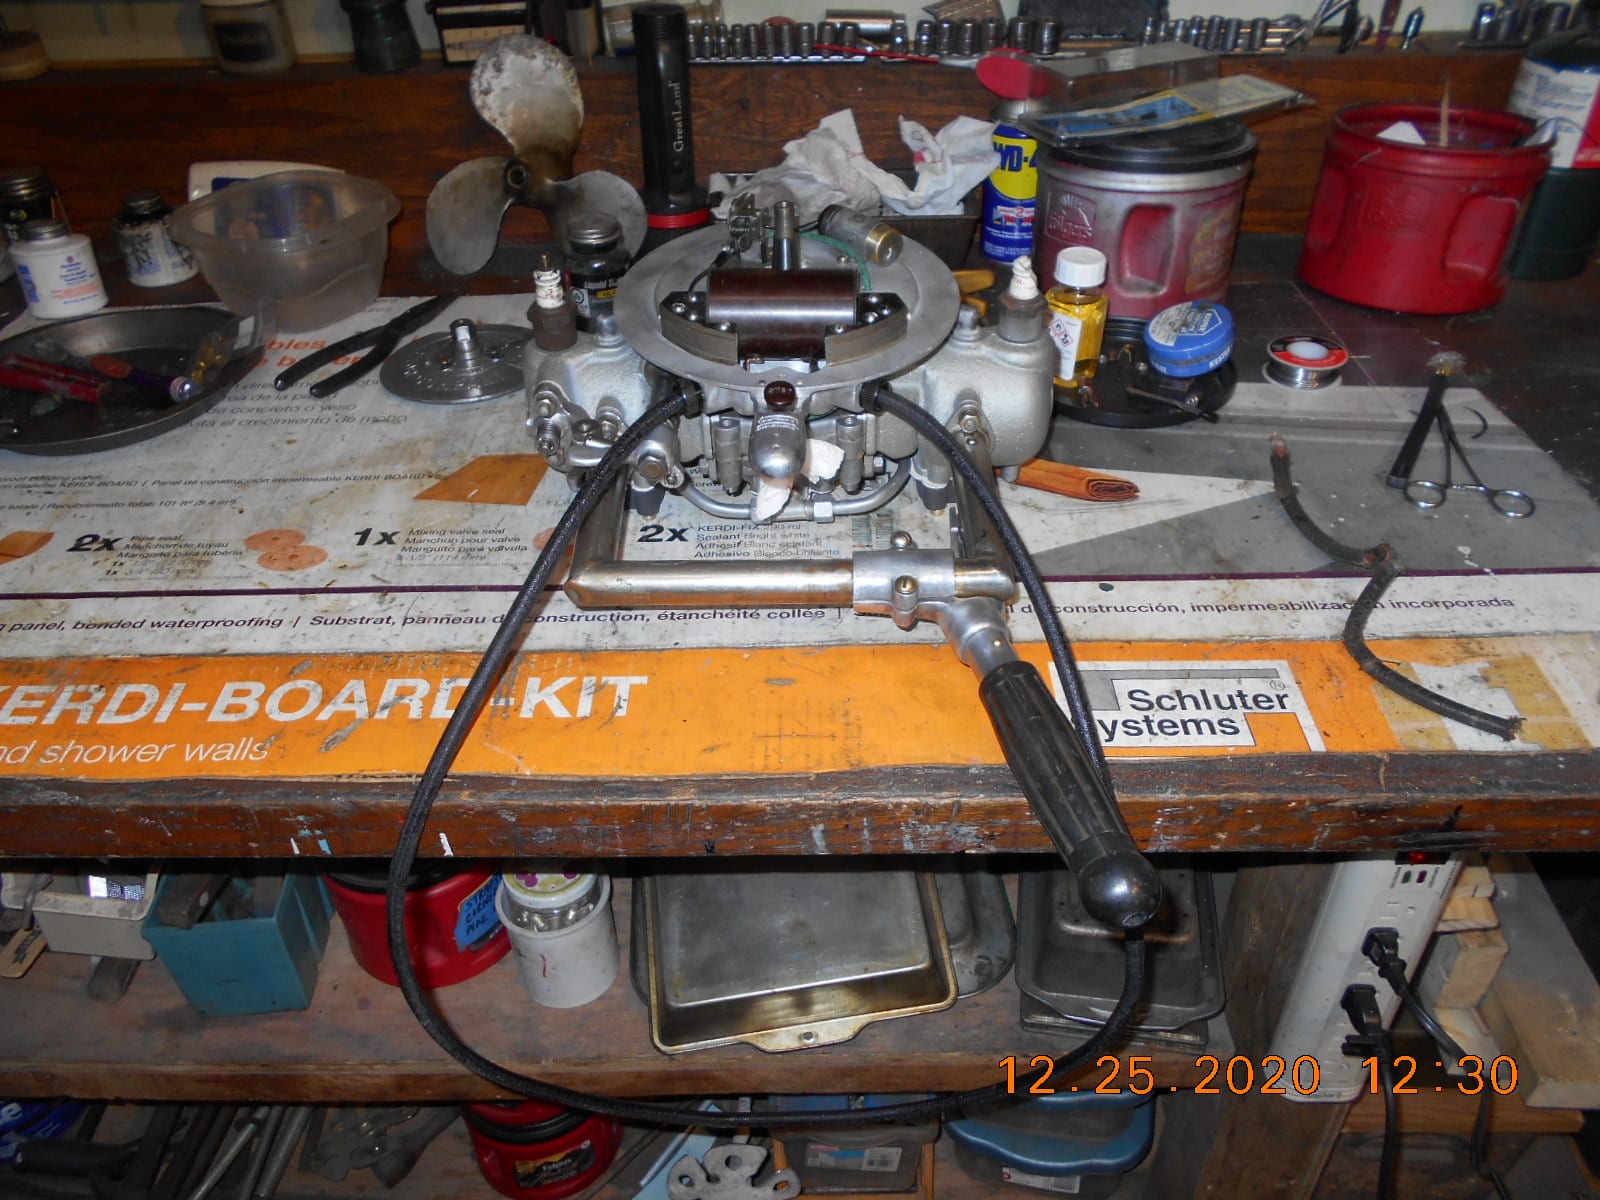
December 26, 2020 at 6:16 pm #226036I messed around a good part of the day before I finally got to
the point to see “spark”. My coil is making nice blue spark at
the plugs. I’m not sure if the huge capacitor I installed was
the correct specs to hold up, but so far, so good.This motor has two separate little keys for the flywheel, of which
one was missing. I found a key in my stash that I made fit,
but the first time I tried sticking the flywheel it didn’t go on all the
way, and almost had to get the puller back out to get the flywheel off.
The micrometer said the key was about .010 too long, so a little
filing and the flywheel went on okay.
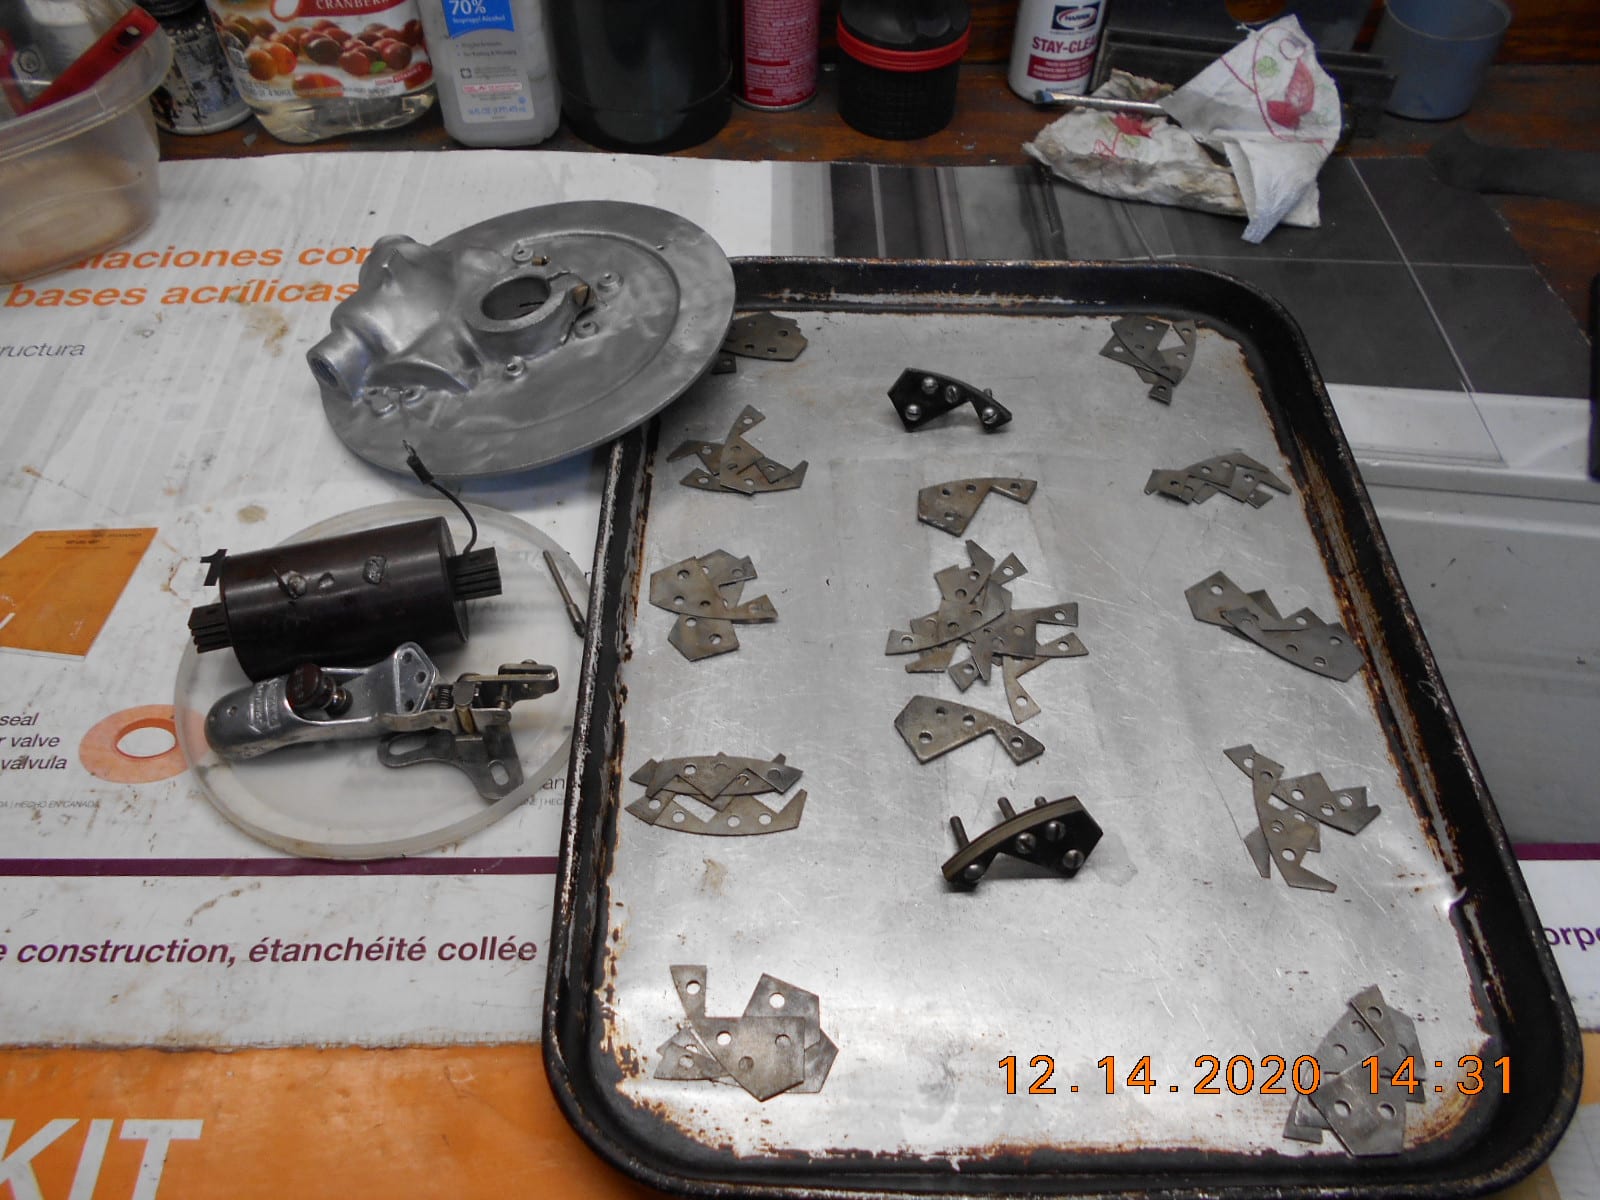
Only problem then, was the magnets were hitting the laminates. 🙁I had all the laminates off the coil, which evidently changed things.
Loosening the coil hold down bolts and trying to move the coil in
did not work. Out came a magic maker, file and Dremel with a sanding drum.
After about a dozen test fits and light sanding of the high spots,
I finally got the flywheel to spin without rubbing.Thought sure I was good to go, so I set the points, torqued the
flywheel down, and spun it over……. NO spark, lol
Took the flywheel back off, and did some checking with the ohm
meter, which I should have done in the first place, and found
the points were grounded as I had one insulator in the wrong place.Long story just to say I have spark, but maybe someone will know
now “not” to do things as I did !Had I known which two magic coil hold down machine screws
could have remained tight and but still be able to remove the coil, I may have
left the laminates all in place! The coil was stuck down with so much tar
under it, I wasn’t sure I was ever getting it out.Photo showing which screws can remain tightened and still remove the coil.

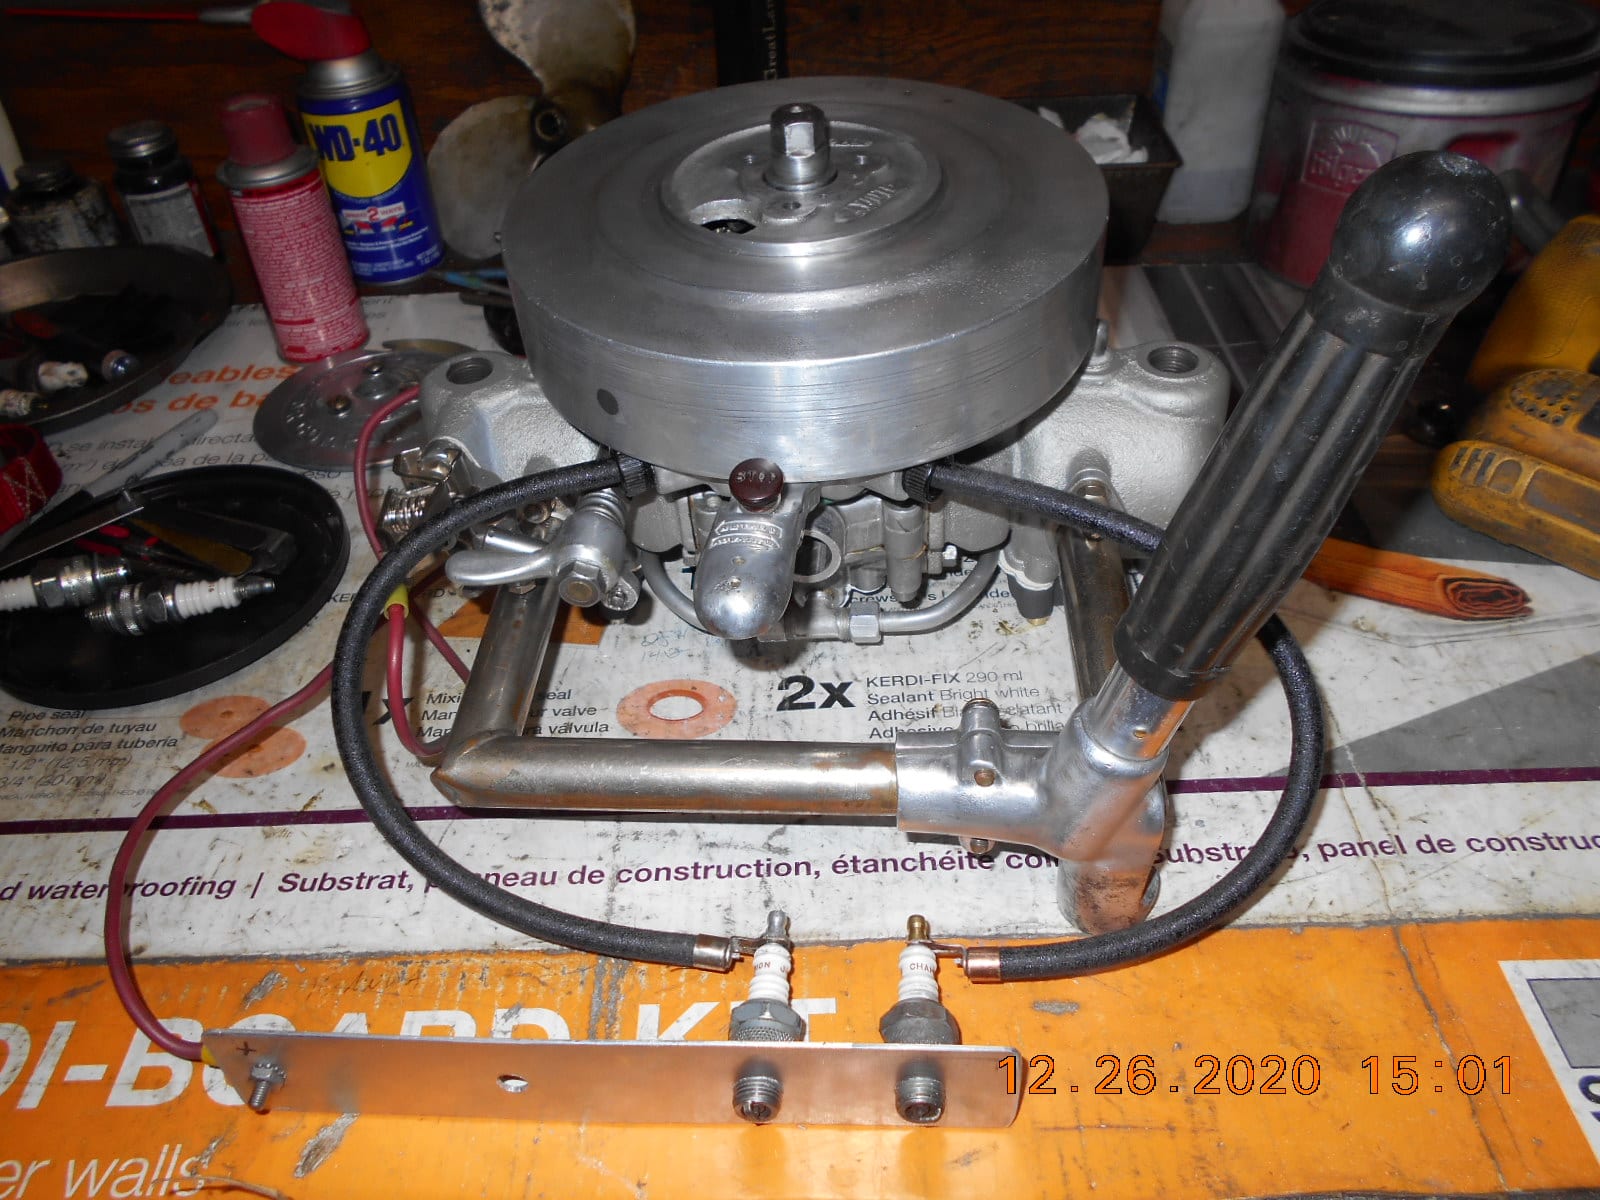
Powerhead awaiting for it’s better half.
Ready, Camera, Action!
https://youtu.be/Ba8KxyMrNWAPrepare to be boarded!
December 26, 2020 at 9:09 pm #226043.
A "Boathouse Repair" is one thats done without having tools or the skills to do it properly.
-
This reply was modified 5 years ago by Tubs.
December 26, 2020 at 11:03 pm #226046Yes, the coil sits deep in the mag plate, and the laminate have
to come out with the coil. The coil core has fingers on each
end that laminates interlock with.
Prepare to be boarded!
-
This reply was modified 5 years ago by
-
AuthorPosts
- You must be logged in to reply to this topic.