Home › Forum › Ask A Member › 1981 Evinrude 4.5 HP Bolt torque
- This topic has 10 replies, 3 voices, and was last updated 8 months, 1 week ago by
Don.
-
AuthorPosts
-
July 22, 2025 at 3:21 pm #298403
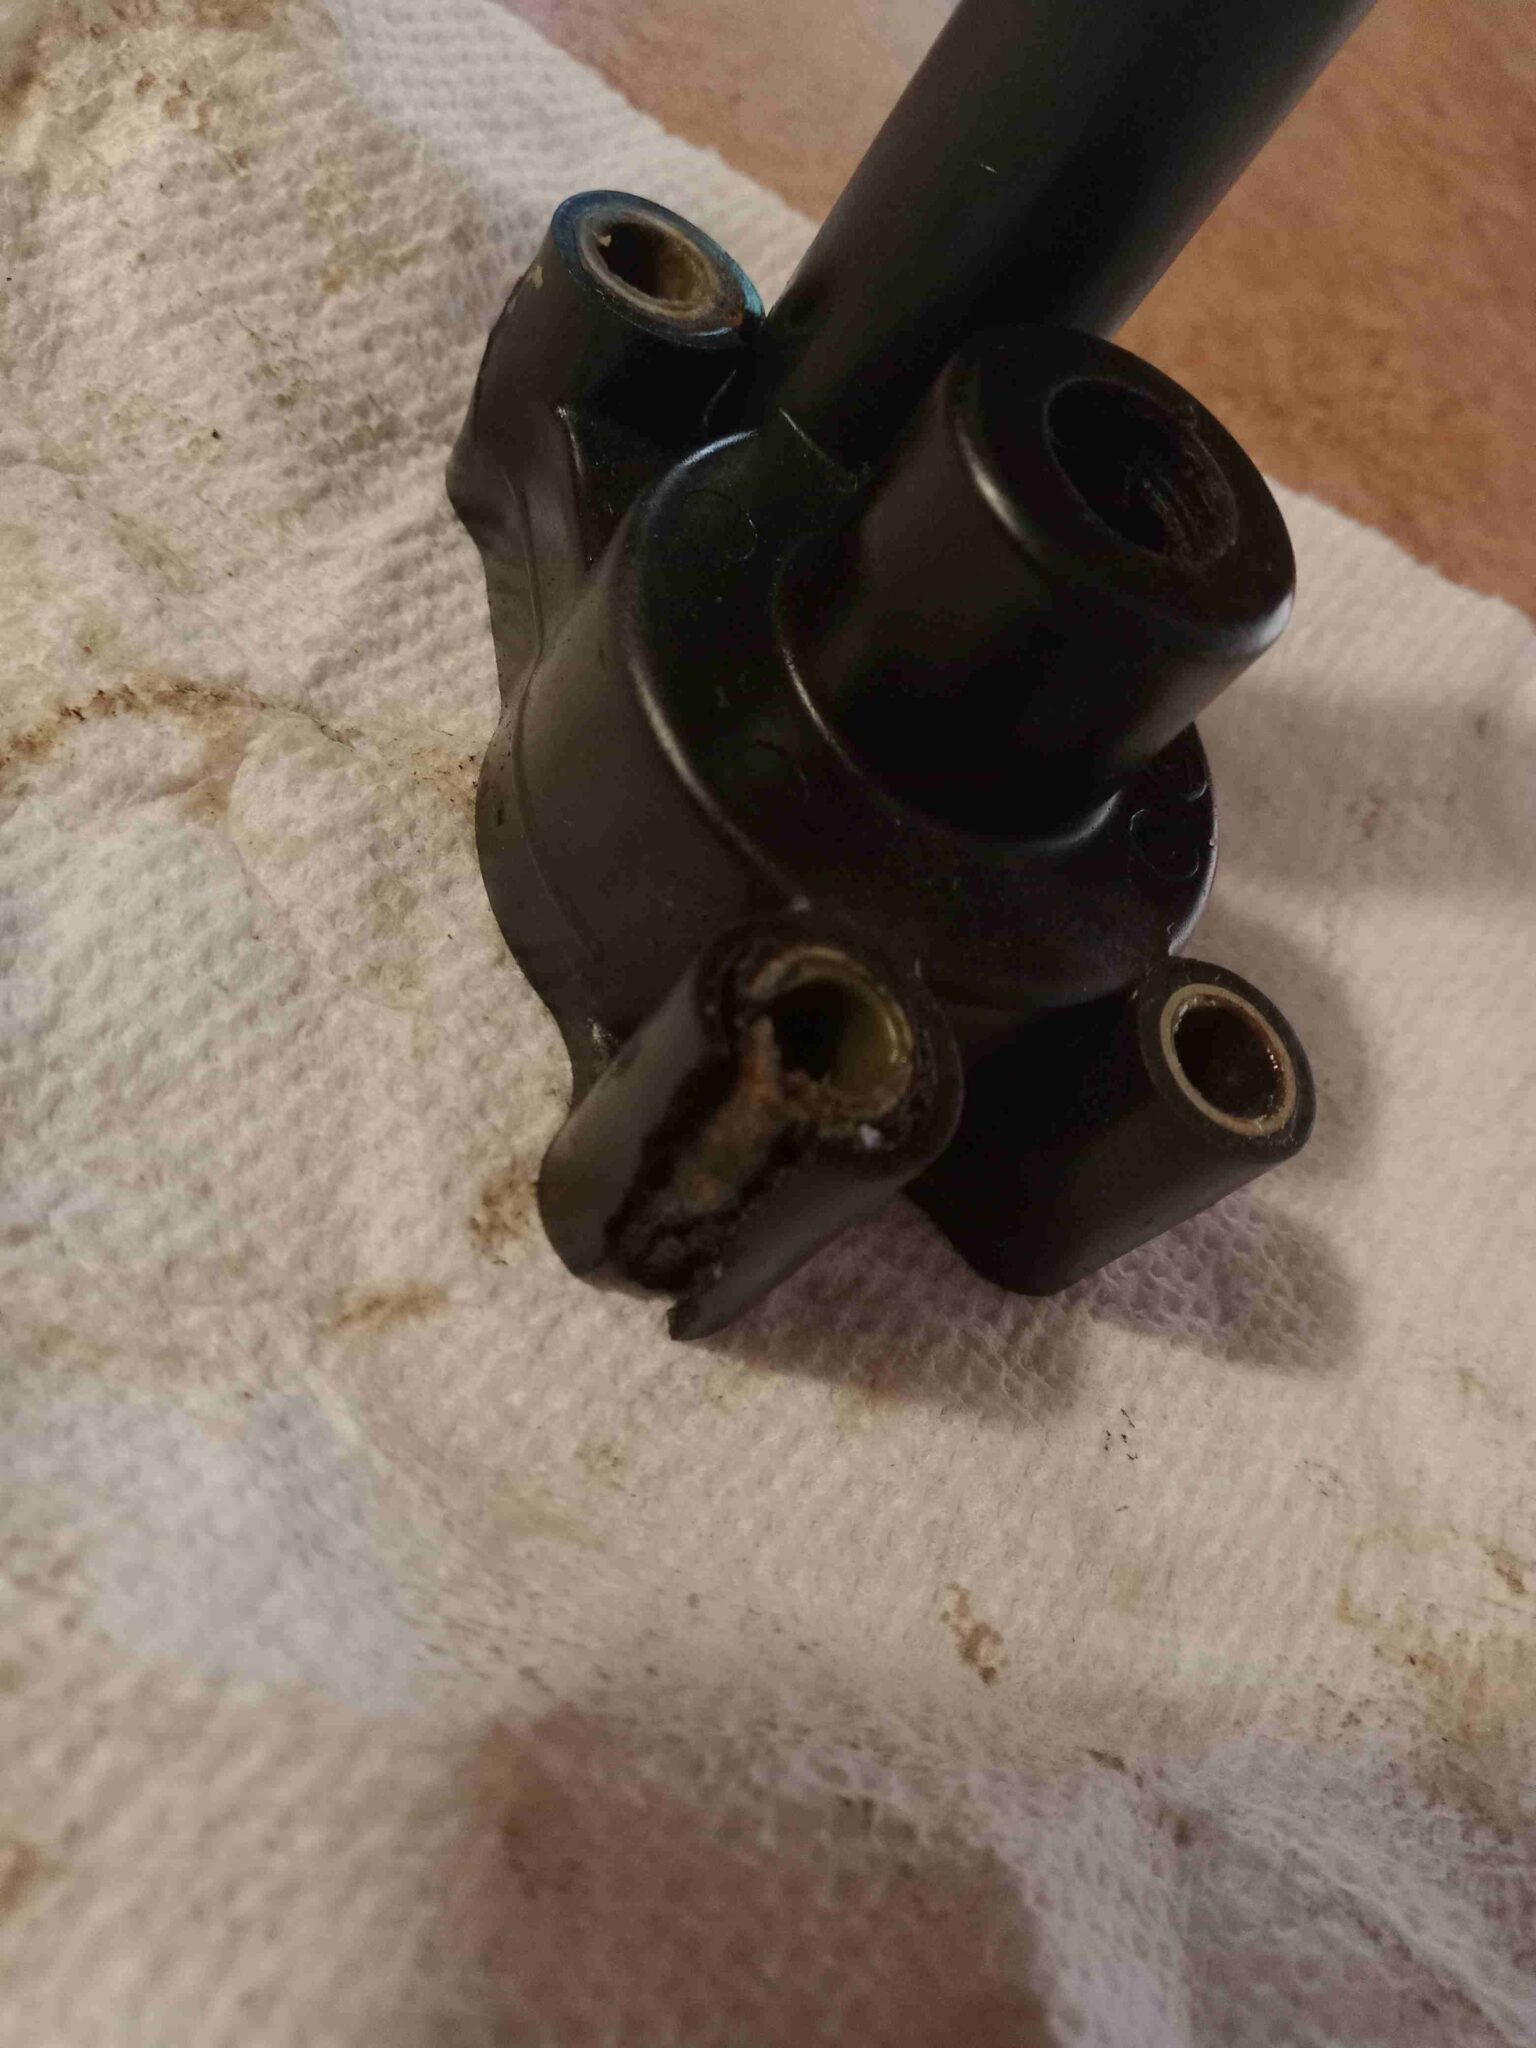
I’m finishing up reviving an E5RCI , 1981 4.5 HP Evinrude that hasn’t been run in 20 or 30 years for a friend. Looks like the last person to change the impeller overtightened the impeller housing bolts, as two of the bolts have the plastic housing below it cracked. When I get the new housing, what is the torque spec for those four bolts?
Thx,
Dave
 July 23, 2025 at 7:54 pm #298451
subjective question… if worried just put some small star lock washers and thighten down with extra 1/4 turn
here is the chatgpt answer to your concern
For the 1981 Evinrude 4.5 HP outboard, the torque specification for the water pump housing bolts is typically around 60 to 80 inch-pounds. That’s roughly 5 to 6.5 foot-pounds, so it’s a light touch—just enough to snug the bolts without cracking the plastic housing, which is a common issue if overtightened.
Joining AOMCI has priviledges 🙂
July 24, 2025 at 10:34 am #298475Oftentimes, over torquing is not the issue here, especially in salt water. The salt builds up between the metal sleeve and the plastic, which ends up splitting the plastic off. Look closely at the other pieces as well, especially the plastic upper seal/bearing housing, this is fairly common.
In any event, the torque spec is 60-84 inch pounds. Be sure to use plenty of marine grease around those bolt shanks to help prevent/reduce the chances of this happening again.
1 user thanked author for this post.
July 24, 2025 at 11:10 am #298477Thx guys for the torque spec and the info about saltwater. With torque that small, I think I’ll use some thread-locker.
When this motor was used, 25-30 years ago, yes – it was used in saltwater on the gulf off Florida, so that could have caused the pump housing to crack. There was white granular stuff that came out on the bolt threads, and not being a guy that sees saltwater motors, I assumed that dried up stuff was dried up thread-locker. I’ll rinse out and lube the bolts and bolt holes. I’ll do the same for the plastic seal above the gearcase. I will not replace that if I can salvage it because new ones are $149.00! There is a very small, partial crack in one corner of that which was could well have been caused, as Fleetwin said, by salt. After each saltwater use, it was run for a while in a bucket of clean water. I see no other signs of salt corrosion on this motor, and it’s new home will be on a lake in central Minnesota – so no more salt.
Dave
July 25, 2025 at 8:26 am #298507Well first, don’t reuse that housing. It will not clamp down properly with the plastic cracked like that. $149?? No, that is not right. $22.40 from marineengine.com
Finally, do not use thread lock on those screws. 60-84 inch pounds is plenty to clamp/hold the bolts in place. Coat the threads and shanks of the bolts libearlly with marine grease to help avoid this problem in the future and to make sure you will be able to get those bolts out in the future without using the torch and melting all the plastic!
July 25, 2025 at 11:13 am #298511Well first, don’t reuse that housing. It will not clamp down properly with the plastic cracked like that. $149?? No, that is not right. $22.40 from marineengine.com
Finally, do not use thread lock on those screws. 60-84 inch pounds is plenty to clamp/hold the bolts in place. Coat the threads and shanks of the bolts libearlly with marine grease to help avoid this problem in the future and to make sure you will be able to get those bolts out in the future without using the torch and melting all the plastic!
The $149 part is #25 in the exploded view – the gearcase cover. It only has a very small partial crack by one of its 3 bolts, and I will do my best to seal, maybe try to glue that crack. I already have a new water pump housing ordered from Marineengine that should be here in a couple days. Thanks for the tip on using marine grease on the bolts.
Dave
July 29, 2025 at 7:36 am #298612You can find those plastic covers used on ebay for a reasonable price, just be sure it doesn’t have the same issue as yours. I’m sure your current cover will be OK, for now anyway. These covers are a royal pain in the butt. Cheesy plastic that doesn’t seal well onto the gearcase housing. And be very careful with that gasket, it more or less will fit two ways, but is only right one way.
These gearcases have an engineering flaw that causes them to burn up gear lube, especially if the engine is used on a tender/sailboat auxiliary, so change the gear lube frequently.
July 29, 2025 at 11:33 am #298616Thx for the info on the gearcase cover. Yes the plastic looks like poor quality. Only a small crack at one corner. I took out the bolt and sprayed the area good with carb cleaner to clean any salt out of the crack and bolt hole. The metal insert was not corroded. I cleaned the bolt good and put it back in with grease like you suggested. I took out and cleaned/greased the other two bolts and holes – no sign of salt or cracks by those. I did the bolts one at a time, so never disturbed the gasket, as it appears to be sealing well. Put the new pump housing and impeller in and got it running good in a tank. This motor hadn’t been run for 20 or 30 years. A small amount of water was in the gearcase, but the washers on the drain and vent screws were in bad shape – one was in two pieces, so that’s probably how the water got there.
I put an OEM kit and float in the carb – the float valve was badly stuck shut and some passageways were totally clogged with dried up gas/oil residue. This model has a self-contained fuel tank. I never saw one of these before with the small, fuel pump built into the manual fuel valve assembly. I assume that helps when the tank gets near empty, where it may have trouble gravity-feeding fuel to the carb.
Thx again for the help and tips! Dave
July 31, 2025 at 7:15 am #298673Yes, that engine is a little “over engineered” with the integral tank, crazy choke/tank valve control and that little fuel pump. God forbid you want to add the option of using a remote tank, another pile of crazy plumbing.
Change that gear lube often, like I say, those gearcases have a few unforgiveable engineering flaws, especially on tenders or sailboats that use reverse gear often.
The impeller housing water tube grommet is another way to get tricked on these things. The little 4.5hp uses the same water pump kit except for one part, that grommet. The little engines have a water tube with a narrow diameter, the larger 6-8hp units have a larger diameter water tube. I’m thinking both grommets are included in the kit, but who knows these days.
The other problem area on this style is the crankshaft/driveshaft splines, they love to seize/rust. It is critical to get these gearcases down every couple of years to clean and relube the splines, replace the oring (on models that use one). The beauty part of this added service is it only takes a few minutes because there is no shift rod connector. Just shift into forward and pull the gearcase down, be sure to lube up all the retaining bolts liberally with grease.
And yes, that gearcase cover is made of cheesy plastic, but to be fair, nothing would be much of a match for the power of salt when it builds up between the plastic and the metal sleeve. This part should have been made out of aluminum.
July 31, 2025 at 11:52 am #298677Thanks for the tips! That 4.5 is going to a relative of my girlfriend’s, and he takes good care of his things. It will be used on a 12′ fishing boat at his cabin on a Minnesota lake, but I expect I will get to do repairs beyond spark plugs and gear oil changes. The water tube grommet I used from the old pump housing – it was like new, so may have been replaced in the past. My girlfriend’s Dad used it for years on a 12 foot open aluminum fishing boat on the Gulf off of Florida (yeah sounds crazy but that’s what he did!). He always ran it in a barrel of clear water when done.
It may get a lot of reverse gear use backtrolling for Walleyes, but that will be at very slow trolling speed.
I was impressed with the minimum idle setting knob with stop button built into the end of the tiller – it appears to be much more robust than the broken ones on my 1989-1991 15 HP motors.
Dave
-
AuthorPosts
- You must be logged in to reply to this topic.