Home › Forum › Ask A Member › Elto Rudder Twin
- This topic has 10 replies, 5 voices, and was last updated 3 years, 11 months ago by
JOSEPH BRINCAT.
-
AuthorPosts
-
April 29, 2022 at 2:17 pm #259174
Just got a coil and timing box rebuilt and need help on wiring. I’ve never fooled with an engine this old and some pictures, or diagrams would be great!
Thanks.
April 29, 2022 at 2:31 pm #259175There should be a long two conductor wire, a short two conductor wire, and one spark plug wire coming out one side. Only a spark plug wire coming out the other side.
Remove the timer, tank, and coil brackets. Put the tank in place, install the coil with the brackets on top of the tank bosses, then finish installation of the tank.
Route the short wire up and into the bottom of the timer. Attach one conductor to the insulated points terminal. Attach the other to the kill switch inside the timer. Install the timer.
Place the timer strap in place on the timer and install the flywheel so that the cam goes into the large end of the timer strap.
Install one spark plug and attach the spark plug wire to the spark plug. Attach the other wire to the other plug, but leave it resting on the cylinder.
Hook the long wire conductors to a 6 or 7.2 volt battery of at least an amp-hour or so. Place the timer all the way to the left. Turn the flywheel counter clockwise against compression until you hear a click. When you do, you should see a spark at the plug resting on the cylinder.
T
April 29, 2022 at 3:10 pm #259177Tom, thank you! Great instructions!
April 29, 2022 at 3:43 pm #259178Tom , thanks again, I’m helping a neighbor with his dad’s model J Ruddertwin. This is my first encounter with a Ruddertwin, so I’m learning. Got the timer up and good, had to make a link. The coil looks to be good. Wires not so much. So, appreciate your explanation on the wiring. It’s missing it’s fuel cap. I will make something, but would like to be near original looking. Could you or David post a pix of an original cap? The thread looks to be 1 -1/4 X 18 tpi
Thanks
Joe B
April 29, 2022 at 6:57 pm #259180Joe, mine didn’t have a gas cap either. I got one from Matt and Doug Penn. Works great! oldoutboard.com
April 30, 2022 at 8:31 am #259189
If you haven’t figured it out already here is
where the wires go in the timer . + & – doesn’t
matter, here or at the battery.
.
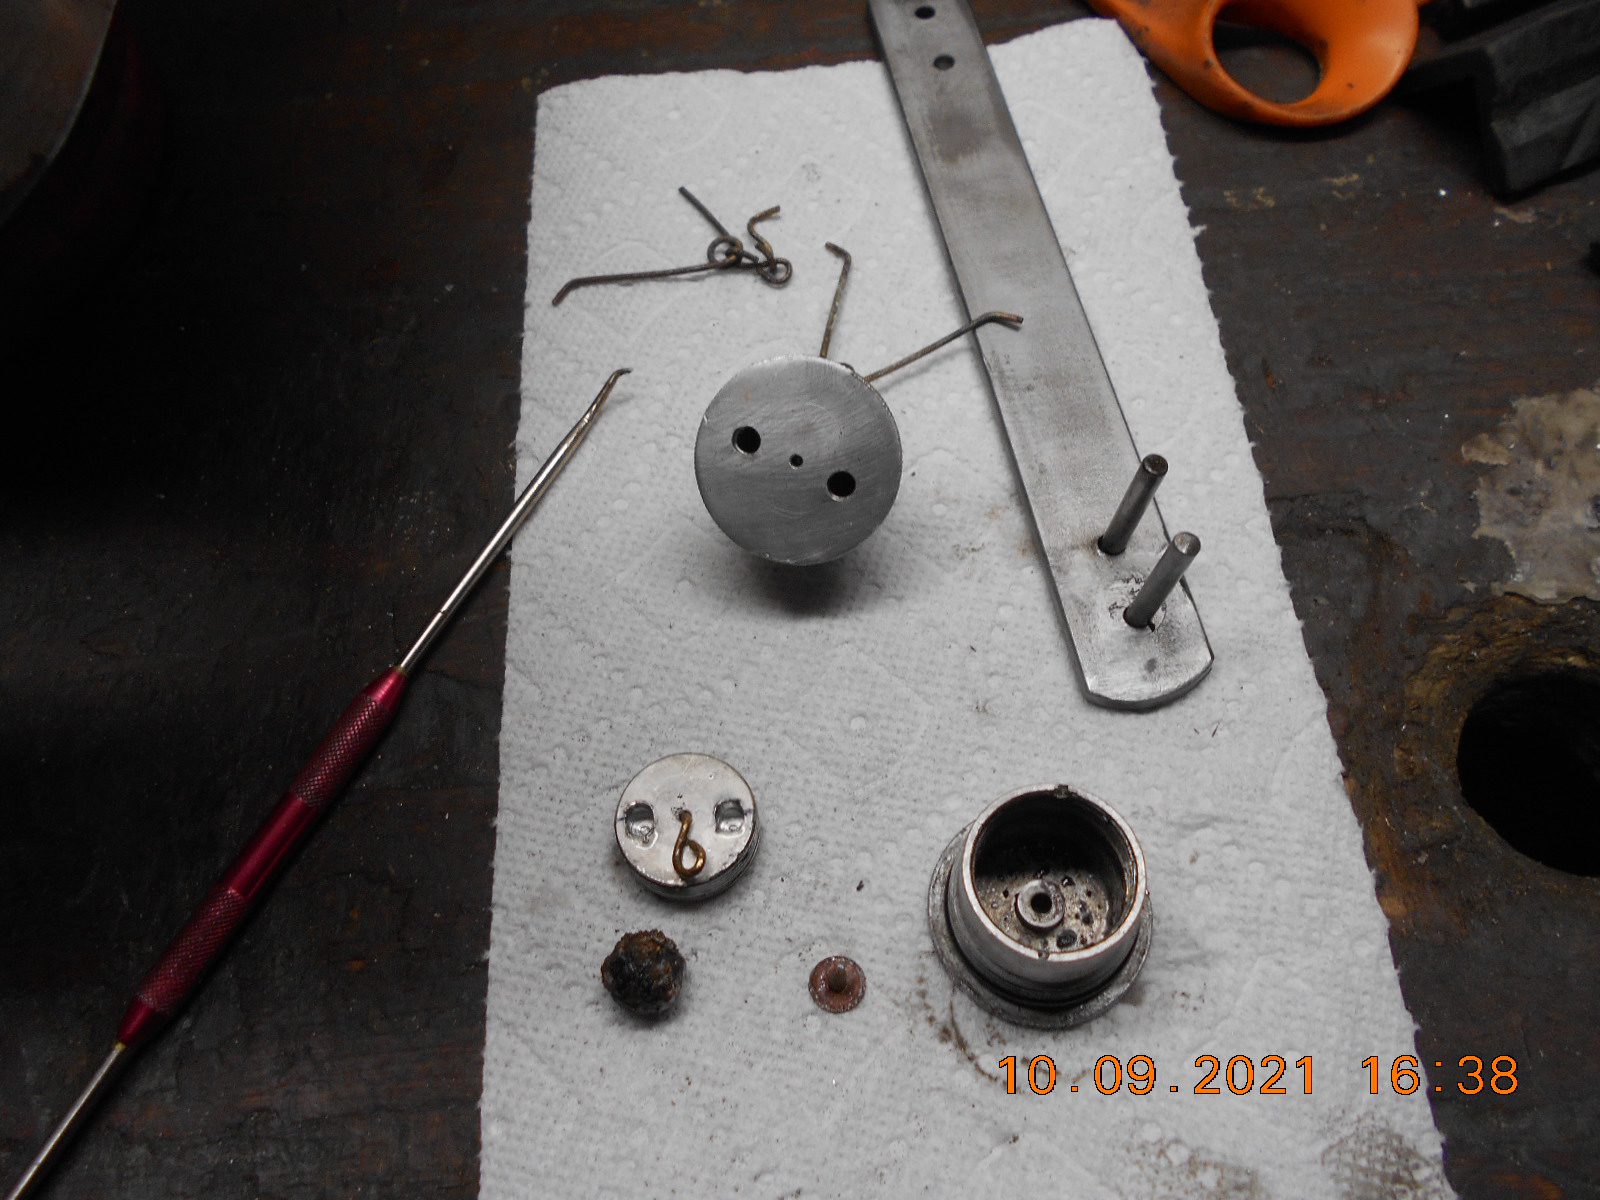
This is a gas cap from my 1925 C Rudder Twin
It needs to be vented. Last picture shows is what’s
is inside. The bottom is concave. As the ball rolls
around it moves the little check valve up and
down slightly opening and closing to let in air
from time to time.
Tubs.
A "Boathouse Repair" is one thats done without having tools or the skills to do it properly.
April 30, 2022 at 2:43 pm #259194Thanks for the photo! Very helpful!
Dave
April 30, 2022 at 6:10 pm #259205Tubs, thanks a lot for especially the gas cap. Olie sure over engineered that one! I think that the best will be to contact Penn’s and see if they have another one around.
Joe B
May 1, 2022 at 10:08 am #259244
There is another style that they used with a pressed in bottom.
I don’t know what years used which one. Its the same
principal inside. The ball is steel and it can rust. That
will stop the ball from moving and jam the check valve shut.
Its easier to solve with the first one I posted and why I
have pictures of mine apart. When you find a replacement
shake it. The ball should rattle.
Tubs.
A "Boathouse Repair" is one thats done without having tools or the skills to do it properly.
May 1, 2022 at 12:32 pm #259255Speaking of rusty balls…..
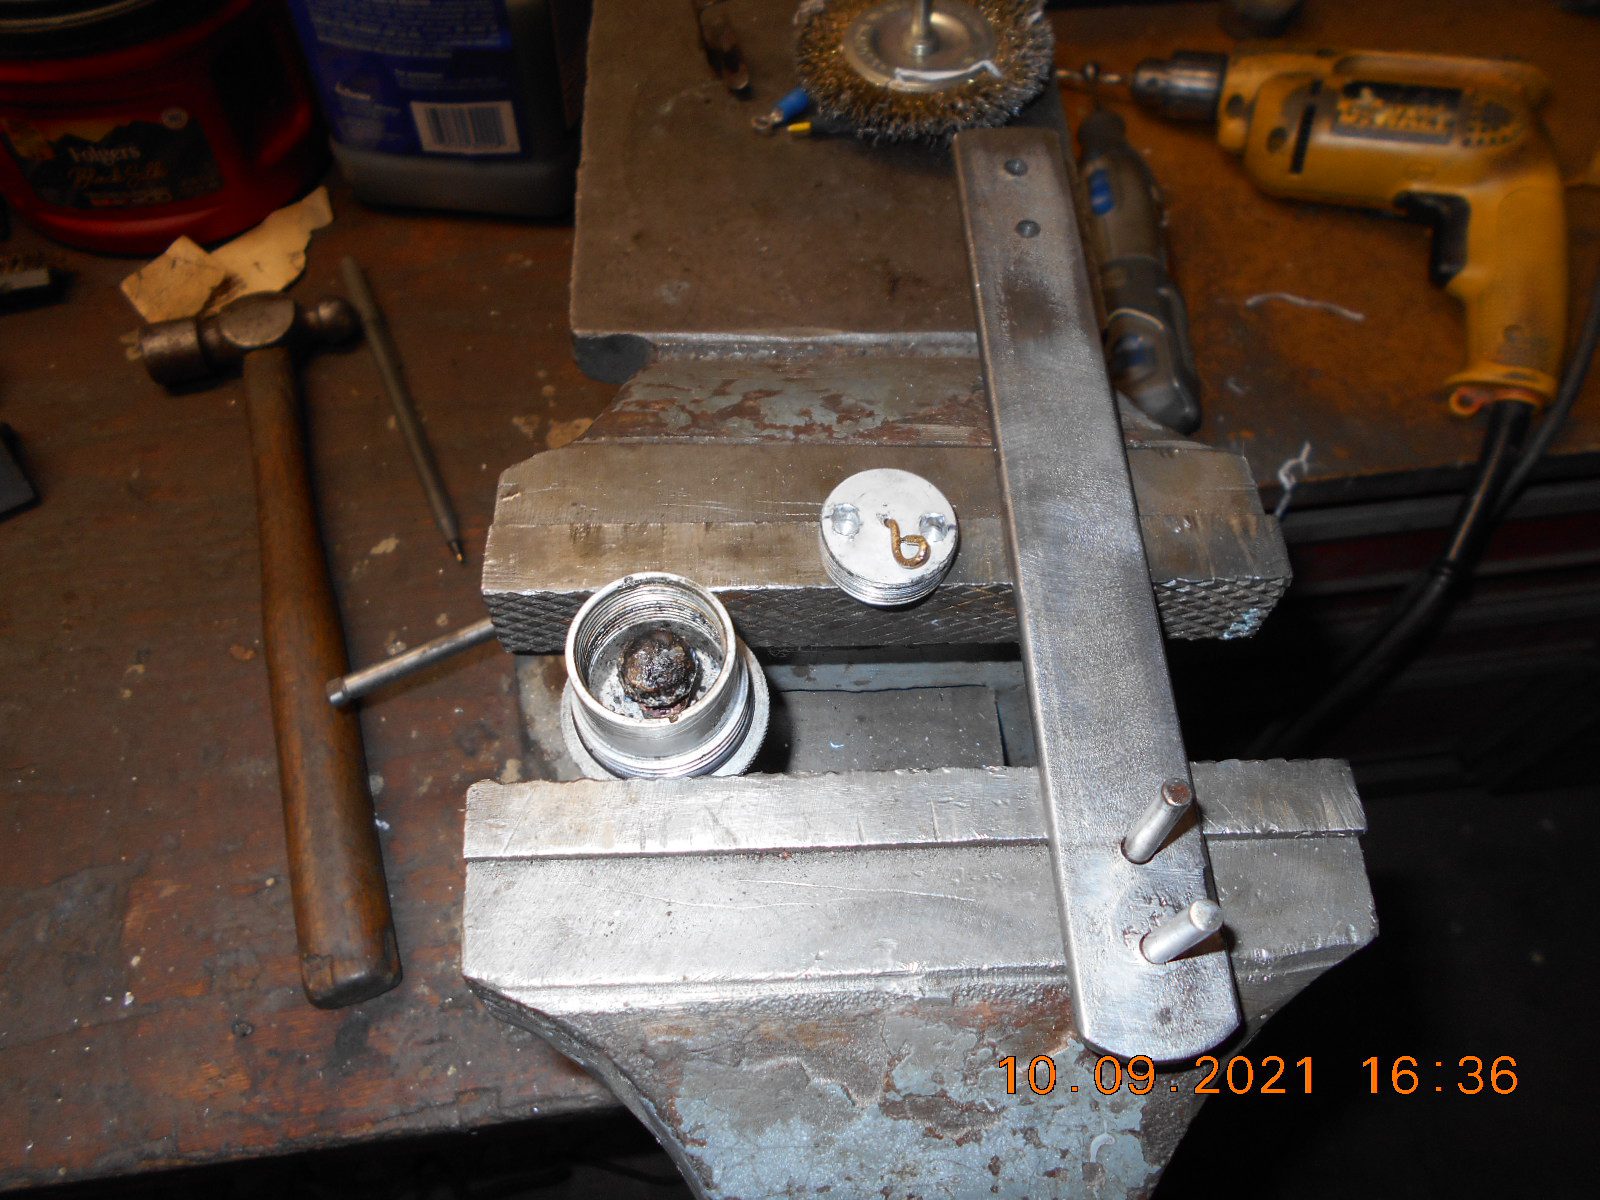
On one of my caps, I could not hold the cap in the vise with
my soft jaws, or wood scraps without destroying the cap
while trying to unscrew the insides, so I ended up drilling
a couple of holes in the top of the cap to hold it in the vice
with a make shift spanner wrench.
I ended up alumi-brazing the holes up, and sanding down,
and polishing the cap, and the holes were barely noticeable.Hopefully when you find a cap, it’s in better shape.
Prepare to be boarded!
-
AuthorPosts
- You must be logged in to reply to this topic.