Home › Forum › Ask A Member › Newbie Questions Restoring 1957 Johnson 18hp FDE-11
- This topic has 53 replies, 16 voices, and was last updated 7 years, 9 months ago by
 Bob Wight.
-
AuthorPosts
-
December 7, 2017 at 5:50 pm #68363
GORGEOUS boat! That’s a work of art… Bravo!
Jim
I say "pardon me" a lot. I had a 20H, then raced open mod sleds.
December 7, 2017 at 8:28 pm #68375Holy cow, Jim. I hadn’t followed the link to the boat till just now. You are a true craftsman. I guess we don’t have to be concerned about you as you rebuild the motor.
December 7, 2017 at 11:45 pm #68383Thanks guys, I hope to make my motor look and run as good as my boat. I’m much more comfortable working wood than metal, so I’m stepping out of my comfort zone.
December 8, 2017 at 1:44 pm #68393HI All,
Dan was nice enough to spend some time on the phone with me last night, and talked through a couple of options and ideas. While on the phone, I pulled the intake and reed plate and took a peek into the crankcase. I don’t see any signs of rust on the crank or bearings. Dan has the idea of trying to flush them with WD-40 to see if any crap comes out. I’ll do this this weekend.
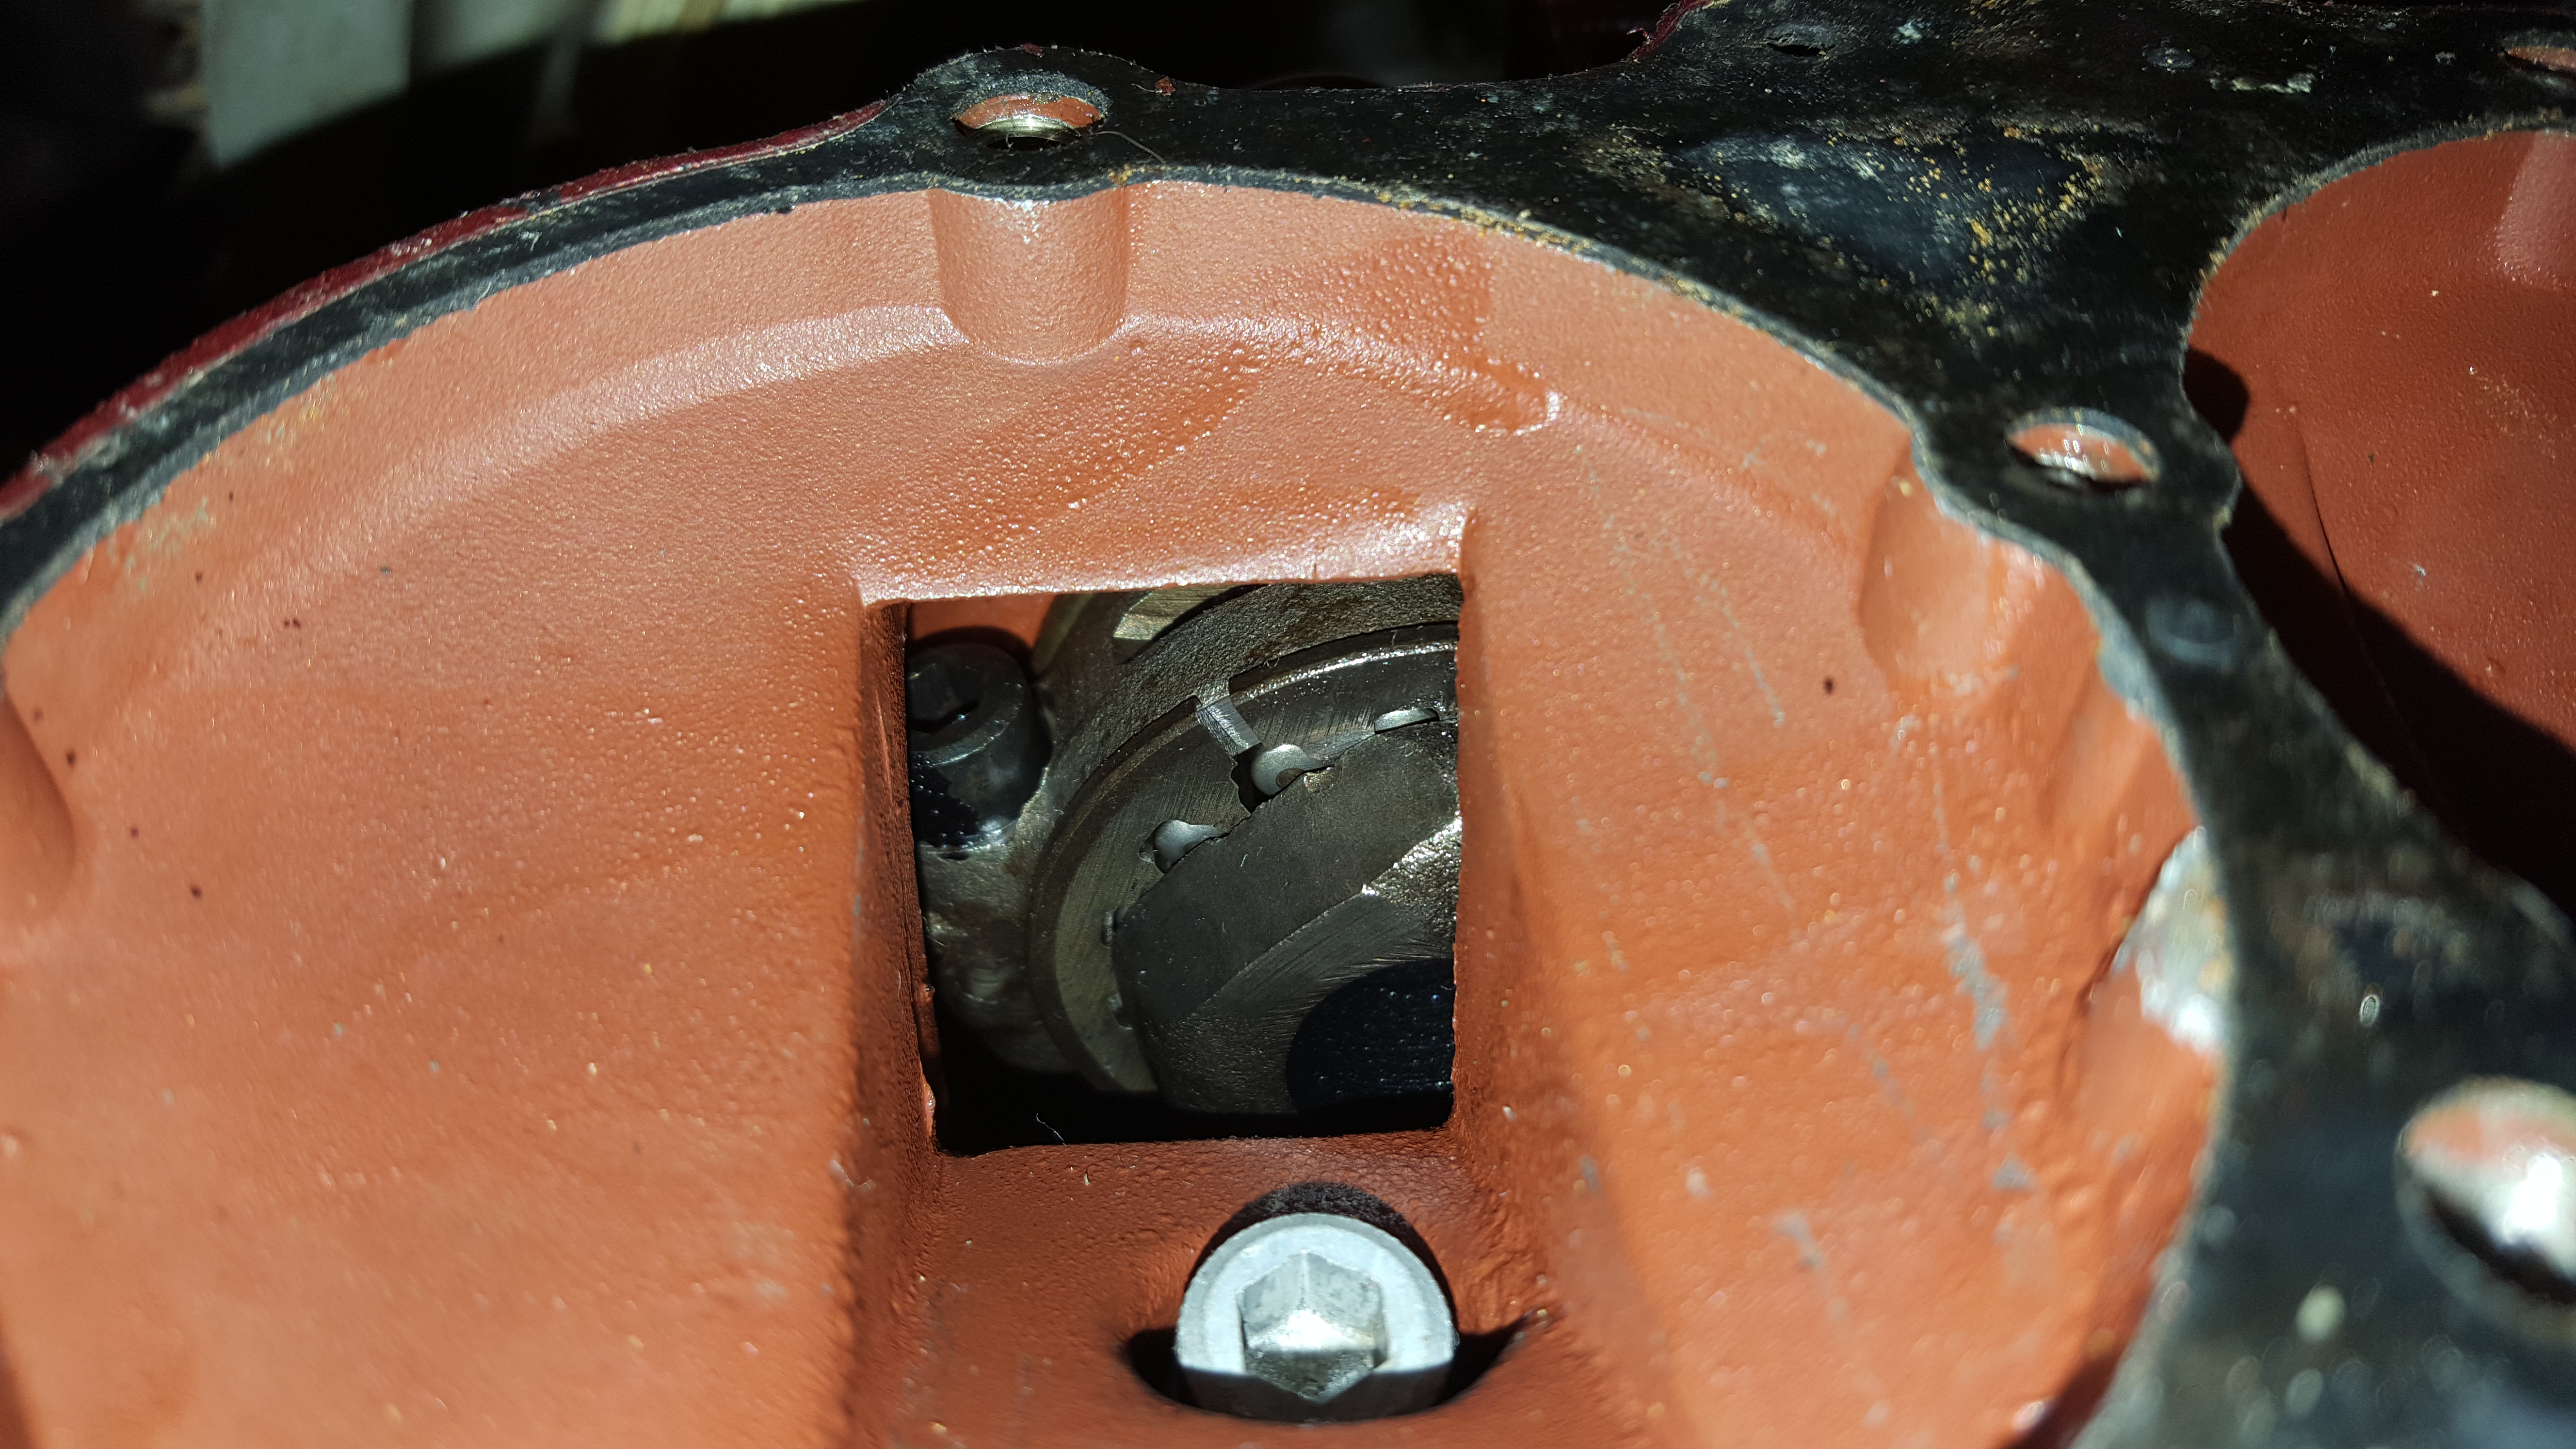
One thing to note, it that I have run this motor for 3 to 4 tanks of gas since I completed my boat back in September. And it was operated a lot at or near WOT (too much fun cruising!). Dan said this indicates that the crank may be fine. Other things from the conversation, were the fact that both pistons were equally black, so he didn’t think any significant amount of water was getting into the motor
One last concern that I noticed, was some significant scoring on the top piston around one of the exhaust ports. This I can feel, but the cylinder wall is still smooth, and both cylinders have ~115psi of compression. So, I’m not sure if this is another argument to crack the crankcase open and do a full rebuild (new pistons, hone/bore block, fix crank?).
 December 9, 2017 at 10:47 pm #68444
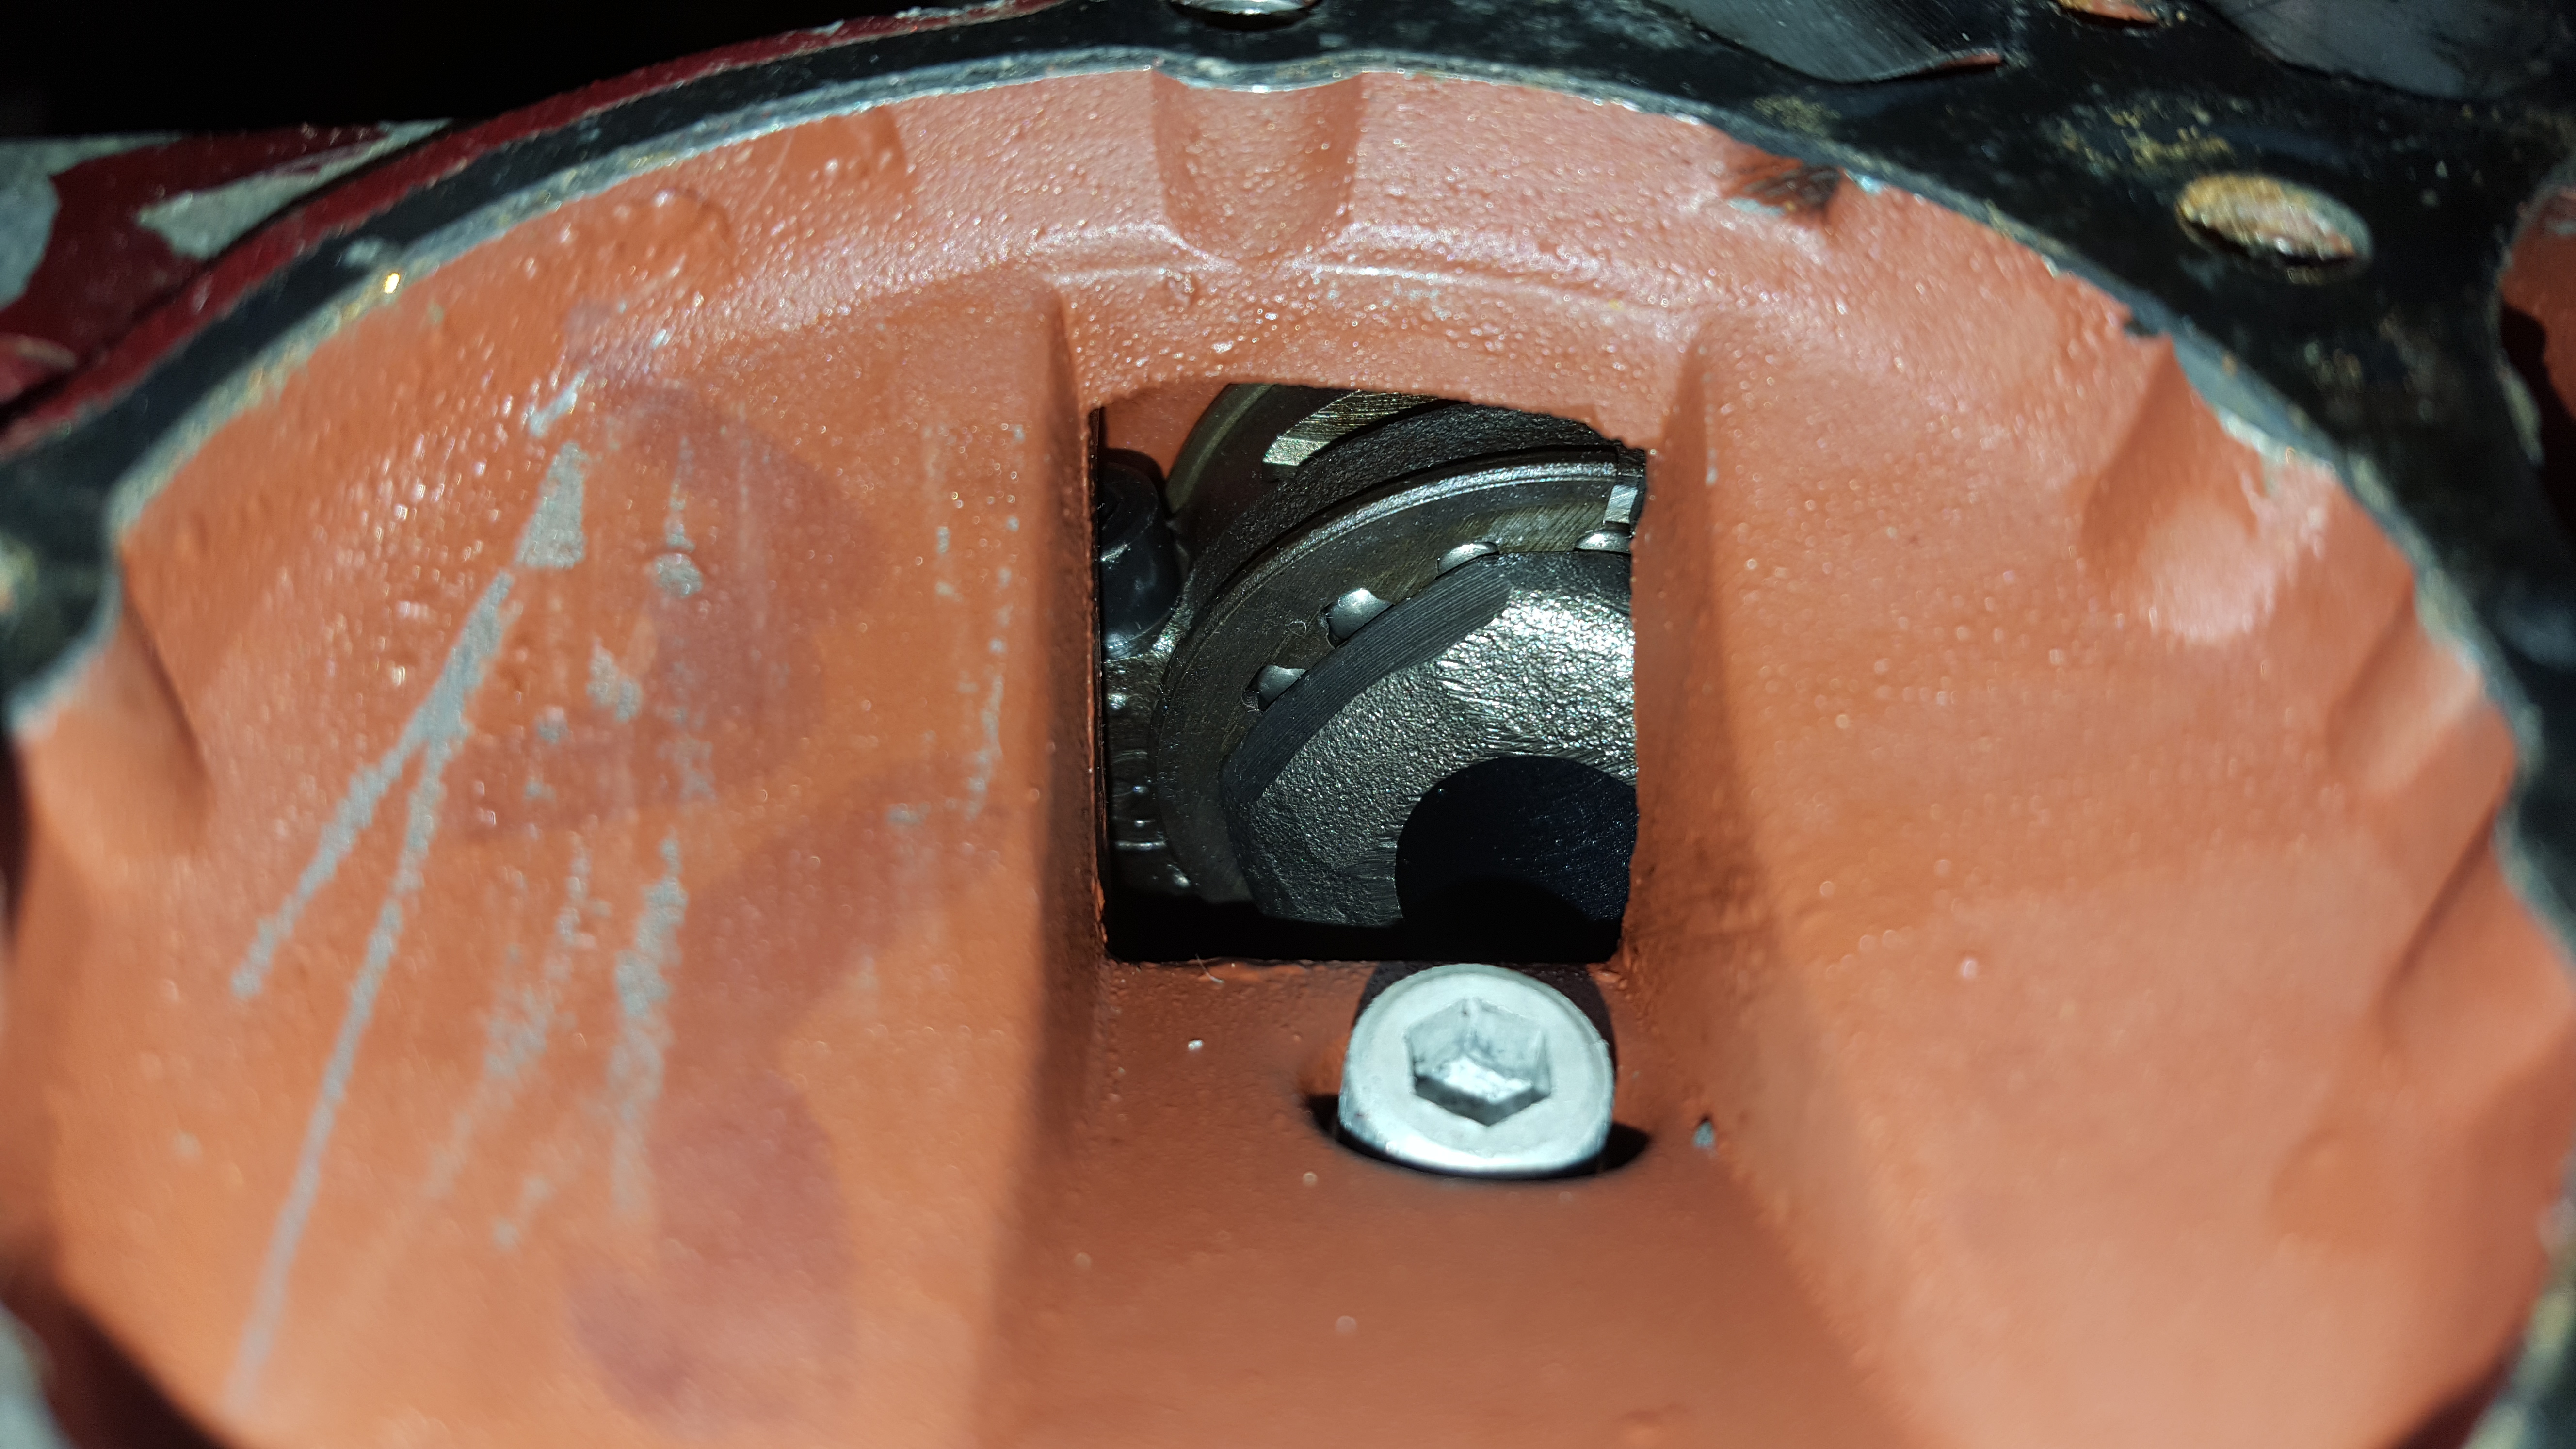
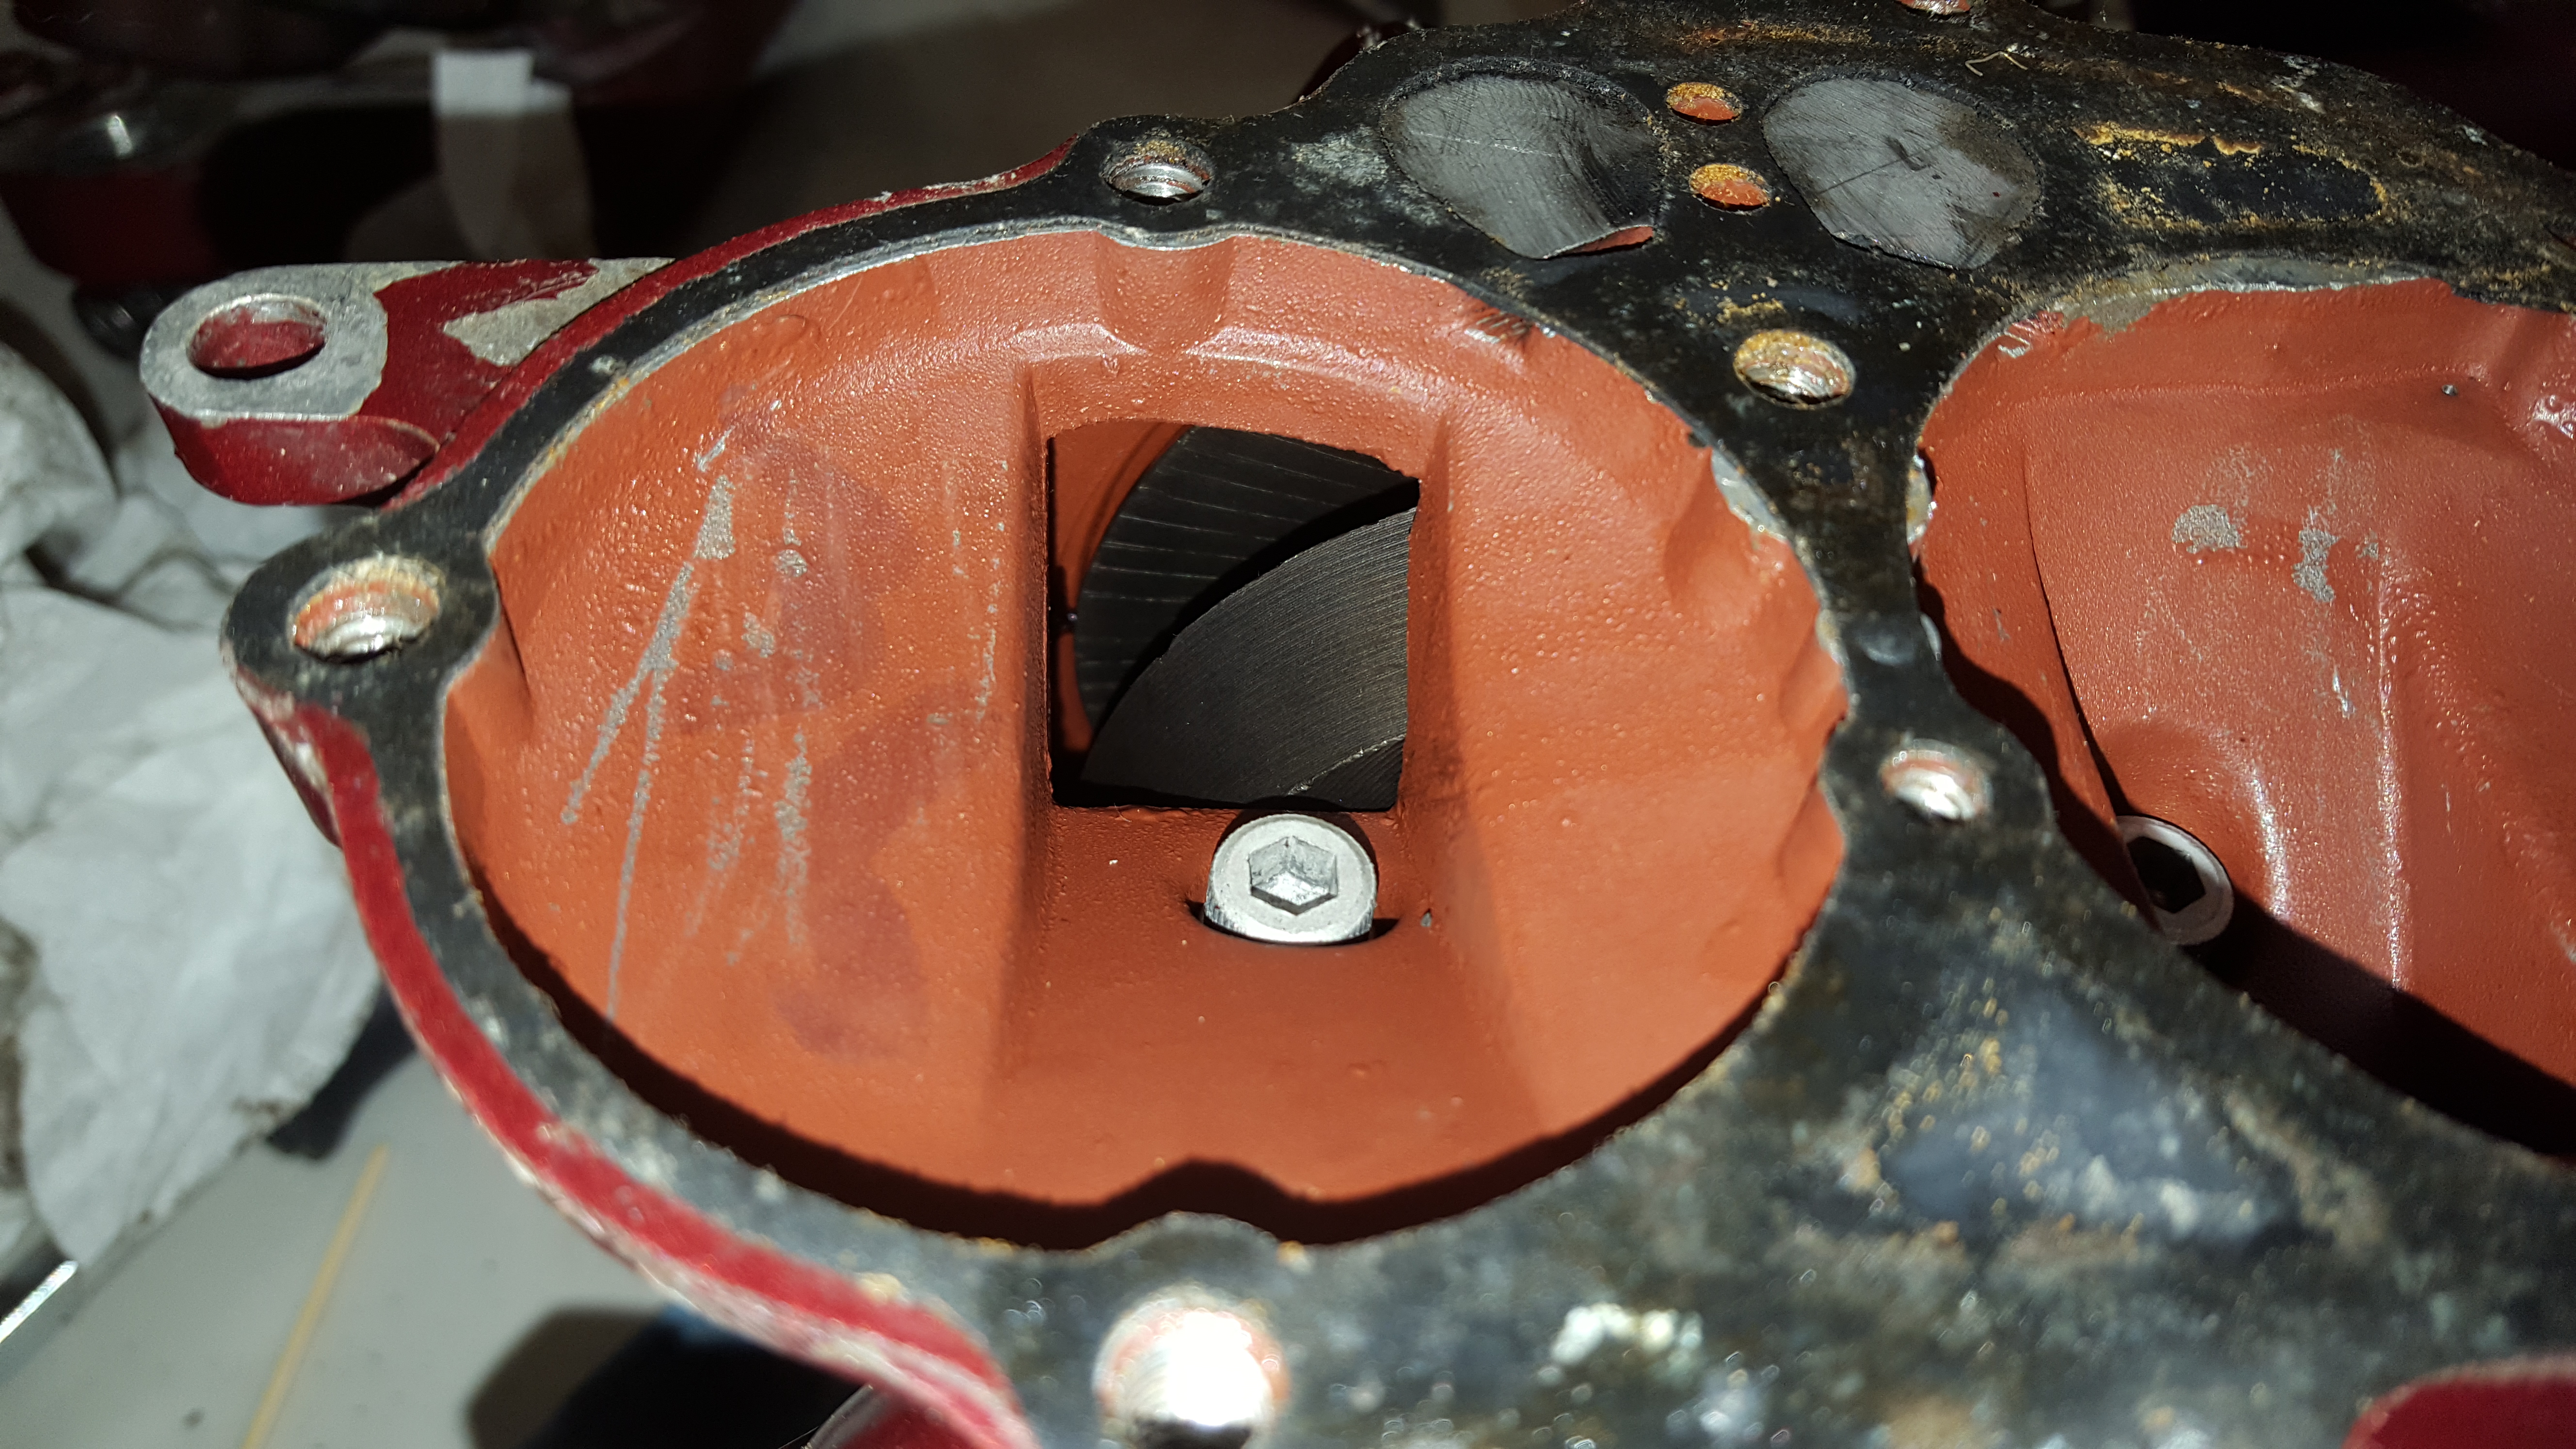
Well I cracked open the crankcase, and the good news is that the crank looks fine under the upper and lower bearings.
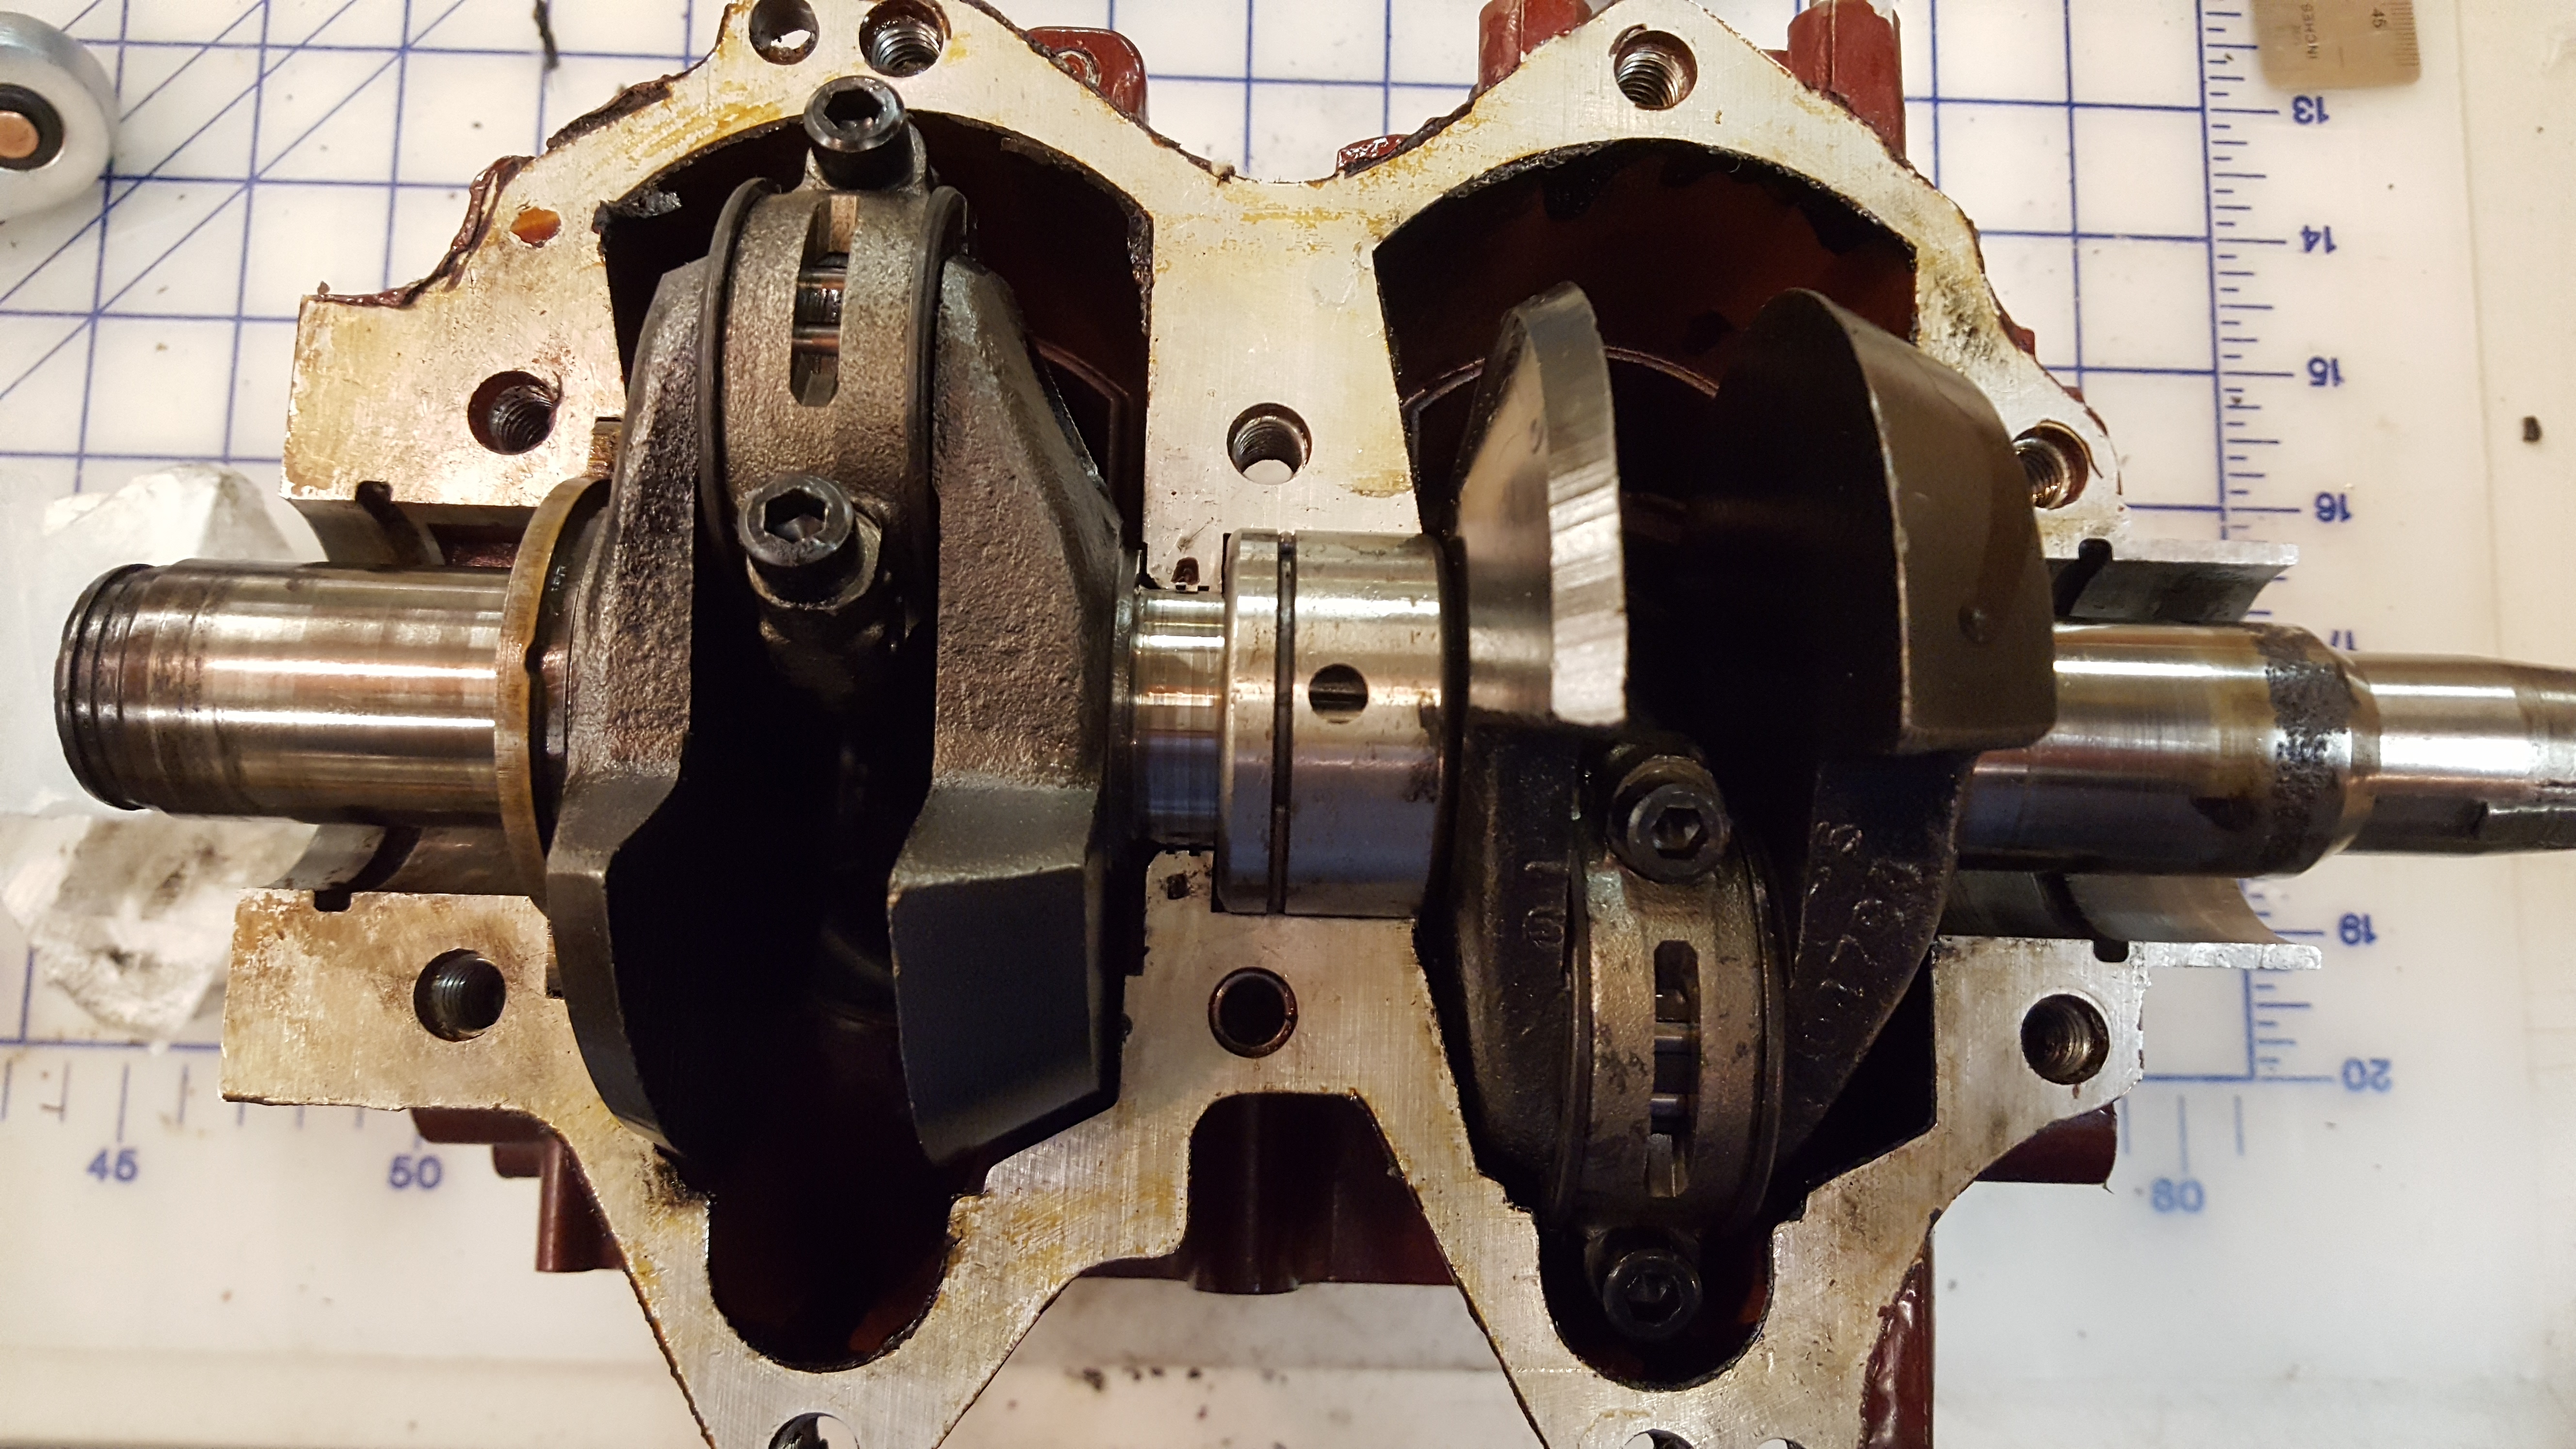
The pitting under the upper seal is significant. My son has the facilities at school to turn the crank, can I machine this section down, or sleeve it?
I pulled the pistons (after marking the rods), and the one is pretty chewed up, so I’ll be putting new ones in.
I did get the carb rebuilt with a new float and seals.
December 9, 2017 at 11:20 pm #68445The good news is, that crank should not be hard to find. If you cannot find one, PM me, ill help you out.
So you have to change the piston. Install new wrist pin bearings while you have the piston off the rod anyways.
Inspect the big end needles. They are likely ok, but have a look at them under a magnifying glass and look for damage.
I usually change the center main, and top and bottom bearings if they are original. That is me while I have it opened up anyways.
Also change the top and bottom seal. And of course new spaghetti seal.
Put a wanted ad on the website here. A member will help out for MUCH less than you would pay buying retail.
Make sure the rod caps go back exactly where they came from. They cannot be flipped, or swapped between rods. I draw a line with a sharpie across the halves before I take them apart.
December 10, 2017 at 2:52 pm #68457Hi Chris,
I’ll check out the bearings, am I just looking for scratches, etc?
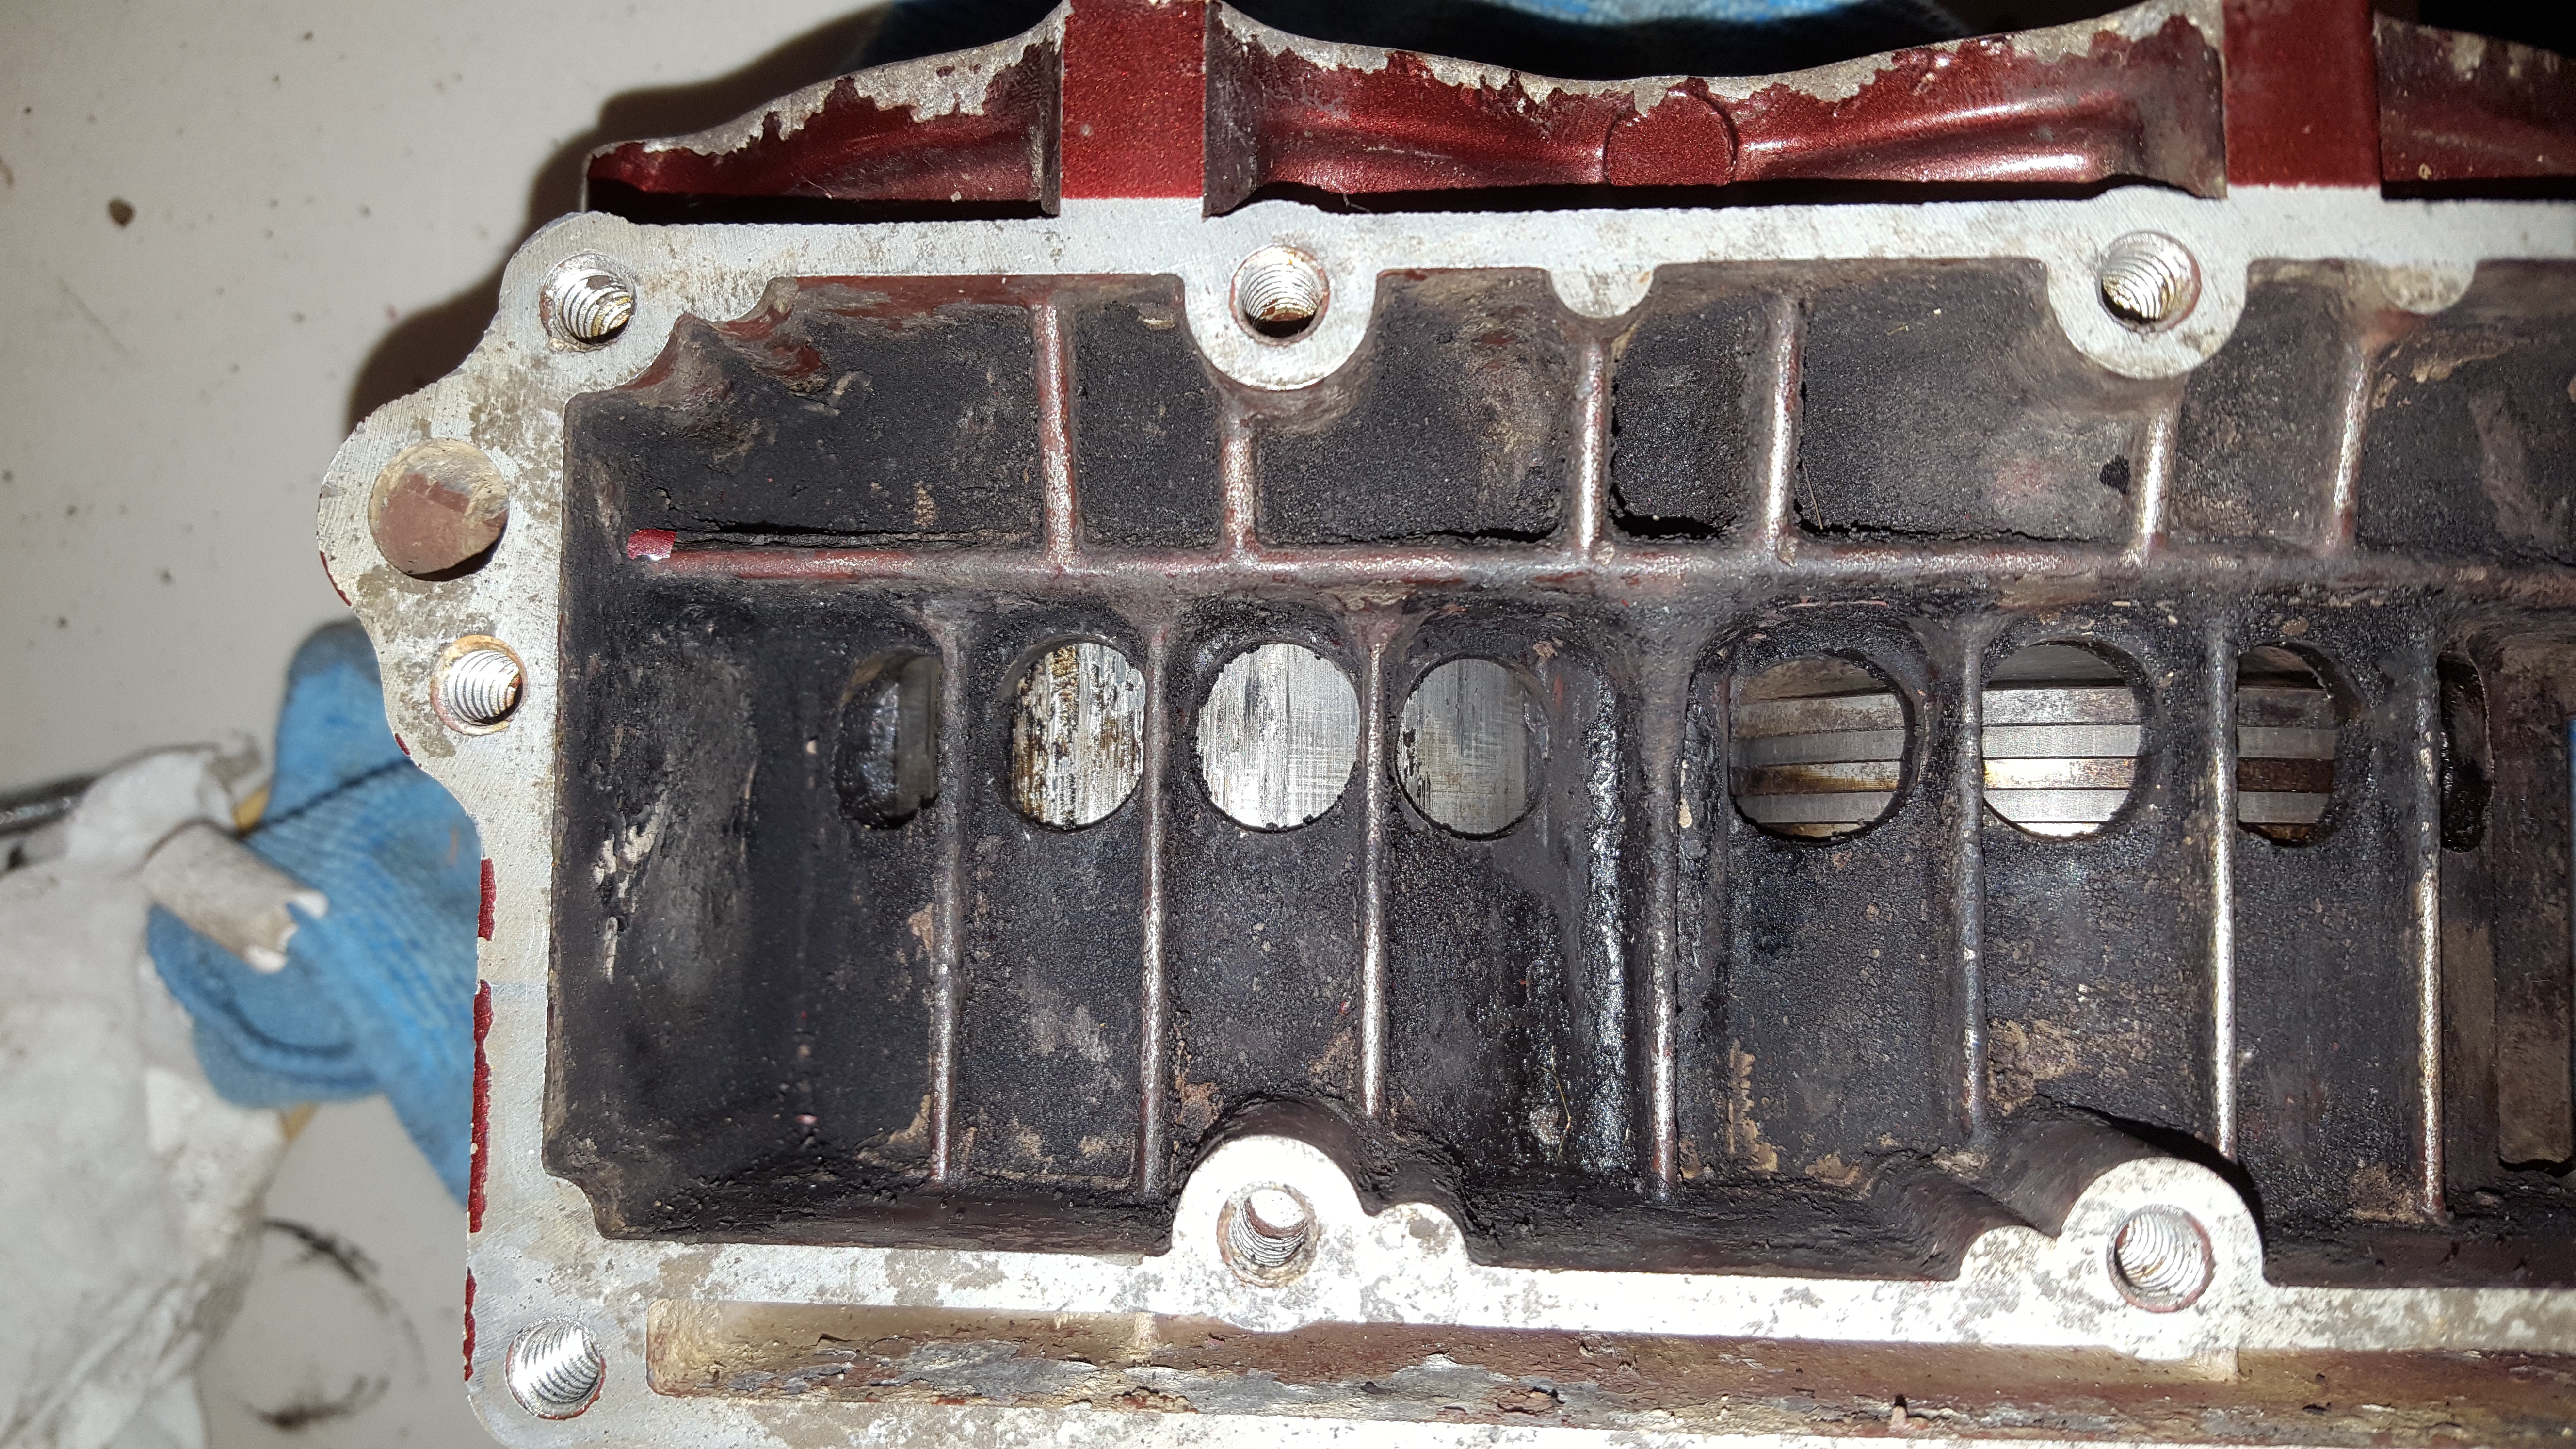
The is no spaghetti seal on this crankcase. Do I just use 3M 847 to reseal it?
I’ve got a line on a new crank and oversize pistols.
Thanks,
December 10, 2017 at 3:33 pm #68458No I do not like 3M 847 for crank halves. It has fillers in it. You want an Anaerobic product. Like Loctite 515 or 518. The 518 will require an activator.
The Permatex equivalents are 51531 and 51813. As above, the 51813 requires an activator. If you use the 518 or 51813, follow instructions to a tee.
There are many other anaerobic sealers, like the OMC Gel Seal, etc…
Main thing is that it is anaerobic, as in does not harden in presence of oxygen. As you can imagine, if it starts to harden before you get the halves torqued, you will get lumps, which will create crankcase leaks. I personally like the Loctite 515, but not saying it is the best, just what I use.
December 10, 2017 at 3:39 pm #68459Before you put on the sealer, drop the other half on and ensure it closes. If you are satisfied, take back off, install the sealer. After you clean spotless of course.
Drive the dowels in to set the crank halves, give the crank a rap with mallet to seat the bearings, then torque the main bolts to spec, in a spiral fashion like you do a head. Start in center, and spiral outwards. Do three passes, Start with half torque, then 3/4 torque, then final torque of halves.
December 10, 2017 at 4:44 pm #68460Sure is a mystery how that crank got bunged up that way….No signs of rust on the bearings, so the bad lower seal theory does not hold water! That one piston is done for sure, finding a decent used crank should not be difficult or expensive.
Resealing those crankcase halves is an extremely important step that must be carefully done, or you will have crankcase leaks. The 847 sealer or the anerobic stuff (OMC gel seal or equivalent) is fine, but the gel seal is much more sensitive to proper prep than the 847. In either case, there will be crankcase leaks if the halves are not properly cleaned, mated, and prepped. -
AuthorPosts
- You must be logged in to reply to this topic.