Home › Forum › Ask A Member › Patched lower unit?
- This topic has 15 replies, 10 voices, and was last updated 9 years, 5 months ago by
ray-mason.
-
AuthorPosts
-
September 23, 2016 at 2:42 pm #44596
According to the parts number found in your C2G7 owners/parts manual page 7. These parts are still available at http://www.marineengine.com. At marineengine.com you have to put a 0 before each part number when you do a search.
ex 0550861 for shear pin Please verify the number with your parts manual.
550861 Propeller shear pin
550108 Gear Housing Gasket
550040 Water pump rotorIf they used JB Weld on the outside of the gear housing cap cover assembly to seal it, then you will have carefully separate it from the gear case. You don’t want to damage the mating surfaces. If someone has modified it this way, then pay close attention to inside to make sure parts are not missing. In this hobby, never assume the previous owner did the repairs correctly.
Over the years, some grease comes in contact with the rotors and they swell up. When they swell up, they do not leave room for gaps in the housing so water can not be gulped up and pushed forward to the water tube by the Rotor.
The rotor from marineengine.com is a little expensive.
Bob Long, AOMCI makes rotors and impellers for hard to find applications. He is reasonable with his pricing. I just purchased an impeller from him for my 1949 Elgin 5hp that I am slowly tackling.
http://home.earthlink.net/~flyingscott/
Just giving you options.
Cajuncook1
My experience with this type of lower unit is limited to one motor that is a 1957 Seaking 3hp. It has the rotor type impeller.
Frank Robb and Garry Spencer are great resources for these motors. Hopefully they will see your post and chime in.
September 23, 2016 at 2:52 pm #44598Is it just me, or is the shaft the prop nut threaded onto bent? You may want to have someone turn it over slowly while you visually check for wobble. Maybe doing it with prop off you could tell.
September 24, 2016 at 3:50 pm #44658I don’t see anything wrong with the lower unit, actually. Just clean it up and it’ll be fine. Like the old TD Johnson, it has the waterpump under the prop. Someone was just ensuring against leaks, is all.
September 26, 2016 at 1:29 am #44720It looks like the "JB Weld" was used in lieu of a gasket. As it turned out it wasn’t JB Weld after all, it was some sort of sealer.
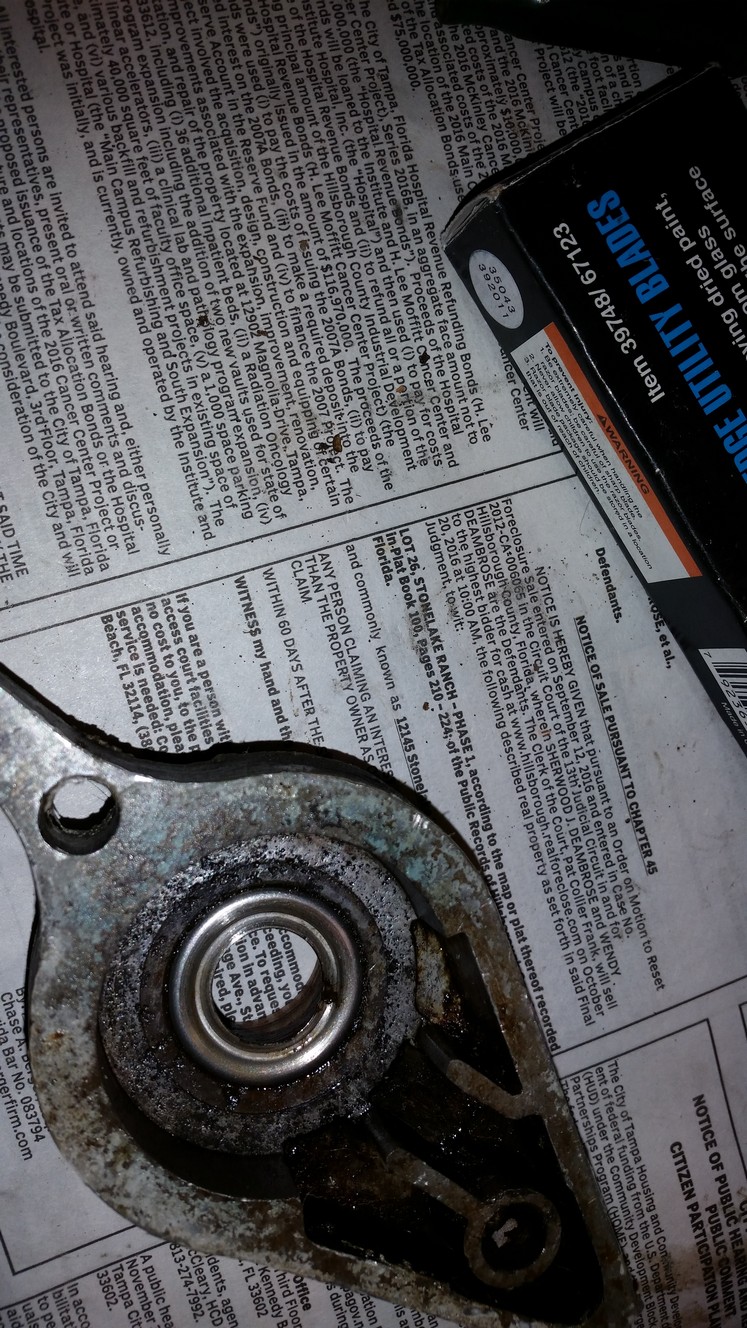
The ring in the surrounding the opening for the prop shaft in the picture, I’m not sure if that’s the Prop shaft water seal packing cup or maybe the prop shaft water seal seat. If it’s the seat I’m in trouble, marineengine shows this part as no longer available; the packing cup is. Can anyone ID this part? If it’s not available; I might be able to tap it back into shape. It looks like the water pump eccentric pin has been replaced by a homemade one someone made out of a nail, Marineengine has that available too. Fortunately all the pieces are there, I’m going to go into the carburetor & see if it looks salvageable before I order any parts.
Attachments:
 September 26, 2016 at 11:18 pm #44774
I don’t know what happened to my answer …
What I remember saying was the water intake is through the propeller hub. The inside of the pump rotor must be snug against the eccentric that drives it. The gear case bearings are sintered bronze. The material is porous and holds lubrication. This decreases friction and reduces ware. The down side is it allows oil into the pump housing causing the rubber to swell. So, instead of a space on the outside to pump water, there is a space inside which allows the eccentric to spin freely without pumping water. The carburetor is strictly Gale. It is used on the 3 and 5 horse models through 1955. The high speed jet is the only fuel mix adjustment. As you retard the spark the carburetor Venturi closes. Where it stops determines the idle mixture. The adjustable screw in the end of the port side of the carburetor rides against a taper in the Venturi. Screwing it out allows the venturi to close farther. If this screw is lost be sure the replacement has no rough edges. If the taper on the venturi is damaged, it will be hard to adjust the idle. I like to speed up the motor a little when screwing it in to take pressure off the ramp. . . . 😀

 September 27, 2016 at 7:01 pm #44821
Good information, thanks Garry!
Ray -
AuthorPosts
- You must be logged in to reply to this topic.