Home › Forum › Ask A Member › Removing Cylinder Block
- This topic has 11 replies, 5 voices, and was last updated 5 years, 2 months ago by
 Tubs.
Tubs.
-
AuthorPosts
-
October 3, 2020 at 2:42 pm #217746
I’m doing a largely cosmetic restoration (it ran when I started this project!) on a Johnson KS 15. I have removed all the easy parts–flywheel, mag, carb, etc. When I took the muffler off, I was surprised at how much carbon there was. A lot vacuumed out, but not all. If I take the cylinder block off, I could get a lot more out and make painting easier. But I haven’t done this before–do the pistons slide out as the block comes off and remain connected to the crankcase? Assuming a new gasket is required, is the material for that readily available? Any other complications? Trying not to make a dumb mistake. Or at least not too much dumber than taking apart a running engine. Thanks.
October 3, 2020 at 6:27 pm #217750Just my opinion, but if it was mine and it’s a running motor I would be very hesitant to do that. You will be crossing over to a major rebuild. You can always run a can of Mercury Power Tune through it to decarbonize it after it’s back together.
October 4, 2020 at 9:38 am #217763Thanks–I have been continuing to look around for information on this, and notice on the newer motors it does look like quite an undertaking. However, probably worth pointing out that this motor is a 1941, and is a design used at least several years before that. Does that make a difference? Or is there something about taking the pistons out of the cylinder that I’m not understanding? Never done this before . . . . Appreciate the help.
October 4, 2020 at 10:28 am #217767107teen, I am not an expert on pre 50’s outoards but I have worked on a few. The power head just unbolts, it comes off in a big chunk. If it were mine I would take a small screwdriver and push lightly on the rings through the exhaust port. If the rings move a little they are probably not stuck that is a good thing! It is easier to clean up parts when they are un-assembled. I have not pulled the pistons out of mine but I wouldn’t hesitate if it looked like a ring was stuck or broken. These motors used a leg that is a rough casting. It collects carbon from the exhaust bigtime! The leg is a bugger to clean out but it should be done. There are small holes that I used to poke a wire down the leg to loosen carbon. Never use automotive oils in outboards. TCW3 oils don’t carbon up nearly as much as the old oils did.
couple pictures
dale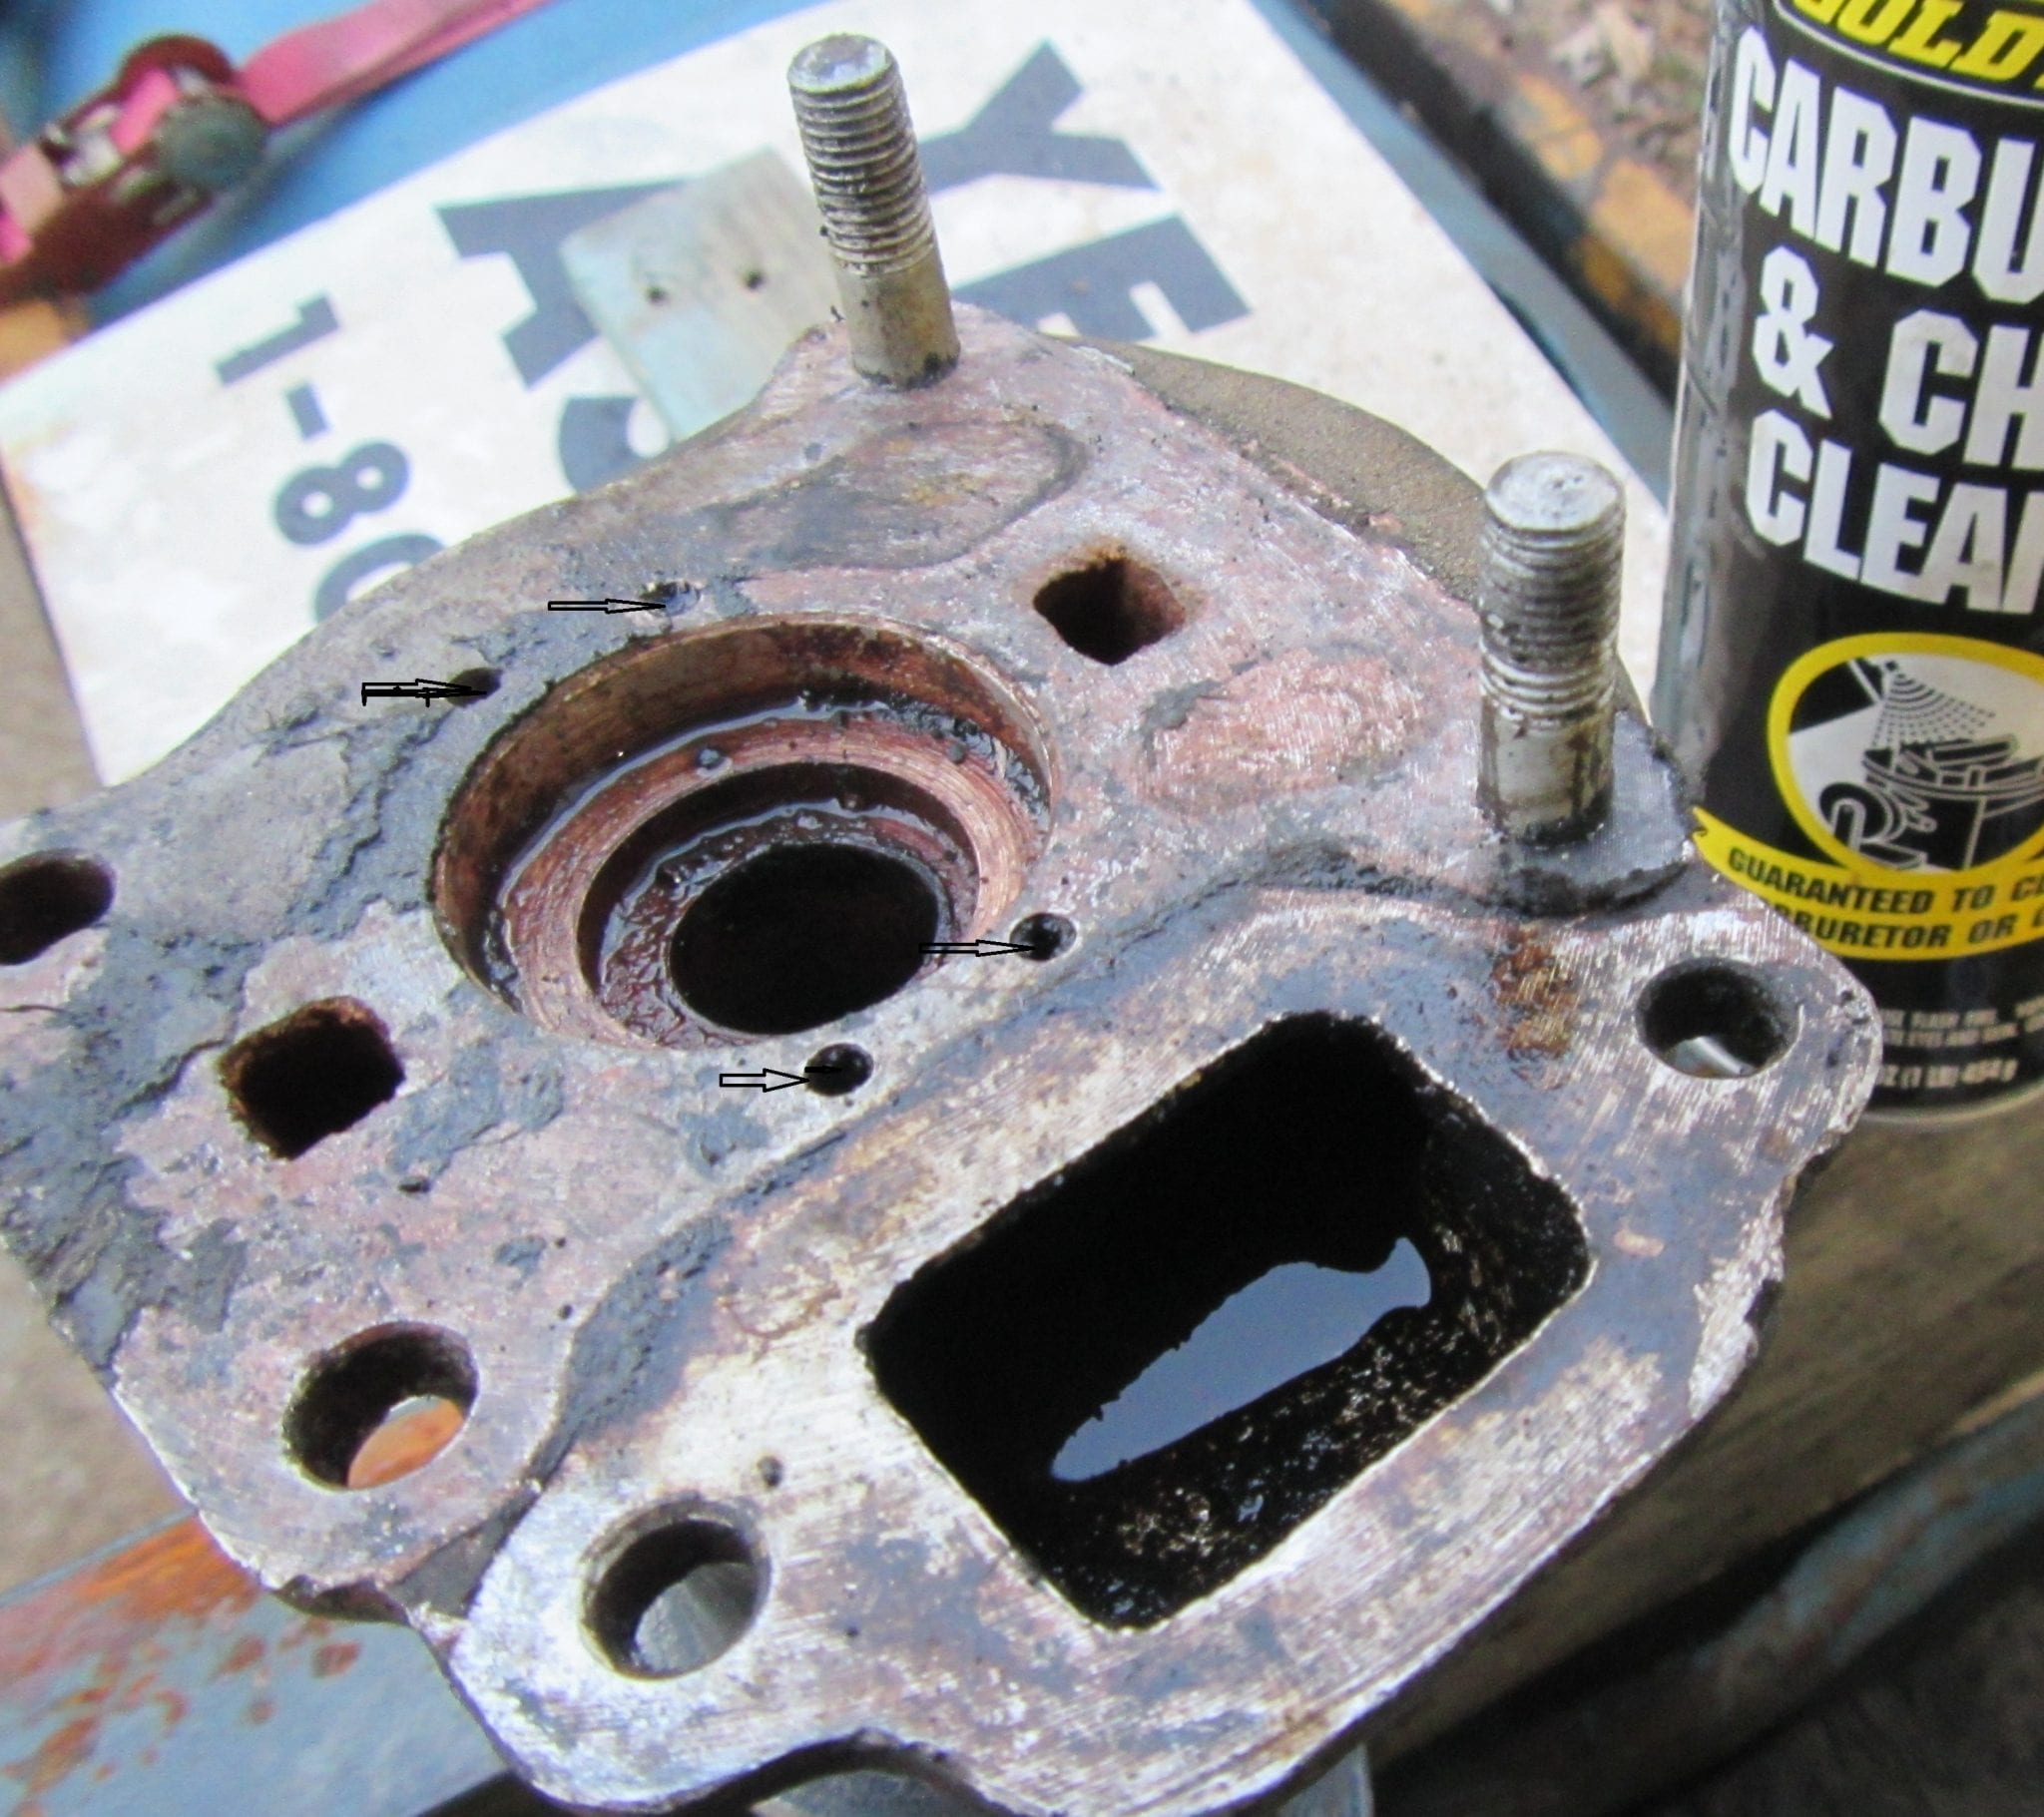
Four small holes for removing carbon.
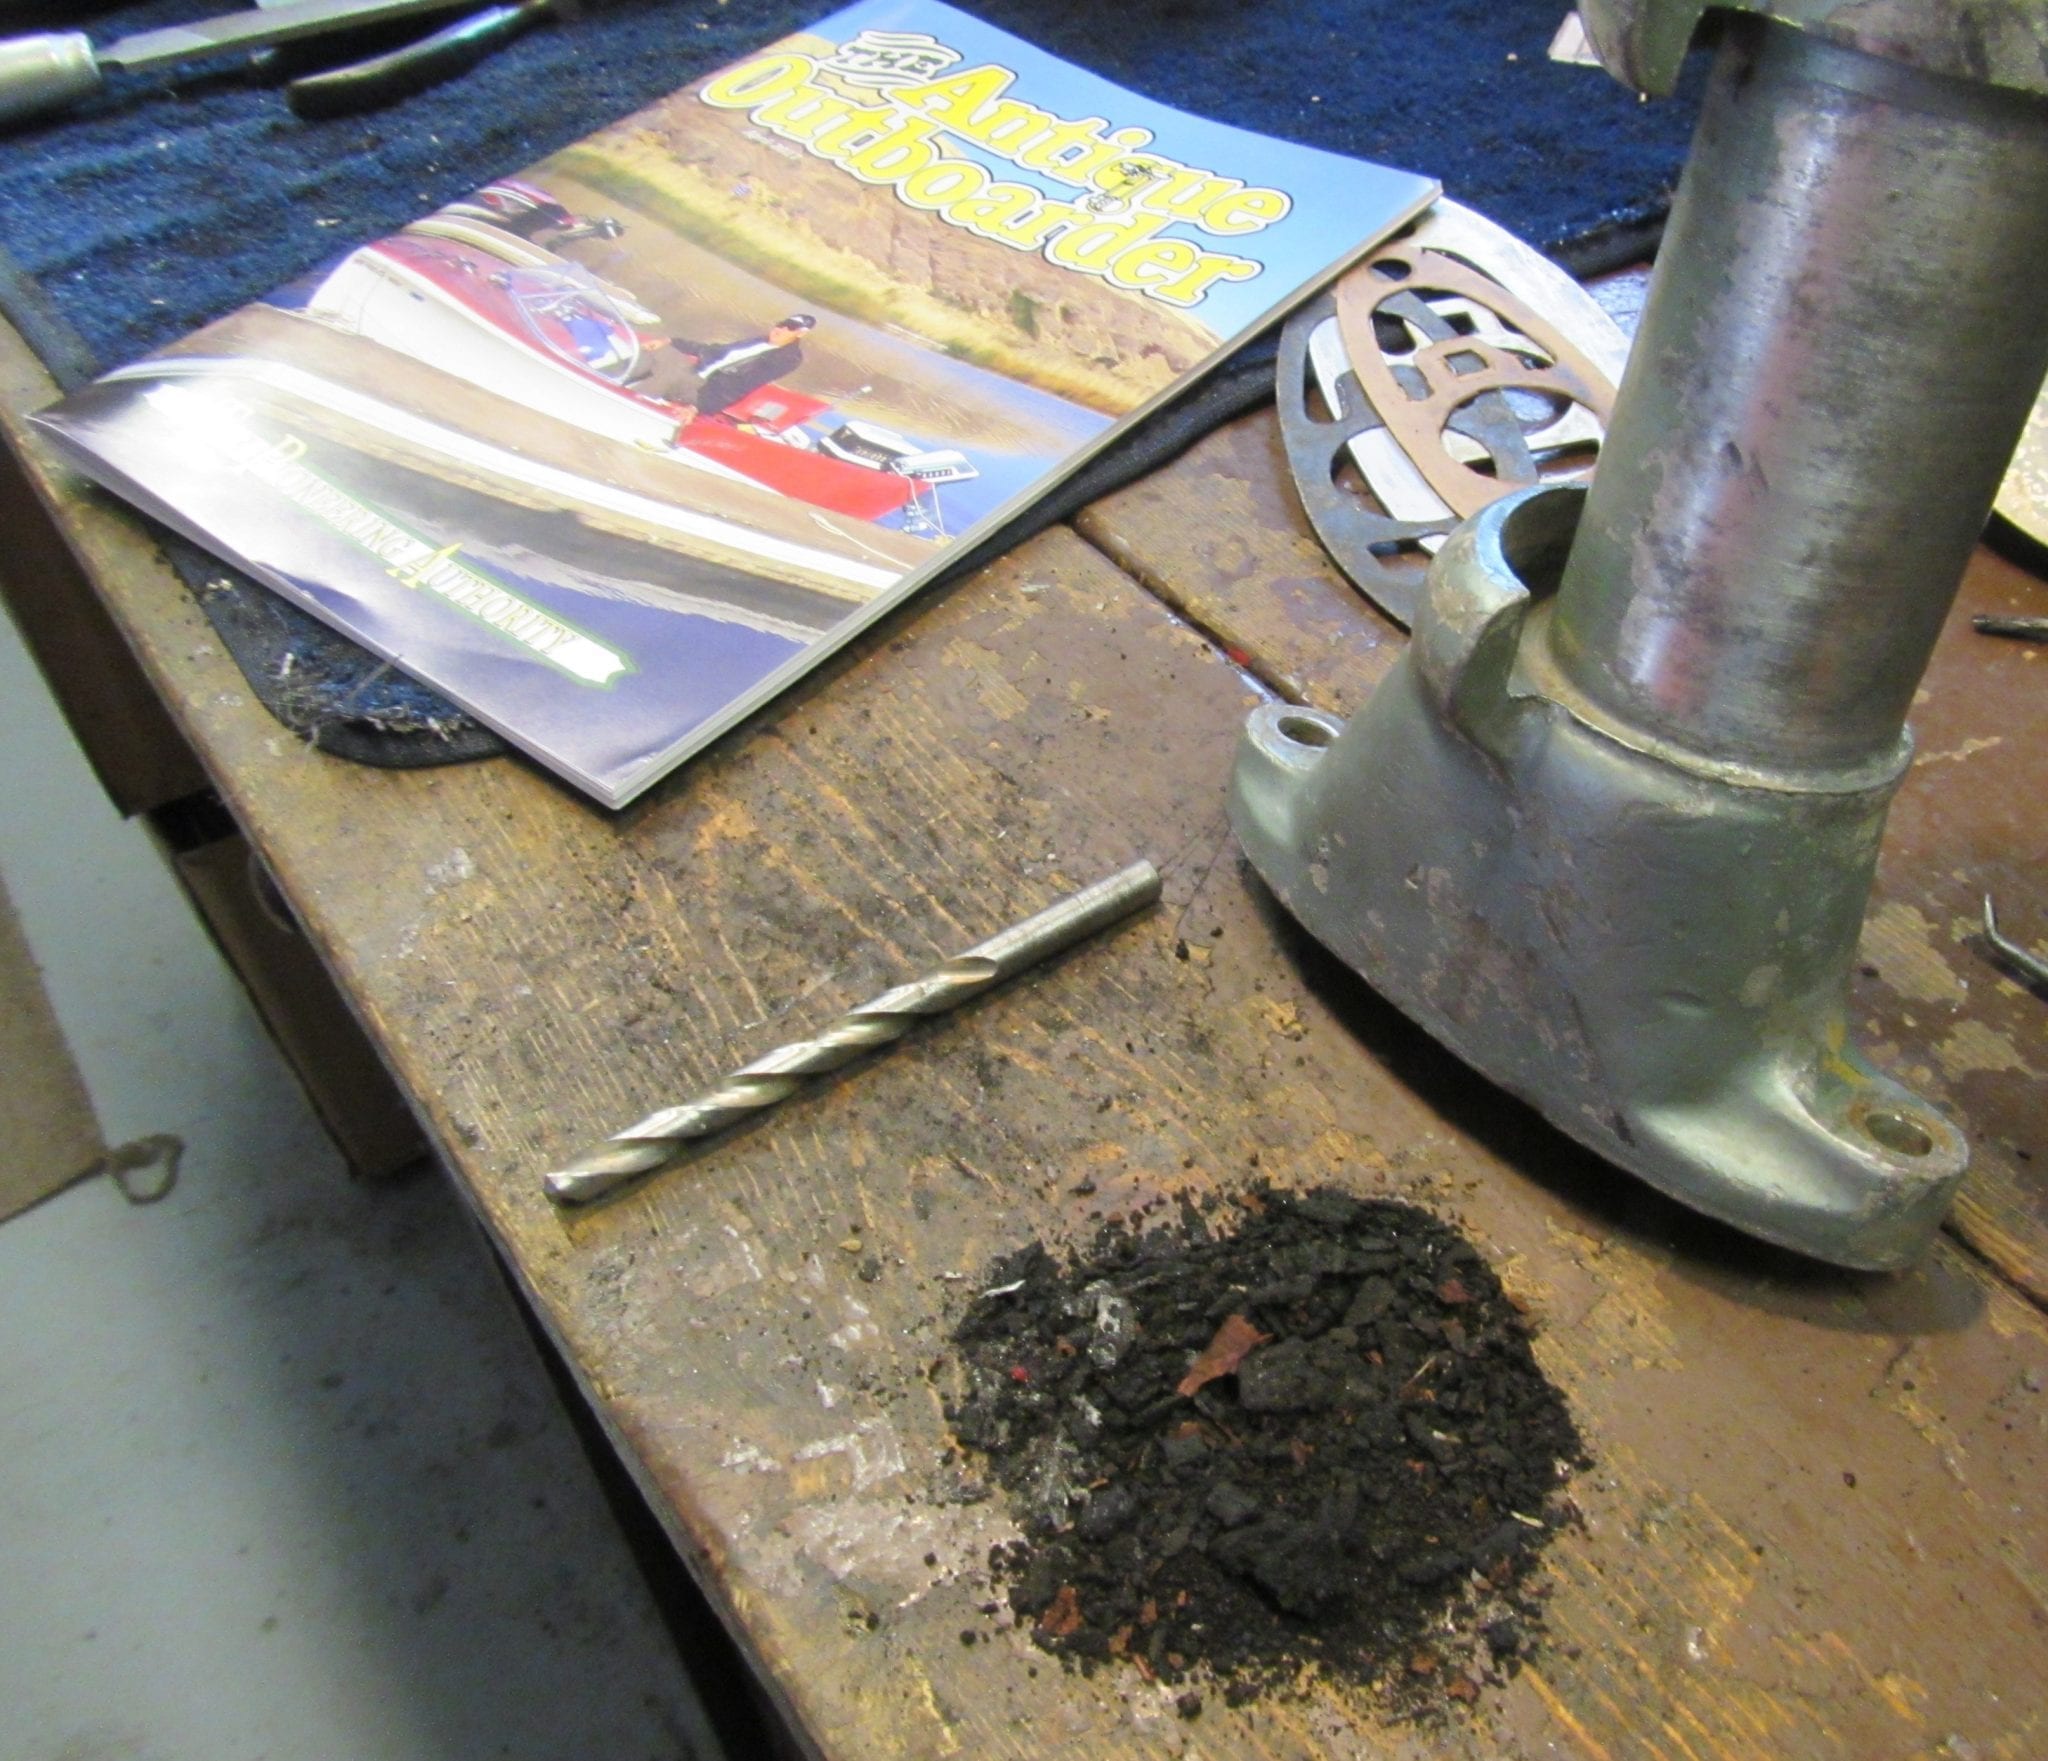
Just a small amount of the carbon that I scraped out.
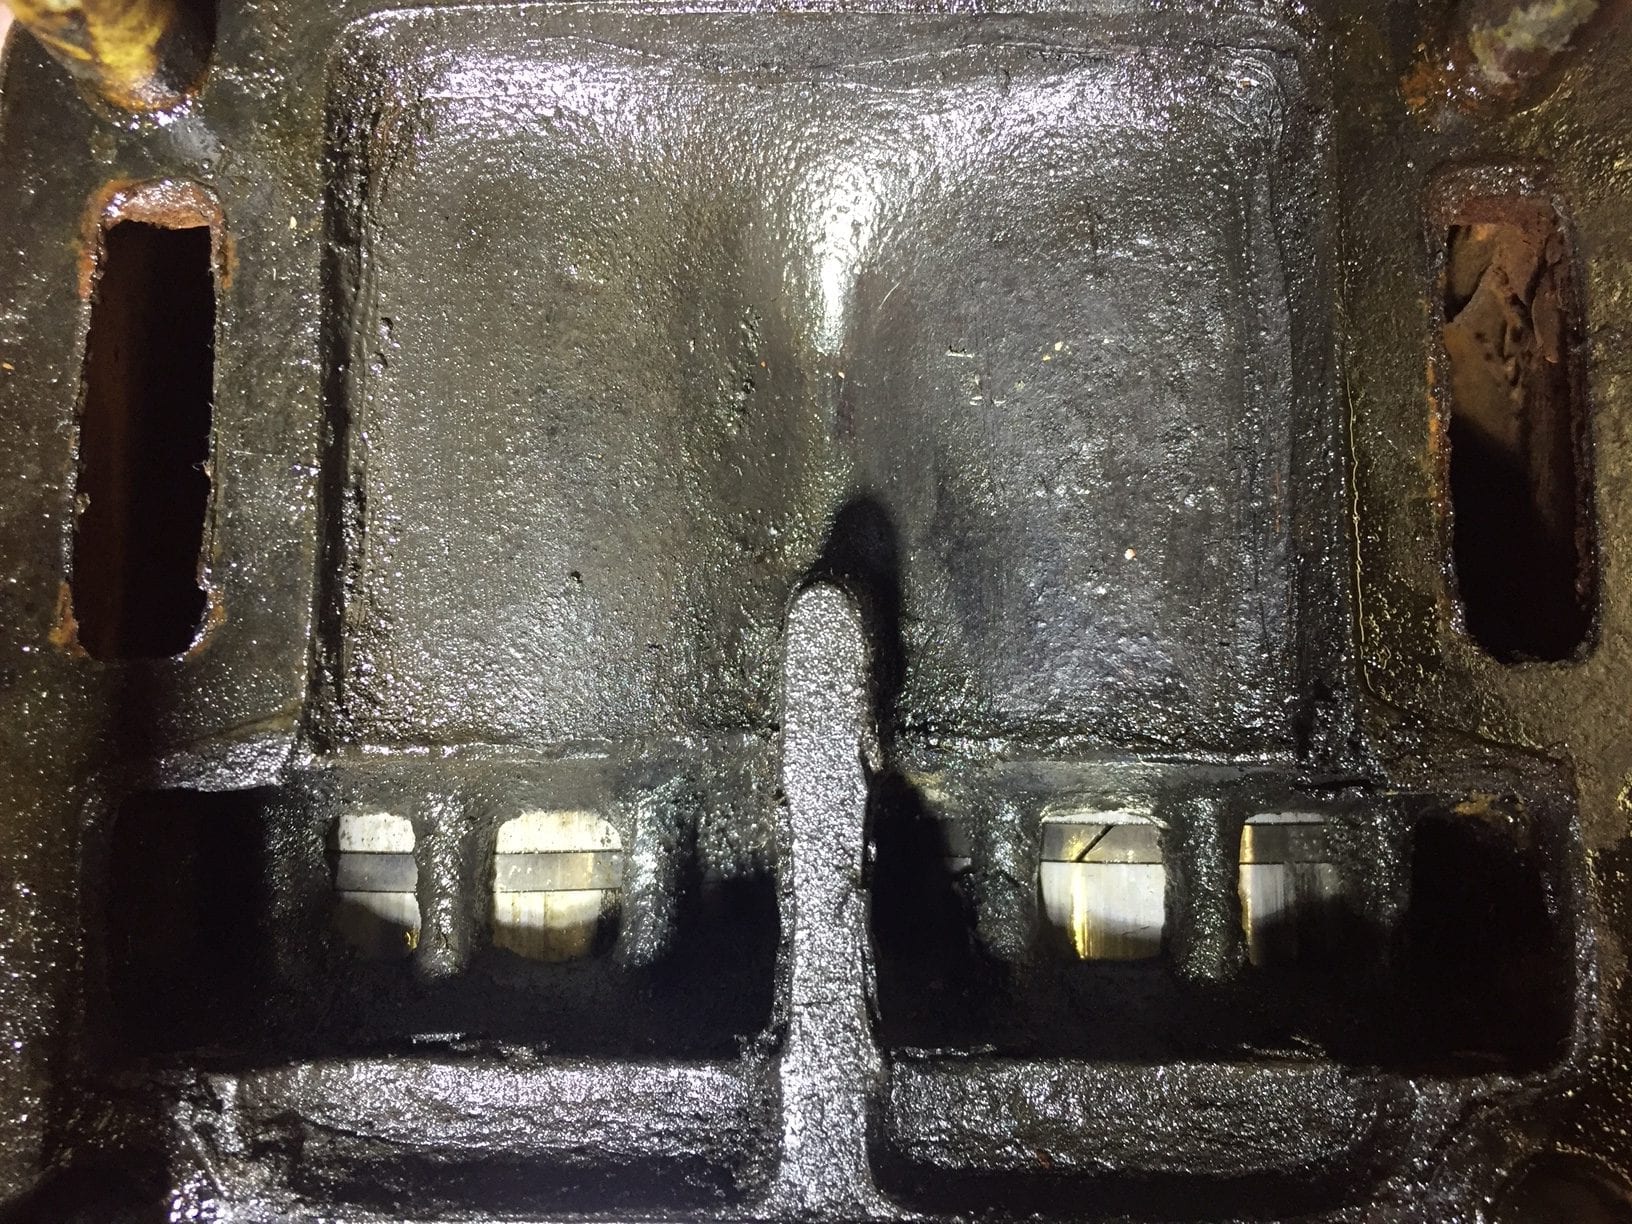
October 4, 2020 at 11:34 am #217776Thanks for your reply! Here is a picture of the exhaust port–you can just see the split on one of the rings–I gave it a gentle poke with a small probe and didn’t notice any movement. The motor was running when I took it apart, so maybe they are OK or curable with Seafood or something similar?
Are the clogs in the little holes you point out in the water system or exhaust system? Or where the systems merge? This is another problem I hadn’t even thought of, but with cooling dependent on prop wash, something important to check.
By the way, where did you get the beautiful gaskets in your picture??? I’d feel a lot better about taking things apart if I had replacement gaskets.
Thanks
-
This reply was modified 5 years, 2 months ago by
 Mumbles.
October 4, 2020 at 2:24 pm #217788Sea food for a sea horse? You probably meant seafoam I bet! LOL I make my gaskets when ever I can. It is not hard and the more you do it the better you get at it. Lotta things like that! Those small holes go into the exhaust. Water holes are the bigger holes, one of the bigger holes is going up and one is going down. These motors have a siphoning system for water cooling. Forward movement pushes water up to power head. Don’t run it to long out of the water. There is no tell tail to see if the water is circulating. Just giv’er the onions when ya first get it on the water, to get the cooling water moving, then the siphon system should start working.
dale
I pay a man twice what he is worth, then I make him earn it! ECK
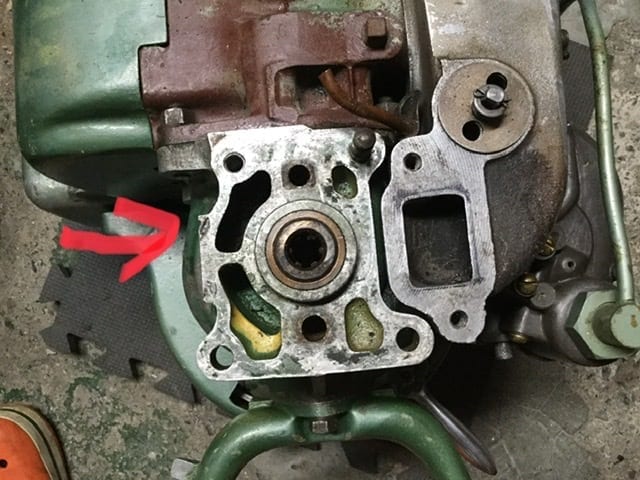
October 4, 2020 at 4:21 pm #217791The carbon buildup you show is pretty common for these motors. I’ve had a few of the K motors apart, very simple design. You probably don’t need to remove the cylinder to clean up the carbon, it’s all there for you to see. TherE usually isn’t much In the head area, at least not in mine. But the area under the powerhead that Lab showed is an important area to clean. I had one so clogged it wouldn’t run without the exhaust relief open.
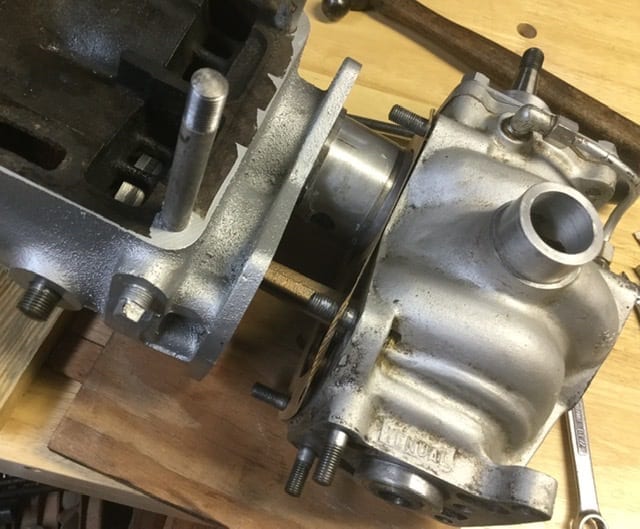
Here’s a picture of my K-80 apart and going back together to give you an idea of how simple they are. The cylinder base gasket is nothing fancy, just very thing gasket material available at good auto parts store. Cut to fit yourself. Good luck. Fun motors.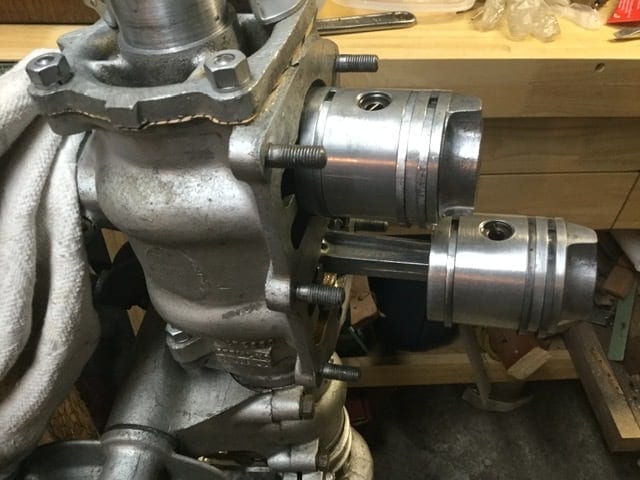
 October 4, 2020 at 5:11 pm #217795
Thanks for the pictures–they help a bunch! Now I’m tempted to take it apart for the fun of it. Interesting observation about the one that wouldn’t run without the exhaust relief open–will check that for sure. I bought a KA10 parts motor to get a few missing items. It had one of those levers on the back of the muffler that opens a hole about the size of a nickel–I don’t think it was standard for that engine. Bet that’s why somebody added it, though.
October 4, 2020 at 6:17 pm #217799So here it is. Funny–those little holes are either completely clogged or were never punched through on the gasket. I made the one hole to see if anything was there. Also, there is no match for the larger oval shaped holes either in the gasket or in the leg. Is this how yours looked on the power head side? Thanks.
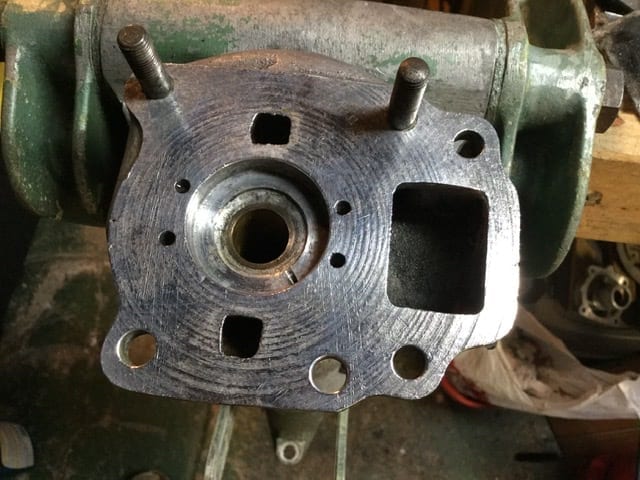
October 5, 2020 at 9:35 am #217829The only important holes there are the two larger round holes, they are your water intake and exit. The small ones do nothing and I’m not sure what they are for. Some nos gaskets have a hole, some don’t. The larger oval shapes are just part of the casting shape.
The lever on the back was an option when new, some have it some don’t. It is a factory item.
Here are pics of my KD-15 top of tower and bottom of powerhead. You can see in the first one the gasket covers most of those cavities. Still not sure why one small hole is open, it Seems to be a drain but as you said has no corresponding hole on the other part.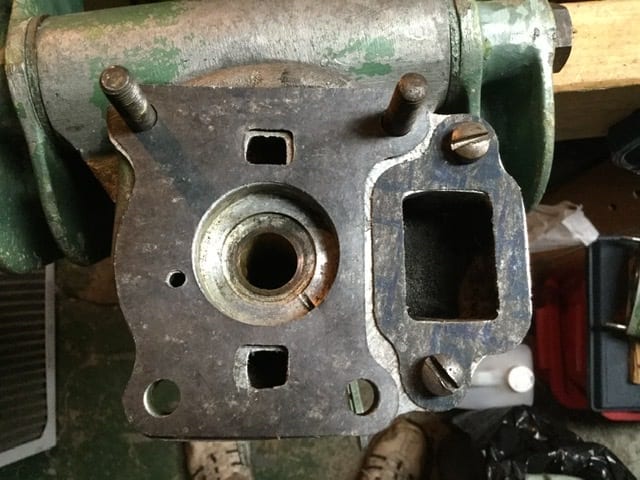
-
This reply was modified 5 years, 2 months ago by
 squierka39.
-
This reply was modified 5 years, 2 months ago by squierka39.
-
This reply was modified 5 years, 2 months ago by
-
AuthorPosts
- You must be logged in to reply to this topic.