Home › Forum › Ask A Member › Replacing the shift rod o-ring, do the bushing as well?
- This topic has 21 replies, 13 voices, and was last updated 10 years, 2 months ago by
chris-p.
-
AuthorPosts
-
March 19, 2015 at 1:01 pm #12328
I have the original special tool to drive them out, and have to say I prefer Frank’s strategy of tapping the bushing, threading a screw in, then driving it out using a center punch and hammer. The original special tool sort of works but seems to distort the bushing (since it is just soft brass), or the bushing becomes stuck on the special tool, or the special tool progressively becomes ‘marred’ on both ends (1 from the hammer, the other from the impact on the bushing).
Frank’s trick has worked 100% of the time. I actually used a paint marker to indicate on my tap how far down to go on the bushing so I don’t thread all the way down. This took a couple of practice gearcases (which were junkers…make it a point to practice new skills on junk motors that are already on their way to the big lake in the sky). Some of them require a pretty good wallop to initially jar free, but using a center punch affords the ability to give it a good whack. Once they start to move the rest is clockwork.
Some of the veteran mechanics here may frown on me, and if so, I will listen….but I’ve been reusing those bushings and they all seem to be working fine so far (Granted, I have plenty to learn). I do have a good supply of NOS for most of the small gearcases should one look or seem to be shaky. The gearcases have >so far< all passed pressure tests. I usually put a small smear of gasket seal around the bushing for good measure, it’s the type that is non-hardening for crankcases so that if it needs to be removed in the future it can still be taken out.
December 26, 2015 at 9:52 pm #29256– Bump –
and the reason being is, I am working on a newly gifted ’66 Johnson 33 and putting in a new
gear case seal kit. Of which I have NEVER done before !!! Using the search feature, there
was one technique that stood out from the rest about removing the Shift Rod Bushing by Frank.
http://www.franksoutboardtools.com/. Which bears resurrection for novices such as myself.
on this motor, of course the seal had to be way down in the belly of the beast.
But, using pretty much the same tools and techniques that Frank used, and a big hammer, it just popped out.
Oh, I did use a few squirts of the ATF/Acetone mix for penetrating fluid for half an hour.
Now, to do the same on a ’60 40 horse tomorrow should b a snap !!
yeah yeah yeah – I know – I got lucky. Compared to some of the horror stories I read, it can be a bit tougher.
I jumped the gun and ordered two new bushing off of e-bay. But, this one I took out looks very usable
with a new O-Ring and gasket.THANKS FRANK !!
.
December 26, 2015 at 10:28 pm #29258I have one of Frank Robb’s shift rod tools and it’s been very handy. Nice thing about it, is the fact that the brass bushing has far less chance of being damaged.
December 27, 2015 at 1:18 pm #29271Yeah I have to say knock on wood, Ive never really had a problem with any of those. Couple quick raps with the tool and hammer and they always just pop out. There is nothing wrong with re using them. Then simply hold the seal in place. If a bit worn, run a bead of 847 around the circ of it. The trick to reinstall, is how far down to tap it. Too far, and you will crush the seal too much, too little, and not enough crush. You get the feel for it.
December 27, 2015 at 7:57 pm #29275I actually made a neat little puller from random stuff around the shop here. I would be happy to share it with everyone and send pics if you email me at outboardrepair1@yahoo.com , put "Puller" in the subject line.
Simply tap the bushing a few turns, use the puller and it slides right out. I even reuse the bushing as I don’t think the few little threads inside do any harm. Basically after the bushing is set on the o ring the o ring becomes the guide for the shaft, just hafta set it at the right "feel" for tightness.
Many different opinions of which this is one.
Doug
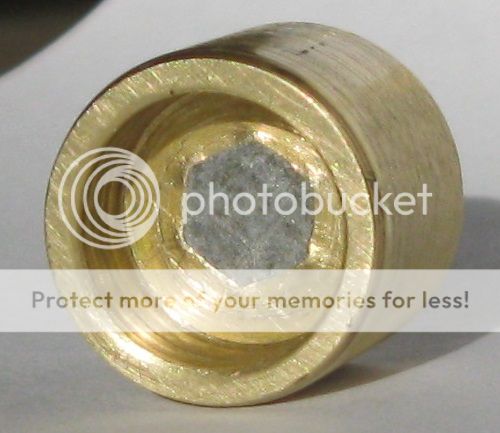
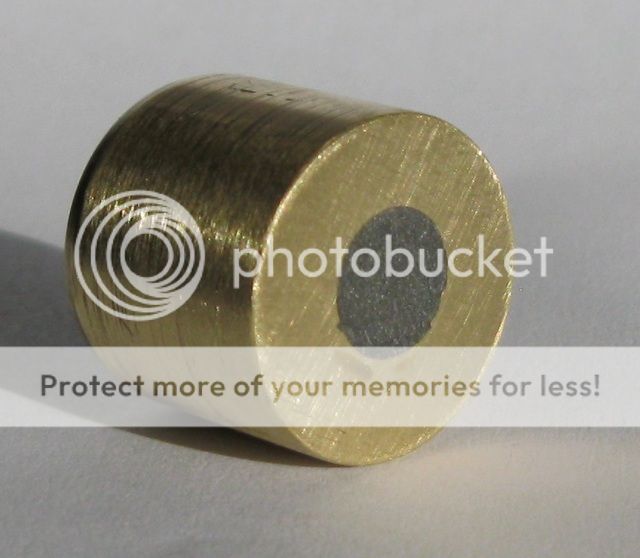
December 27, 2015 at 10:21 pm #29280Before attempting to tap for the 5/16" bolt, I "thought" one of my hex shank tools would
be enough to pop it out – I was wrong – the soft brass just gave way and I made a 1/4" hex hole
in the bushing. Layed everything down for a minute and came to the Ask a Member archives to
find out how the professionals do it .. …
THEN, I tapped it out to the 5/16" and with a few taps on the bolt, it popped right out.
But, I still had the hex hole . . . washed it good with acetone and tightly packed the shaft hole
with epoxy putty and will let it set for 2 days then use the drill press to drill the 1/4" hole.
This should seal all the threads that were cut for a nice snug fit for the shift rod.
IMHO, The O-Ring and Gasket are the most crucial parts, not the brass bushing hole …..
I did not tap all the way through the bushing, so it still has the original 1/4" hole.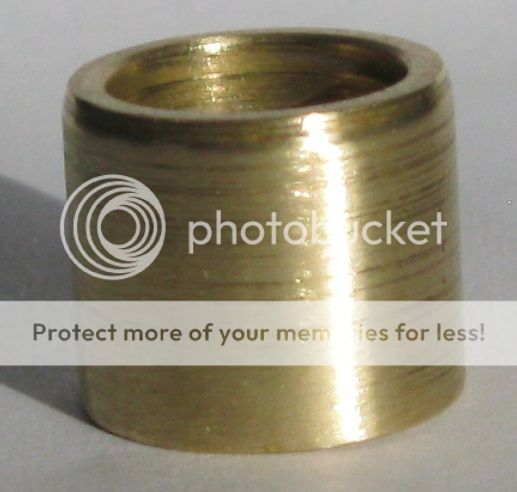
 December 27, 2015 at 10:34 pm #29281
Anonymous
I found that a long-shank (3/8"?) spade bit I have does the job (I used a block of soft wood over the bit end)….
Maybe it was an irwin? I can check if anyone is interested.December 29, 2015 at 3:22 am #29331I ran a tap in the bushing & pulled it out using a bolt & nut with a cross bar. I always install with the shift shaft in place to check for friction too. No leaks that way.
December 29, 2015 at 3:56 am #29332Anyone got any tips on pushing the bushing in a bit further ‘after’ the shift rod is installed.
I believe I saw Ben D. do exactly that at Tomahawk. The idea was to get the shift rod in easier then tighten up the O ring a bit.
December 29, 2015 at 12:47 pm #29338If you are using the OEM o-ring, no need to pre-compress it. In fact if you do, you may find the shift rod won’t go through it (depending on how much you mooshed it). Sierra o-rings are thinner–I don’t use them.
-
AuthorPosts
- You must be logged in to reply to this topic.