Home › Forum › Ask A Member › Restoration/Rebuild of a Rowboat Motor Gas Tank
- This topic has 17 replies, 15 voices, and was last updated 9 years ago by
49hiawatha.
-
AuthorPosts
-
March 14, 2017 at 3:05 am #6536
I have been on the site for a number of years but have not shared much of what I have done. I felt it was time to share some of my current project. The tank below is off a 1925 Evinrude Bigtwin LAT. This one was sent to me it repair but has become a full on rebuild. I do this for the fun and challenge. I hope you the members don’t mind me sharing:
Here is the day that the tank arrived
 KIMG0005 by James From, on Flickr
After glass beading: Clearly see there is not much left of the bottom and sides:
 KIMG0033 by James From, on Flickr
 KIMG0030 by James From, on Flickr
Here is removing the bottom of the tank. I had to map out and measure out the tank mount to make sure it would be put back in the same spot on reassembly.
 KIMG0045 by James From, on Flickr
Here is the new bottom. I had to enlarge the piece to compensate for the lip edge.
 KIMG0216 by James From, on Flickr
Then had had to make a buck from plate steel and wood to build the bottom
 KIMG0047 by James From, on Flickr
 KIMG0225 by James From, on Flickr
 KIMG0229 by James From, on Flickr
Once the bottom was done then I started on the sides. I first mapped out the sides compensating for beads/raised sections and the compound locking lips.
 KIMG0292 by James From, on Flickr
 KIMG0299 by James From, on Flickr
 KIMG0303 by James From, on Flickr
Then I had to build a template of the original sides to figure out how much I need to stretch the center prior to installing the beads. I stretched it using a English Wheel.
 KIMG0388 by James From, on Flickr
Then I shaped the new sides to the original and followed by test fitting the top and bottom prior to putting in the beads
 KIMG0435 by James From, on Flickr
 KIMG0455 by James From, on Flickr
 KIMG0456 by James From, on Flickr
 KIMG0462 by James From, on Flickr
This is where I am at, at this point. Now I have to start on the fuel trough for the bottom. It will be made separately and seamlessly welded in. I have to remake the trough on the original bottom so I can make a template.
This is a condensed summary. Please feel free to ask for more detailed info.
All will be soldered back together like original.
Thanks
James FromMarch 14, 2017 at 10:12 am #54299I don’t have a question, just wanted to say that it looks great and your very skilled with sheet metal
March 14, 2017 at 11:12 am #54300Excellent Work, you should be very proud of your skills!!! Most people today if they can’t find an "APP" on a smart phone to fix it
they don’t know how. I remember making a metal toolbox in shop class when I was 14 yrs old, it’s not pretty, but it taught me
some valuable skills that I still use today for layout, and planning etc…
We need more Craftsman like you who can teach others and keep this hobby going!March 14, 2017 at 11:22 am #54301WOW. I knew making a new tank for my RBM is beyond my talents, but you just confirmed it.
March 14, 2017 at 11:49 am #54303Very nice work indeed. I have great respect for anyone that has the skill and talent to work sheet metal like that. It’s something I’ve wanted to try for some time, but I don’t have the tools or the knowledge and do have so many other projects. Very cool! Thanks for sharing.
-BenOldJohnnyRude on YouTube
March 14, 2017 at 12:27 pm #54305great work- would like to see how you folded the lock seam
March 14, 2017 at 1:21 pm #54309quote dmbono:would like to see how you folded the lock seamMy question also.
My experience is with just straightening
the original parts. This may have already
occurred to you but I’ve learned the parts
that attach to the motor need to be on the
motor when soldering them to the tank
if you want them to fit.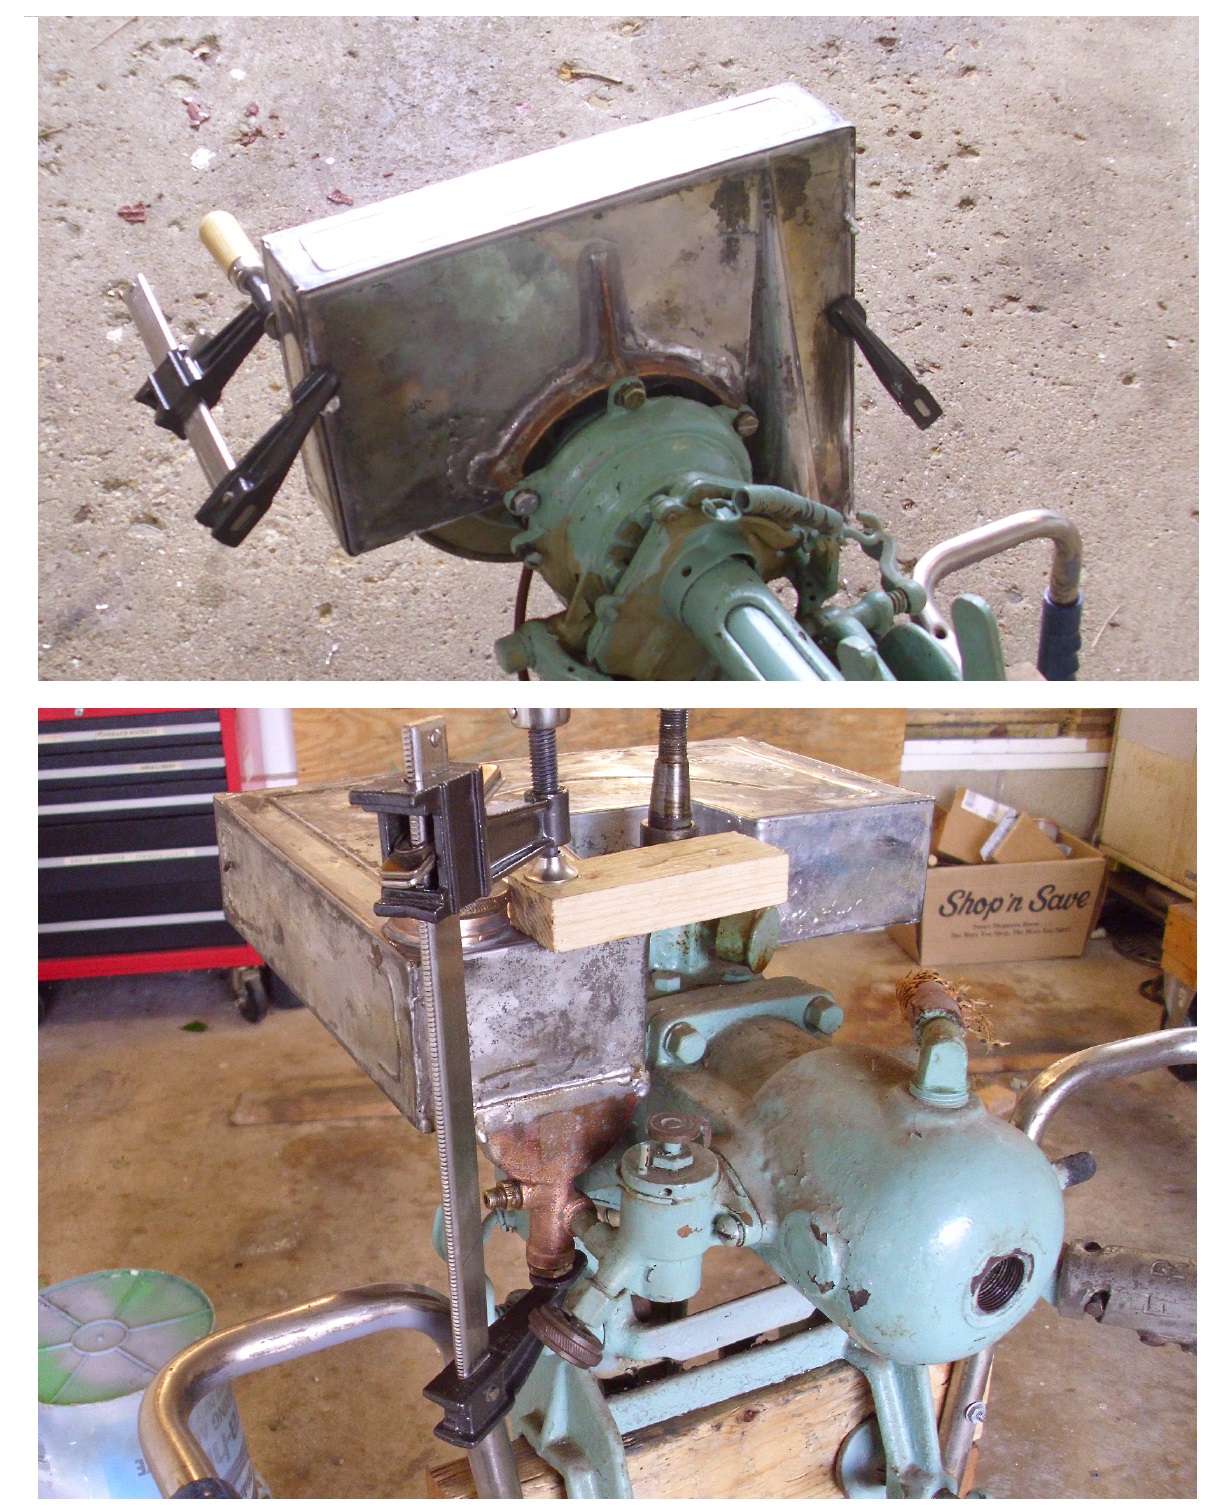
A "Boathouse Repair" is one thats done without having tools or the skills to do it properly.
March 14, 2017 at 1:44 pm #54312Thank you all for the kind words. This is my type of therapy working with metal The key is patience and not rushing.
I have done about a half dozen of the standard square RBM tank and in cases where I have to take off the brass portion that attaches to the carb I will solder that back on in place on an extra power head that I have. But as far as the bottom and top of the tanks I assemble and solder that off the motor.
As for lock lip on the tank above. I started out with my first bend using a brake. I bent it as far as I could with the brake. then finished with placing the piece between the 2×4 and long flat I-beam that I using for metal shaping. Once the first bend was completed I than took a 1/4" piece of bar stock the length of the piece and laid that down equal to the depth of the locking lip and clamped it in place.Then I used the bar stock as a dolly and using various body hammers to bend the lip to a 90. Then I removed the bar stock and put a strip of metal the same thickness of the tank and continued to bend the lip over, Once finished with both sides I then put it in the english wheel to smooth out. Keeping the strip of metal in place to keep the gap at the proper width.
Thanks
James KIMG0298 by James From, on Flickr
 KIMG0301 by James From, on FlickrMarch 14, 2017 at 2:14 pm #54313
.
nice job James.
For a very rare motor , this is the only option you have
finding a spare tank somewhere, is close to zeroA luck is that you still have the ID plate.
😎March 14, 2017 at 2:19 pm #54314The id plate is in very rough shape as it and the top of the tank as it took a good hard hit at one time
-
AuthorPosts
- You must be logged in to reply to this topic.