Home › Forum › Ask A Member › Caille Neptune Gas Tank Repair?
- This topic has 94 replies, 15 voices, and was last updated 4 years, 6 months ago by
 Buccaneer.
-
AuthorPosts
-
November 27, 2020 at 5:41 pm #221745
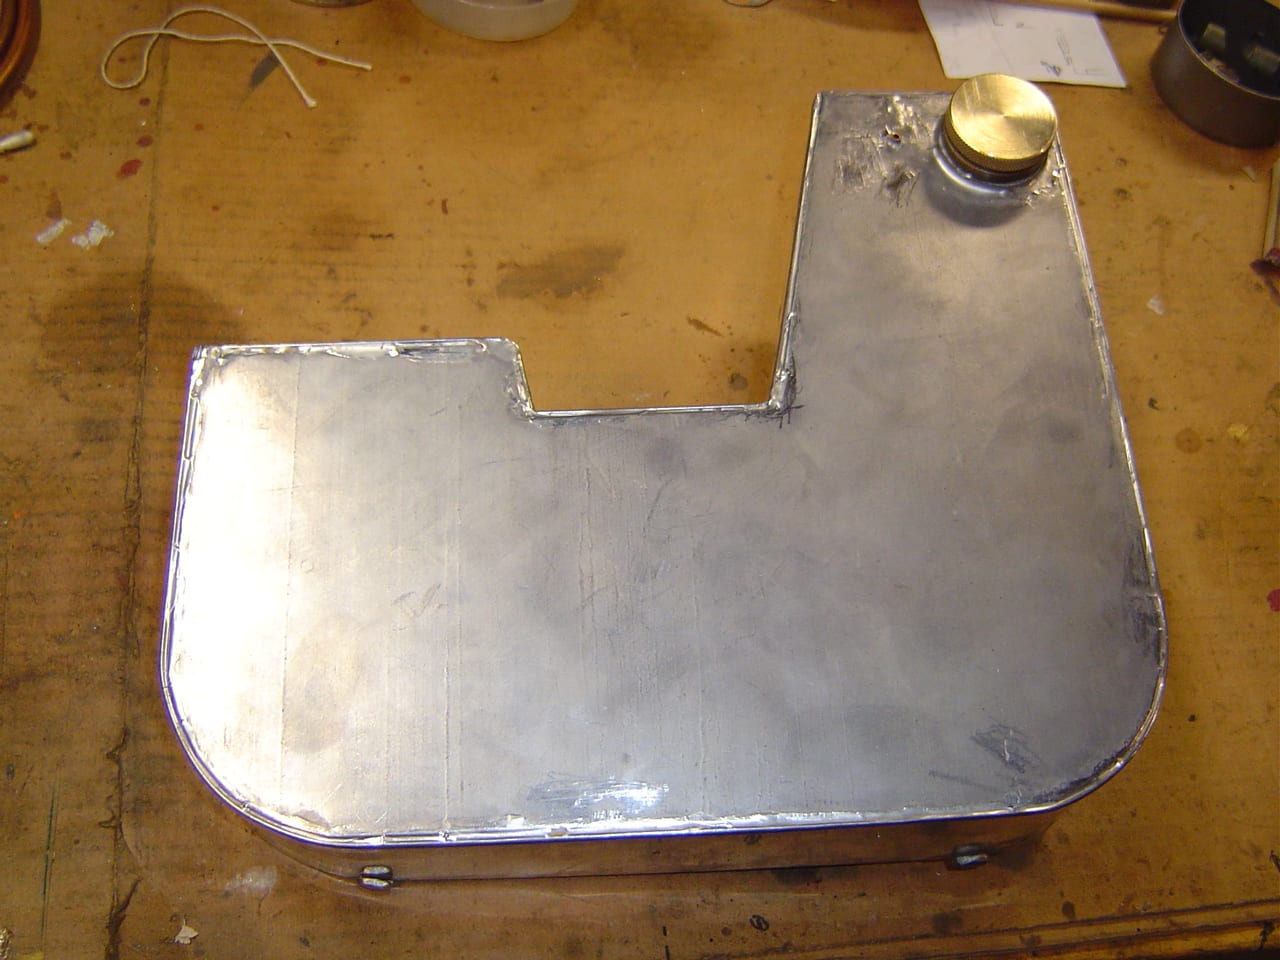
I tore the gas tank apart today. I’ve seen worse, but it is fairly
rusty inside, and has a few pin holes, and likely leaks around
some of the rivets.
I’m toying with the idea of buying some sheet metal and starting
from scratch. It’s been a long time since my 9th grade
sheet metal class…… that lasted about a week.
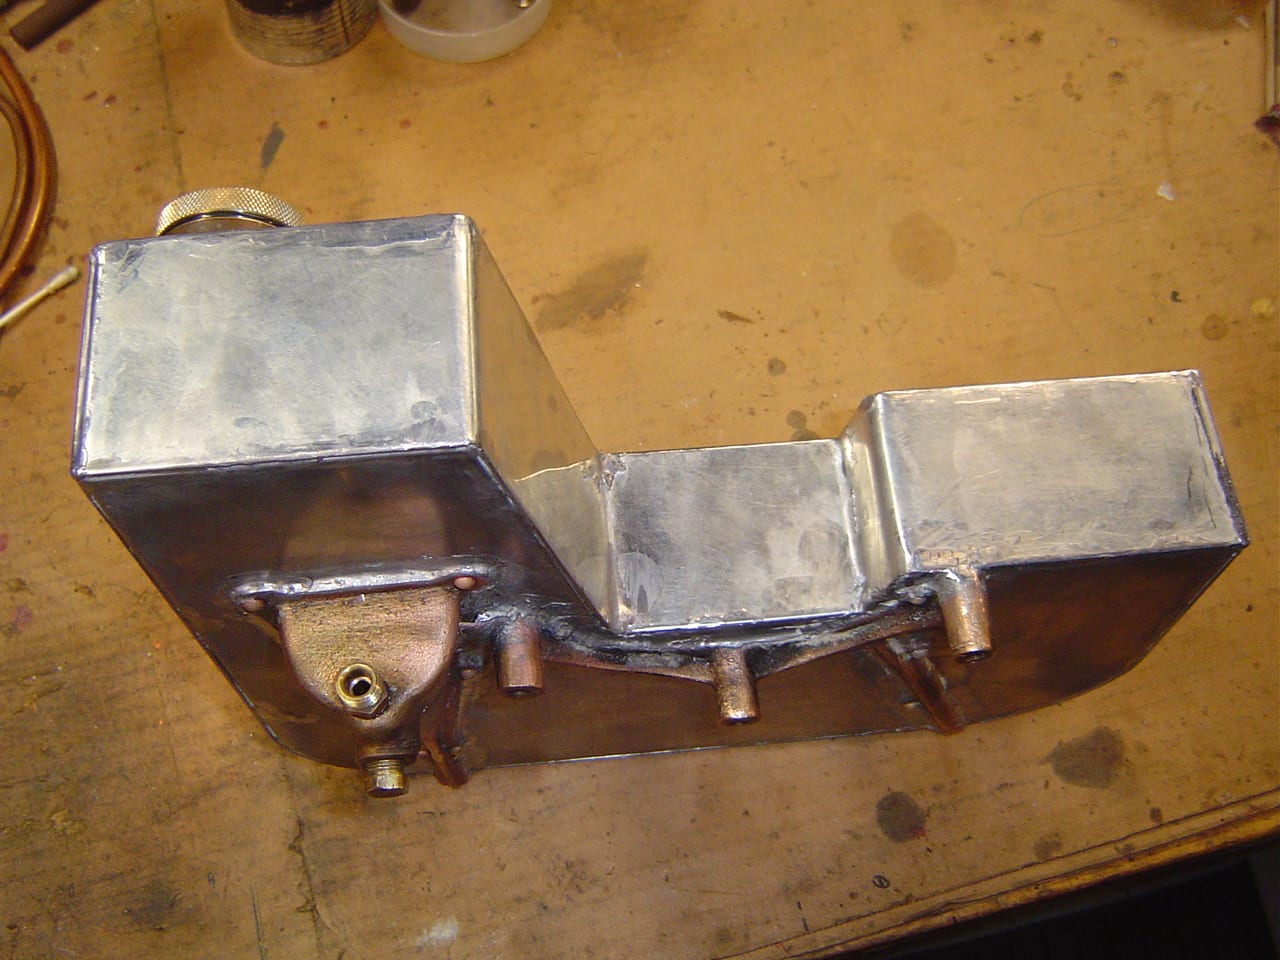
I made a little rectangular box with a cover.
Only problem is this gas tank looks like a 12th grade project,
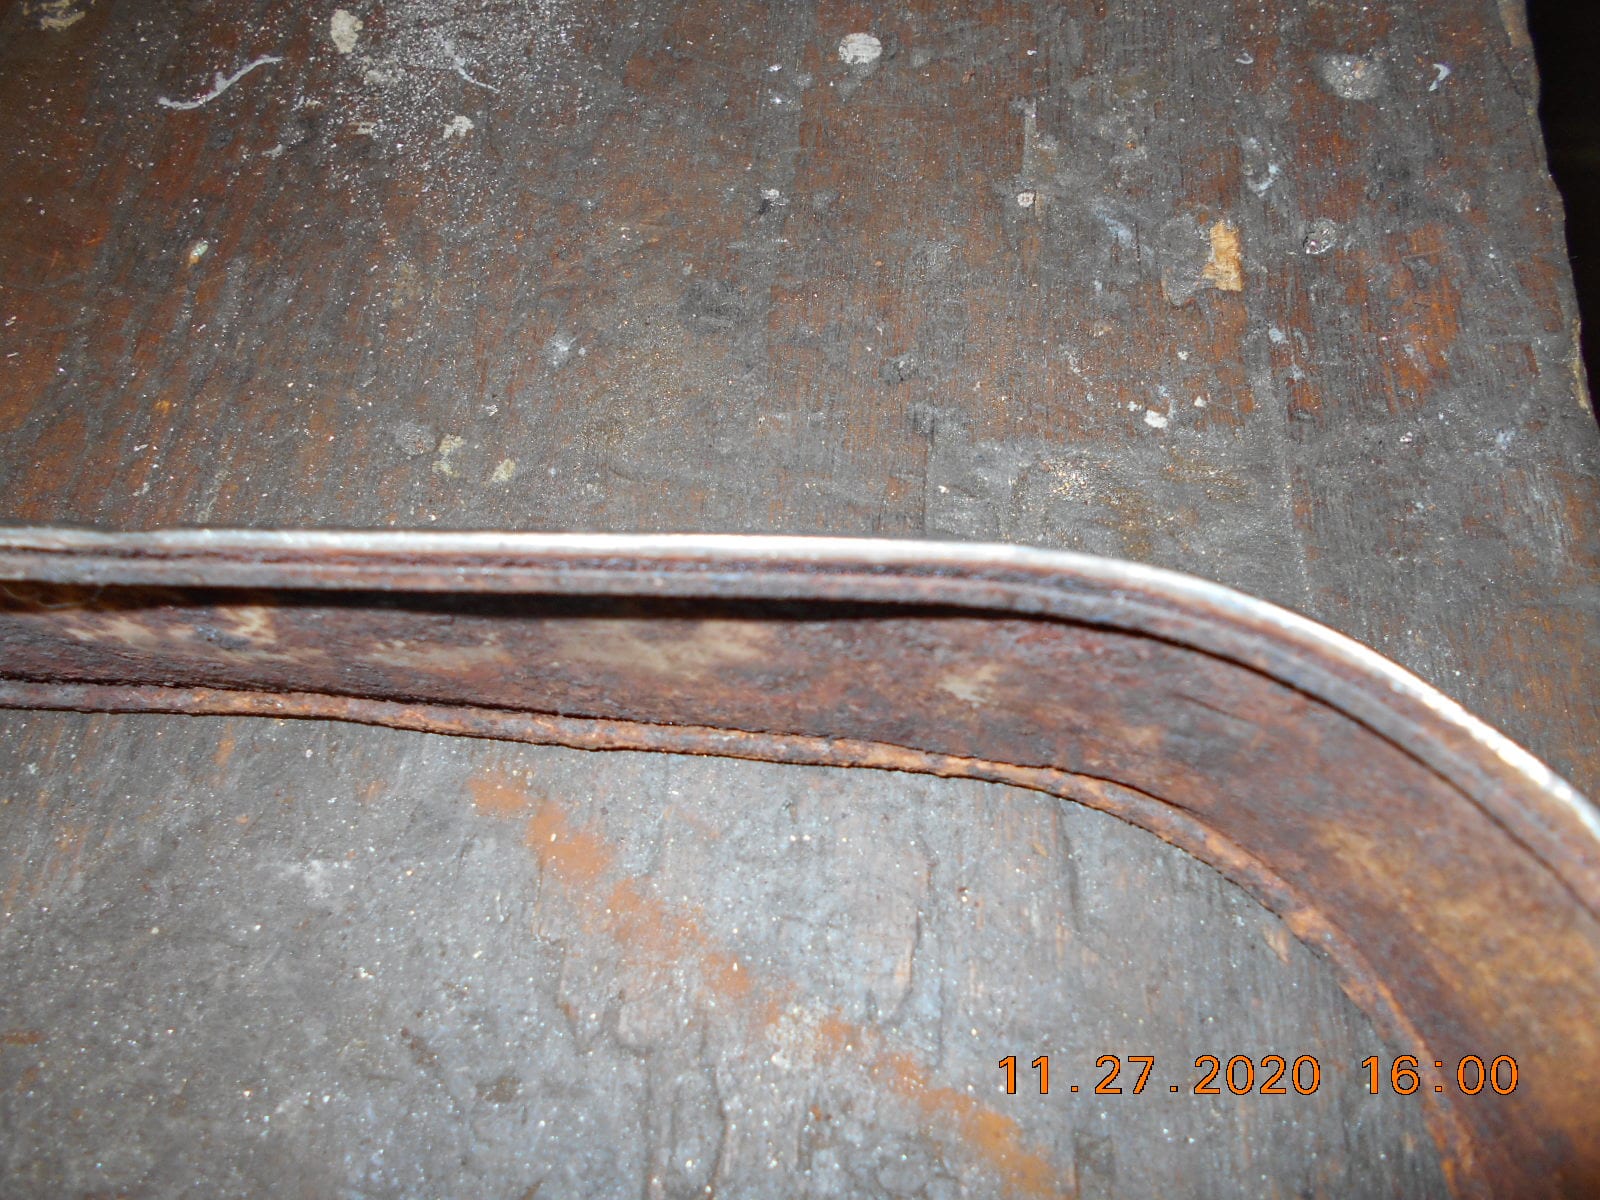
and I don’t have the fancy tools like they did in shop class.The middle band of the tank has the folded joints that the top
and bottom tank pieces fits into. The top and bottom pieces
just have a 90 degree fold that fits into the band. Getting a
nice 90 degree fold on the rounded side of the tank might
be challenging.Anybody make their own tanks, and have wisdom to share?
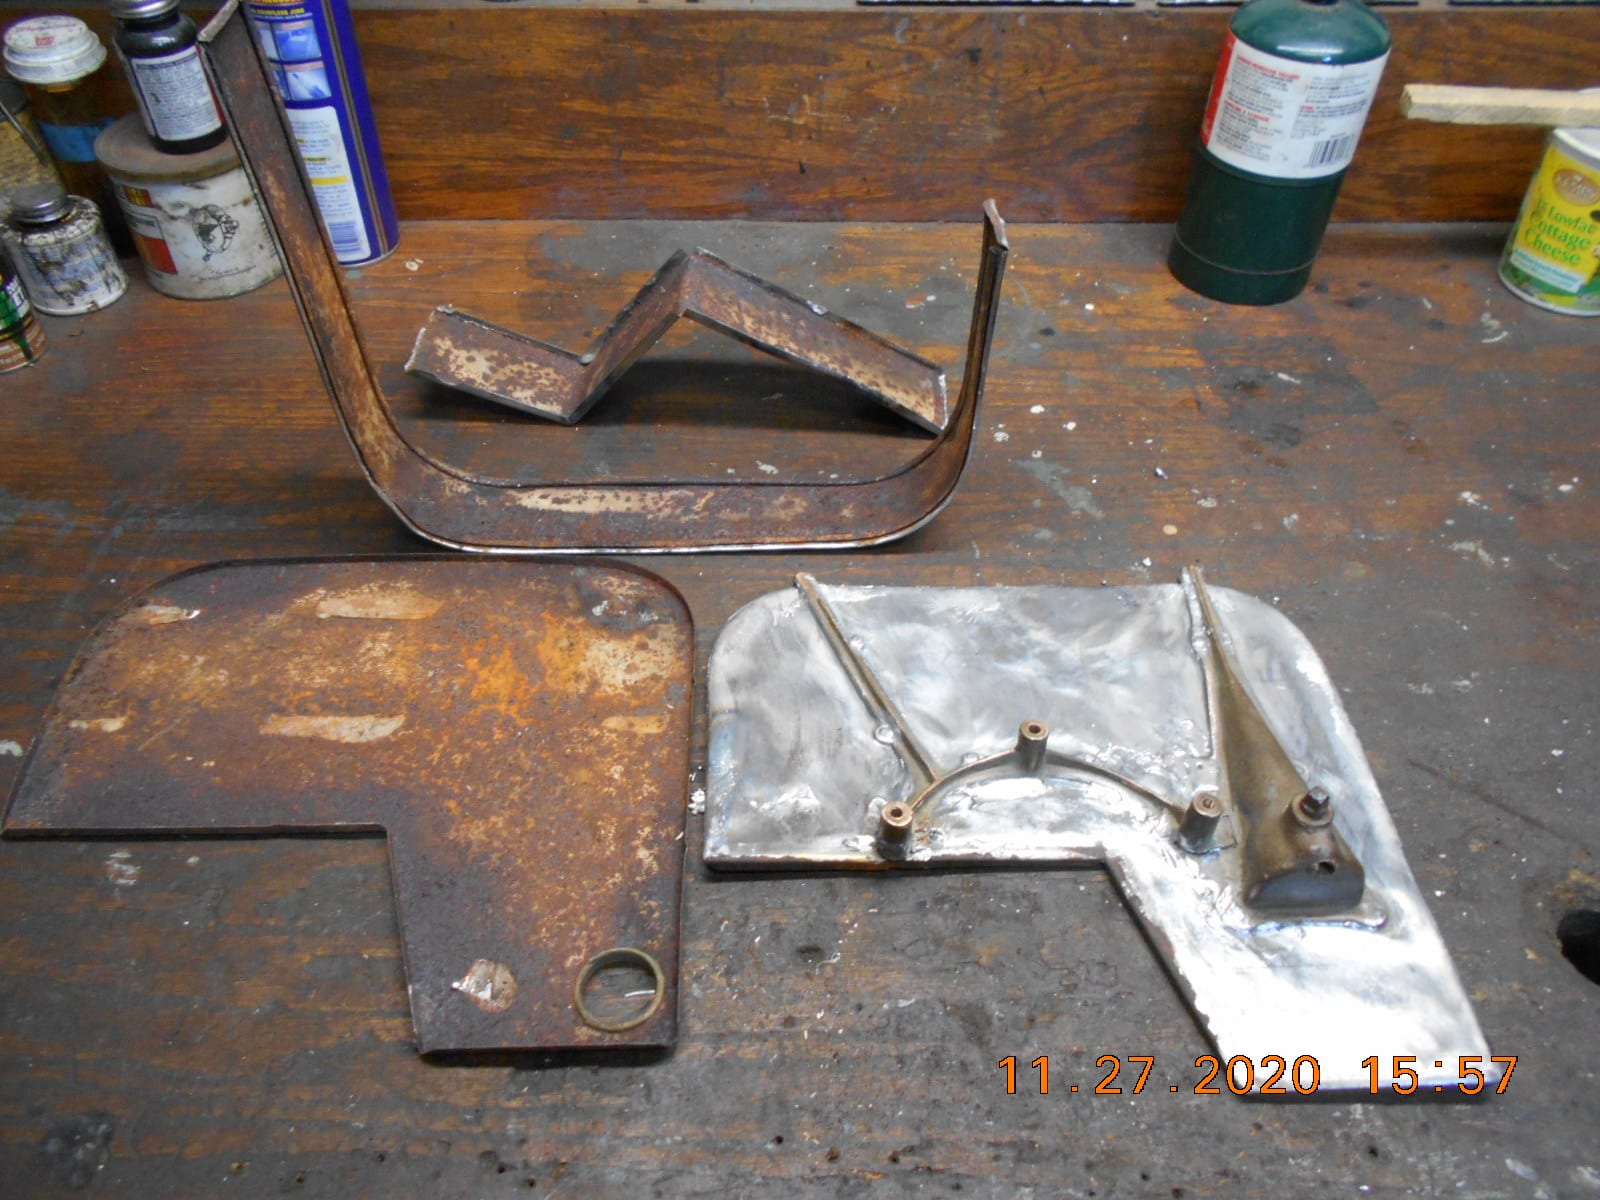
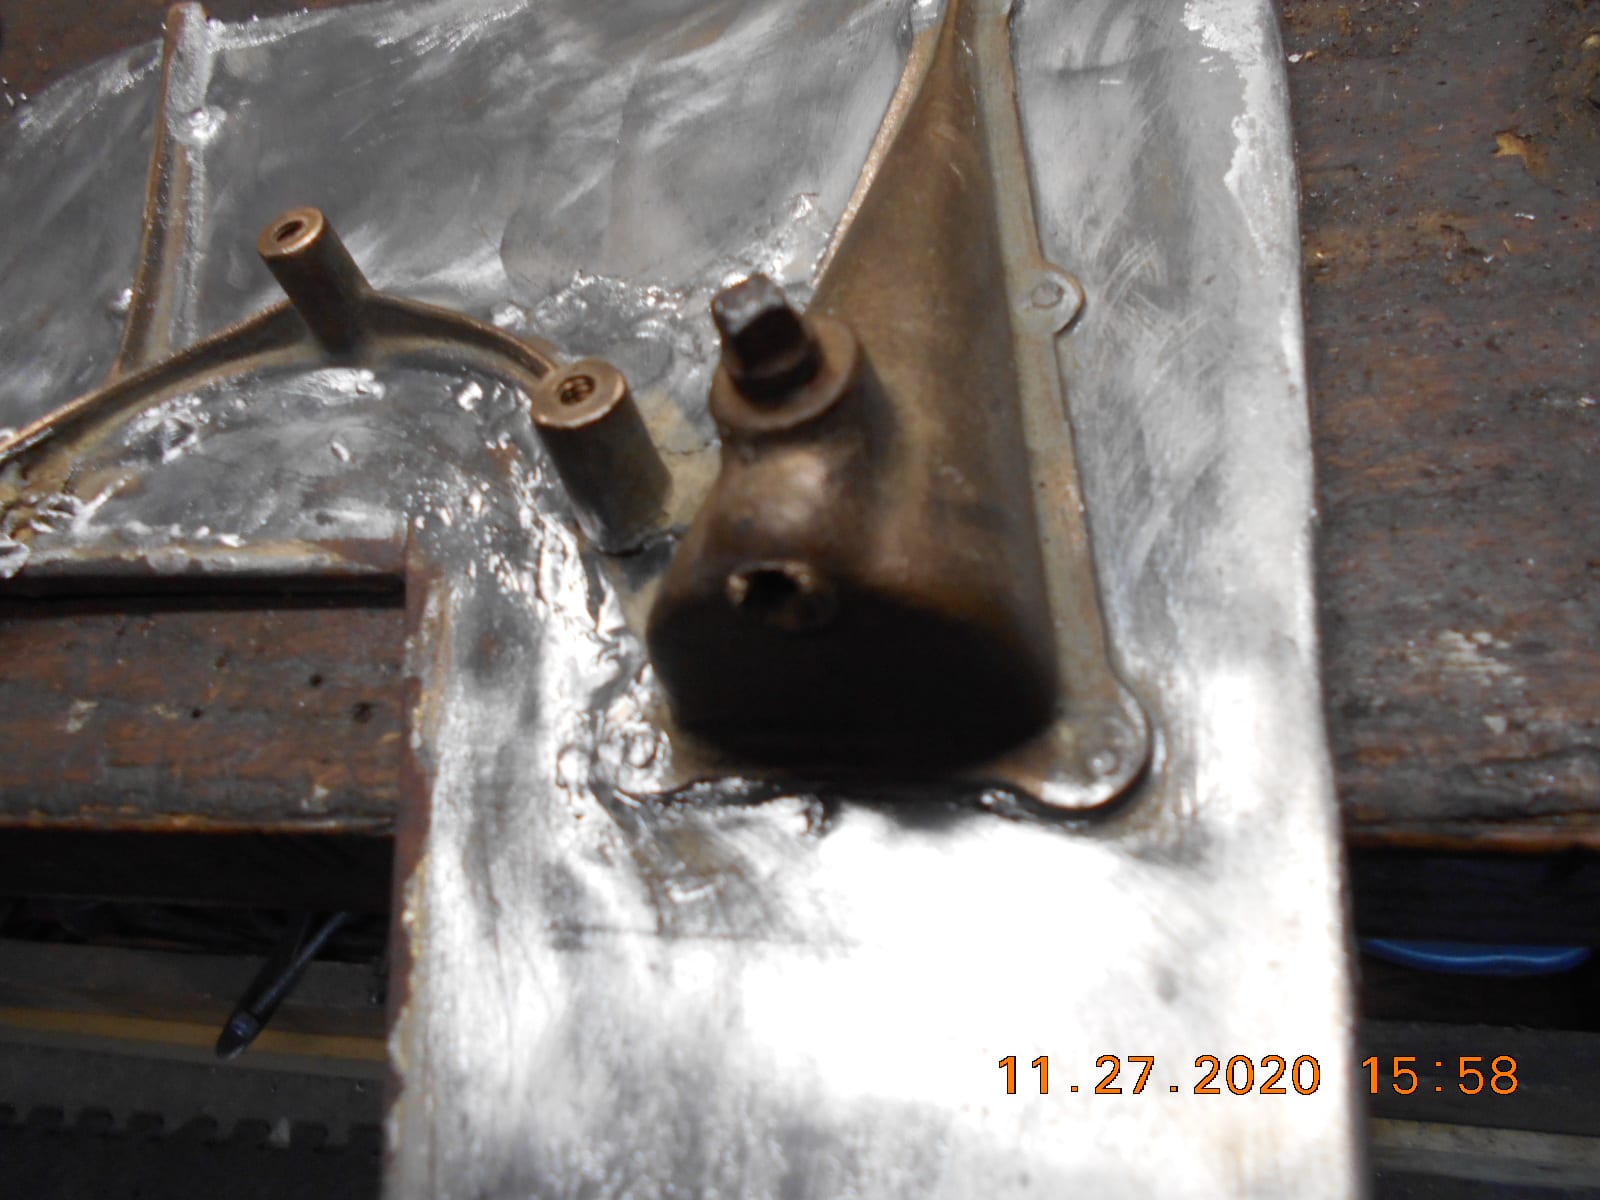
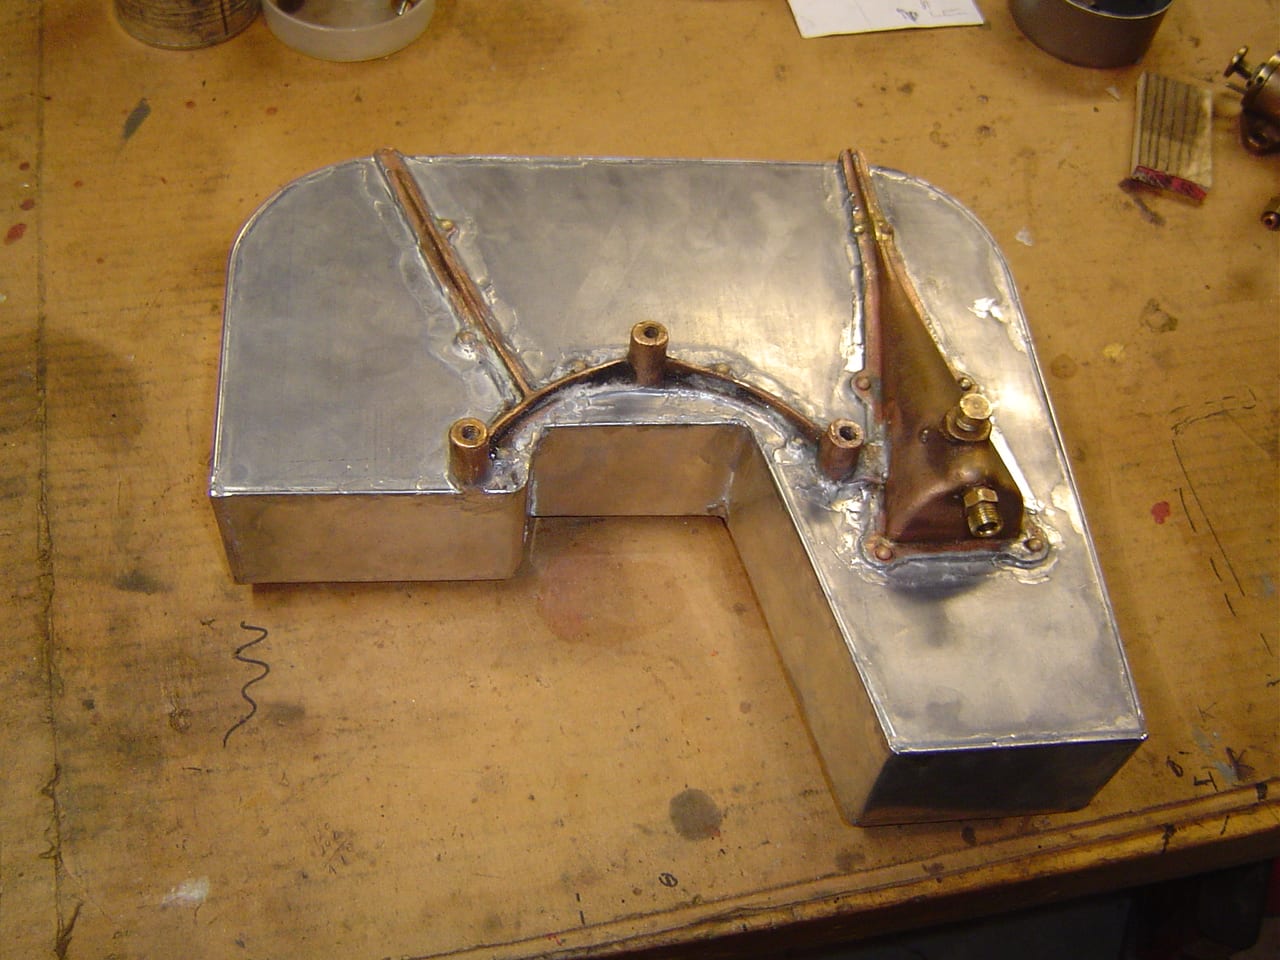
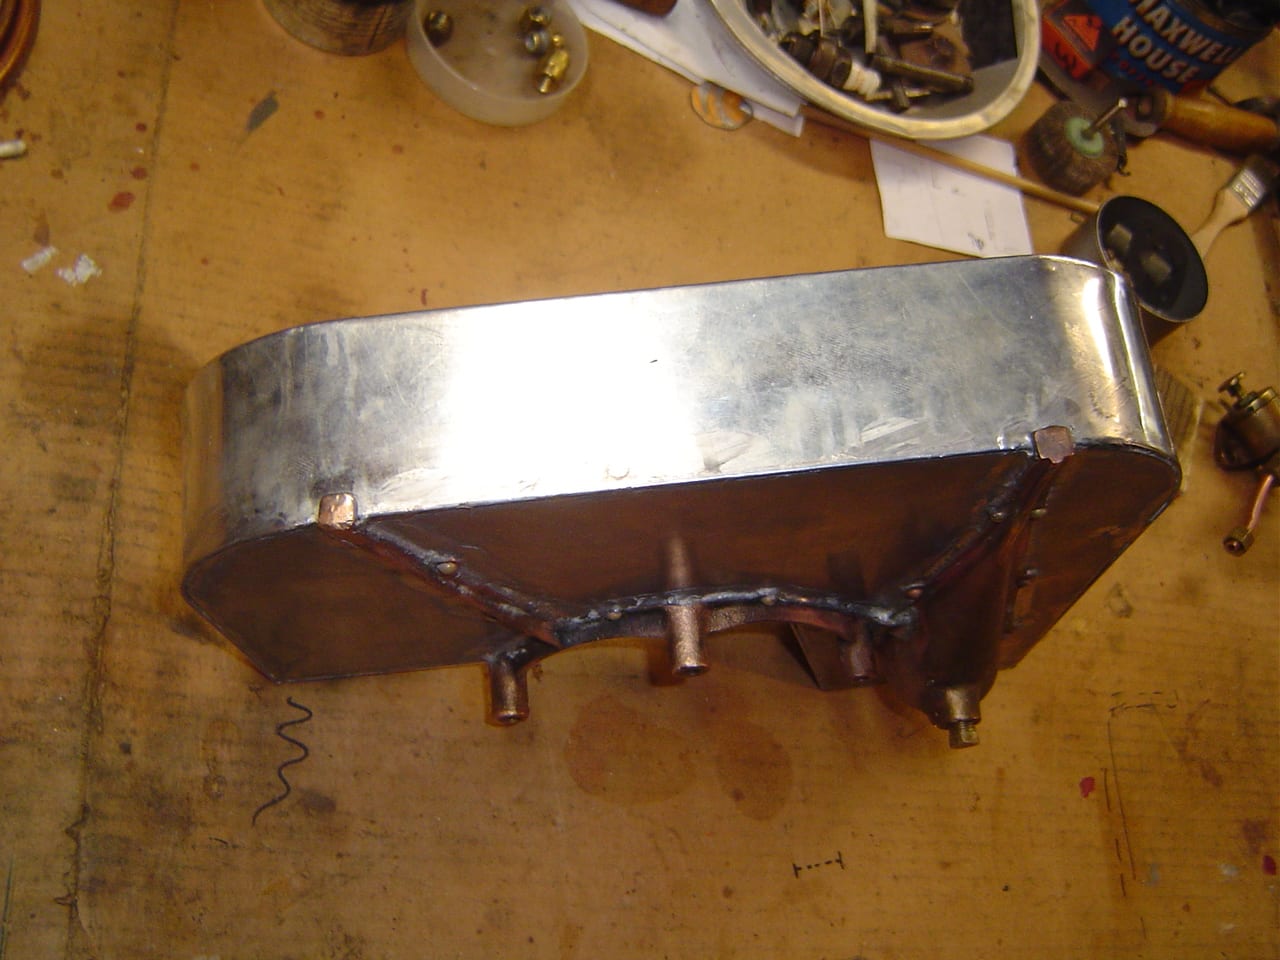
Whatever fitting for the fuel line, that protruded from the bronze casting
on the bottom of the tank, has been broken off, and I have
no petcock for the Caille. Will have to research what I need to
repair that.
Thanks!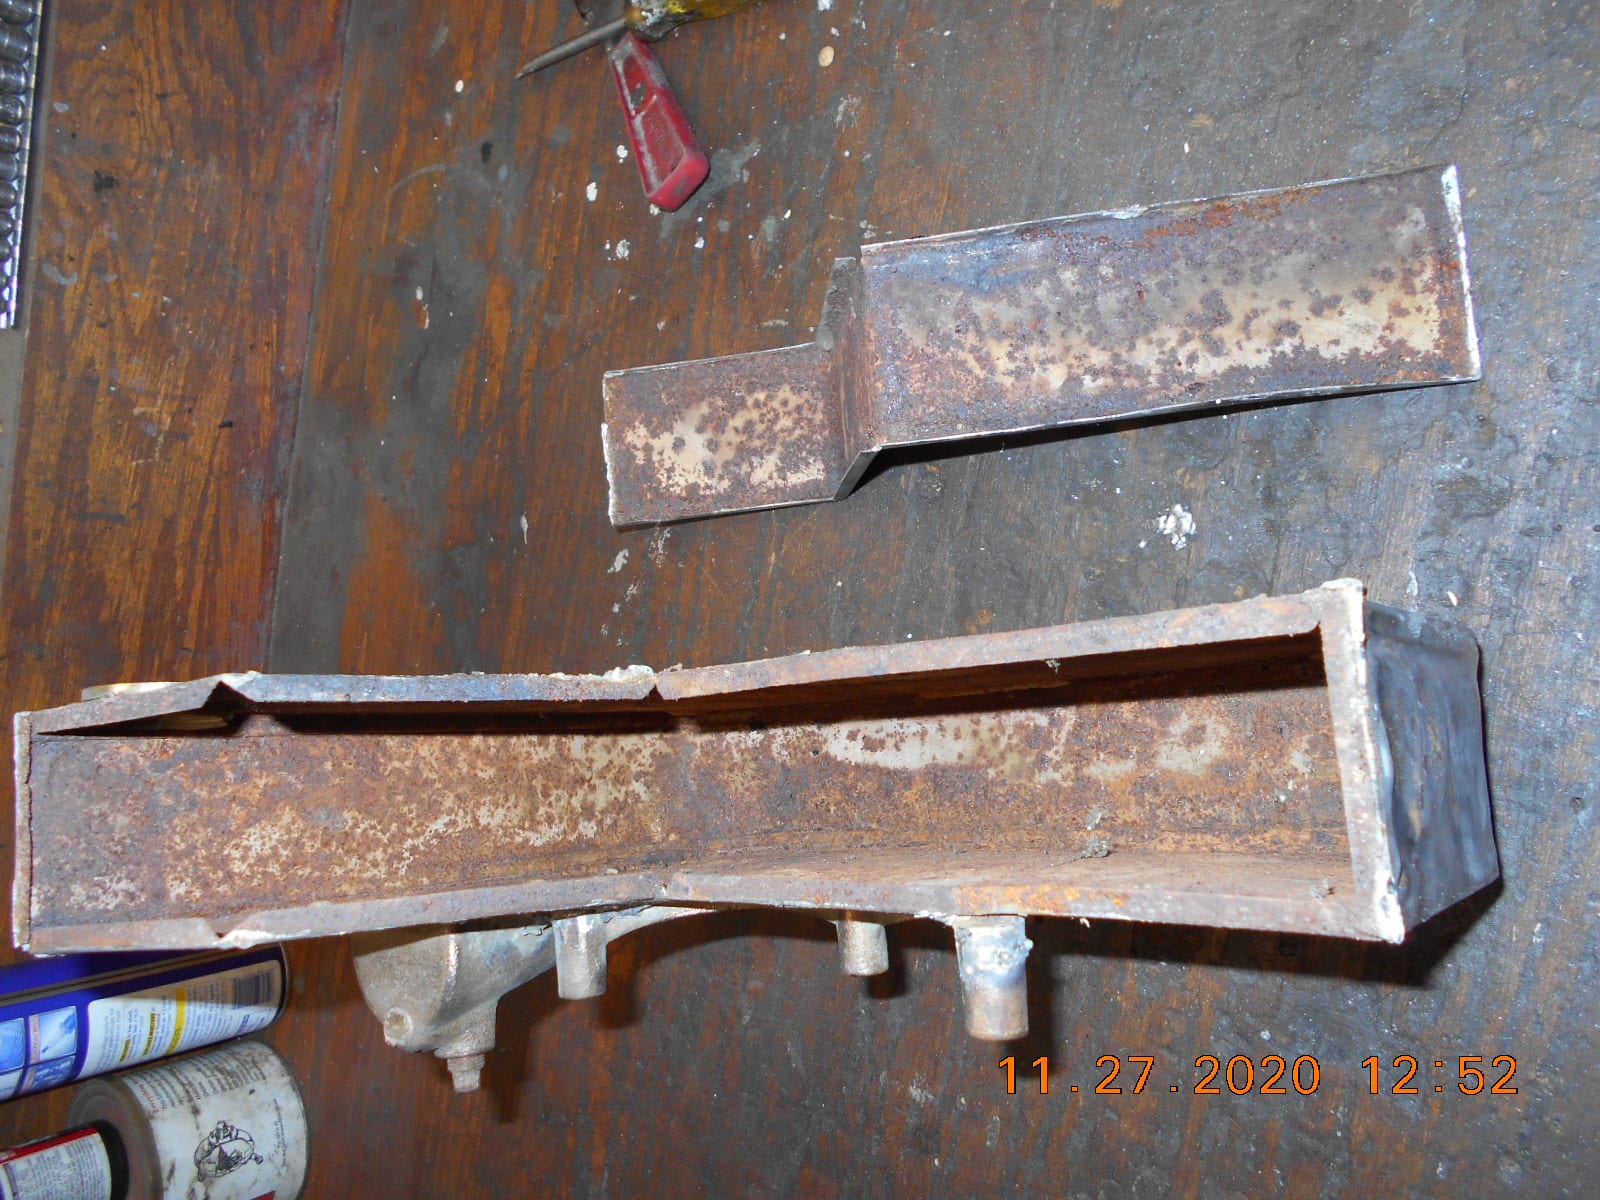
Prepare to be boarded!
November 27, 2020 at 5:47 pm #221751I am not into this work BUT how about making a pattern from 1/4 in steel then you may be able to hammer a 90 degree edge around it .just a thought.
November 27, 2020 at 6:01 pm #221752That’s a good idea Dave, but I bet even a plywood pattern would work, as the sheet metal
is only .030 thick. Have to research what gauge that is.Prepare to be boarded!
November 27, 2020 at 6:41 pm #222103Bucc, good start, seeing how the original was put together. I had to make one a while back. Yes, best to have a accurately made hard wood ( maple best) pattern to form the top and bottom accurately and also ensure that the sides fit the top and bottom.
Joe B
-
This reply was modified 4 years, 7 months ago by
 Mumbles.
November 27, 2020 at 8:27 pm #222518Just a thought…. if your priorities are around cosmetics and can stand something unconvential to gain functionality, consider inserting a plastic tank into your newly repaired/homemade tin tank. With that you don’t have to worry about leaky seams. I’ve had some success with bladders .
November 27, 2020 at 9:40 pm #222520Bucc, good start, seeing how the original was put together. I had to make one a while back. Yes, best to have a accurately made hard wood ( maple best) pattern to form the top and bottom accurately and also ensure that the sides fit the top and bottom.
Joe B
-
This reply was modified 4 years, 7 months ago by Mumbles.
Joe, Very Nice Job, I’m impressed!
Few questions if you don’t mind.What kind of sheet metal? Plain steel or galvanized?
Did you use an old fashion blacksmith type soldering iron,
little bottle torch, or?What kind of flux and solder, and did you use muriatic acid for
cleaning the seams, like I seen on YouTube?What if any specialty tools did you use to make the seams?
I have a small hand brake or flanger… not sure of it’s proper name,
but it’s about 3″ wide.Sorry for all the questions! Thanks.
Prepare to be boarded!
November 27, 2020 at 9:44 pm #222521Just a thought…. if your priorities are around cosmetics and can stand something unconvential to gain functionality, consider inserting a plastic tank into your newly repaired/homemade tin tank. With that you don’t have to worry about leaky seams. I’ve had some success with bladders .
I could think of a couple of issue with a plastic tank inside
the tank, especially if one used a torch to solder the outer
tank back up. Also, Not sure what one with do with the gas
cap to make it look original.
You may have a sound idea, but I’d probably just
use gas tank sealer if in doubt about the tank leaking.
Thanks.Prepare to be boarded!
November 28, 2020 at 10:38 am #223851Joe, replied to your PM, heading out to the garage, will check back later. Thanks.
Prepare to be boarded!
November 28, 2020 at 1:35 pm #223863Just got done removing the brass casting from the bottom tank panel.
That was harder than taking the tank seems apart, especially when
you’re worried about breaking the castings. So far, so good.
I dug out what sheet metal tools I inherited from my dad.
Forgot I even had the shorter “folder” for bending the edge of sheet metal.
Found a piece of old sheet metal I may practice on, but not quite
big enough for the whole tank. Fun.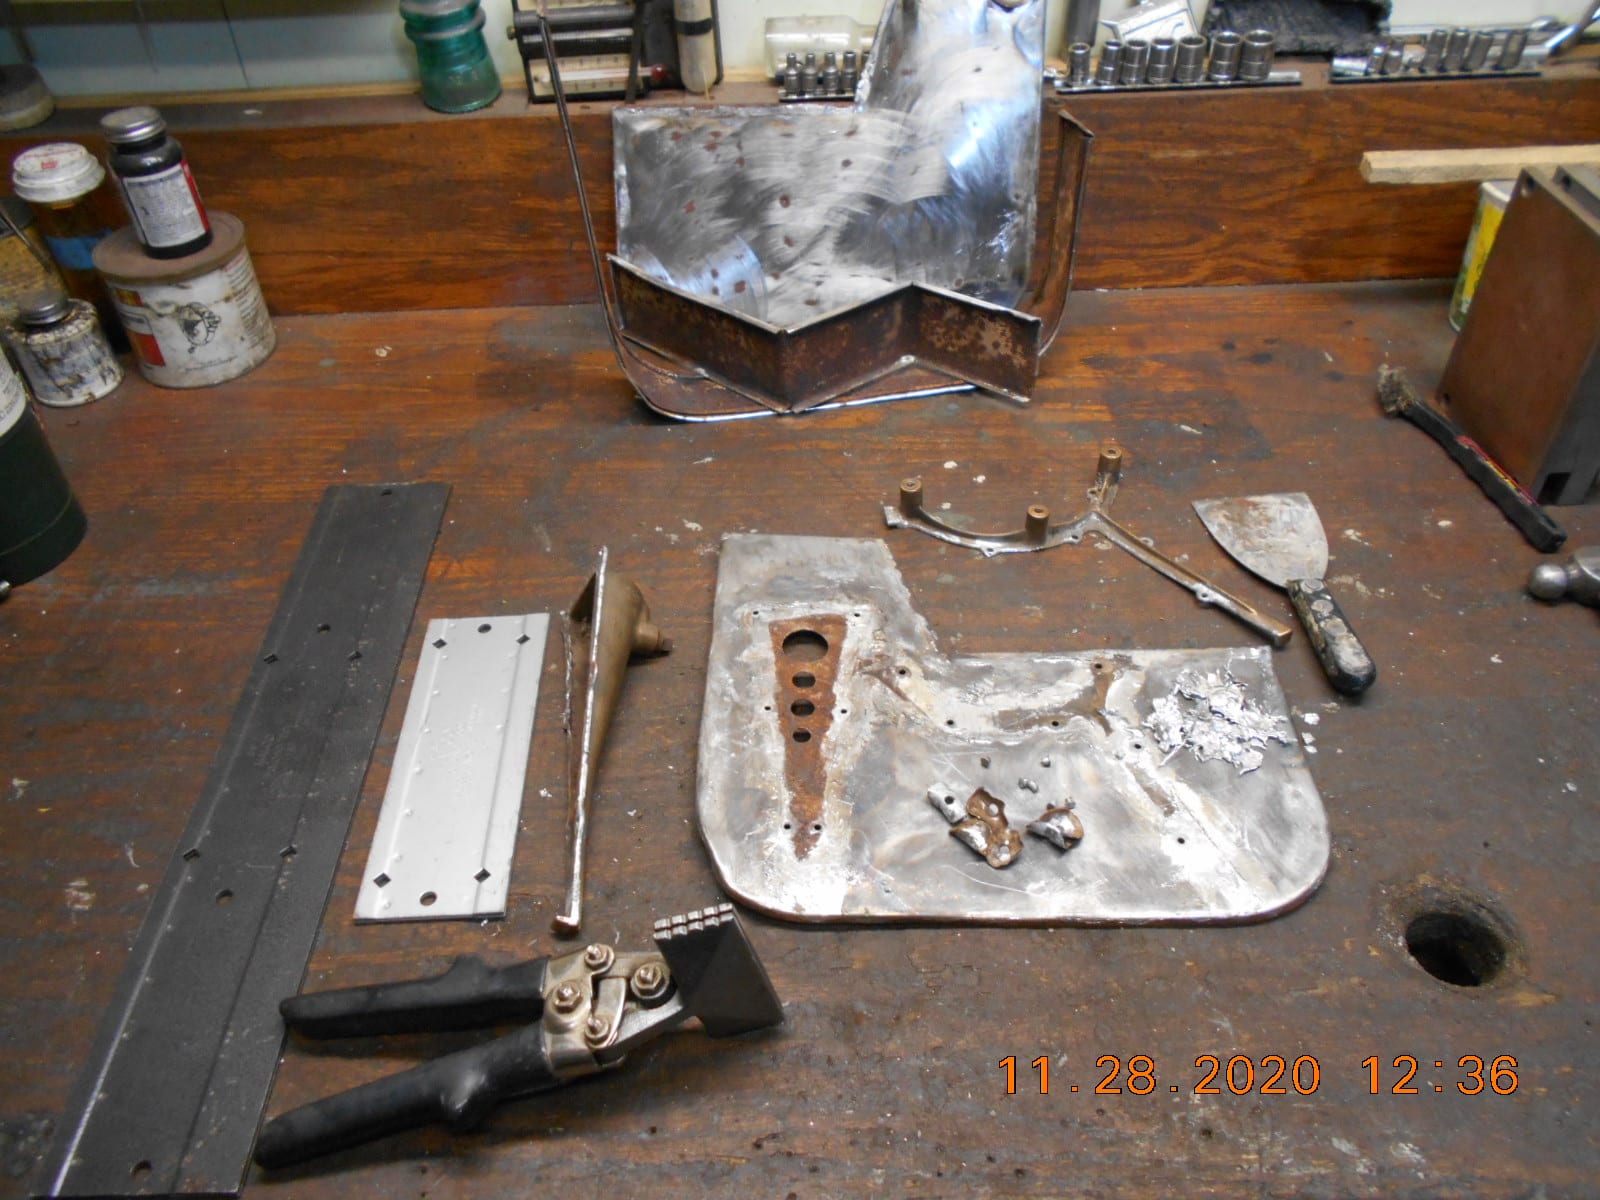
Prepare to be boarded!
November 28, 2020 at 2:09 pm #223866Buc – looks like a real task. Just curious how the castings are attached to the tank – riveted and soldered?
Bob
1937 Champion D2C Deluxe Lite Twin
1954 Johnson CD-11
1955 Johnson QD-16
1957 Evinrude Fastwin 18
1958 Johnson QD-19
1958 Johnson FD-12
1959 Johnson QD-20“Every 20 minute job is only a broken bolt away from a 3-day project.”
"Every time you remove a broken or seized bolt an angel gets his wings." -
This reply was modified 4 years, 7 months ago by
-
AuthorPosts
- You must be logged in to reply to this topic.