Home › Forum › Ask A Member › Caille Neptune Gas Tank Repair?
- This topic has 94 replies, 15 voices, and was last updated 5 years, 6 months ago by
 Buccaneer.
-
AuthorPosts
-
November 28, 2020 at 2:46 pm #223868
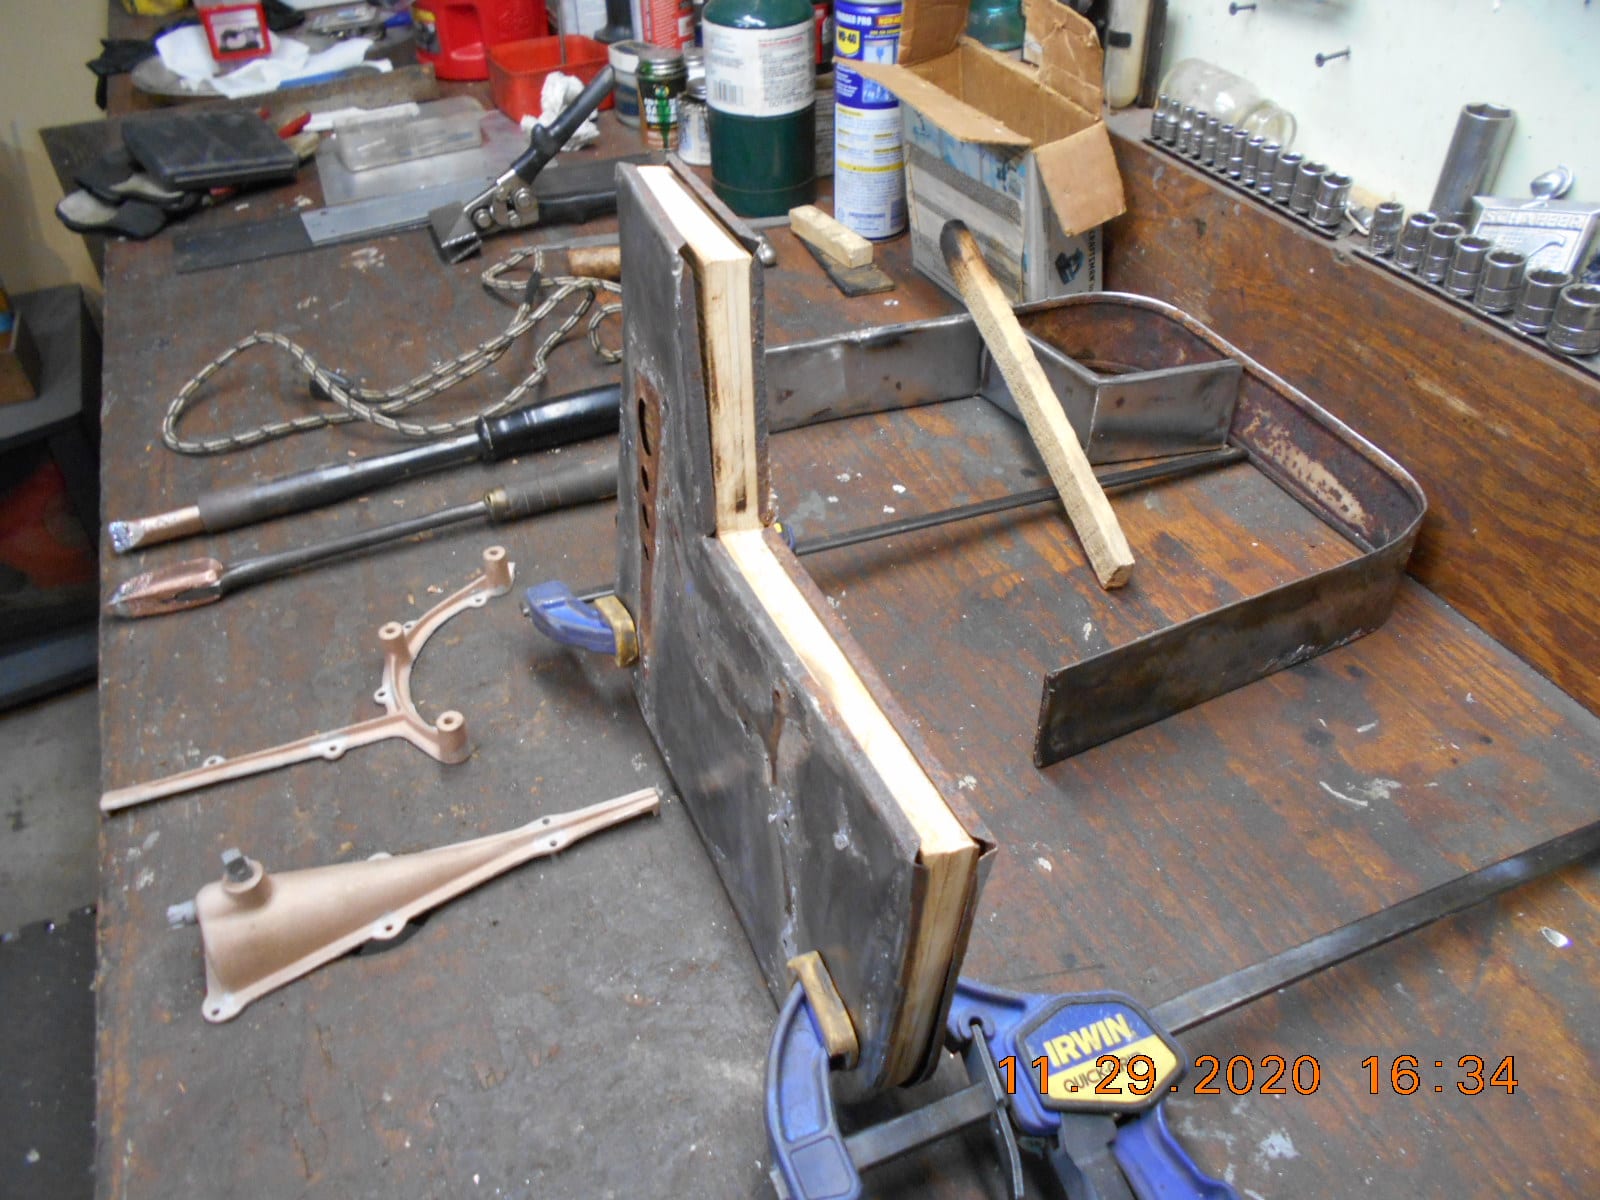
Bob, solder everywhere! The rivets were soldered and peened,
and thin tin washer inside the tank on the rivets that hold the
mounting casting.
Amazing it lasted 100 years in as good
a shape as it was.Prepare to be boarded!
November 28, 2020 at 3:12 pm #223869Well, the tank may have rusted out but the casting sure weren’t going anywhere!
Bob
1937 Champion D2C Deluxe Lite Twin
1954 Johnson CD-11
1955 Johnson QD-16
1957 Evinrude Fastwin 18
1957 Evinrude 3022
1958 Johnson QD-19
1958 Johnson FD-12
1959 Johnson QD-20
1982 Evinrude 25hp“Every 20 minute job is only a broken bolt away from a 3-day project.”
"Every time you remove a broken or seized bolt an angel gets his wings."November 28, 2020 at 9:29 pm #223901OK, I’m back and will try and answer the questions that Buccaneer asked about how I did my tank.
– sheet metal? The common material for fuel tanks was Terrne, that is lead coated steel. Hard to find these days, but I was fortunate to find a few pieces 024 thick, that is what I used for the top and bottom panels. Used much thinner stock, 014 bright (tin) steel for the sides as the thinner stock allowed for easier forming of the required tight “S” bend.
– solder ? I used regular 50/50 lead solder and NoKrode paste flux. If one used galvanized (zinc coated) steel you may need more aggressive acid flux
– soldering tool? A heavy duty electric soldering copper ( not the little gun type for electrical work)
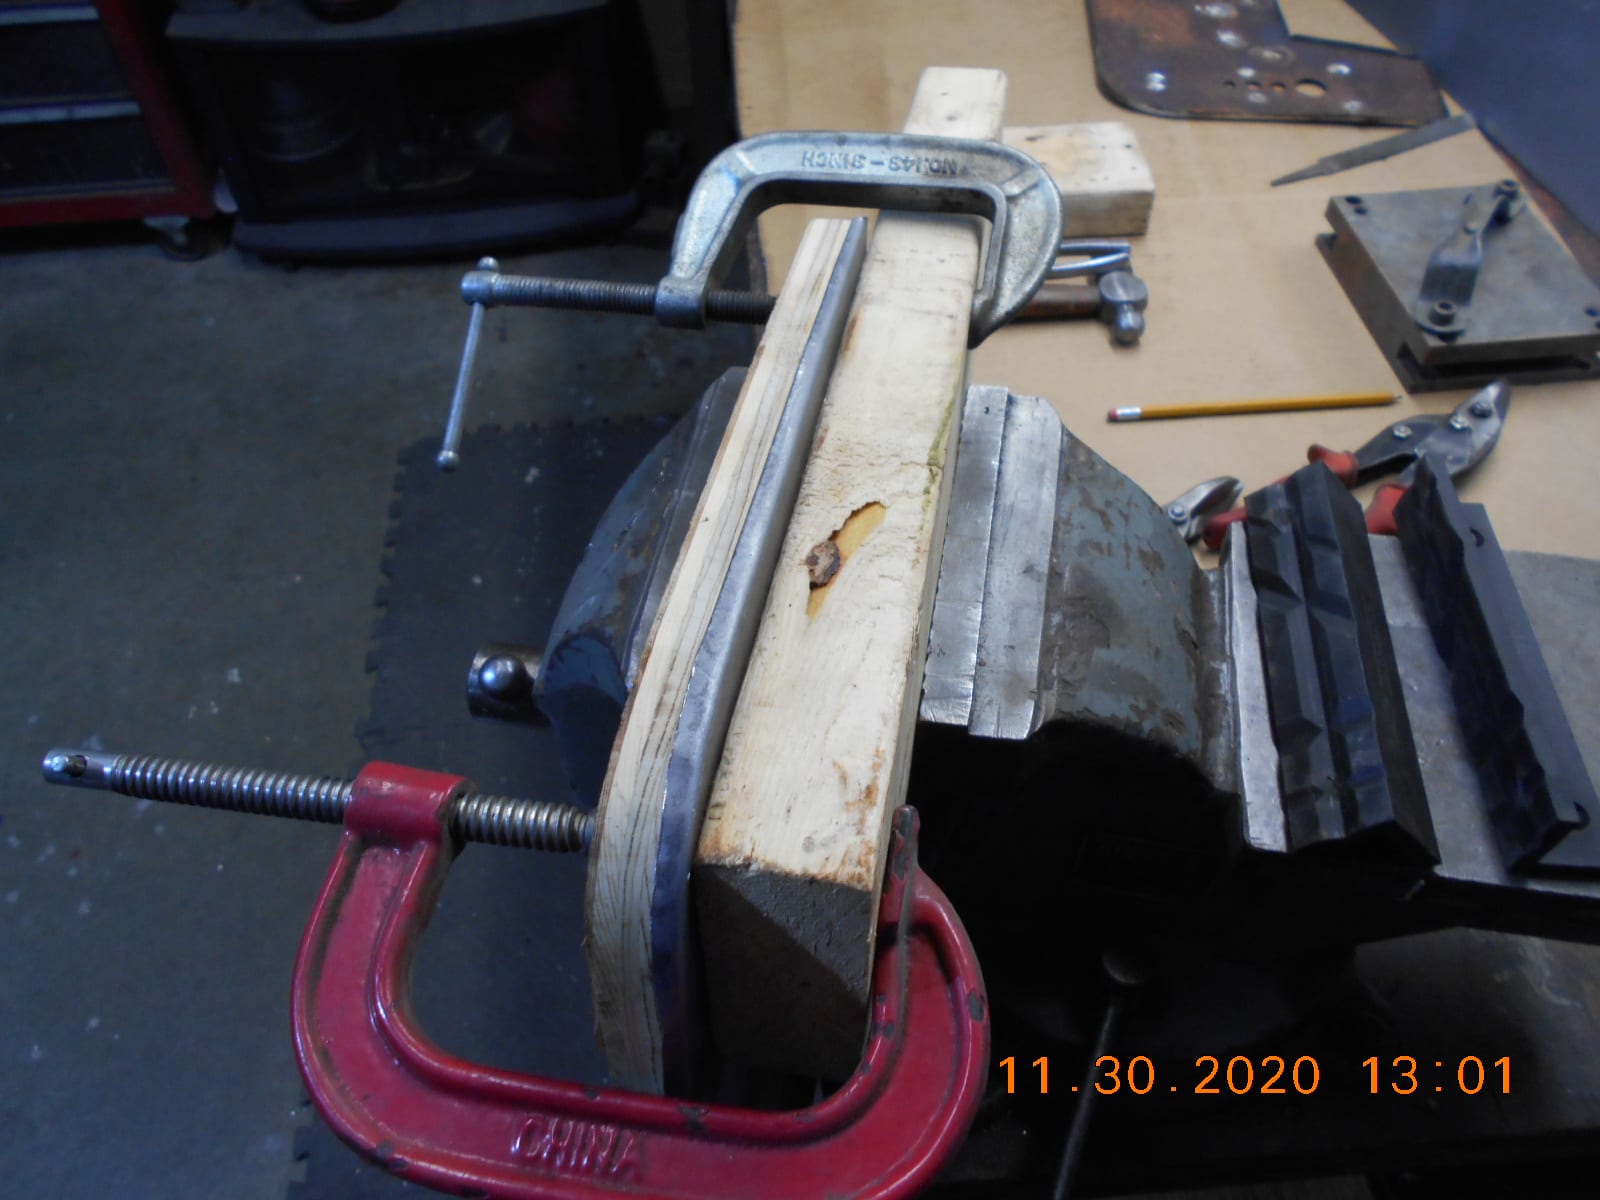
– Forming ? Used matching hardwood ( maple) forms for top and bottom panels to form the 3/16 wide flange. To hand form the “S” shape on the side panel , clamped the stock strip between steel bar and carefully mallet formed the “S” in stages.
– Rivets? soft brass rivets, penned and soldered inside and out.
Assembly? First join the bottom to the sides, next the brass pieces riveted and soldered to the bottom. Finally close the top.Hope this helps,
Joe BNovember 28, 2020 at 9:35 pm #223903Joe, much appreciate your posting this information, and enjoyed talking with you!
I have a lot of good tips to get me started now.
Thanks!Prepare to be boarded!
November 28, 2020 at 9:55 pm #223905November 29, 2020 at 8:52 am #223914Tubs, Hopefully I don’t end up with a one gallon gas can strapped
atop the motor with plumber’s strap!Prepare to be boarded!
November 30, 2020 at 7:13 pm #223993Solder and Flux is on order. I dug around a found some sheet metal…
either for practice, or finished tank…. depending what happens. I found
some .028 thick for the top and bottom, and some .019 thick for the
side band, which has the double bent lip to accept the top and bottom
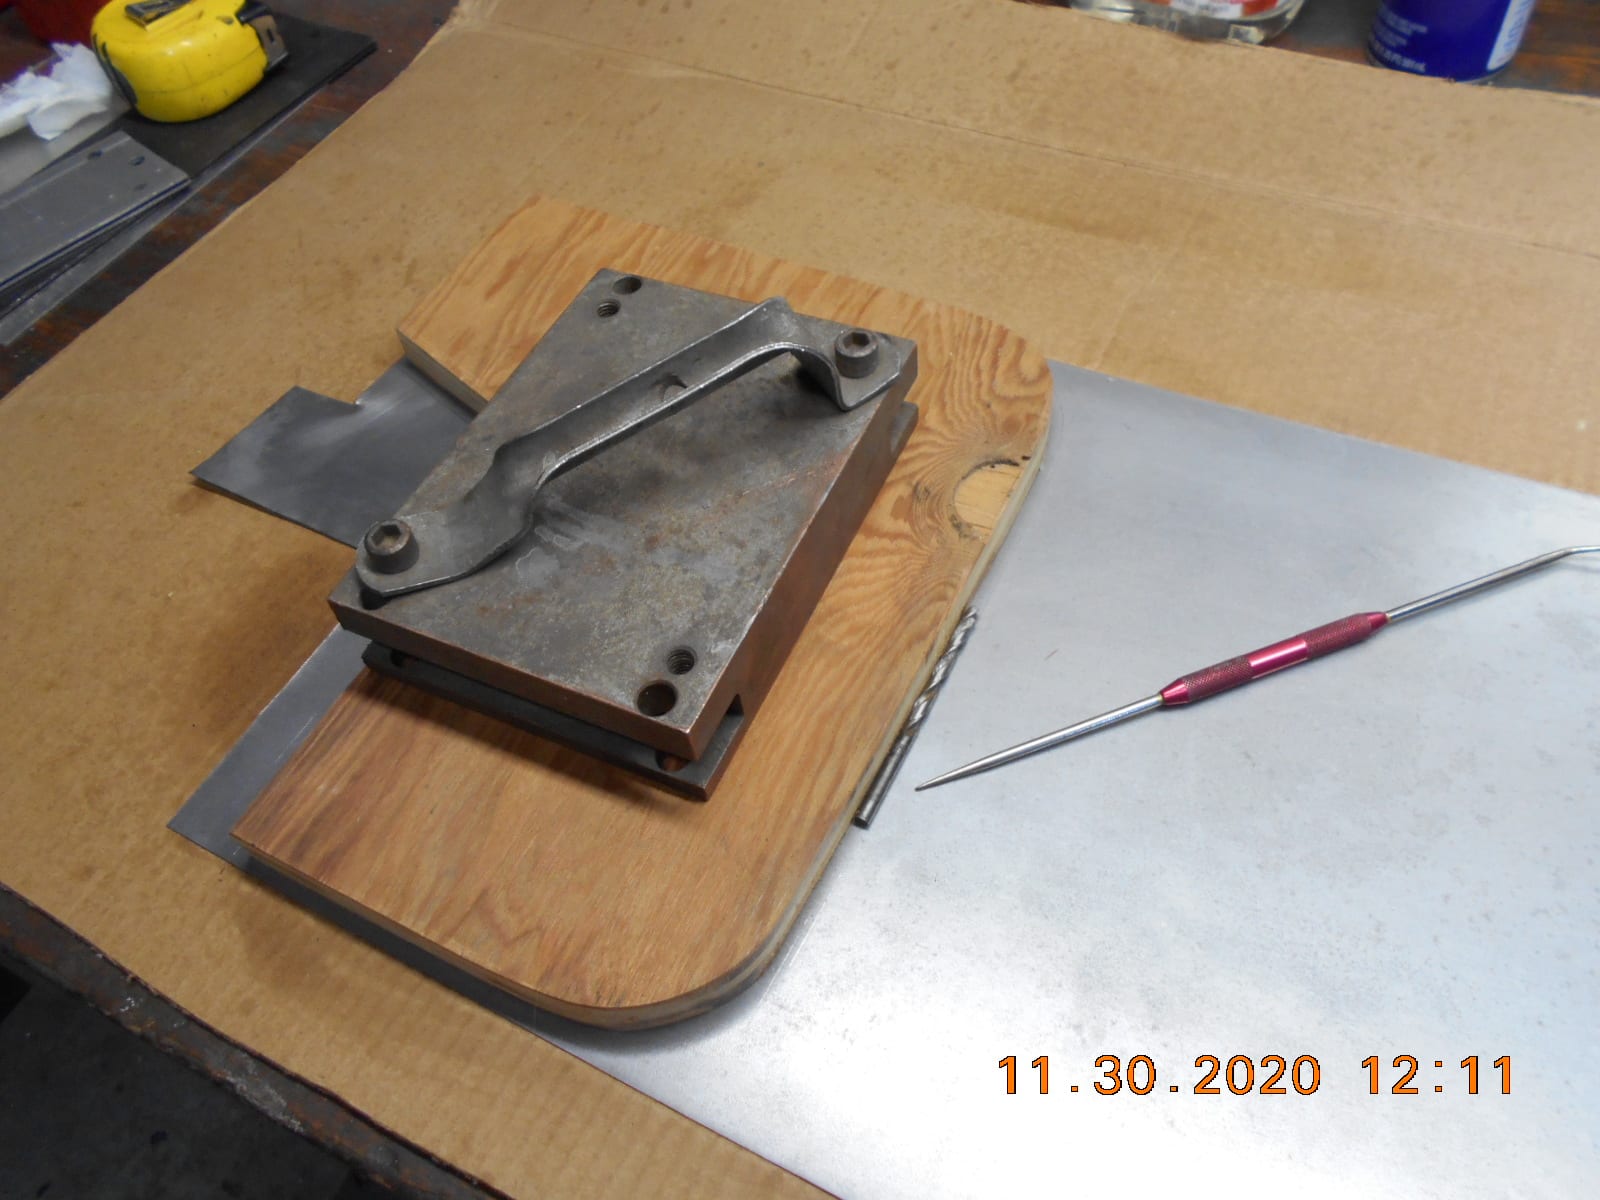
tank pieces.Joe B. suggested making a pattern (two identical) the shape of the tank bottom and top
out of maple, then sandwich the tin, clamped between the two patterns for forming the lips.
The lumber yard is fresh out of maple, but I found a piece of
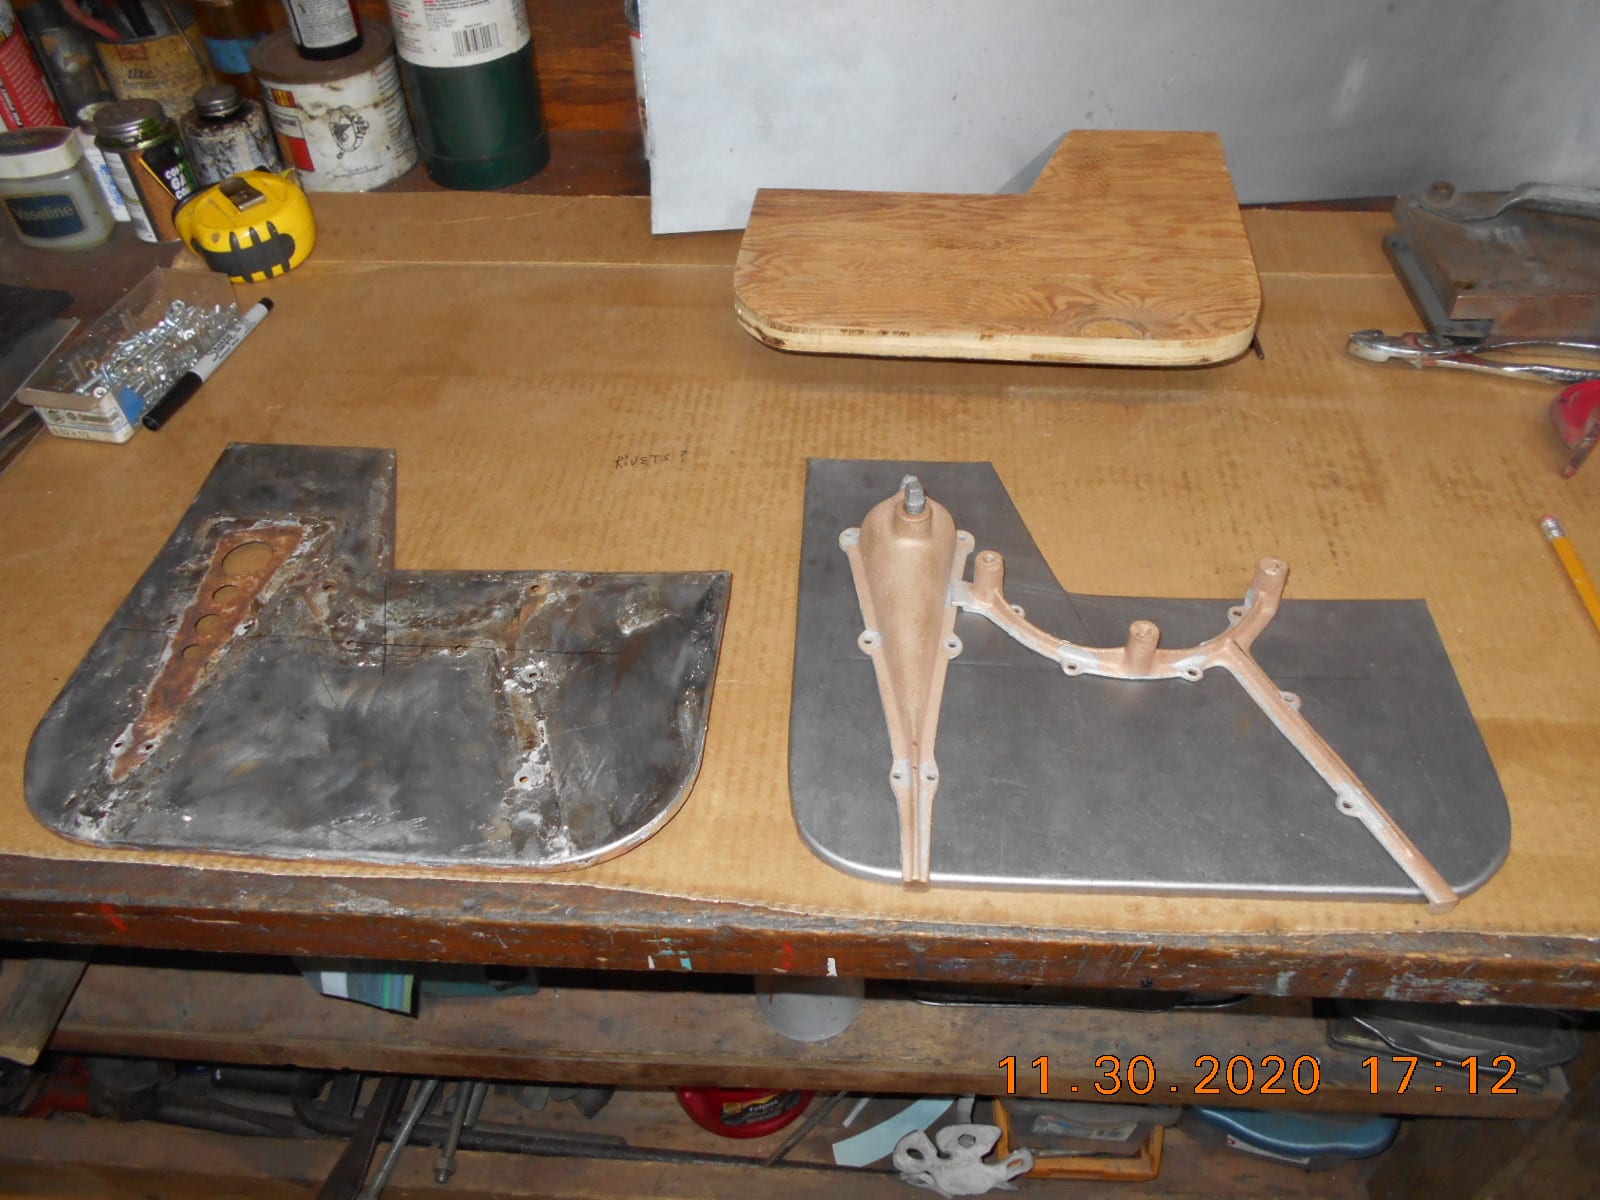
3/4″ plywood…. again, good enough for practice.So far I only have the bottom piece cut out and the lip formed around the
3/4″ plywood.It seems I need 9/64″ diameter rivets. The original were steel, but I’d prefer
brass. They seem to be hard to find online, but by chance, I’ll look
through my dad’s old cache of rivets in a 5 gallon bucket just in case.More fun tomorrow.
Prepare to be boarded!
November 30, 2020 at 7:32 pm #224000just another thought. save the wood and make a tank out of it and fiberglass it.
-
This reply was modified 5 years, 6 months ago by
 DAVID.
November 30, 2020 at 7:39 pm #224002Buc – that bottom panel looks like a mighty good “practice” piece to me! Very nice work! Keep posting progress pics.
Edit – haven’t looked them up in a long time, but there used to be a place called Blacksmith Bolts that used to have a large variety of specialty bolts and rivets. Might try them for your brass rivets.
Bob
1937 Champion D2C Deluxe Lite Twin
1954 Johnson CD-11
1955 Johnson QD-16
1957 Evinrude Fastwin 18
1957 Evinrude 3022
1958 Johnson QD-19
1958 Johnson FD-12
1959 Johnson QD-20
1982 Evinrude 25hp“Every 20 minute job is only a broken bolt away from a 3-day project.”
"Every time you remove a broken or seized bolt an angel gets his wings."-
This reply was modified 5 years, 6 months ago by
 Bob Wight.
December 1, 2020 at 10:25 am #224017Buc, Looking real good so far . I can’t tell from the pix, is that sheet metal galvanized? If so, looks to be dirty and/or oxidized (dark color) , be sure to clean to bright condition before attempting to solder.
Joe B
-
This reply was modified 5 years, 6 months ago by
-
AuthorPosts

- You must be logged in to reply to this topic.