Home › Forum › Ask A Member › Evinrude Ducktwin recoil reassembly
- This topic has 6 replies, 5 voices, and was last updated 6 years, 2 months ago by
JACQUES.
-
AuthorPosts
-
April 2, 2020 at 5:37 pm #199044
Hello fellow members
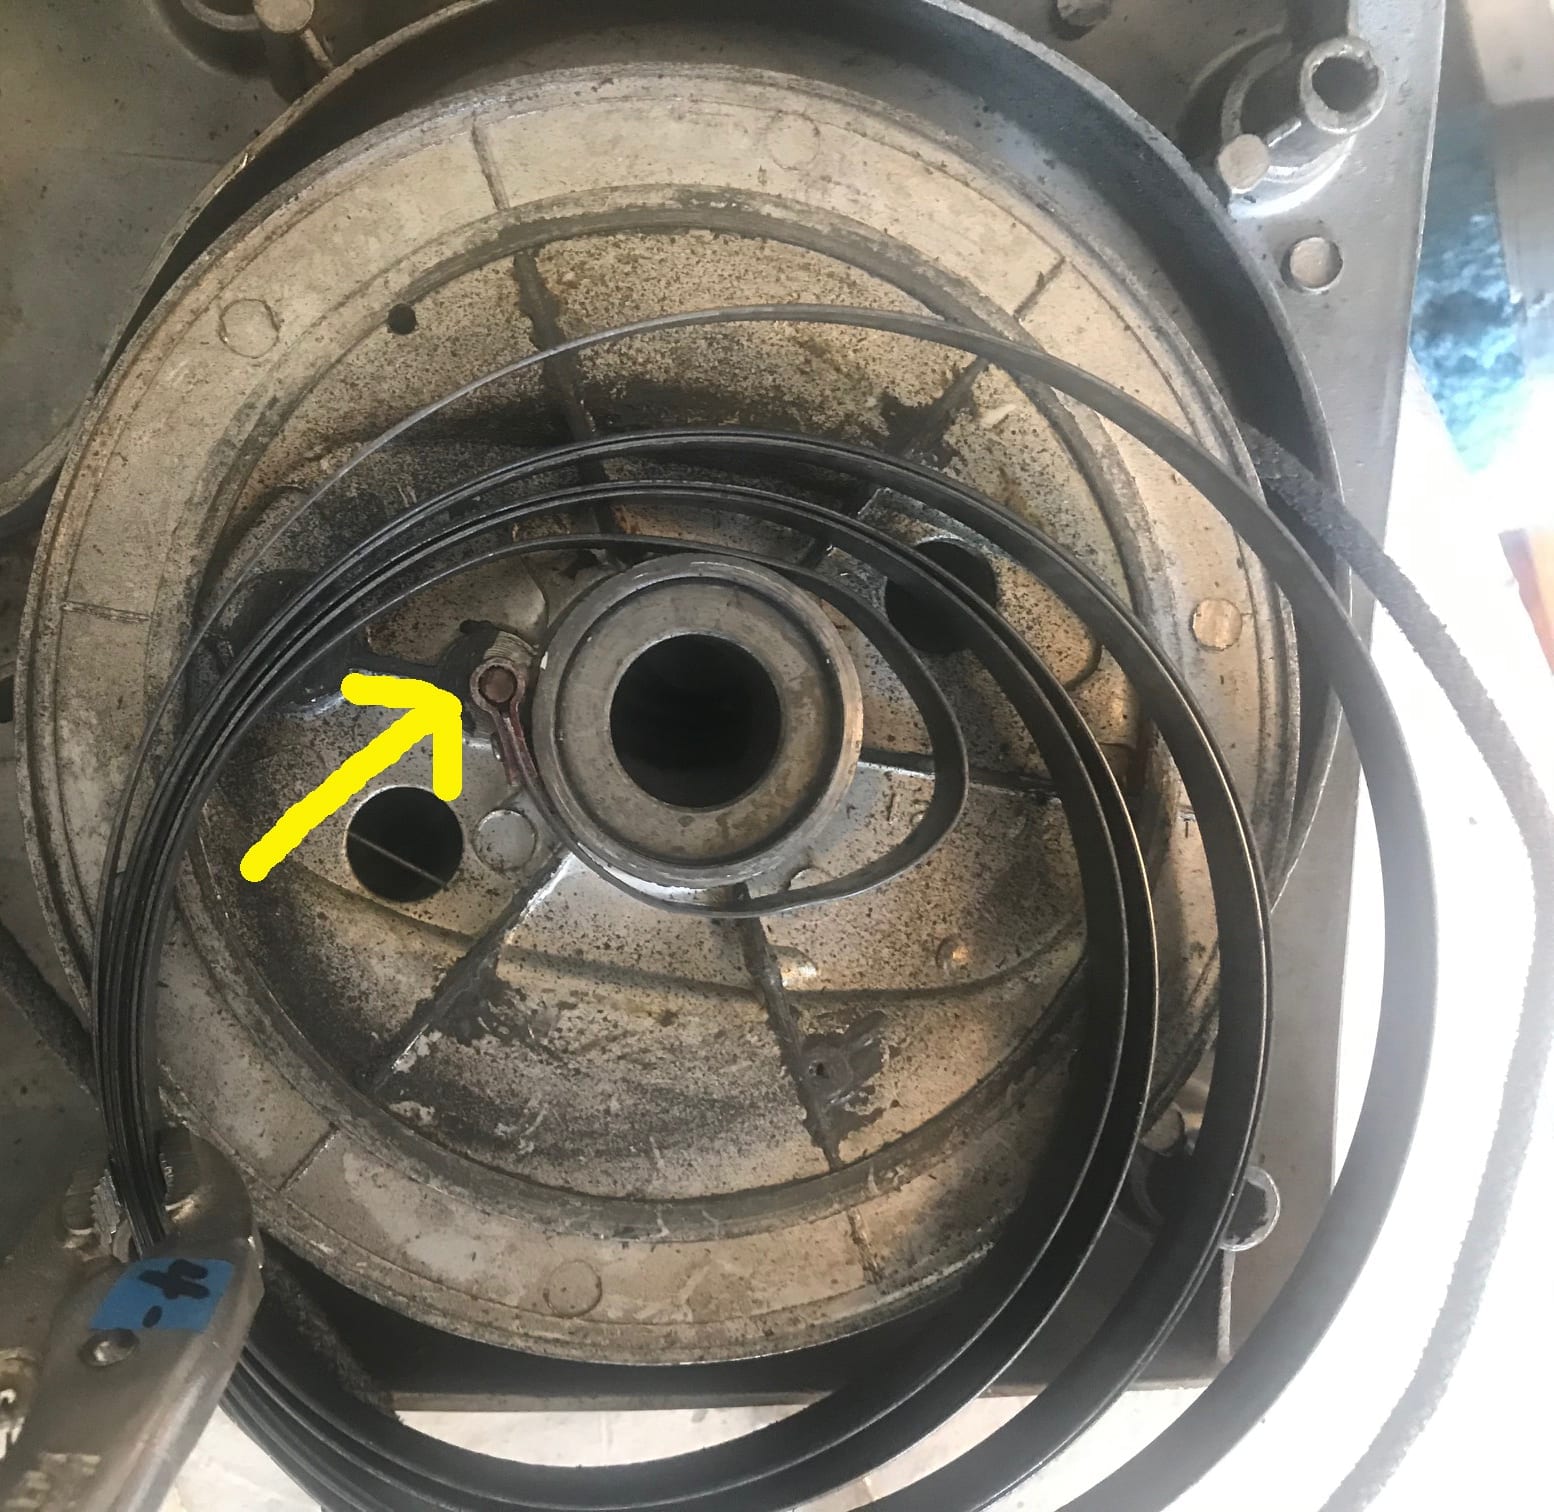
I have an Evinrude Ducktwin, I think it’s a ’67. The starter rope was sluggish on return so I figured the mechanism was gummed up from years of storage. I removed the four screws holding it onto the gas tank and the single screw in the center of the pulley. Boing!!! The recoil spring came loose from post on the top cover while it remained on the post on the pulley. I’m not sure of the best way to coil up the spring and reattach the spring end on the post.
I think the Johnson recoil had a different setup, at least it appear that way on some of the videos on YouTube.
I figured there must be a sequence or procedure to get this back together so I thought I’d ask.
Any suggestions or help would be appreciated.
Thanks
Doug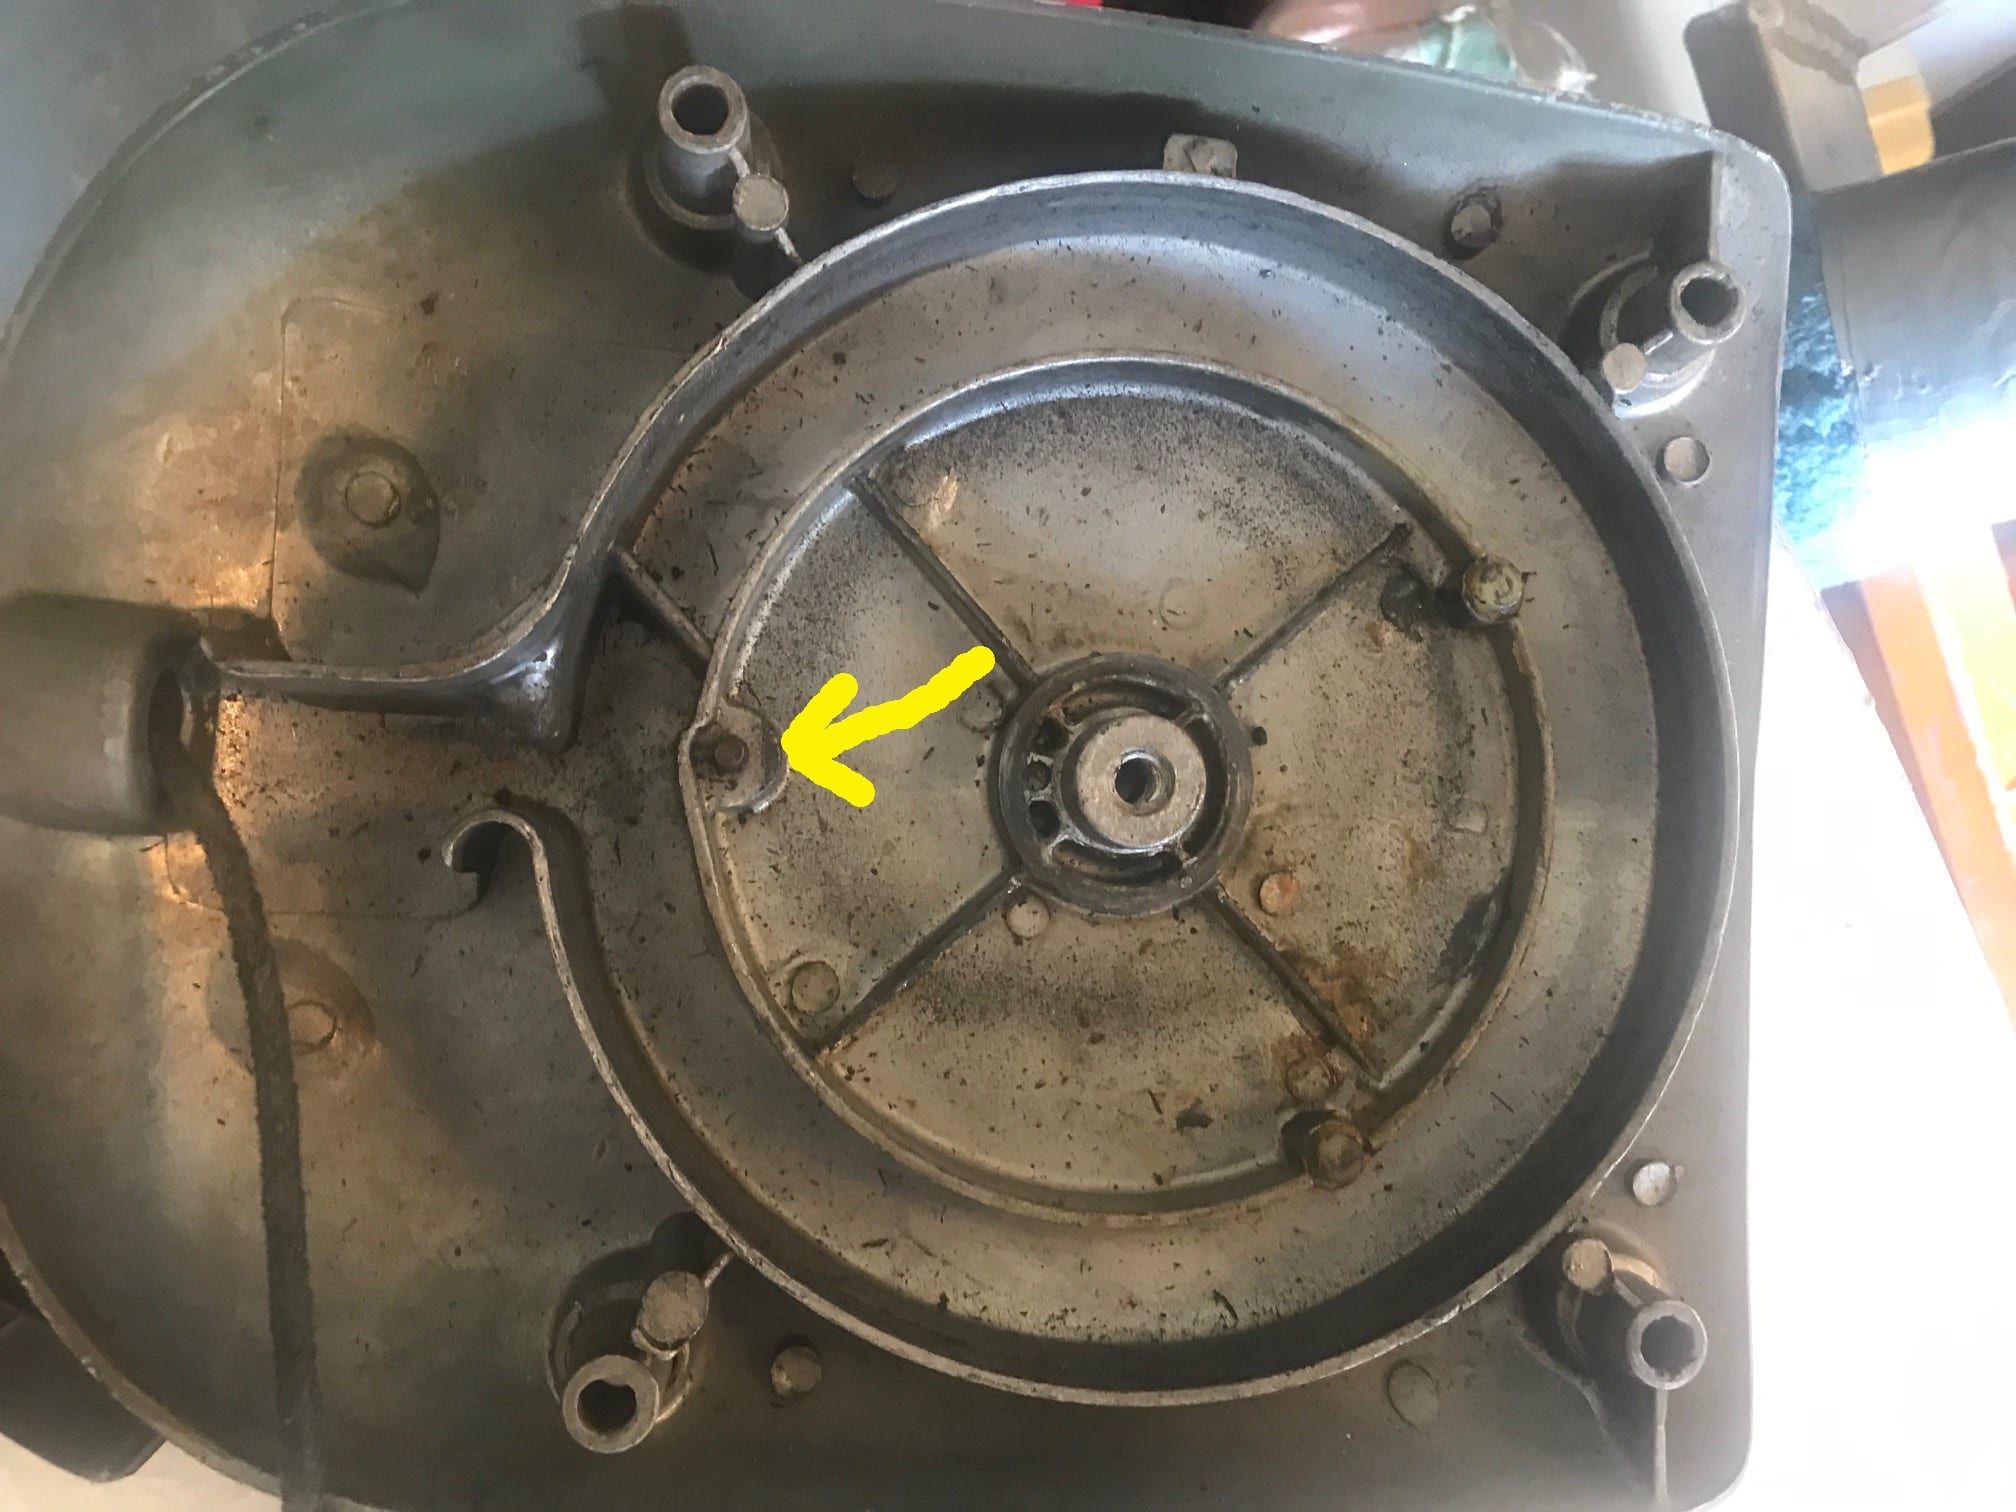

 April 3, 2020 at 11:22 am #199060
Oh boy, sorry you pulled that pulley screw out of there…You could have just squirted some light weight oil into the open holes in the pulley….
Doesn’t look like there is any easy way to get that spring back in there, OMC made a rewinding tool that I’m sure you don’t have, so you are going to have to wrestle it back in….
Get some safety glasses and gloves, perhaps an assistant.
Remove the spring from the pulley, and attach the other end to the pin inside the recoil housing. Now you will just have to manually “rewind” that spring into the housing cup. The assistant can help by holding the other end of the spring so it is easier for you to guide it into the cup. Be very careful, that spring’s mission is to just pop right out of the housing, especially when you are almost done getting it all back in there.
Once the spring is back in the housing, you are faced with the tricky/dangerous/frustrating task of reconnecting the other end of the spring to the pulley. You almost need three sets of hands, even though there is no room for them…Sometimes you can lower the pulley onto the pin without lifting the end of the spring slightly, especially when it already has a bend like yours does. If not, you and your assistant will have to lift the end of the spring up and out of the cup just slightly, using your fingers, or a flat blade/something to hold the rest of the spring down in the cup…
Good luck….DonApril 3, 2020 at 11:41 am #199061attach to the outside pin then peal it around till you get it all in. as said be careful.
April 3, 2020 at 12:22 pm #199062Thanks
Live and learn I guess.
That makes a lot of sense. I think I’ll disconnect the rope and deal with reconnecting or replacing it later, it looks like I’ll have enough on my (3 sets of) hands to deal with as it is.April 3, 2020 at 12:48 pm #199063After doing who knows how many thousands of them, it gets easy.
1. Before you begin, look at the pulley. See that little hole, about 1/8″ dia? Find a nail or allen wrench or whatever you have that will fit through the hole and set aside for later
2. Remove rubber handle then grab hold of the knot at the other end of the rope and pull it out of the pulley.
3. Place the outer spring eye over the pin. Now wind the spring in as if coiling up a garden hose.
4.. Check the inner end of the spring. Is it located handy so you can lower the pulley’s pin into it? If not feel free to adjust it. The end of the spring will stand a reasonable amount of bending.
5. Lower the pulley into the housing, aiming for the spring end loop. The rest is easy.
6. Lubricate the spindle with some light grease and slip it into the pulley. then the screw, washers, etc
7. Hold it down to the bench top and rotate the pulley to wind the spring as far as it will go, then back it off a full turn. Then stick that nail into the small hole. That will keep the pulley from re-winding. WARNING!! Be sure you don’t let it get away from you while winding. If it does it will violently unwind, backlash, and destroy the spring.
8. Now, feed the rope into it’s hole in the pulley and out of the recoil housing. Make sure it goes behind the pin beside the hole.
9. Reinstall the handle, hang onto it, remove the nail and let it rewind slowly
10. Lubricate the spring through the holes in the pulley.
11. Done. I could have done the whole job in less time than it took to type all this.
-
This reply was modified 6 years, 3 months ago by
 frankr.
April 5, 2020 at 11:54 am #199246I love this club. Thanks for all the help. With the information posted here I feel a lot more comfortable tackling this task.
I’ll post my results when I’m done.
Thanks again guys.April 5, 2020 at 1:15 pm #199255wear eye gasses after one or 2 you will be an expert … that nail hole did it for me 🙂
Joining AOMCI has priviledges 🙂
-
This reply was modified 6 years, 3 months ago by
-
AuthorPosts
- You must be logged in to reply to this topic.