Home › Forum › Ask A Member › Sand after Priming ?
- This topic has 6 replies, 4 voices, and was last updated 3 years, 9 months ago by
jeff-register.
-
AuthorPosts
-
September 19, 2022 at 1:53 pm #266329
I sanded the cover with 120 grit and then spray painted on a coat of primer.
- Do I now sand the Primer before painting ? And if so, with what grit ?
- Finally, what is the procedure for sanding the lower unit, etc. ? sand with 120 grit and then coat of primer ?
Thanks,
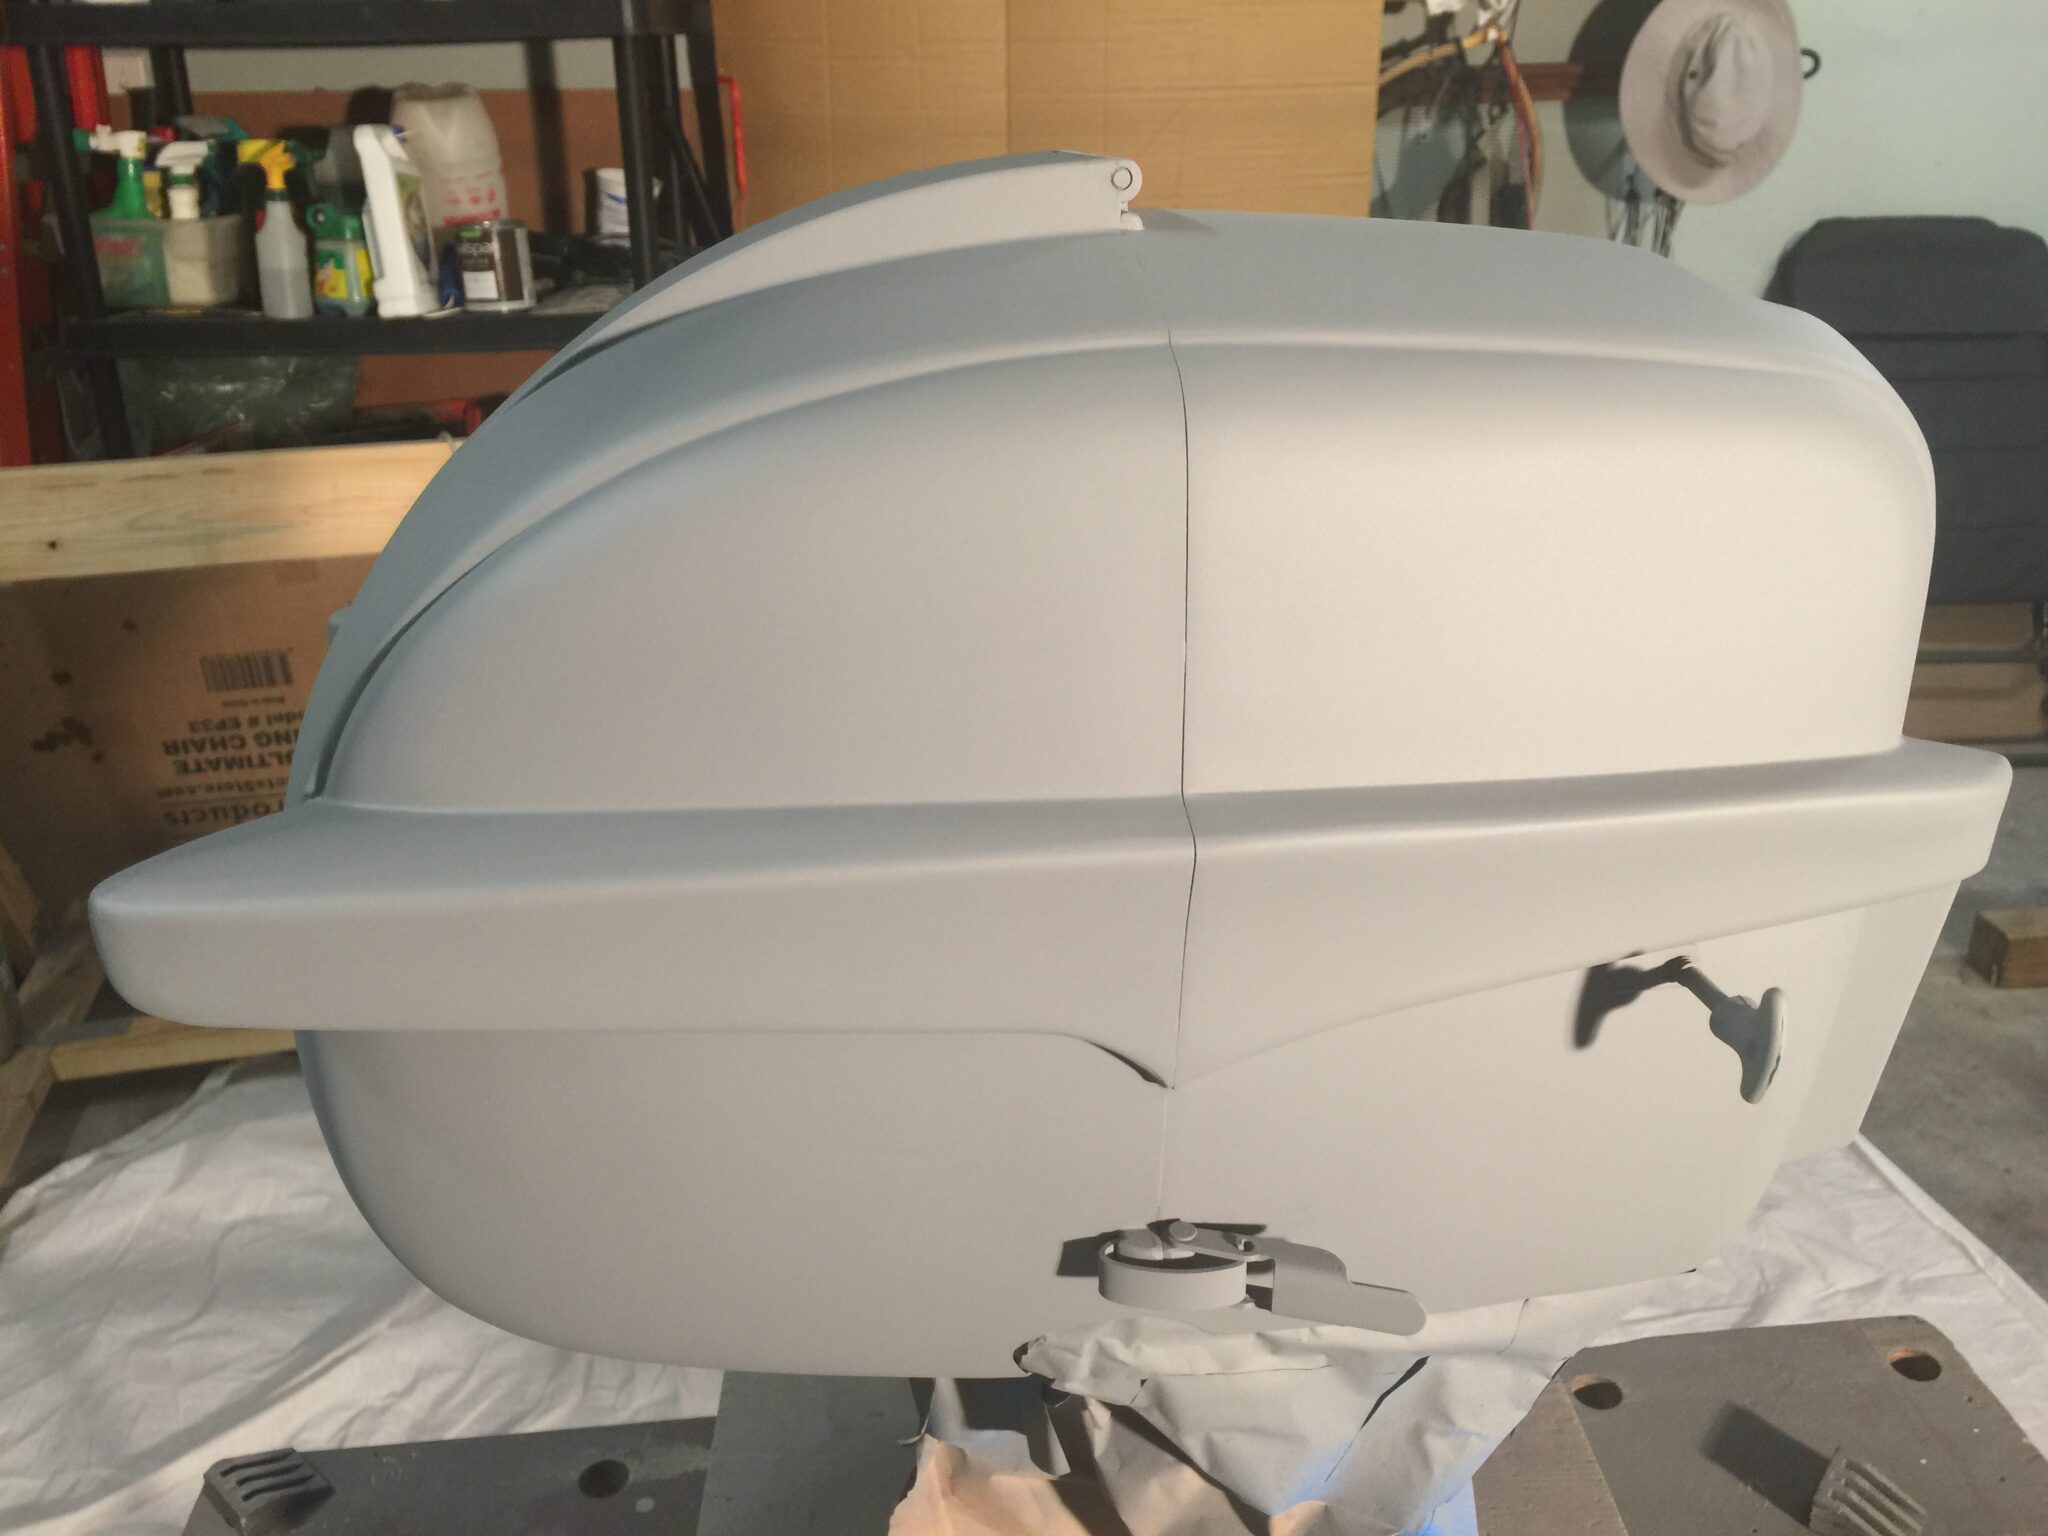
September 19, 2022 at 2:47 pm #266336I typically wet sand my final coat of primer with 600 and then 1000 grit before applying the color coats. Note that any imperfections that show in the primer will also show up in the color coat, so getting the primer really smooth is critical. 120 grit is pretty coarse – if you use that to get rid of old paint and rough spots in the metal, then I would follow up with 400 and then 600 grit before applying primer. Here’s a pic of one of my cowls after 3 coats of primer and wet sanding before applying the color coats. I suppose everyone has a slightly different approach but this is what works for me.
Bob
1937 Champion D2C Deluxe Lite Twin
1954 Johnson CD-11
1955 Johnson QD-16
1957 Evinrude Fastwin 18
1957 Evinrude 3022
1958 Johnson QD-19
1958 Johnson FD-12
1959 Johnson QD-20
1982 Evinrude 25hp“Every 20 minute job is only a broken bolt away from a 3-day project.”
"Every time you remove a broken or seized bolt an angel gets his wings."September 19, 2022 at 2:54 pm #266339Thanks Bob,
And any suggestions on how to approach the lower unit and order ?
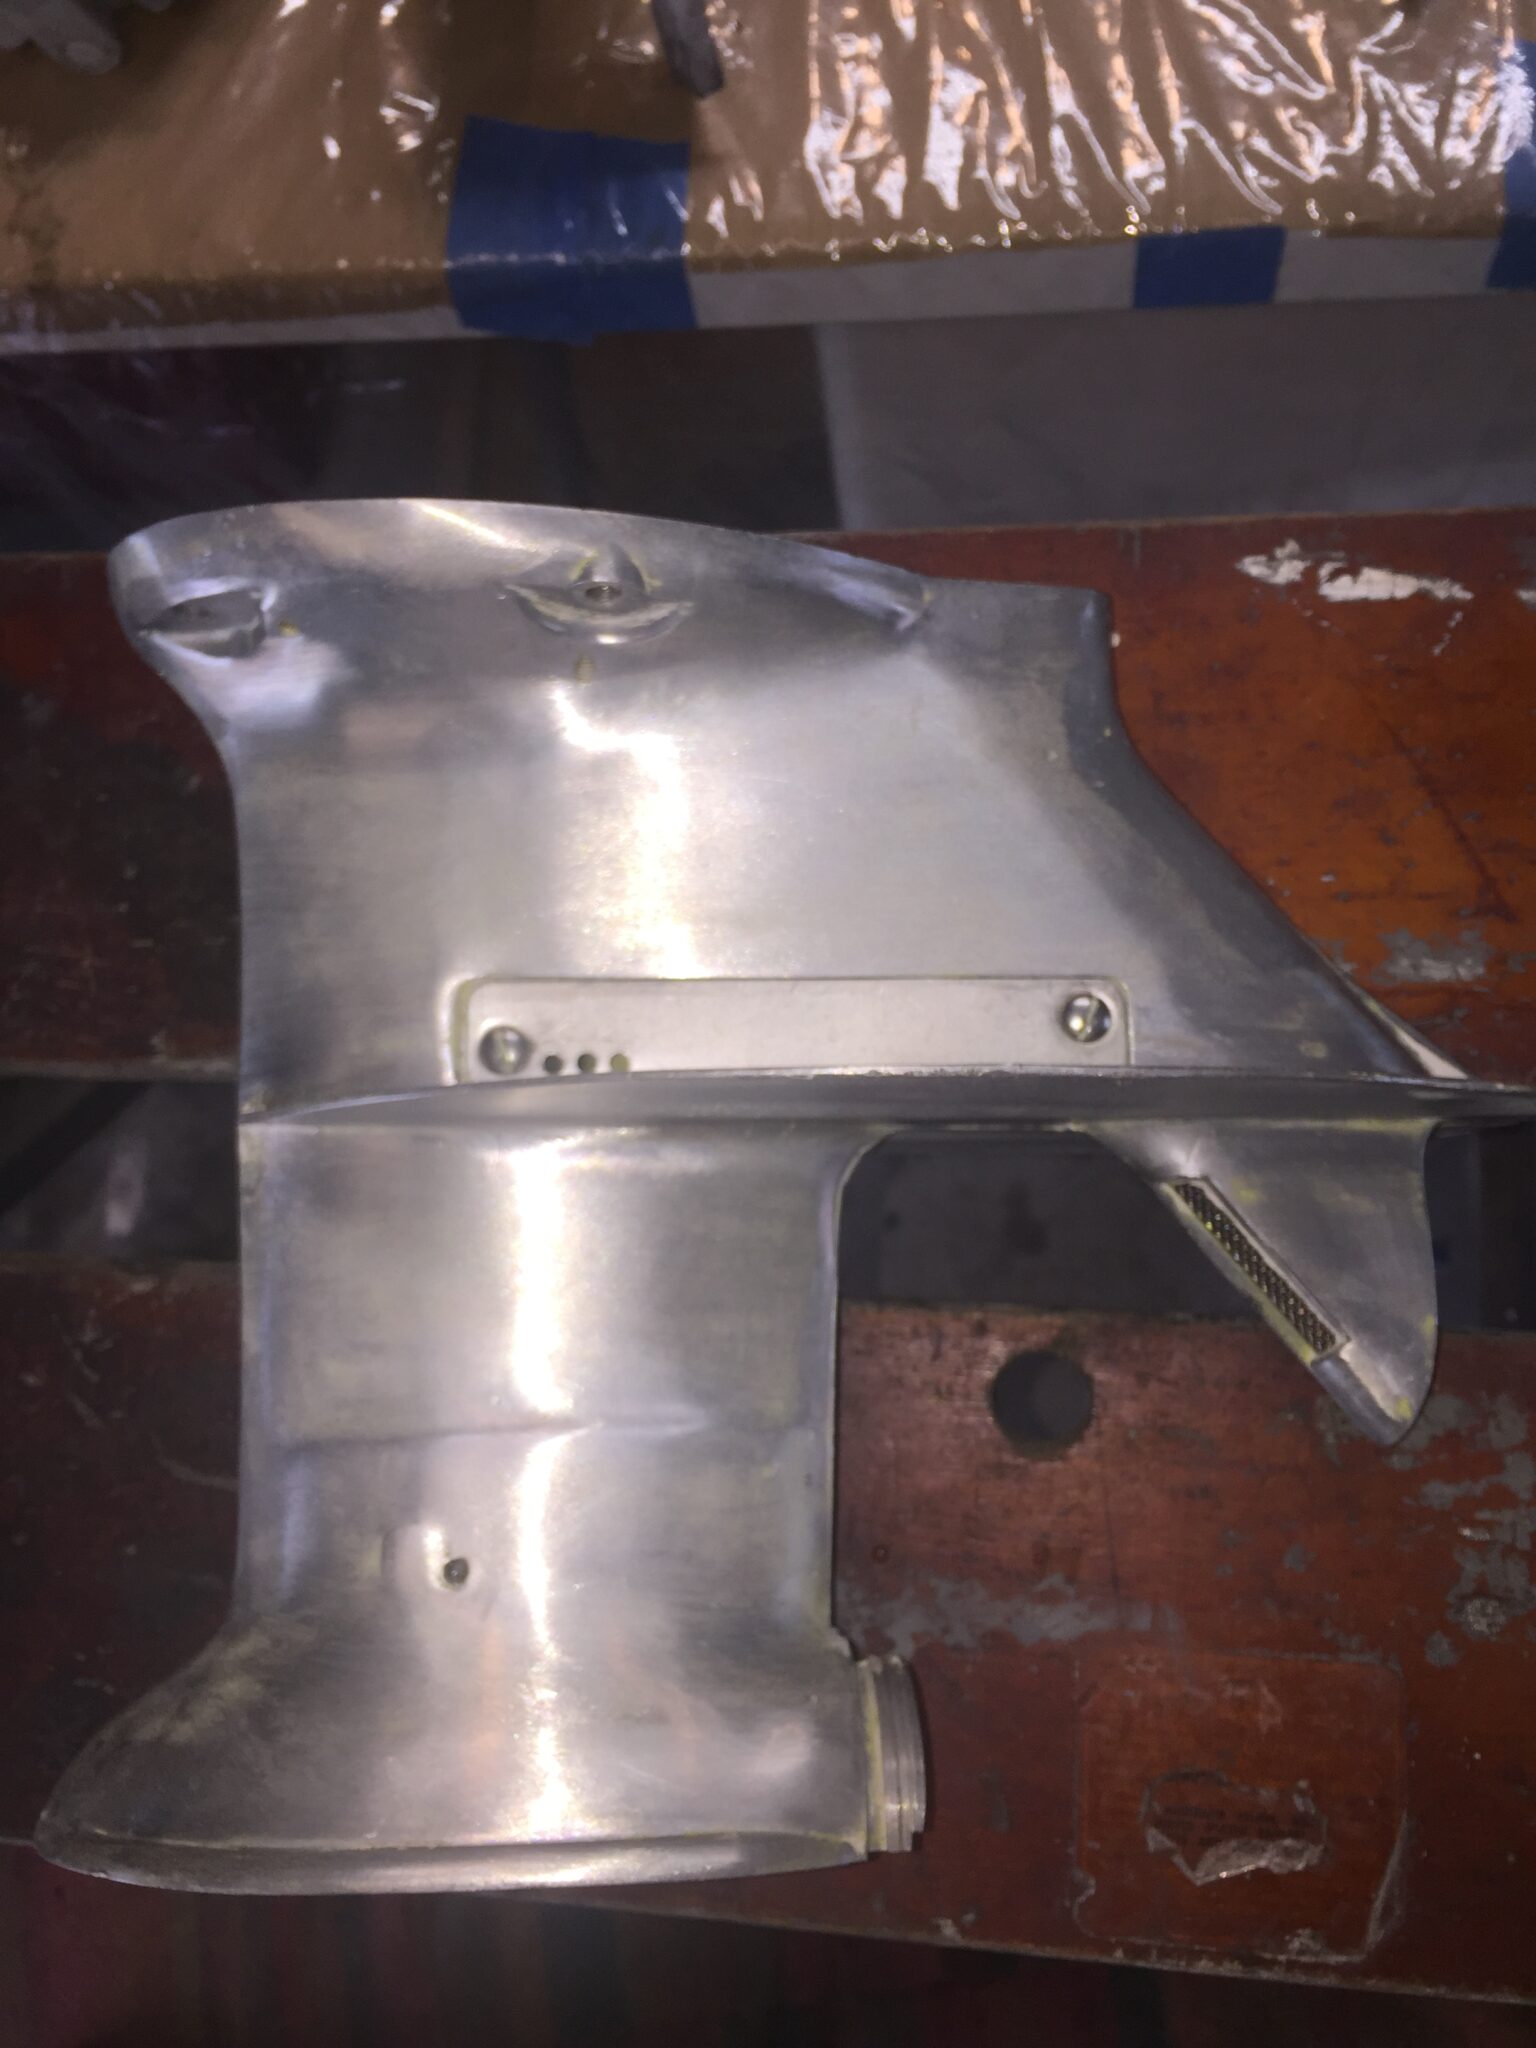
September 19, 2022 at 3:40 pm #266340If you don’t have access to a bead blasting setup, then just sand all your other pieces until smooth, apply self etching primer, wet sand, then apply color coat. Another option to bead blasting to bare metal is to use a paint stripper. It’s a little messy but you can get down to bare metal that way. Here’s a lower unit where I used Citri-Strip – worked real good.
Bob
1937 Champion D2C Deluxe Lite Twin
1954 Johnson CD-11
1955 Johnson QD-16
1957 Evinrude Fastwin 18
1957 Evinrude 3022
1958 Johnson QD-19
1958 Johnson FD-12
1959 Johnson QD-20
1982 Evinrude 25hp“Every 20 minute job is only a broken bolt away from a 3-day project.”
"Every time you remove a broken or seized bolt an angel gets his wings."September 19, 2022 at 4:00 pm #266343Bob, Thank you, going to try the paint stripper method.
September 19, 2022 at 8:34 pm #266363Rick, you may not have to strip it completely. That’s a ton of work.
As Bob W said, possibly you can sand down the original paint, hit it with primer and topcoat. OMC used some very good paint back in the 50’s that I have used as a good base for many motors. One other tool that you should use in your basic painting setup is Bondo glazing and spot putty. It’s a fine putty that works well to fill out small imperfections during your final primer and sanding stages.
Funny thing however with this old 50’s motors , is that the factory was not painting Ferrari’s. If you look at an original motor you will see paint drips, blemishes, paint overspray, and missed non painted areas, especially on powerheads.
So I guess not being absolutely perfect, is actually more original! The choice is yours.Bob D
1 user thanked author for this post.
September 21, 2022 at 8:17 pm #266438I cleaned up the metal all the way& then used etching primer from the airport. It is made for aluminum & corrosion protection. Comes in rattle cans too.
-
AuthorPosts
- You must be logged in to reply to this topic.