Home › Forum › Ask A Member › Wisconsin M RBM poppet valve carb
- This topic has 23 replies, 7 voices, and was last updated 2 years, 7 months ago by
 Buccaneer.
-
AuthorPosts
-
September 3, 2021 at 6:07 pm #246045
I’m still “tweaking” on the Wisconsin, trying to get it to start easier,
and stay running. Today was the longest run I’ve got out of it.
I replaced the Detroit buzz coil with a Ford Model T buzz coil,
after putting a new capacitor in it.The poppet valve carb may be the biggest road block. The fuel mixture
must be very close, but I usually end up flooding the engine.
The poppet valve guide is worn badly, and hence there’s a ton
of “side play” in the valve. Whether this has anything to due
with it flooding, or “quitting”, I can’t say for sure.When it dies, it’s sudden, like someone shut off the ignition, but it
did the same thing with the other buzz coil. I don’t see any reason
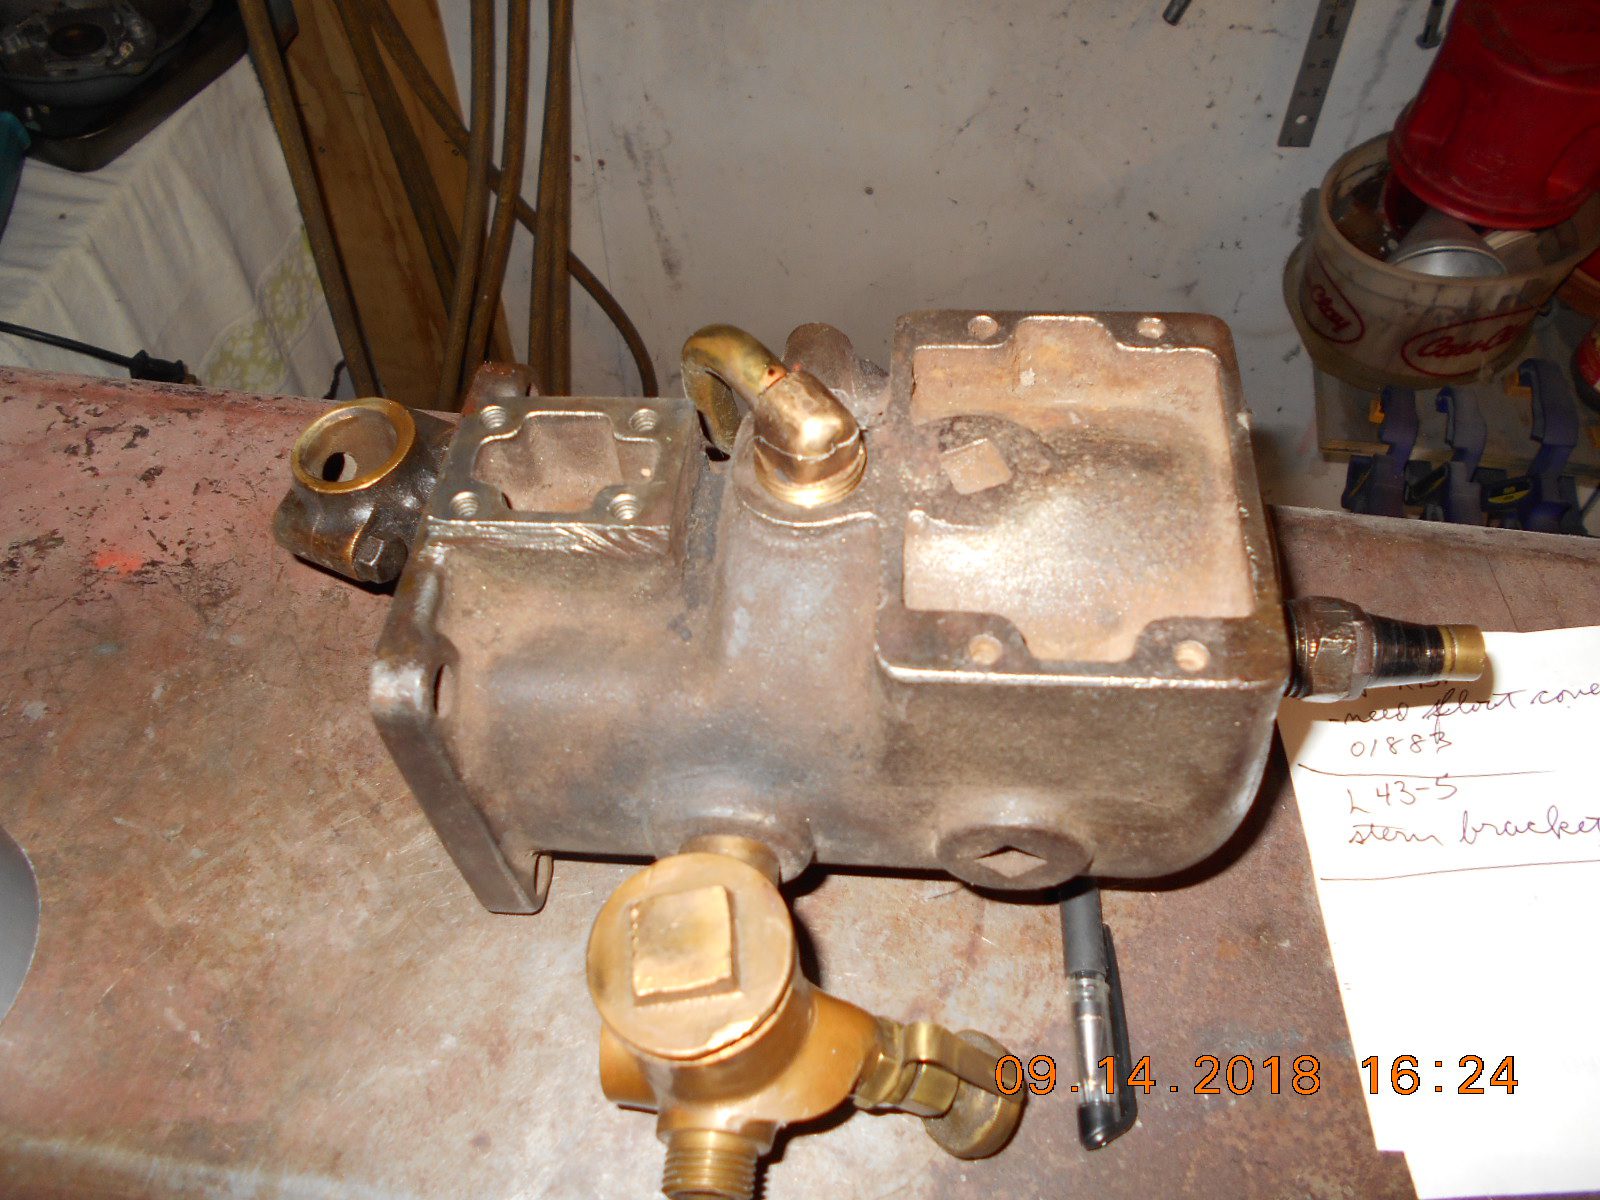
my homemade timer is malfunctioning, but anything is possible.I’m not sure if the poppet valve guide can be “bushed”, as there’s
not much meat in the casting. But in order to even try, I’d have to
be able to get the carb out of the cylinder.
I was not able to get it to budge when I was refurbishing the motor.
It was not designed with a “flat” to put a wrench on it, the castings
are delicate, and there’s not even a good place for a pipe wrench
with padding to grab a hold.I presume the carb unscrews, and not just pushed into a hole with
sealer, but either way, it’s probably has never been out in the last
100 plus years.
I would hesitate at this point to get the torch out, big or small, to heat up the cylinder
around the carb.
My one “thought” was to cut off the bronze casted carb about 1/4″ away from the block,
try to fix the poppet valve, then make a brass sleeve and solder the carb back onto
the 1/4″ stub.
This would be a much better plan if I had a spare carb for it, in case
I bugger it totally up, but I do not.Any insight on why the engine won’t stay running, or in removing the carb,
appreciated. I’m running out of good ideas at this point!
Thanks!Prepare to be boarded!
September 3, 2021 at 10:50 pm #246079How about leaving the carb on the cylinder and using the cylinder to clamp the carb to the milling machine for reaming the valve stem hole if required?
September 3, 2021 at 10:52 pm #246081Your video sounds like it is running out of the available fuel – restricted ?
September 3, 2021 at 11:28 pm #246083Your video sounds like it is running out of the available fuel – restricted ?
Harry, I checked fuel flow yesterday with the poppet valve out, and
with the needle cracked about 1/4 turn open, I had a steady drip
coming out of the bottom of the carb, via the small passage in
the poppet valve seat.
Prior, I did find a little crud in the system when I took the fuel
line off, and I flushed the tank out several times.Mounting the cylinder in the milling machine may be an option.
I hate to tear it back apart, but I’ll keep it in mind. Thanks!Prepare to be boarded!
September 3, 2021 at 11:41 pm #246085I think you are making more work for yourself than is necessary. My personal experience is that even a worn poppet valve stem wouldn’t necessarily be causing the issue you having with the motor running continually. I’m inclined to agree with Harry that fuel starvation is more likely.
WRT to the poppet valve stem – I’ve been working on a Blakely gearless motor (aka Gray Gearless) that has a very worn poppet valve stem. I had issues with getting it to run at all, which actually turned out to be compression ring related. before I went after the rings, I machined a new poppet valve with the stem machined back to original diameter (3/16″ in this case). After I got the compression issue solved, I have run it with both the new poppet valve and the old worn one. It makes no difference whatsoever which one is in the carb, it starts and runs exactly the same. The old poppet valve stem is worn down to 0.155″ so there is more than 0.030″ clearance between the stem and the section of carb that supports it. If you really want to address the fit of the poppet valve stem, then machine a new one and leave the casting alone. You can only cut the casting once, and if you are the least bit misaligned, you’re going to cause yourself more problems than you’ll solve. Transversely, you can make as many poppet valves as it takes to get it right.
Those are my thoughts, not yours. Hope it helps.
Best,
PMT2September 4, 2021 at 8:42 am #246107
I see you have advanced the timing from your
last video. Now it seems to be where it needs to
be for starting. I would also think a restriction
somewhere in the fuel passages would be worth
investigating. Years ago I had a motor that kept
running out of fuel. Not an RBM. I disconnected
the fuel line several times and the flow seemed
adequate. Out of desperation I ran a pipe cleaner
with carb cleaner through the fuel line. Although
the pipe cleaner got a little dirty I didn’t think I
had found anything but it solved the problem.
In your case I would think the passage from the
mixture screw to the hole under the poppet
valve would be a place to start. Your refusal to
quit is going to lead to a running motor.
TubsSeptember 4, 2021 at 9:34 am #246110PMT2, in my case, the poppet valve guide is worn badly and not uniformly,
and the valve stem indicates very little wear with the micrometer.
If I make an oversize valve and stem, I’d still have to ream out
the valve guide hole first, and still would have the problem with
reaming it square with the valve seat. Not sure how I would accomplish
that with the carb is attached to the cylinder, unless some kind of guide
that set in the valve seat was fabricated.I’m curious to know “how” and “what” material you used to make a new
poppet valve, and was it made in one or two pieces?Before I get carried away with reworking the mixer, I’ll explore fuel
flow further.Tubs, As mentioned before, I did find some crud in the fuel system
a while back. I had the top of the tank off during the original
refurbishment, and everything was thoroughly cleaned and the
tank was coated with “Red Coat”….. it looks red anyway.
What I can’t remember if there’s a strainer in the tank, or not
even sure if one if feasible. I’ll keep playing with it!Thanks for the replies.
Prepare to be boarded!
September 5, 2021 at 11:08 am #246167Well, thats a new one to me. Usually the phosphor bronze mixer body is harder than the brass poppet valve, and its the stem that wears, not the bore it sits in. Normally, with knowing what you’re saying, I’d have to suggest that somebody already replaced the poppet valve, but who really knows…..
Best I can suggest is if you need to repair the condition of the stem bore, make a tool guide that fits down and locates on the existing poppet valve seat, and hand ream the hole to the next nominal size. Obviously you don’t want to remove a lot of metal in doing so, thus it may be required that you buy a special size reamer that you might only use once in your life (a lot of my tools fit that description, it goes with the territory). MOst valve stems I see are 3/16″ (0.1875″) so if yours matches up with that, then reaming buying a decimal size reamer and carving it out to 0.200″ is not out of the question.
I make poppet valves out of standard 360 yellow brass, and in one piece. Most common seat angle I see is 30 degrees.
Hope it helps.
Best,
PM T2September 5, 2021 at 1:39 pm #246176Well, thats a new one to me. Usually the phosphor bronze mixer body is harder than the brass poppet valve, and its the stem that wears, not the bore it sits in. Normally, with knowing what you’re saying, I’d have to suggest that somebody already replaced the poppet valve, but who really knows…..
Best I can suggest is if you need to repair the condition of the stem bore, make a tool guide that fits down and locates on the existing poppet valve seat, and hand ream the hole to the next nominal size. Obviously you don’t want to remove a lot of metal in doing so, thus it may be required that you buy a special size reamer that you might only use once in your life (a lot of my tools fit that description, it goes with the territory). MOst valve stems I see are 3/16″ (0.1875″) so if yours matches up with that, then reaming buying a decimal size reamer and carving it out to 0.200″ is not out of the question.
I make poppet valves out of standard 360 yellow brass, and in one piece. Most common seat angle I see is 30 degrees.
Hope it helps.
Best,
PM T2Thanks for the timely information. I have piece of brass laying out now,
and a diagram drawn up with dimensions.
It looks like the valve guide will need reamed out to .200 or even larger.
A #8 drill bit (.199) almost starts in the hole, and the next size
smaller falls in and is sloppy.
The valve and seat are ground at 45 degrees on this one.
I have an old valve grinding machine to fine tune the face after
it gets off the lathe, but not sure it will chuck up a valve stem as small as I need.
Going out to the shop to see if I happen to have any reamers the right
size, but might start “roughing” out the new poppet valve…… first one
might be for practice anyway!When I went out to the garage yesterday morning, I found out I had
a “senior moment” the day before, and left the fuel supply valve “on”
overnight, and had a big puddle of gas on the floor, gas dripping out
of the muffler, cylinder and crankcase as well.
I have the motor half apart, drying it out, so decided it was a good time
to address the poppet valve. Perhaps the old sloppy valve wasn’t seating
too good, but when I lapped it in with valve grinding compound originally,
it looked okay.
Thanks!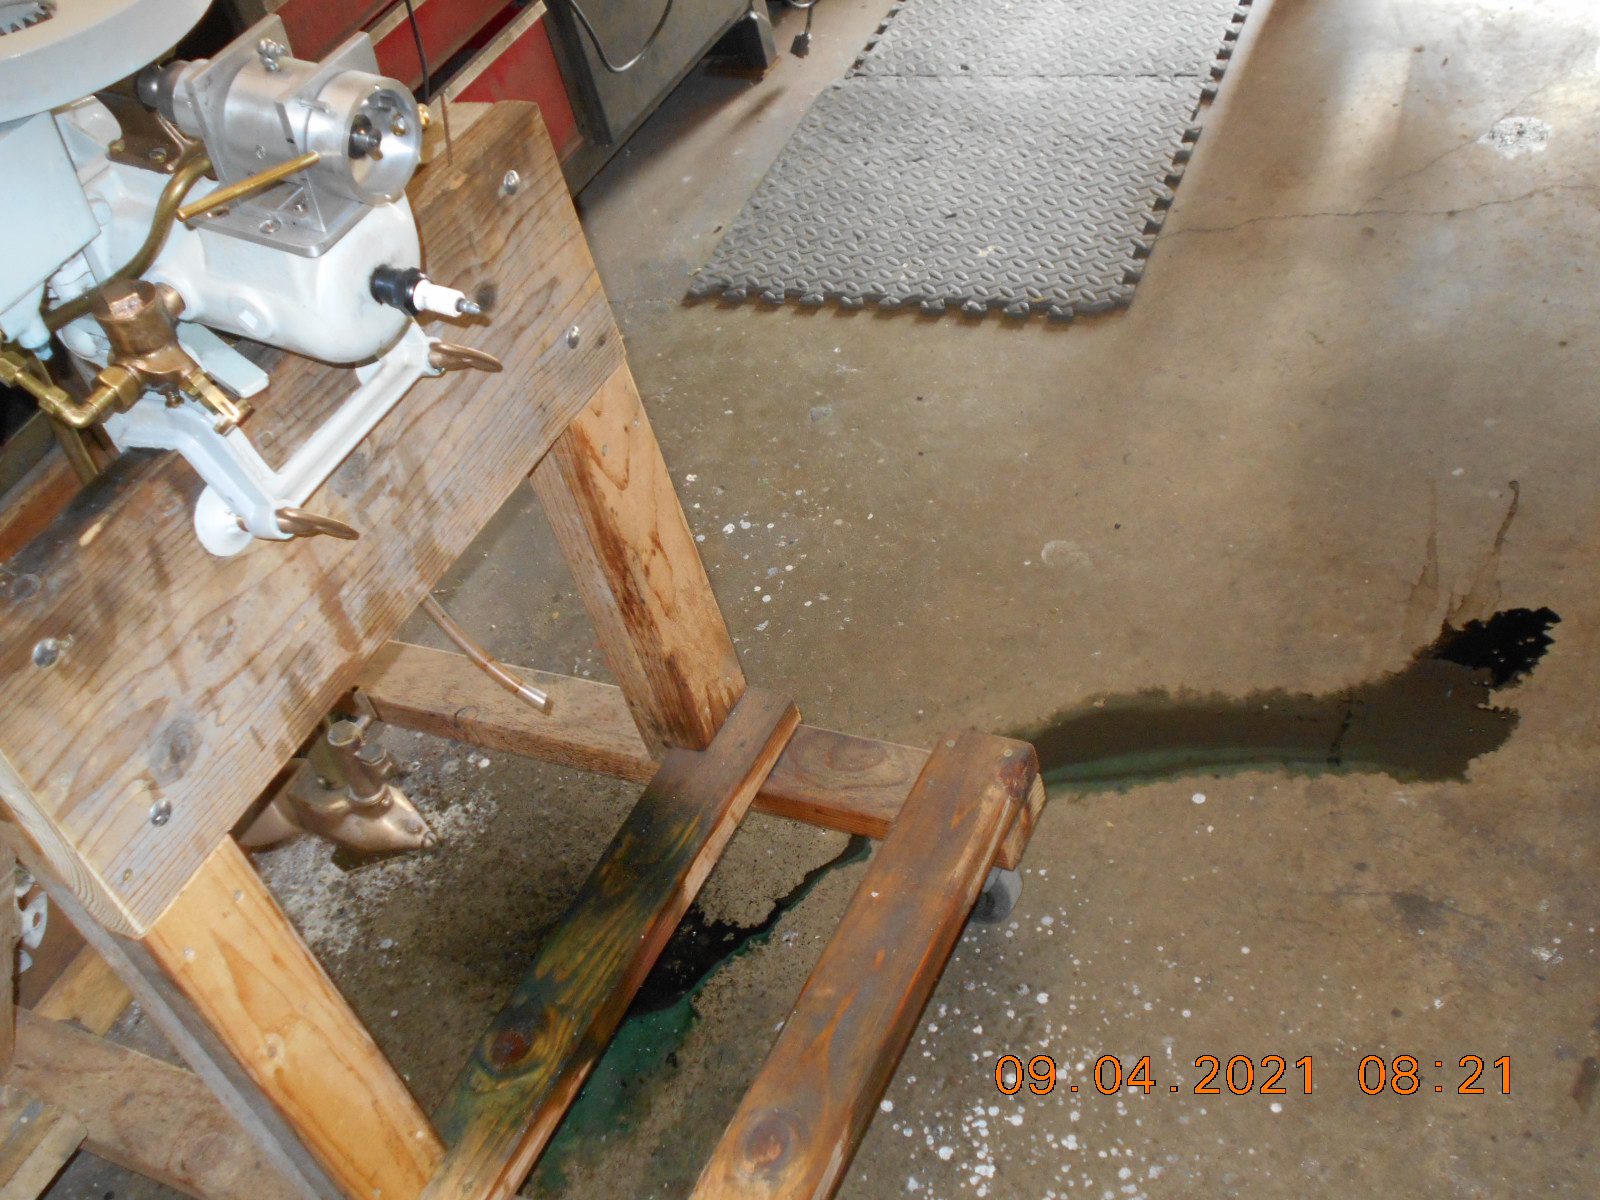
Prepare to be boarded!
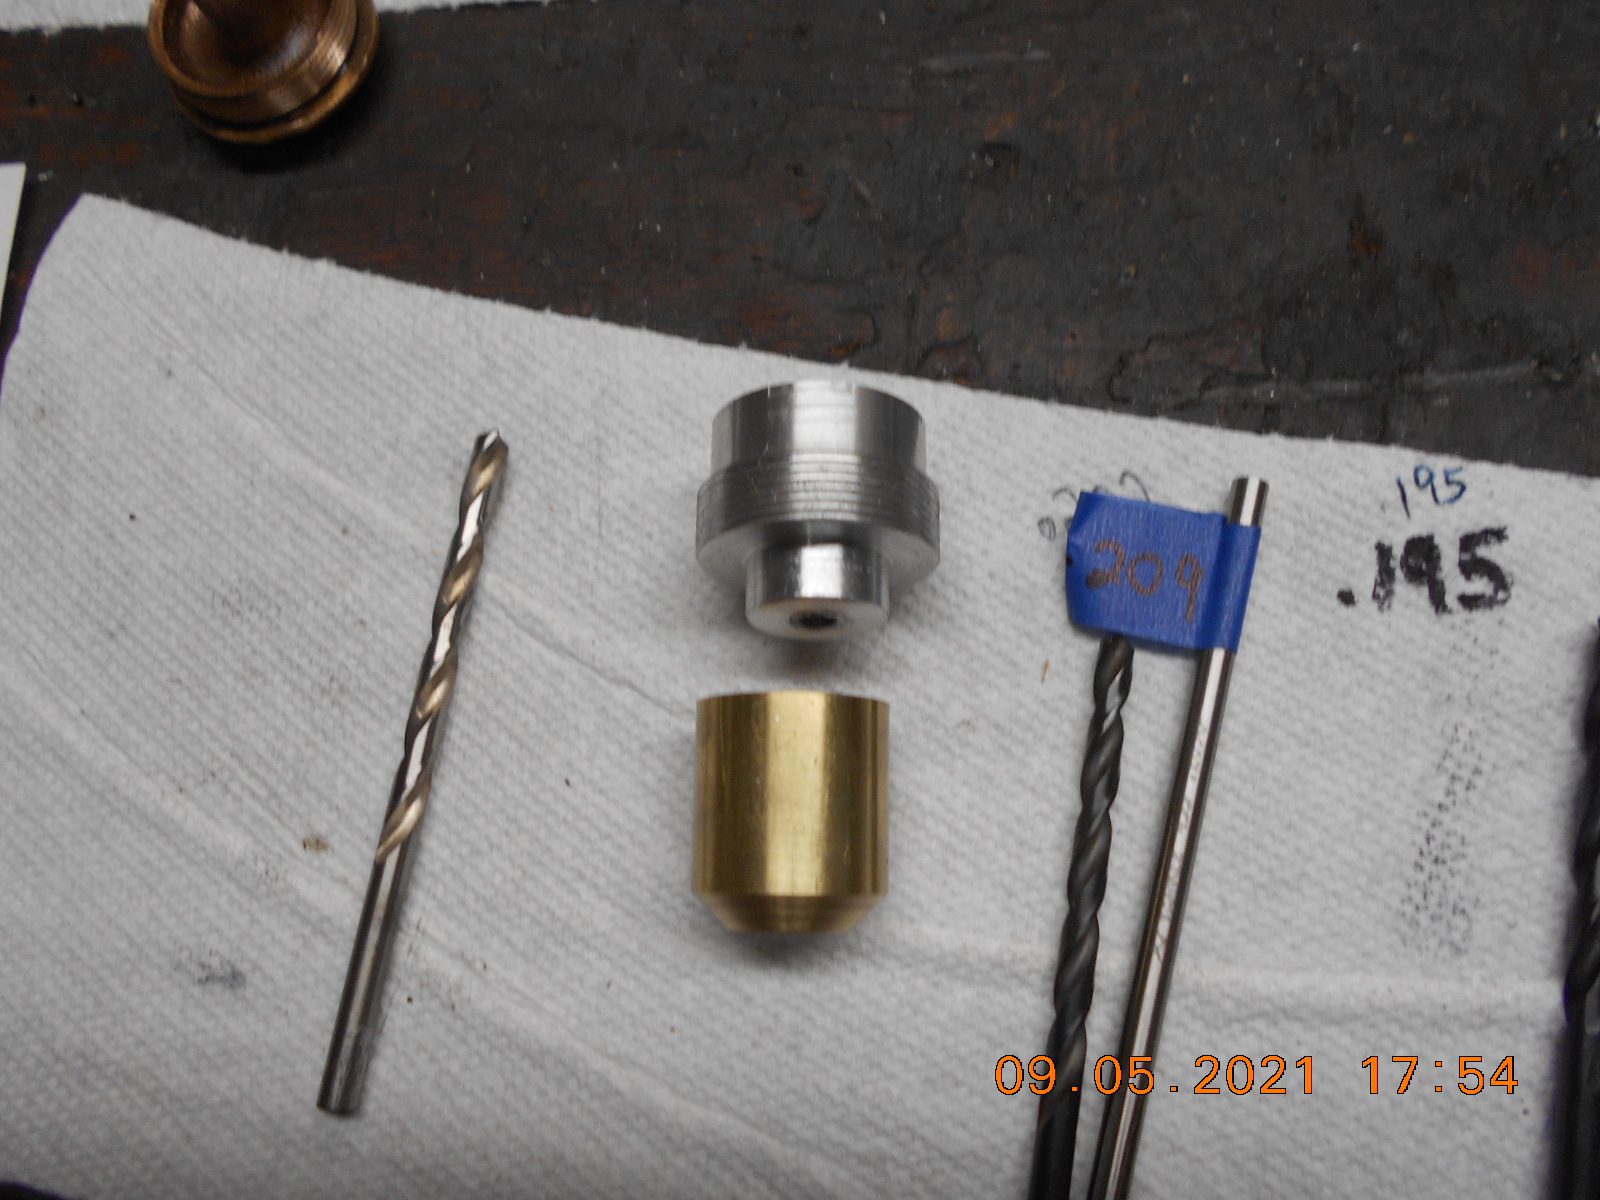
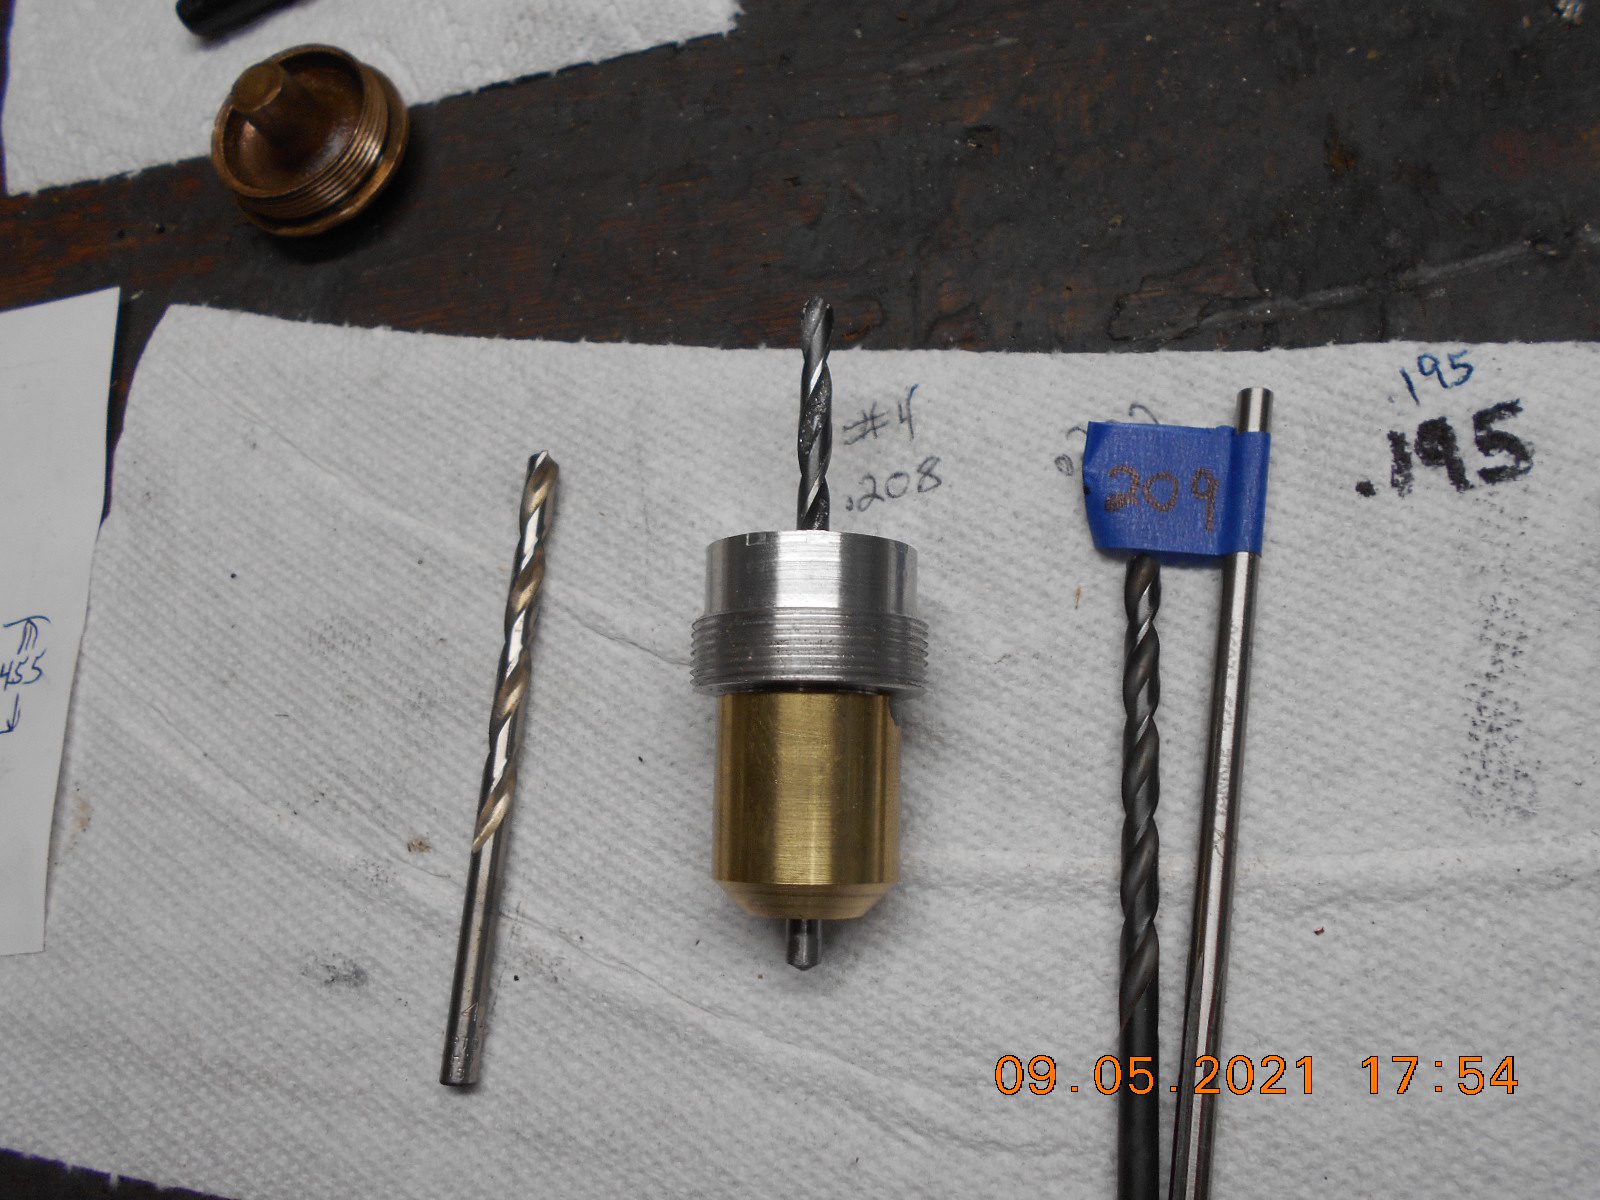
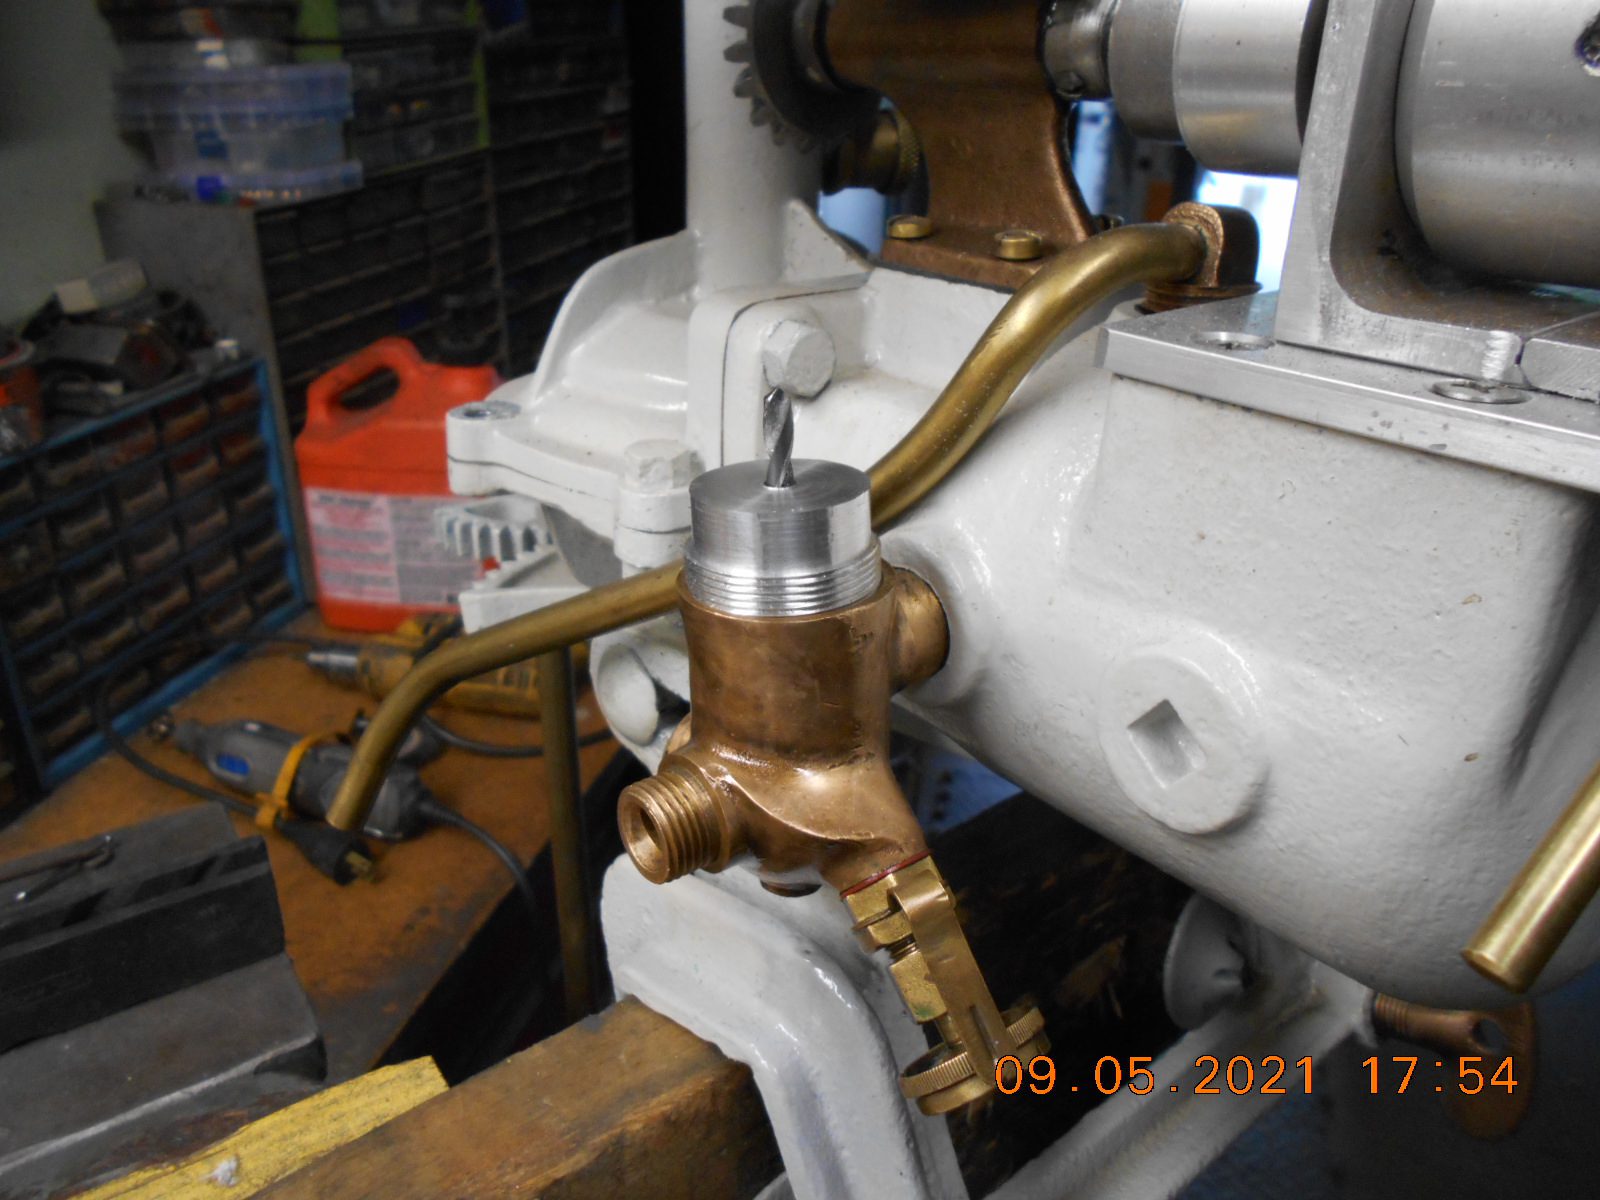
September 5, 2021 at 8:43 pm #246212I decided to take the more logical step first, and machine a guide for drilling and reaming
out the worn poppet valve guide, then start on the poppet valve, as I found
a reamer that should work.The old guide hole was worn out to almost .200, and the valve stem is .185 if I remember
correctly. I have a .202 drill bit, and a .209 reamer.
To date, I’ve had very little experience with little reamers.
Will a little reamer remove .007 of bronze material okay using
a tap holder, turning by hand? Not sure there’s room for a drill,
but perhaps using one would end up with a better bore?Anyway, I ended up making a two part guide. I kind of “winged” it,
but after the fact, I was thinking I probably could have made it one piece.
I think it will work okay as is though.Will ream it out tomorrow, and hopefully start on the new poppet valve.
Not sure I’ll solve any running issue with the motor, but at least
I’m getting some machining practice!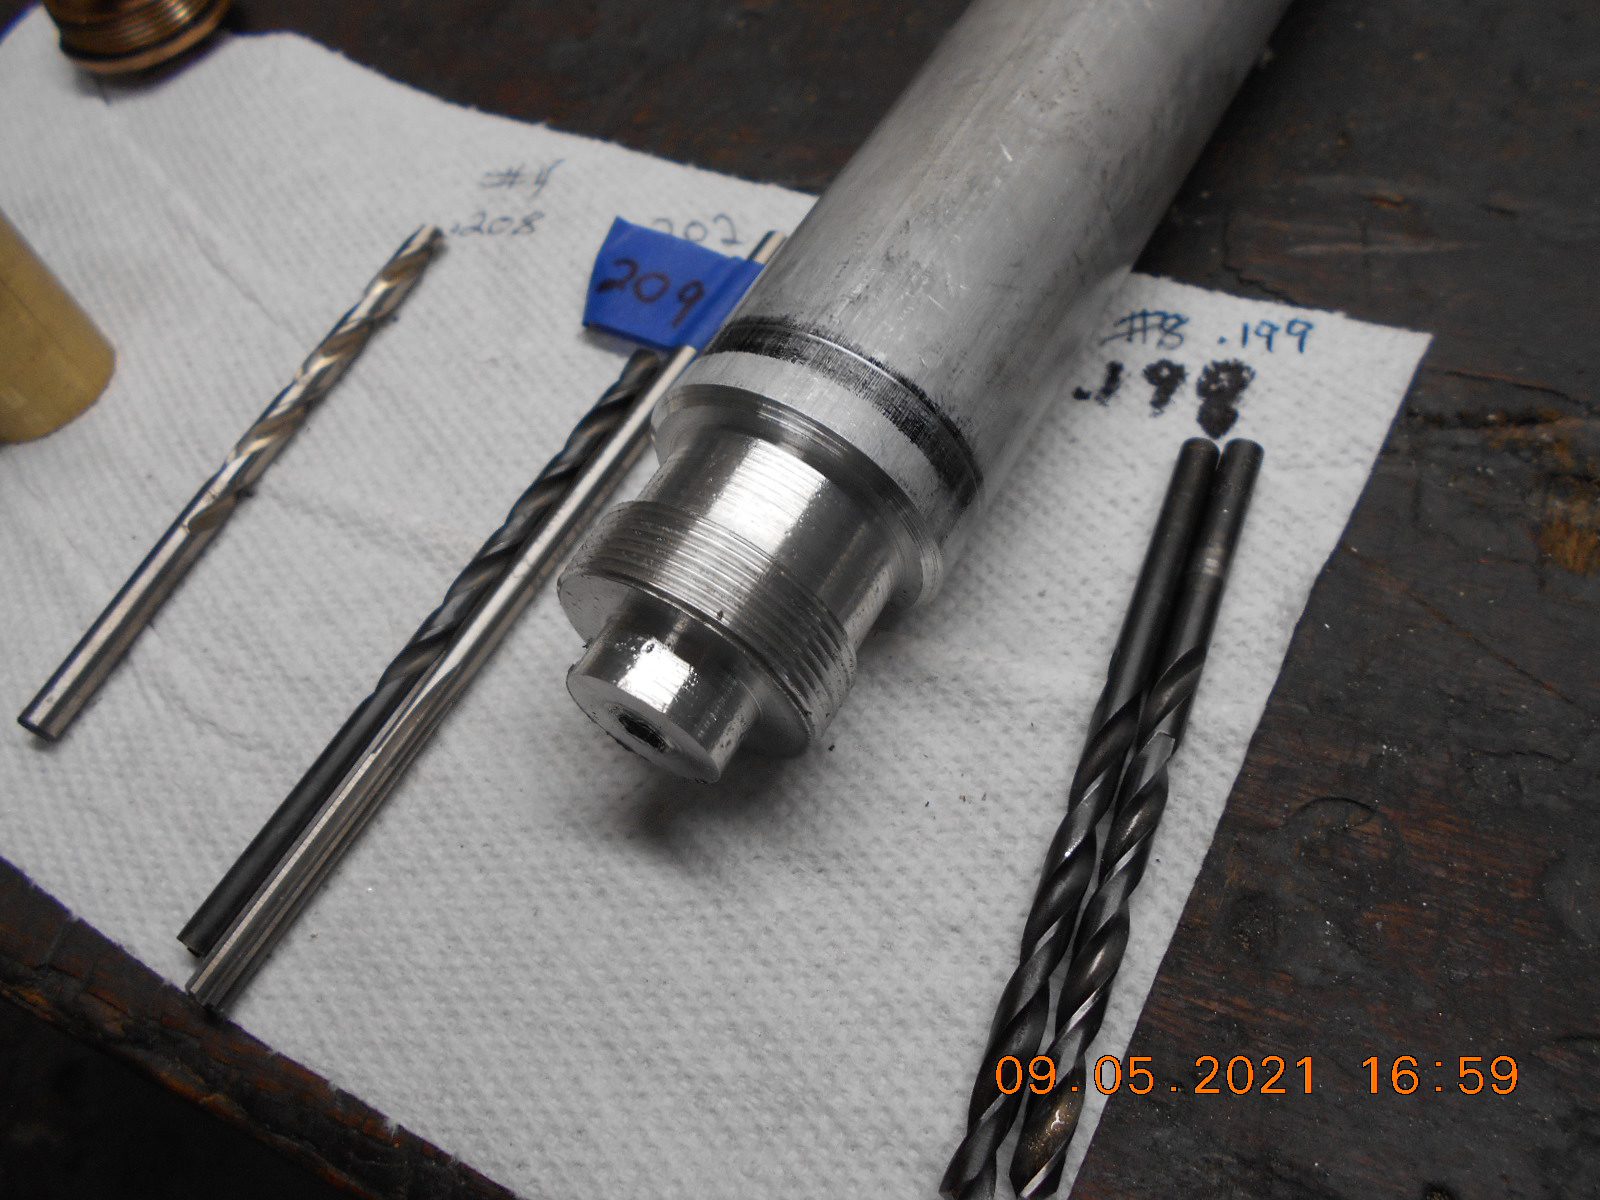
Prepare to be boarded!
-
AuthorPosts
- You must be logged in to reply to this topic.