Home › Forum › Ask A Member › Caille Neptune Gas Tank Repair?
- This topic has 94 replies, 15 voices, and was last updated 5 years, 6 months ago by
 Buccaneer.
-
AuthorPosts
-
December 2, 2020 at 10:02 pm #224155
Buc – that kind of work is way beyond my skill set but it sure looks like it’s going to turn out really nice! Can’t wait to see the finished project!
Bill, I’m sure you could make a tank……. it seems to require more patience
than skill, and if you’re not careful, band-aides!Prepare to be boarded!
December 3, 2020 at 10:46 am #224166Buc,
As usual, I am impressed with your projects. Your pics are excellent as well as your story telling skills.
Keep it up!
David Bartlett
Pine Tree Boating Club Chapter"I don't fully understand everything I know!"
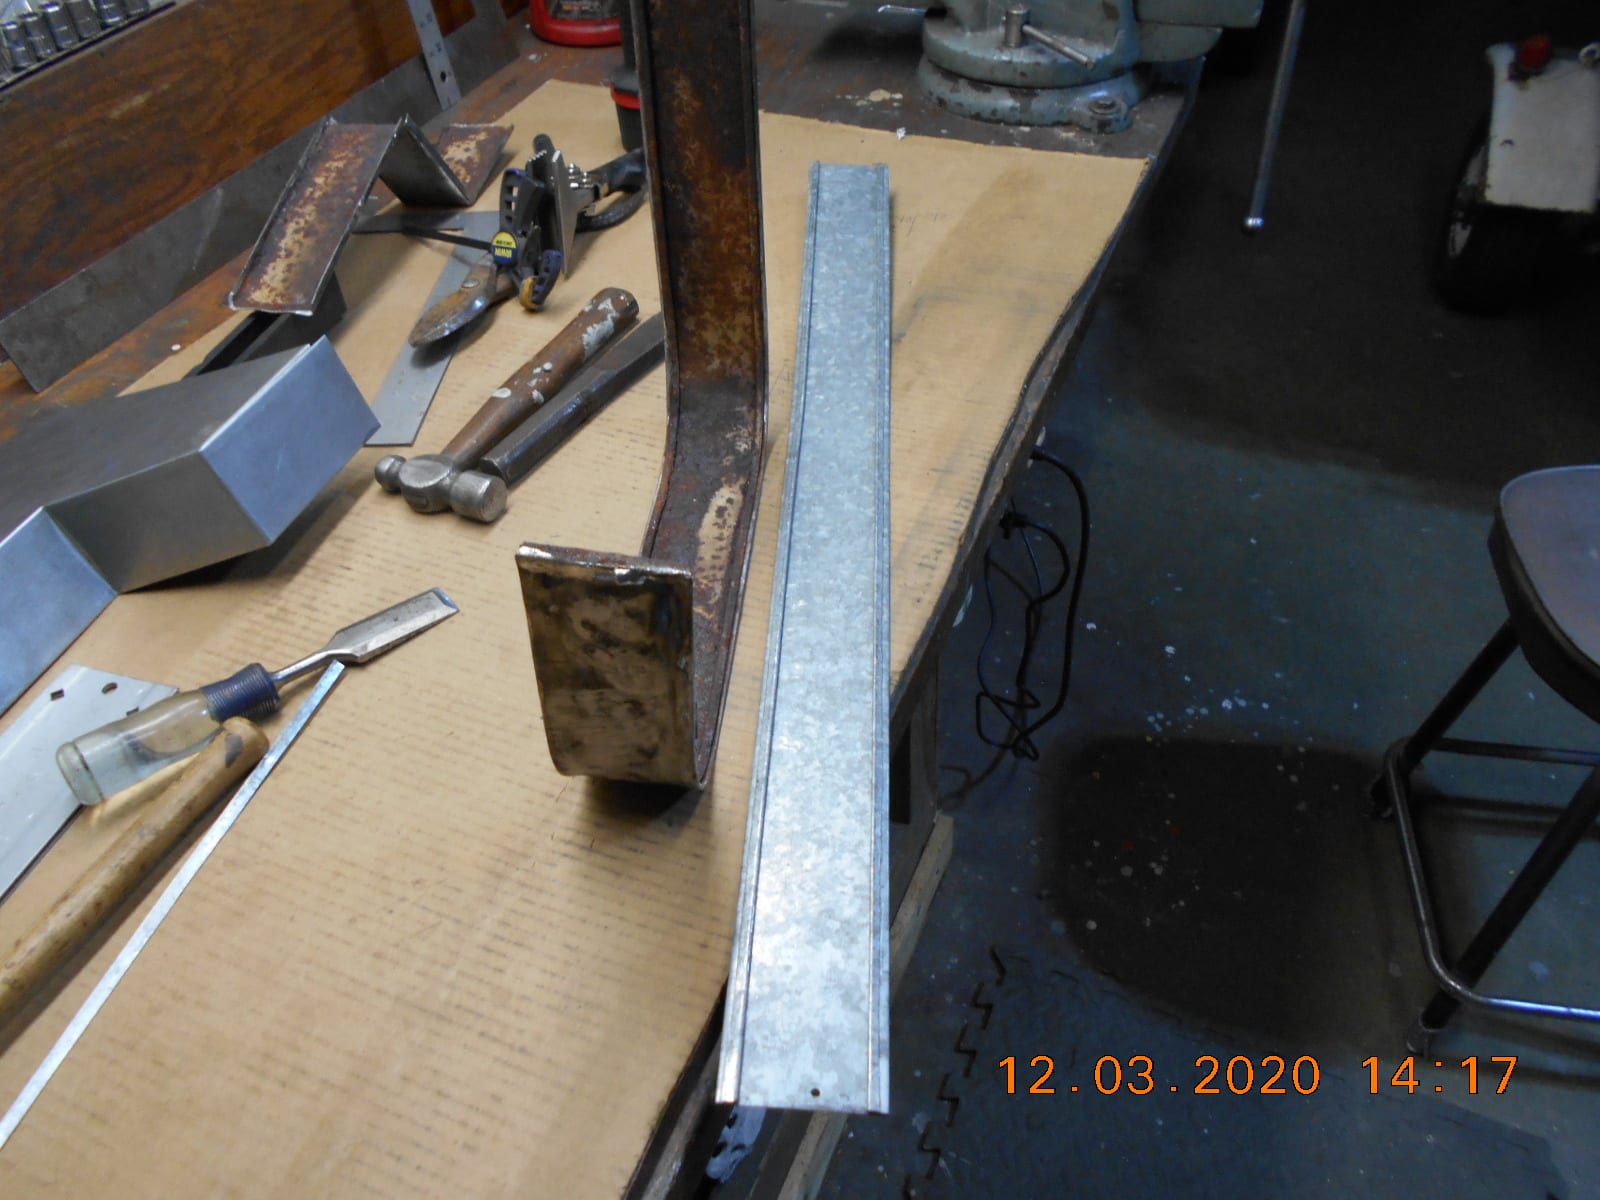
December 3, 2020 at 6:23 pm #224173Joe, if you’re still “out there”, did you have to notch the seam in places to make
the bends on the long side panel, or just bent it around something with
a similar radius?I hammered out the long side panel today, so hopefully I can bend it to fit
the top and bottom panels tomorrow.
I ended up bending all the folds on the panel a little at a time between
two 6″ pieces of angle iron in the vice….. slow work for sure.
Prepare to be boarded!
December 3, 2020 at 7:16 pm #224183Notching for the bends? You should only have to notch the outside of the “S” to make smooth bends, That assuming that you slosed the inside of the “S” tight ( the 180* bend part/. I used a cut off wheel on the Dremel to make the notches.
Joe B
December 3, 2020 at 7:32 pm #224184Look’en good Buc! I can’t wait to see how you make the fill cap! Some talented people out there.
dale
get’em wet don’t let’em set!
December 3, 2020 at 9:31 pm #224186Notching for the bends? You should only have to notch the outside of the “S” to make smooth bends, That assuming that you slosed the inside of the “S” tight ( the 180* bend part/. I used a cut off wheel on the Dremel to make the notches.
Joe B
Thanks Joe. I have the Dremel ready to go with a little cut-off wheel.
Prepare to be boarded!
December 3, 2020 at 9:35 pm #224187Look’en good Buc! I can’t wait to see how you make the fill cap! Some talented people out there.
dale
get’em wet don’t let’em set!
Dale, There was a brass threaded ring soldered to the top of the tank
for the filler cap to screw into. If the threads are okay, I’ll re-use that,
but you made me remember that I don’t have the filler cap for the Caille!
Will have to study up and see what one looks like, and maybe make
something on the lathe.Prepare to be boarded!
December 4, 2020 at 3:48 pm #224222In between a wood working project for the wife, I worked on the tank some
more today. It was kind of a “bugger” getting the correct curves on the long
side panel to fit the bottom.
Not sure how one is suppose to get the top panel to fit as one won’t be
able to manipulate the metal from the inside of the tank…… should be
interesting.I still have to cut the side panels for length and make the tabs to lock
them together.Also still have to play around with the brass rivets I found in my stash.
They’re hollow on the end part way. It seems to me these are the type
of rivets used on brake shoe lining “back in the day”, and vaguely
remember using a manually operated riveter / press type of tool
once to install them.
I was thinking of machining a punch to work on these type of rivets,
but not sure what the end should look like. Anyone know?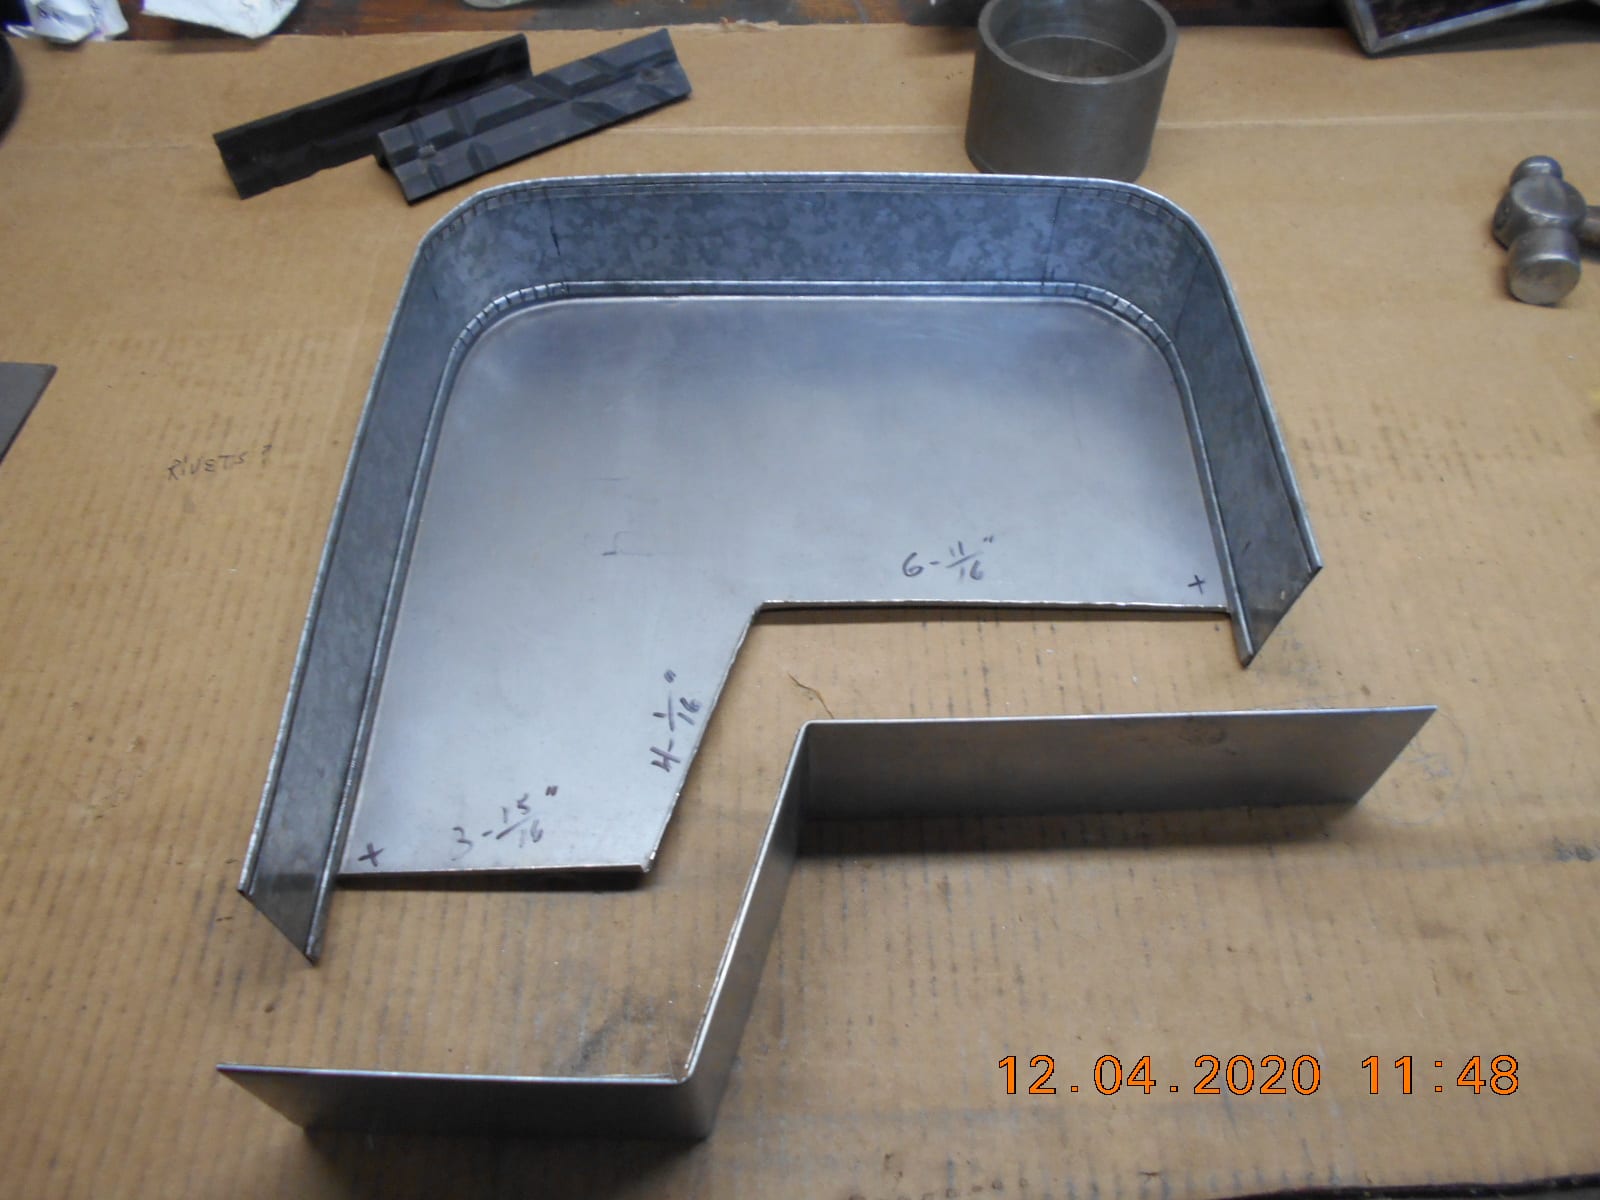

Prepare to be boarded!
December 4, 2020 at 5:16 pm #224232Buc, before you drill and mount the brass pieces, first check on the motor that the tank will be positioned properly , clearing the flywheel and looking nice and even all around
Joe B
December 4, 2020 at 6:07 pm #224234Buc, before you drill and mount the brass pieces, first check on the motor that the tank will be positioned properly , clearing the flywheel and looking nice and even all around
Joe B
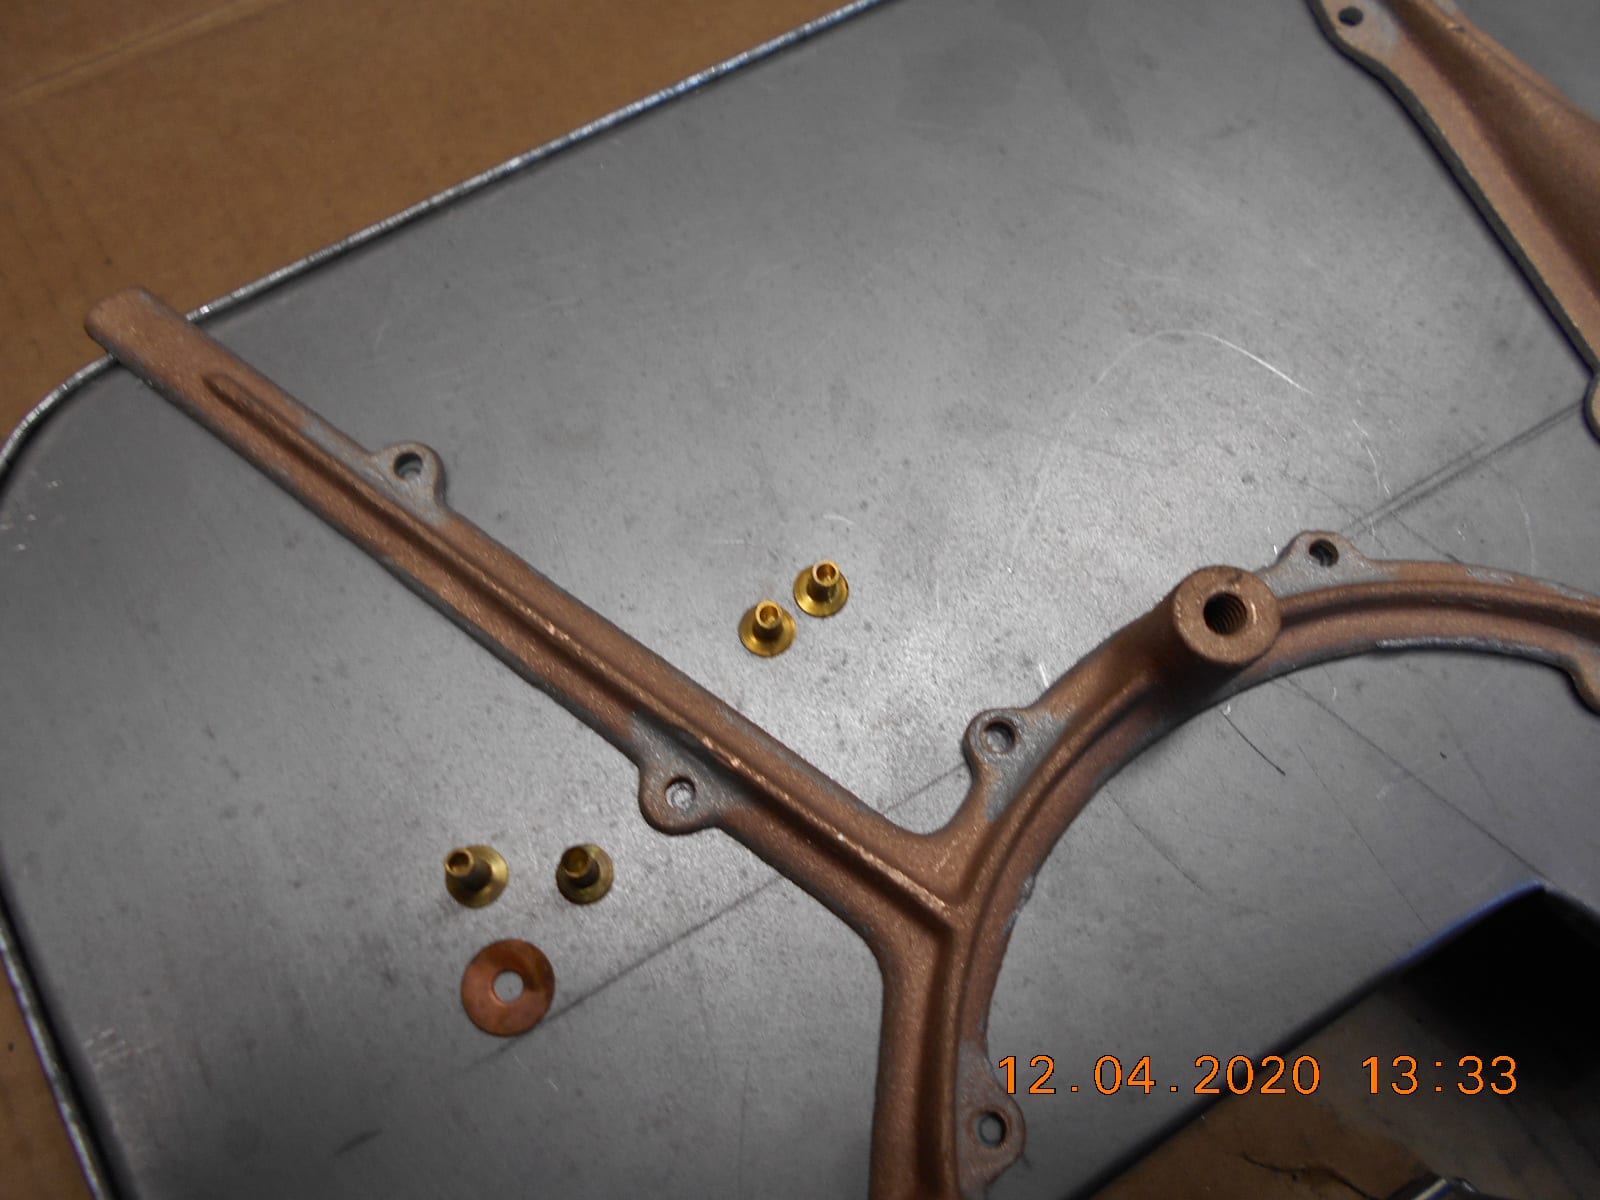
Joe, I kind of did that the other day, with the old and new bottom panel,
setting the bronze mounting piece, atop the three bolts on the back of the crankcase,
along with the bottom piece. It appeared that the original tank was just
a hair out of square with the cylinder.I ate some brain food (taco’s) and went back out and worked on the tank
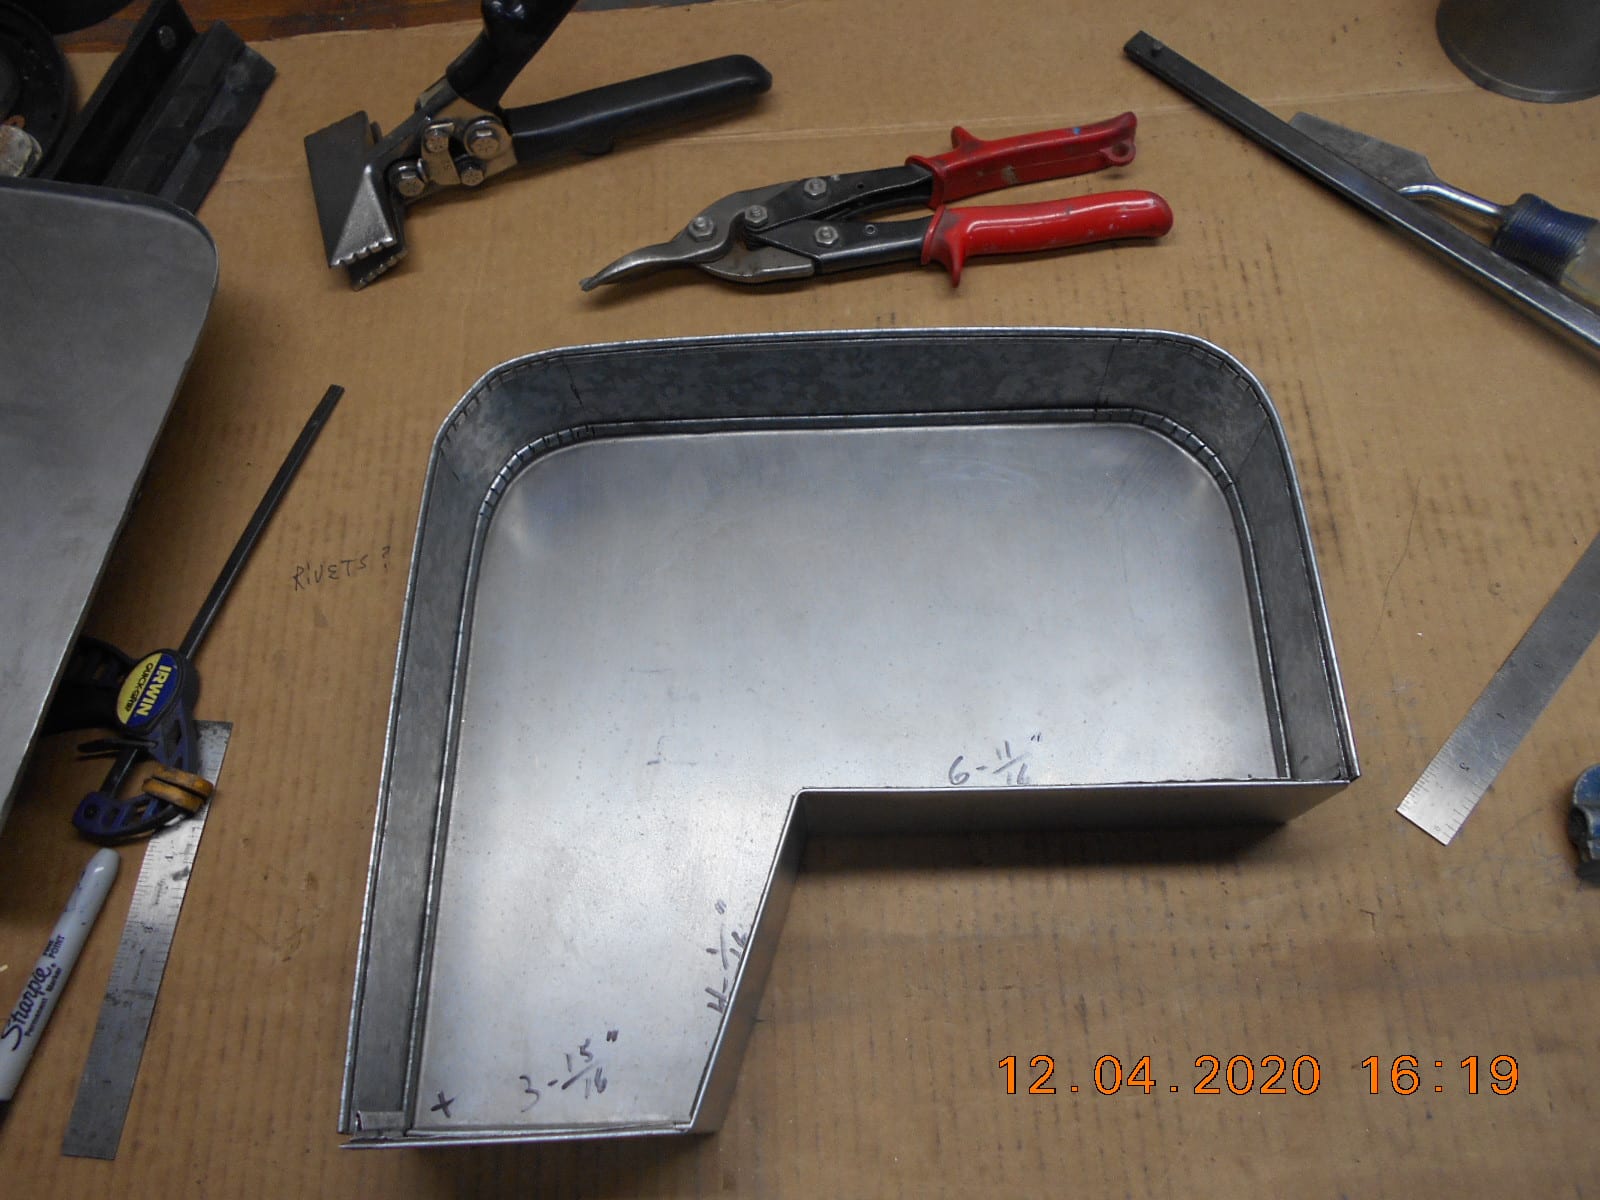
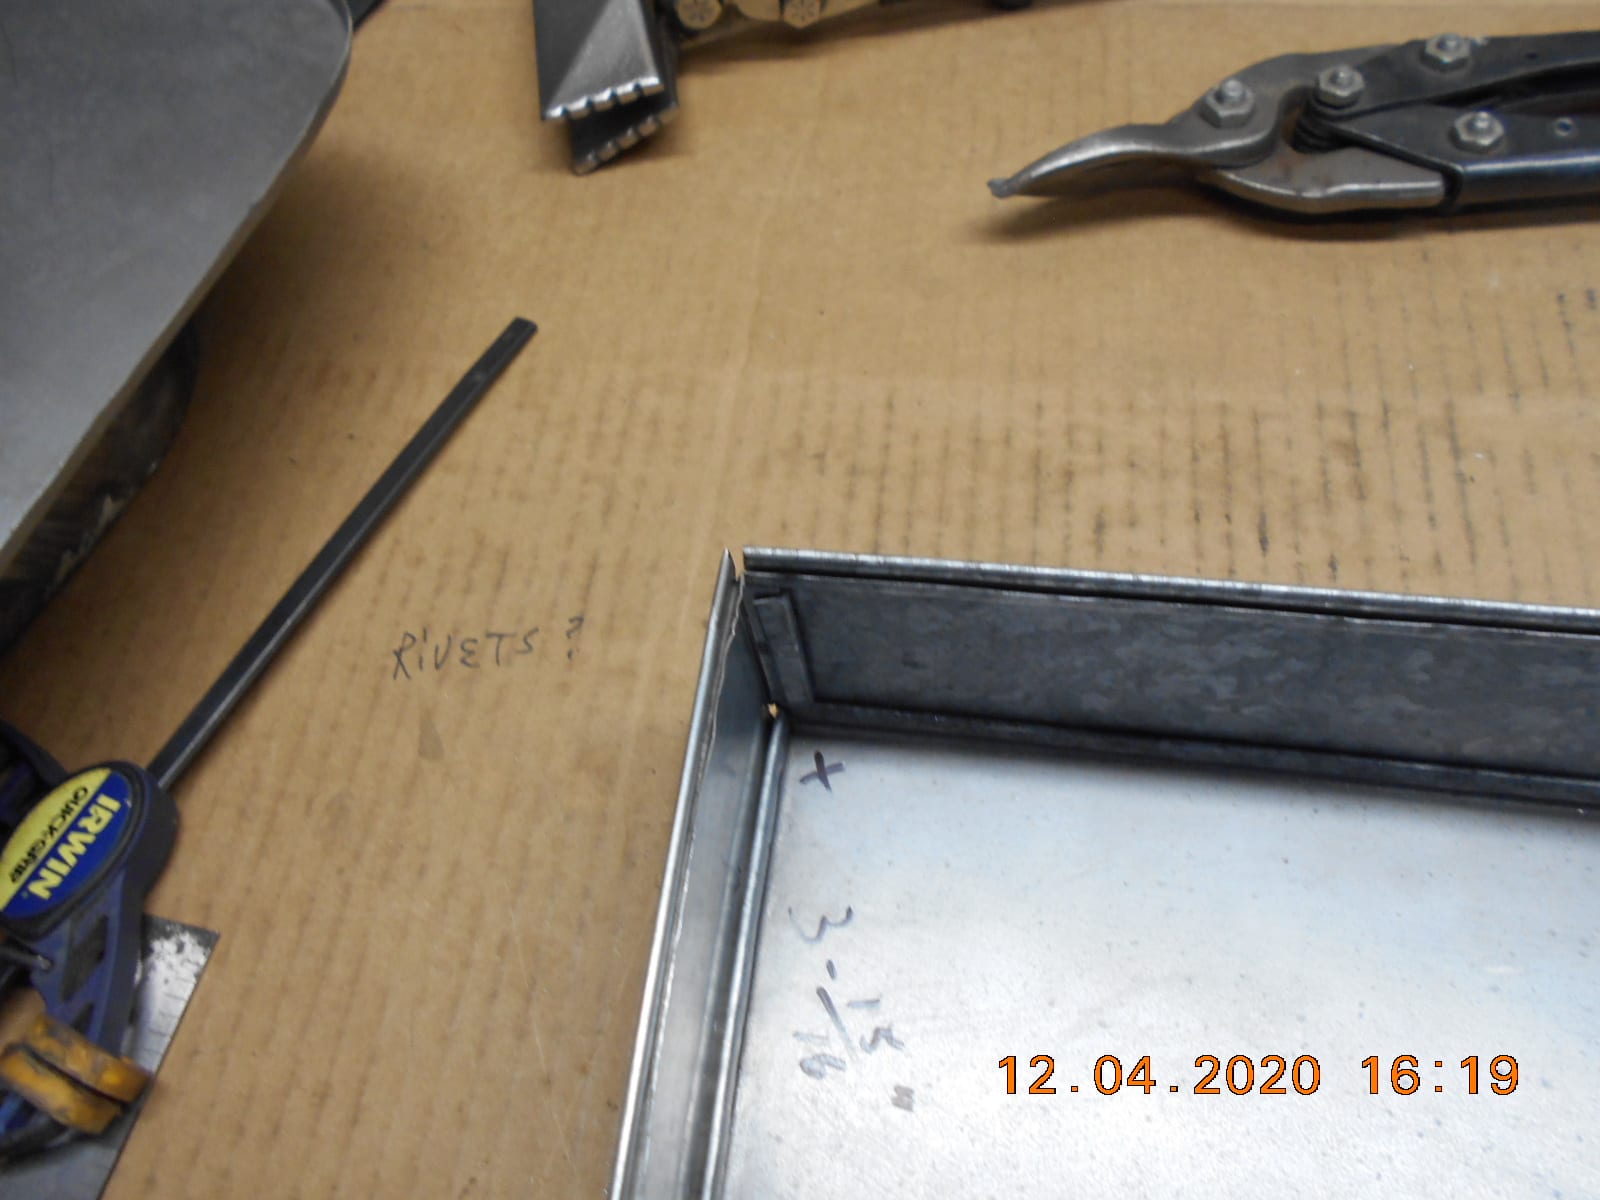
some more.Joe, Is this what you were talking about with how I did the “tabs” and “S” joints
to connect the side panels together?The side panels are seated into the bottom panel, but not crimped in tight yet.
Guess there will be no way to “crimp in” the top panel after the bottom is on,
but recon solder will keep it from going any place.At this point forward, I’m wondering about the remaining sequence of events.
Q. Do I rivet the bronze castings to the bottom panel before I attach the side
panels?Q. Do I “tin” the bottom of the castings with solder before I rivet them on?
Q. Do I install the top and bottom panels to the sides then solder everything
at once, or do the bottom panel “inside and outside” first to make sure
none of the joints leak, then do the top panel last?
I’m a little concerned that if I solder the bottom first, if may be harder or
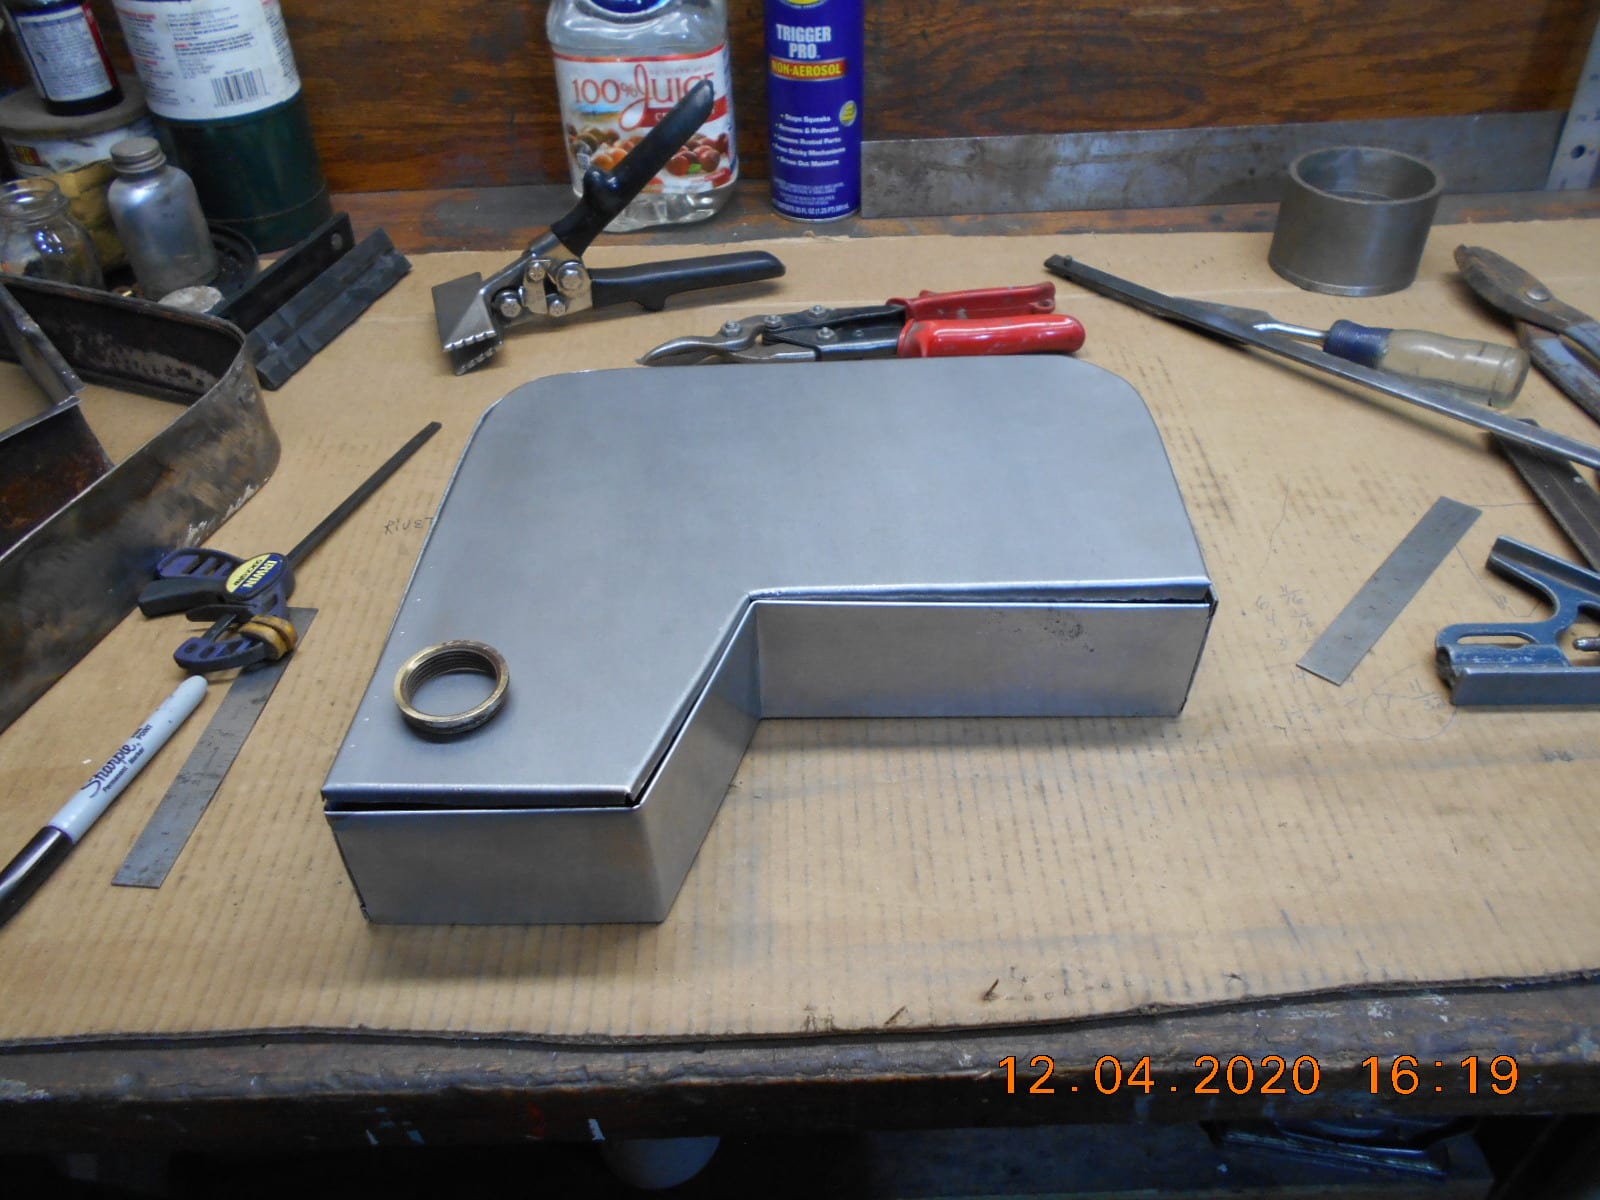
impossible to get the top panel inserted. Thoughts?I think my brass threaded gas cap ring that’s soldered to the tank top is okay.
I was just thinking that I might want to make a gas cap on the lathe while
the brass threaded ring is still available to test fit the cap while on the lathe.I noticed from photos that there were two different styles of gas caps
on Caille’s of this era. A “flat top” one, and one with a raised center tab
to grab with your fingers.
Q. Any idea which is correct for my Caille Neptune?
I don’t have a milling machine, so the flat top one would be easier to make!Also, my tank appeared to have evidence that there was an 1/8″ OD tube
to atmosphere, near the cap, for a vent. Mine is broken off flush with
the top of the tank.
Q. How high did the vent tubes stick up, and did they go straight up, or “curlie cued”?
Tried looking at some archived photos last night, but hard to make out that detail.Thanks!!
Prepare to be boarded!
-
AuthorPosts
- You must be logged in to reply to this topic.