Home › Forum › Ask A Member › 1937 Thor built Sea King 2.4 hp This and That
- This topic has 5 replies, 3 voices, and was last updated 6 years, 1 month ago by
 Buccaneer.
-
AuthorPosts
-
March 27, 2018 at 1:36 am #9502
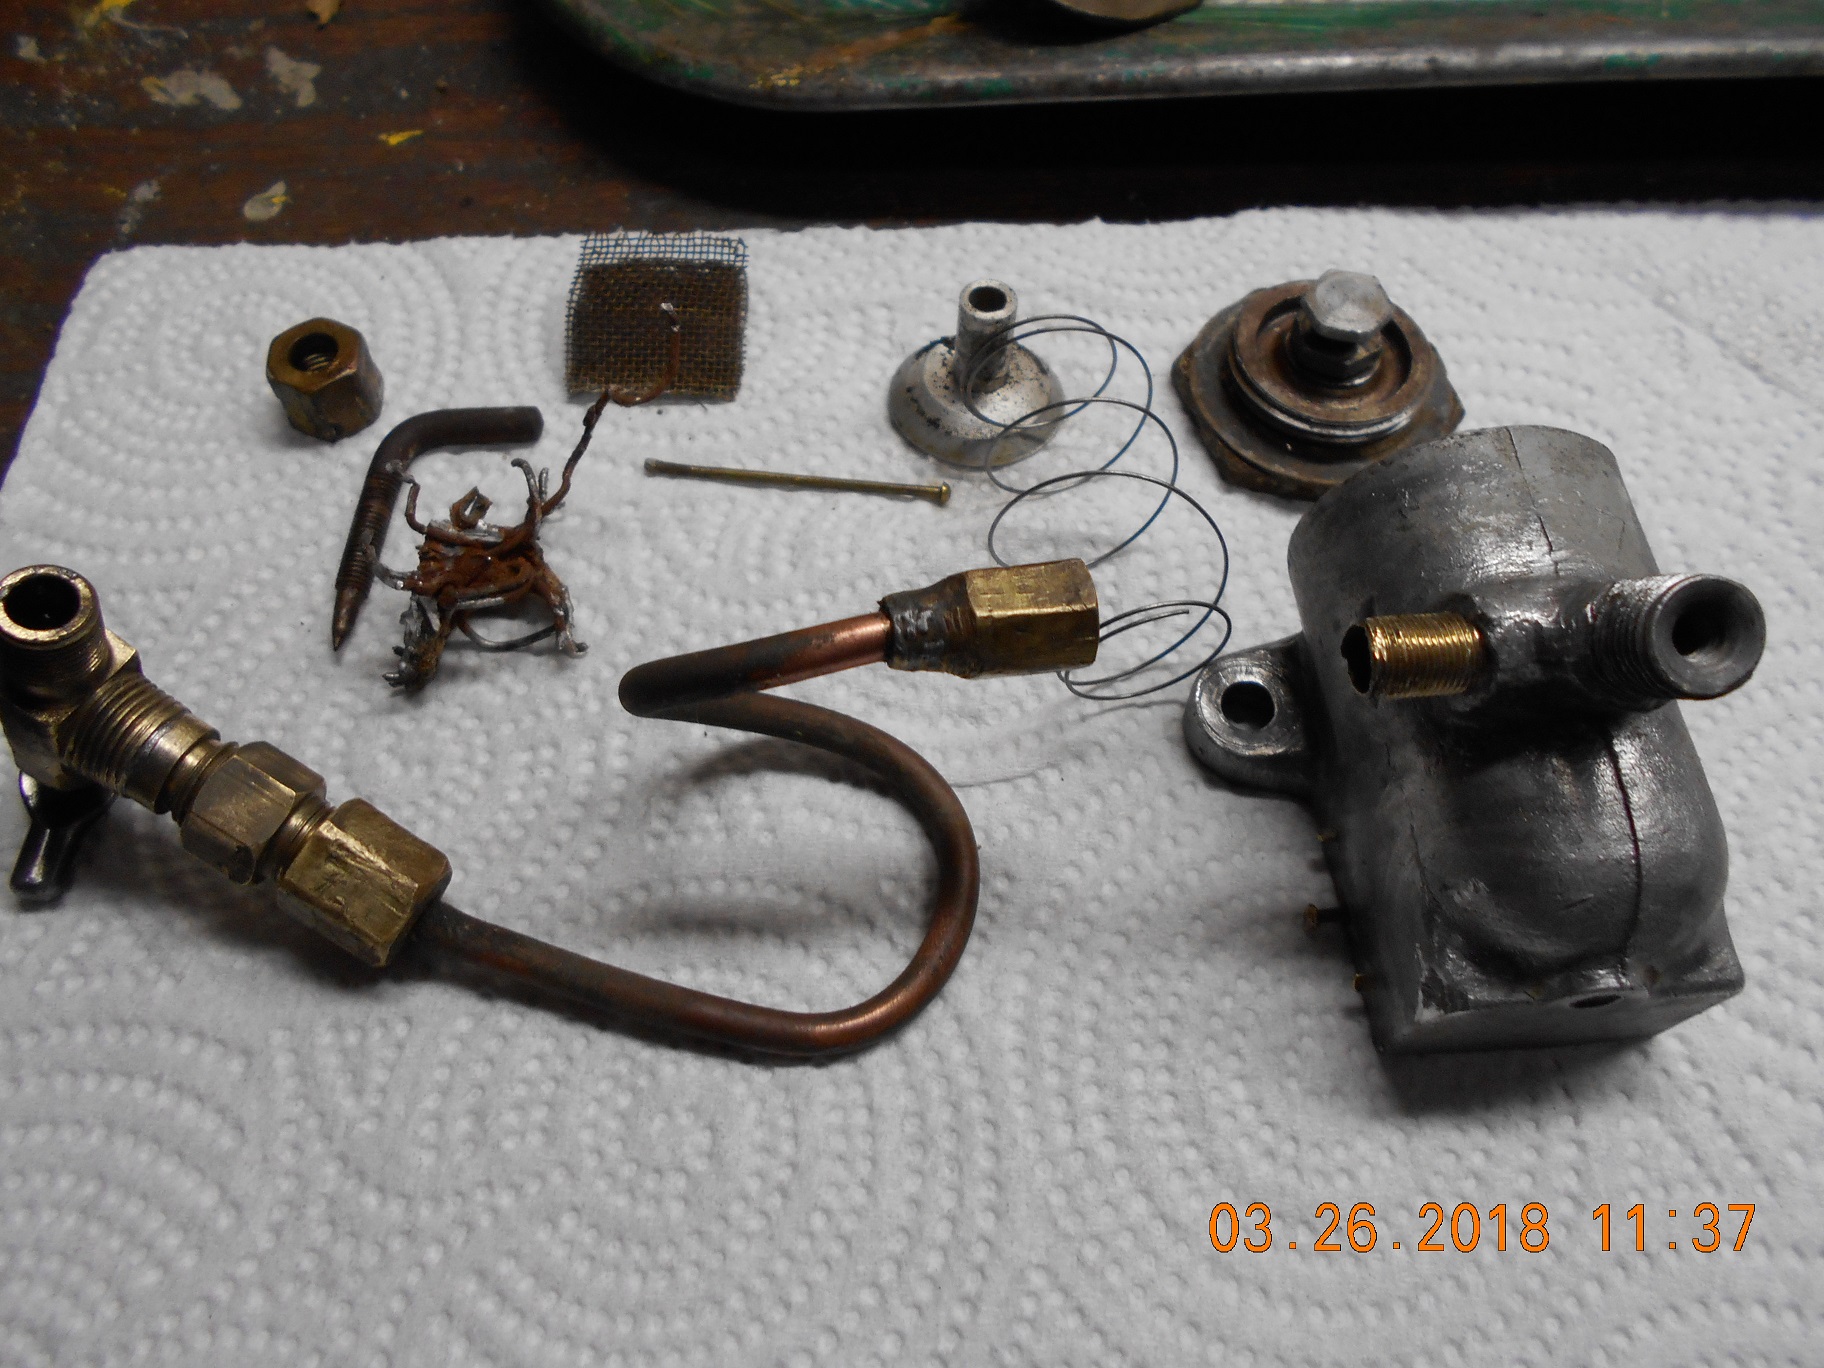
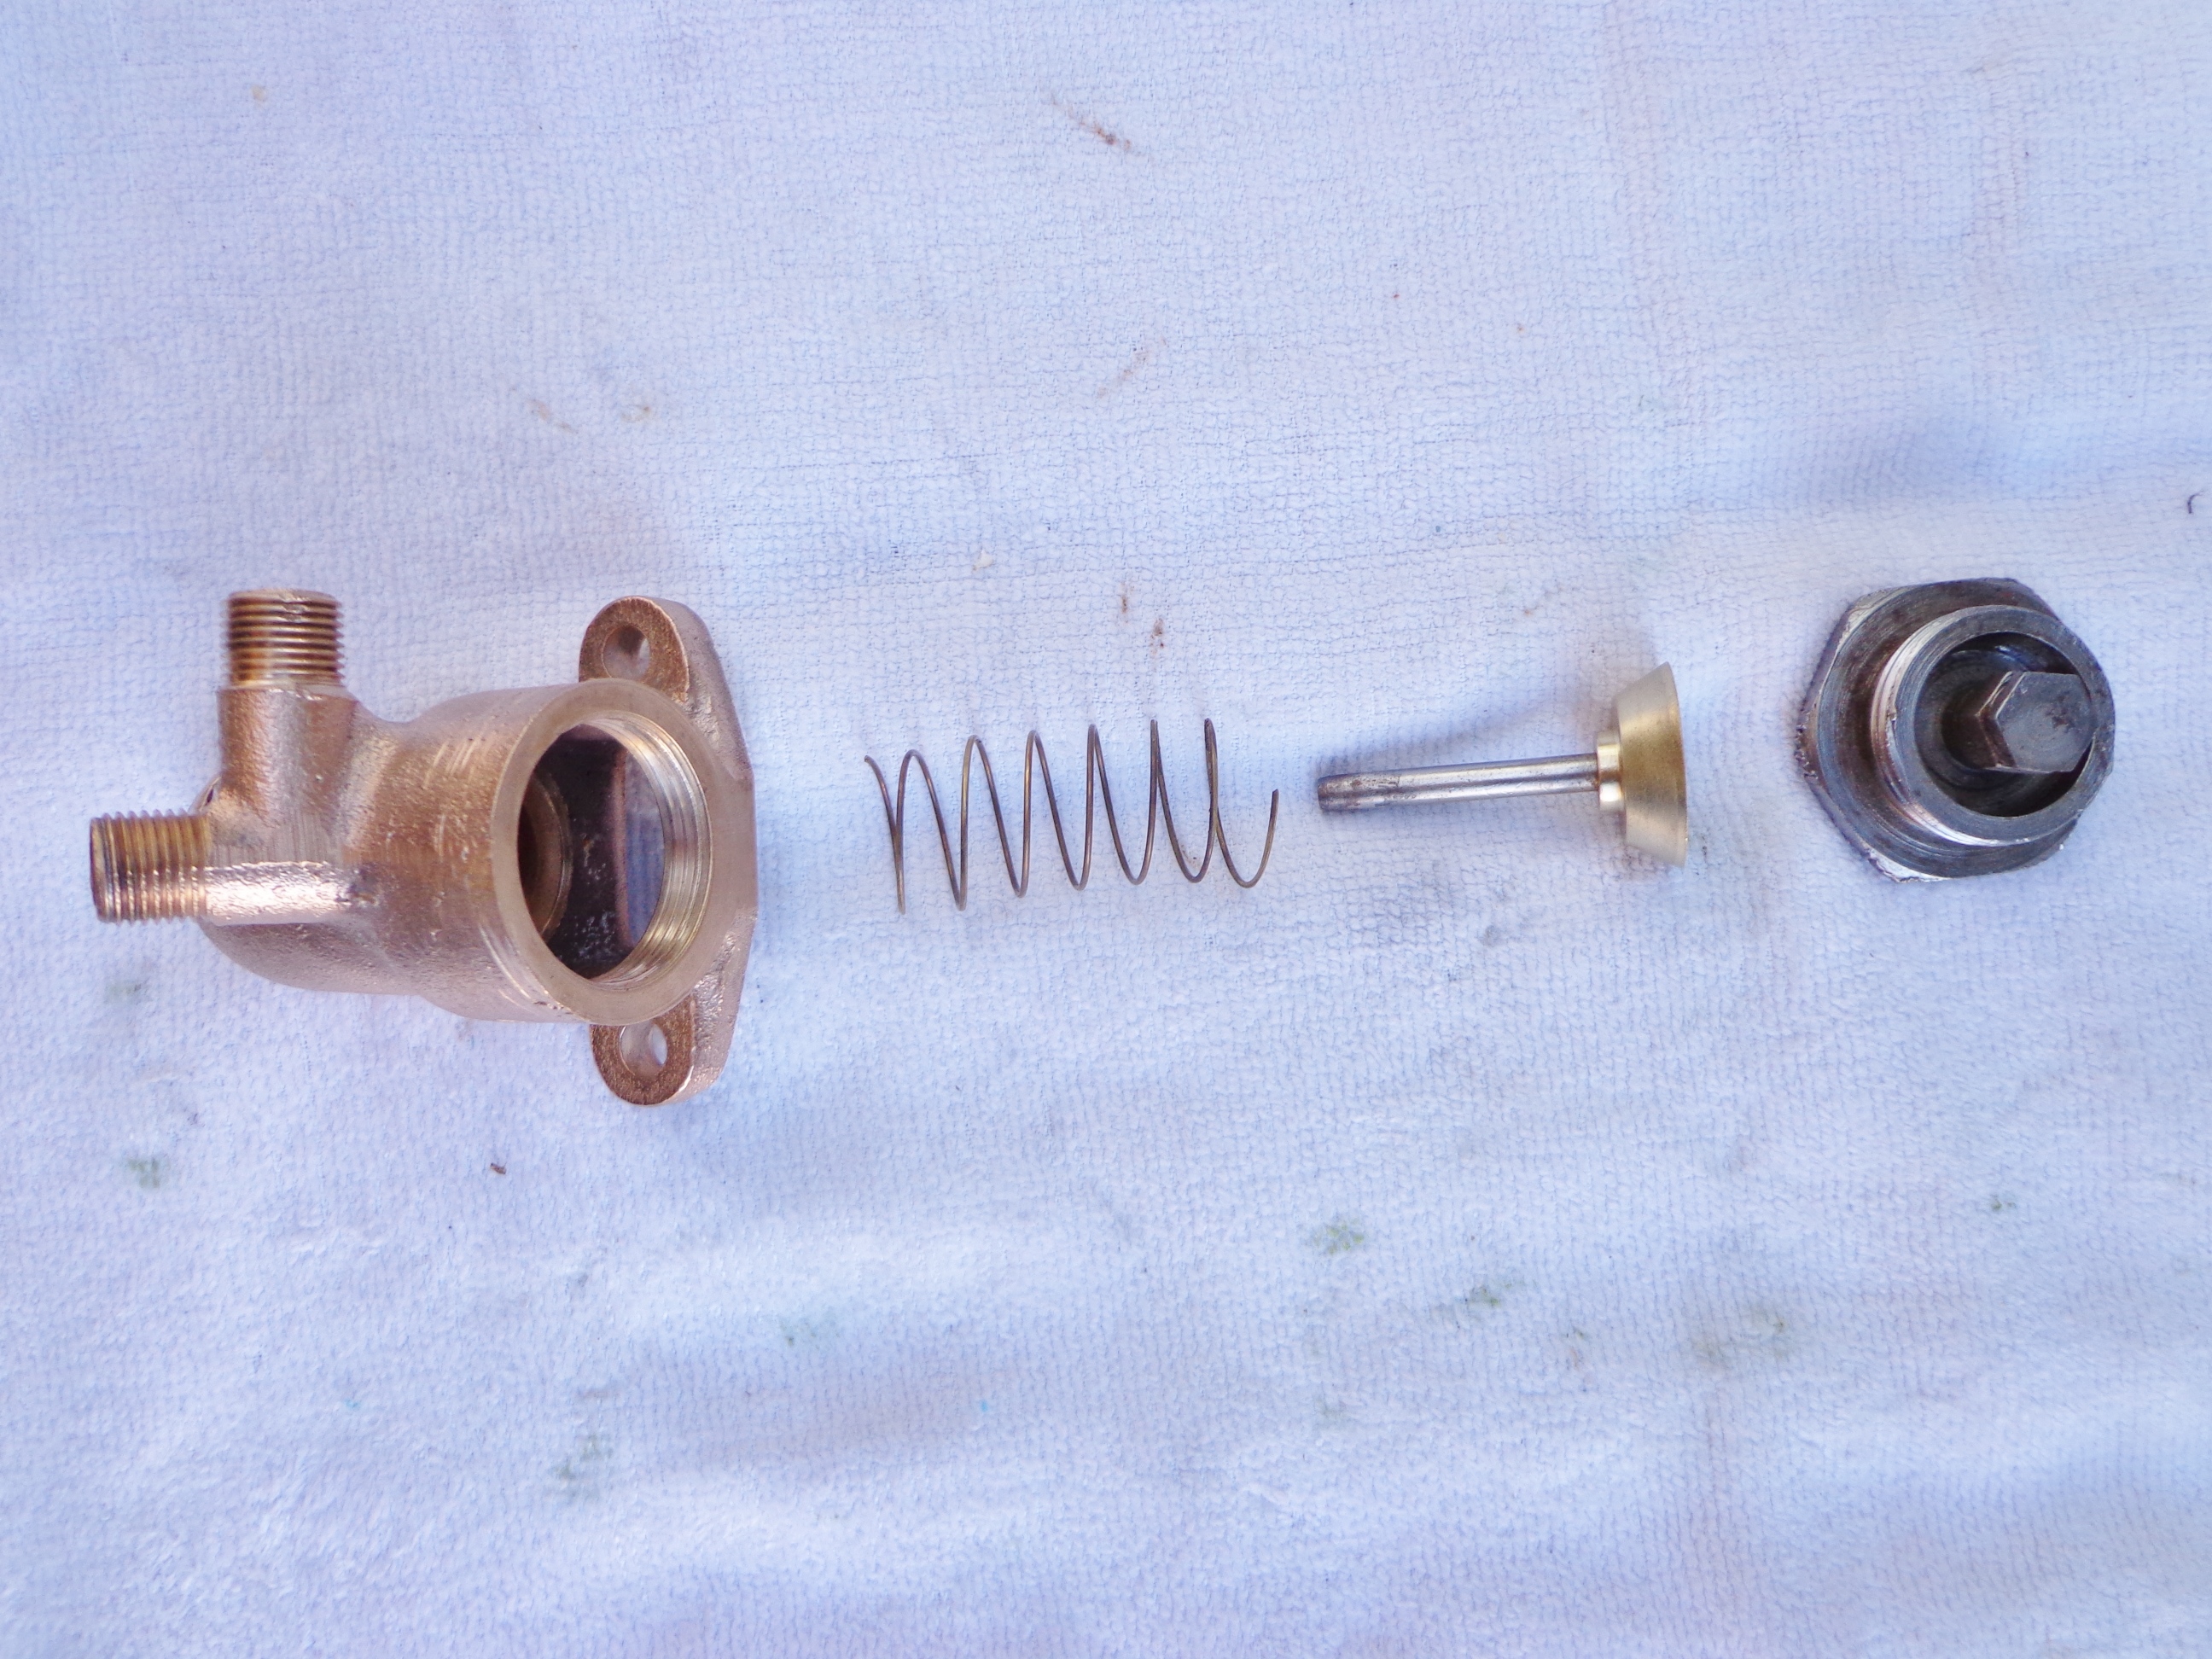
Regarding the subject motor, the poppet valve carb fuel
inlet that the fuel line from the tank attaches to, was
broke off about 1/4". The brass threaded fitting that
the line was attached to is the same size and thread
as as Shrader valve stem on an auto.
I can’t imagine this is original as the fitting is so thin,
there wouldn’t be much of a seal inside the fuel line.
It evidently did leak, as the whole affair had a bunch
of bailing wire wrapped around it, then solder applied
to the wire. 😮
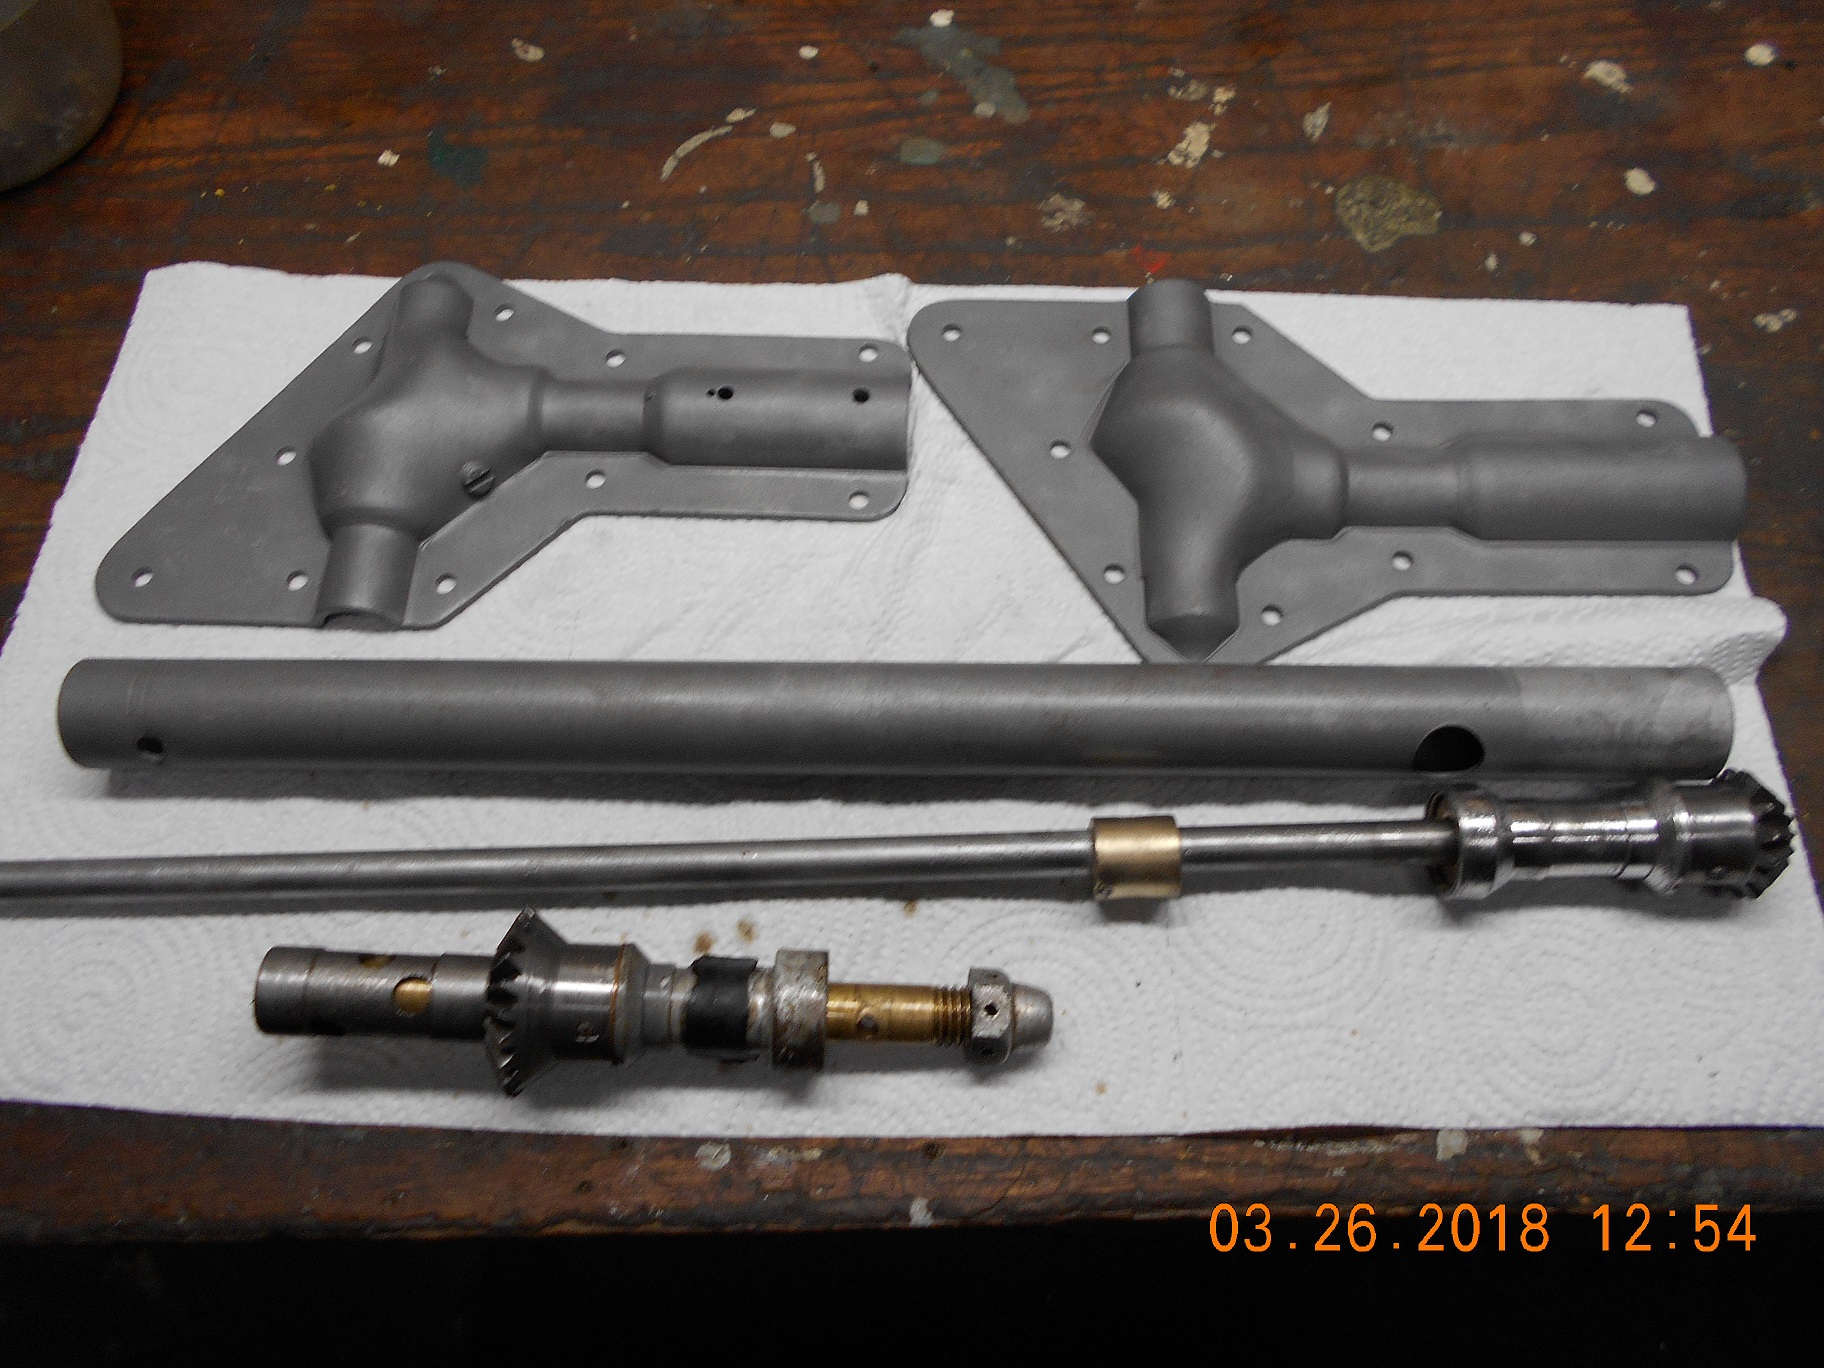
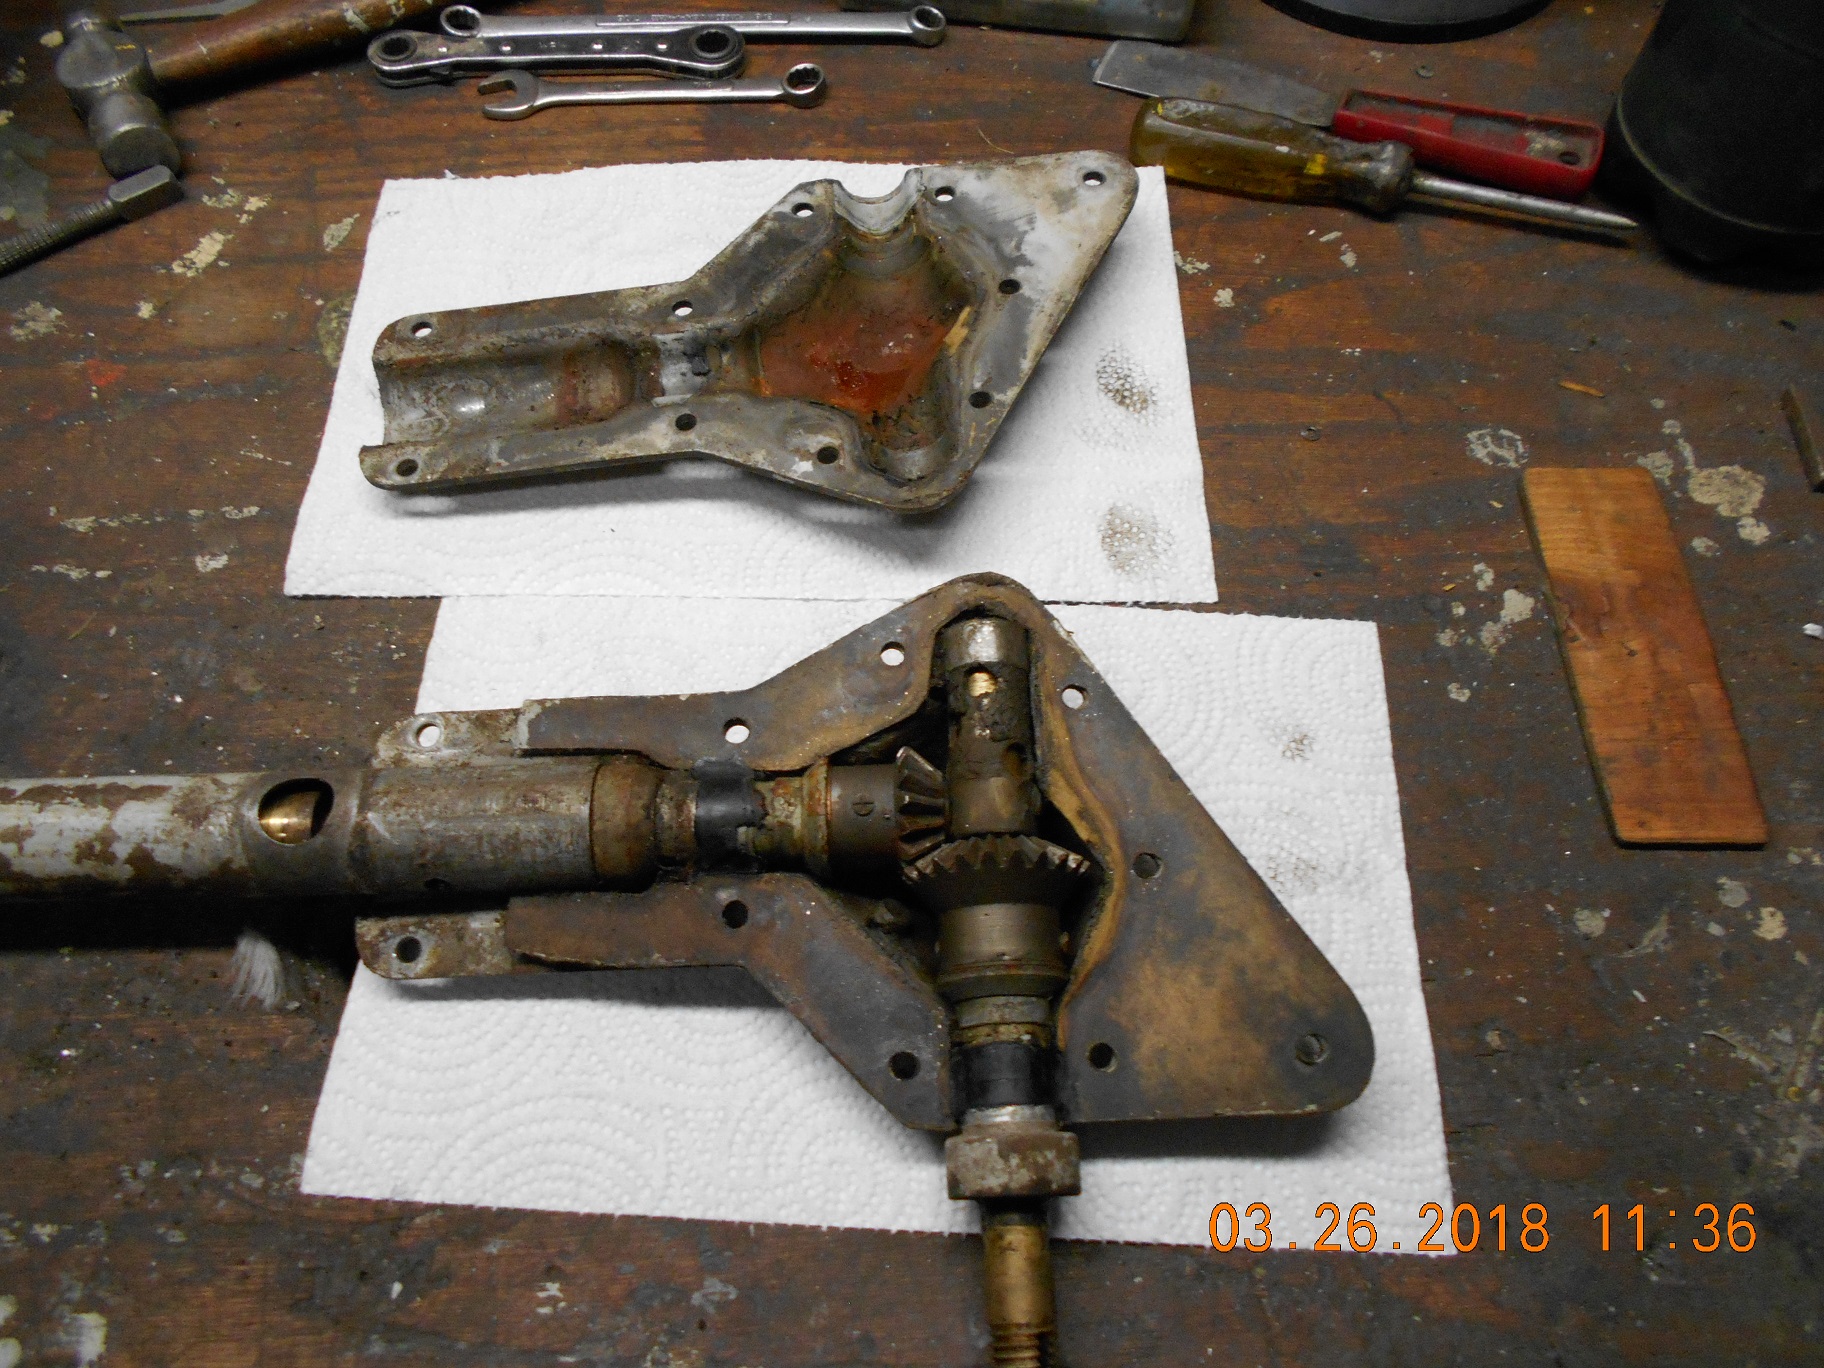
Anyone have a good photo of the fuel line and inlet fitting?The lower unit came apart today, and didn’t look too bad inside.
Strangely, the gaskets between the two stamped halves of the
gear case weren’t cemented on. The bronze bushings seem
tight.Over sized piston rings from Dave Reed on the way.
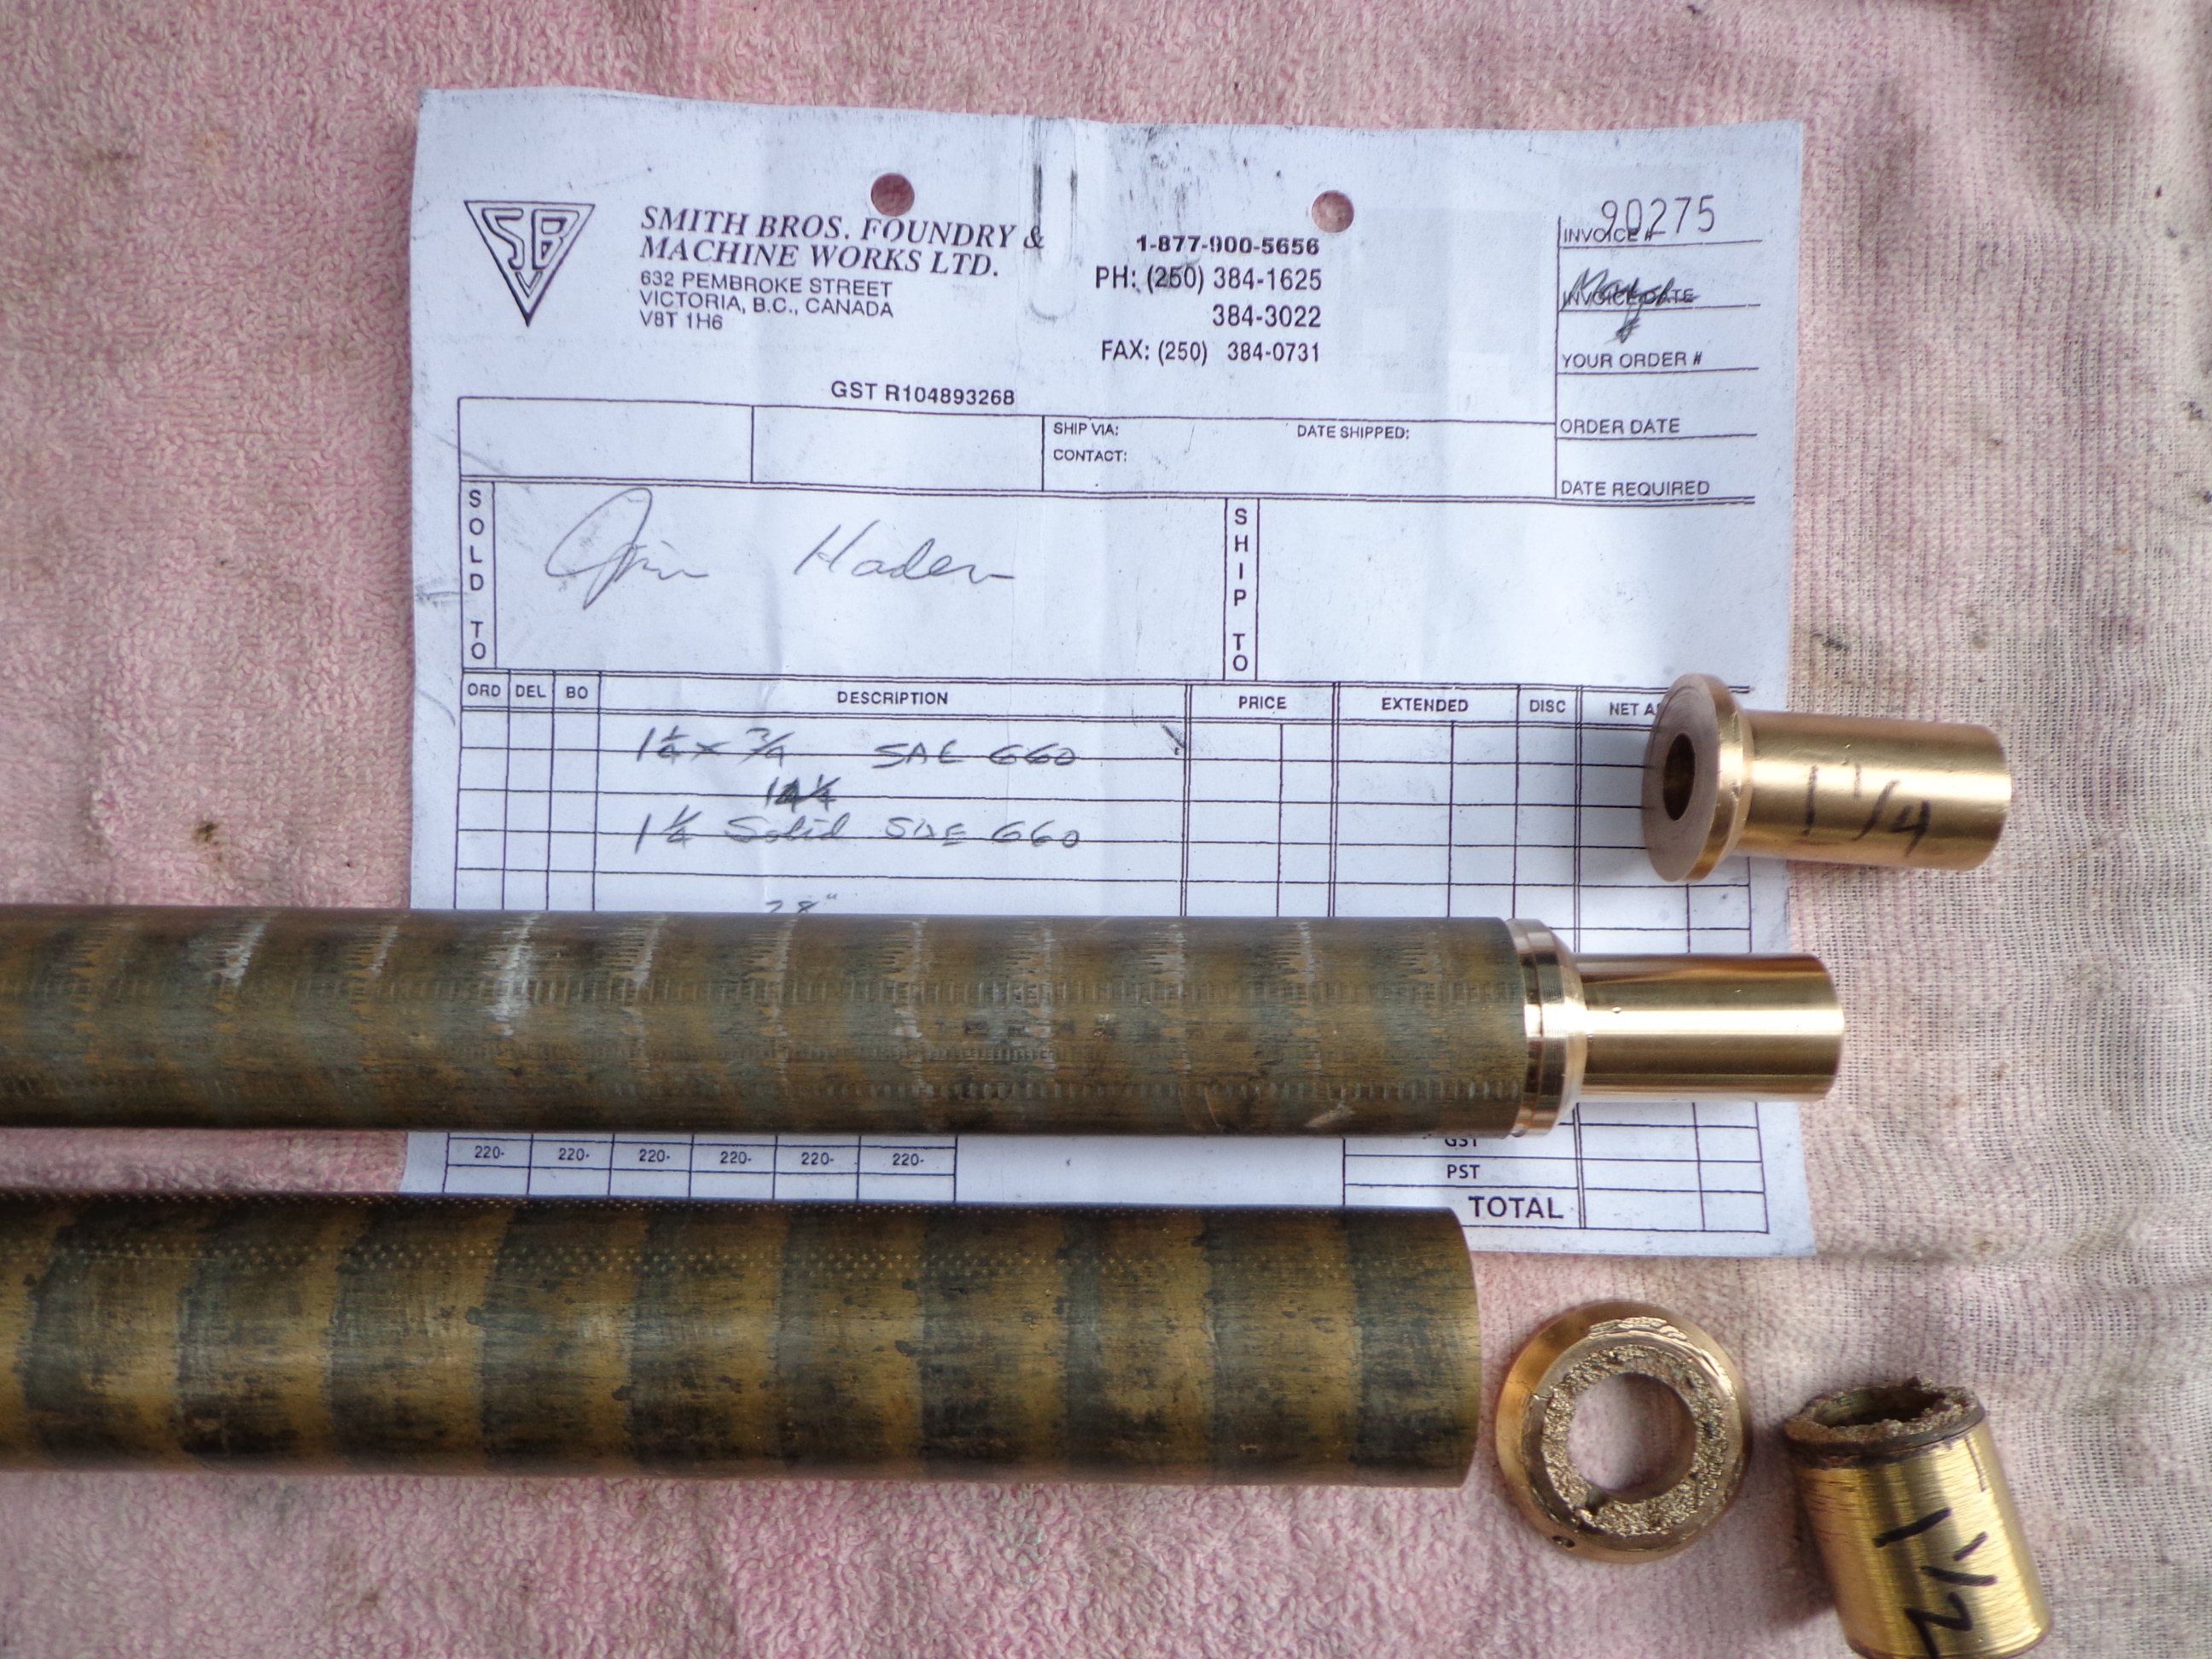
Still researching and shopping around for some 660 bronze to
make crank bearings. What’s the best way to make oiling
grooves in the inside of the new bearings. The current
bushings have spiral grooves.
The last time I made oil grooves I ended up using a Dremmel.
It wasn’t pretty!
Thanks!
Attachments:
Prepare to be boarded!
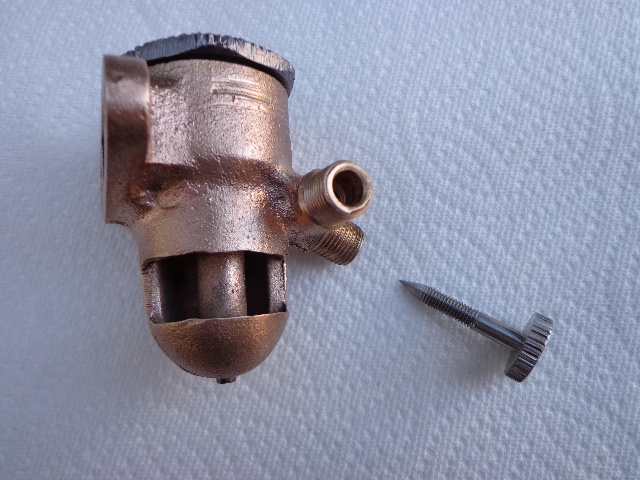
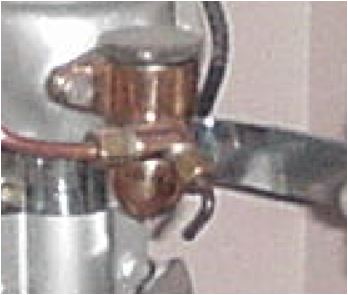
March 27, 2018 at 5:01 am #73099quote Buccaneer:Anyone have a good photo of the fuel line and inlet fitting?The best I can come up with is this one PM T2 sent me.
Is your mixer plated? Mine is bare bones bronze.
Attachments:
 March 27, 2018 at 10:45 am #73103
Looks like your mixer has had the nipple broken off and a repair made by inserting a section of pipe for the fuel line nut to hang onto. Your mixer nipple should look more like Jim’s. If your mixer body is aluminum, it would explain the breakage, and also leaves you fewer options.
BUT – if its bronze that is painted over, you have the option of silver-soldering a new nipple onto the mixer, then you can use a proper compression nut and sleeve on your fuel pipe, and that should solve the leakage issue.
Oil groove in bearing – Not saying its the "best" way to do it – its just the way I do it, cuz I don’t know any better – but my low-precision method to make spiral grooves on the ID of bronze bearings is by using a carbide boring bar and making one heavy cut that covers the majority (maximum 2/3, but a little less will do) of the length of the bearing. I make the cut with the lathe in its lowest back gear speed, and make the cut by withdrawing the bit OUT of the part. You don’t need to make a groove that is 60 thou deep, you’re just making a channel for the oil to get in and do its job. I start by moving the tool bit in to the desired position, then advance the tool into the work the desired depth (I like 0.020" myself) while rotating the spindle by hand and do about 5-6 revolutions right there. The lathe is then turned on while the tool is withdrawn from the bore very quickly (less than a second), and it gives a nice even spiral all the way out. This method does raise a burr at the edges of the groove, so it involves a bit of refinishing work to get the burrs off, but finger sanding usually does it real fast.
transversely, you don’t really need to make a spiral groove, you could get away with a straight one.
Hope it helps.
Best,
PM T2March 27, 2018 at 12:17 pm #73106Thanks again for the replies.
Pretty sure my mixer is aluminum.
I’ll look through my box of brass fittings.
Perhaps I can get the old fitting out,
and re-tap the mixer for a different fitting.Regarding the groove in the main bearings,
I like your idea PMT2. Will have to practice
before doing the real deal.
The finished bushing walls will only be 1/16" thick,
so indeed, the groove won’t be very deep.
I have some 660 bronze hollow tube coming,
1/2" hole, 1" OD. Hope it’s "good stuff".Any ideas on the proper color to paint this Sea King?
It was light grey, but possible signs of black or green
here and there, but that could have been primer.
I have a bunch of parts sand blasted, so I have to
get busy painting pretty soon.Prepare to be boarded!
March 27, 2018 at 3:14 pm #73111quote Buccaneer:The finished bushing walls will only be 1/16″ thick,
so indeed, the groove won’t be very deep.
I have some 660 bronze hollow tube coming,
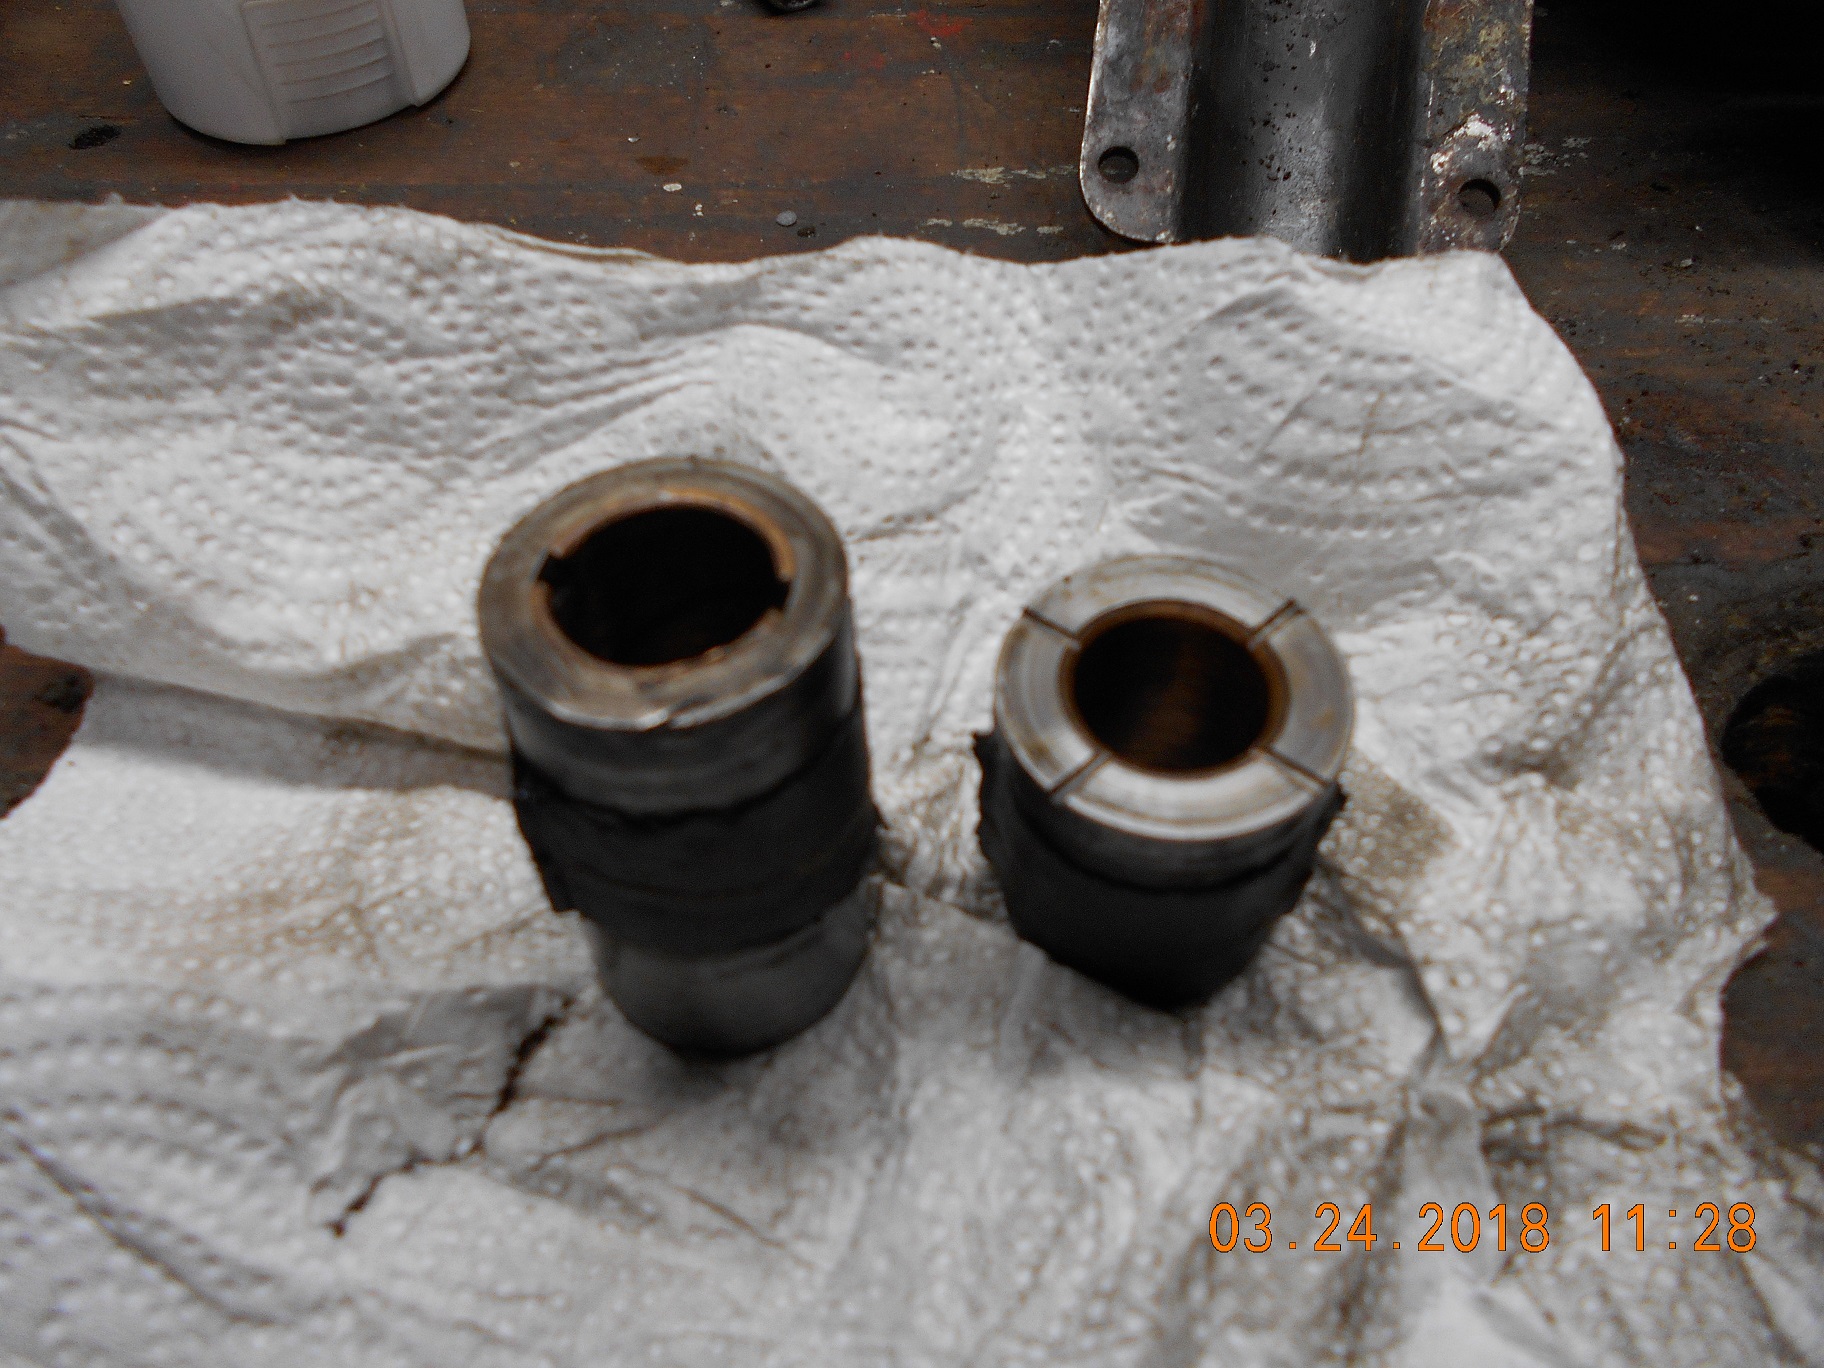
1/2″ hole, 1″ OD.Are your bronze bushings thinwall and pressed into a carrier? Mine were solid with no oil groove and had to be made out of 1.5" and 1.25" stock.
I better not give up on this project as I probably paid more for the 660 than I did for the motor itself!
Attachments:
 March 27, 2018 at 4:13 pm #73117
My crank bushings are thin walled, and they had better
press out! The 660 hollow tube I ordered is 13" long
and cost me $30 from Amazon with the Prime / free shipping.
Do you think your crank bushings had bee re-worked before Mumbles?
Attachments:
Prepare to be boarded!
-
AuthorPosts
- You must be logged in to reply to this topic.