Home › Forum › Ask A Member › ’51-54′ Goodyear 5Hp Carberator Reed clearance Help
- This topic has 9 replies, 4 voices, and was last updated 5 years, 7 months ago by
 lindy46.
-
AuthorPosts
-
September 22, 2018 at 2:48 pm #11303
Hello,
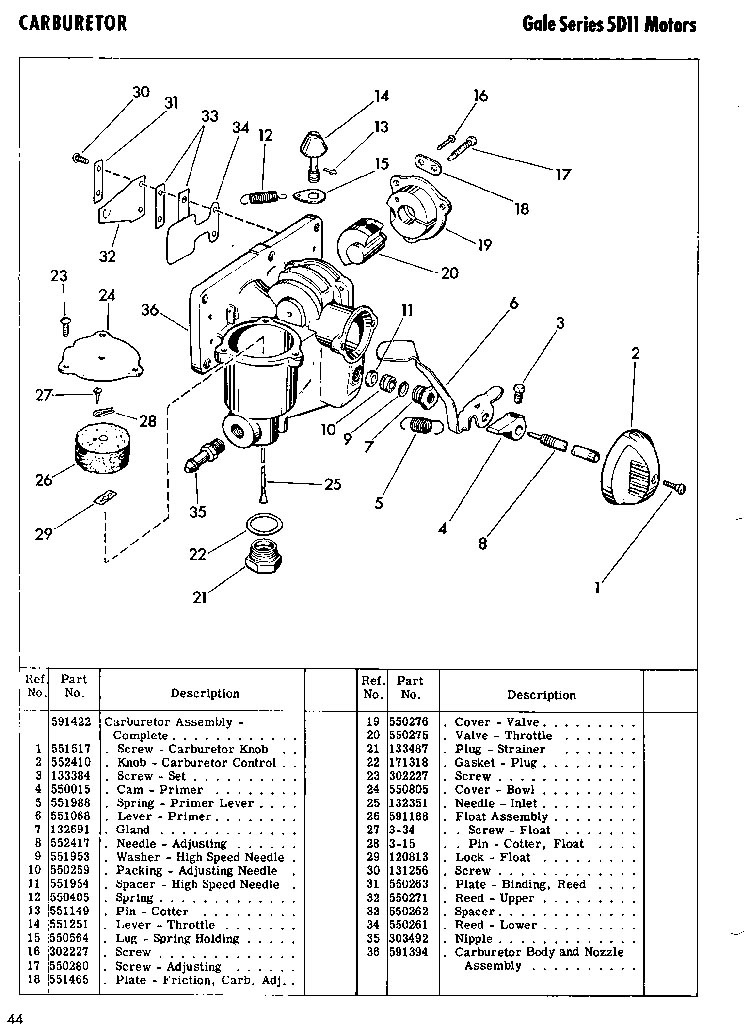
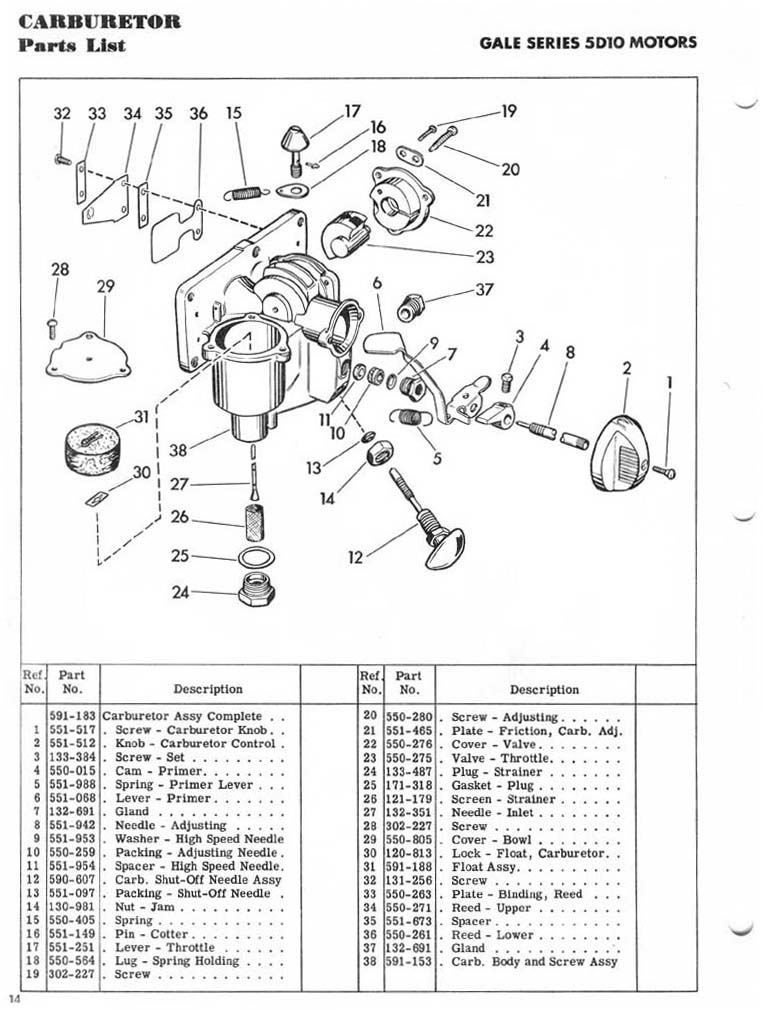
I have a Gale Goodyear 1951-1954 5HP outboard. ’51-54′ Gale, Goodyear 5 HP Model 025-3569 (or 5D10G) (Forward and Neutral shift)
Just putting the Carb back together after a good cleaning.I inspected the reeds and the one on the bowl side of the carb has a couple of .0xx" gap between the upper and lower reed.
The other 2 reeds are touching.
Can anyone tell me if this is correct or how to go about a remedy? Never had to play with Reeds before. Funny since Reed is my last name.
Thank you,
Slimbob’51-54′ Gale, Goodyear 5 HP Model 025-3569 (or 5D10G)
’89’ Gamefisher 9.9 HP
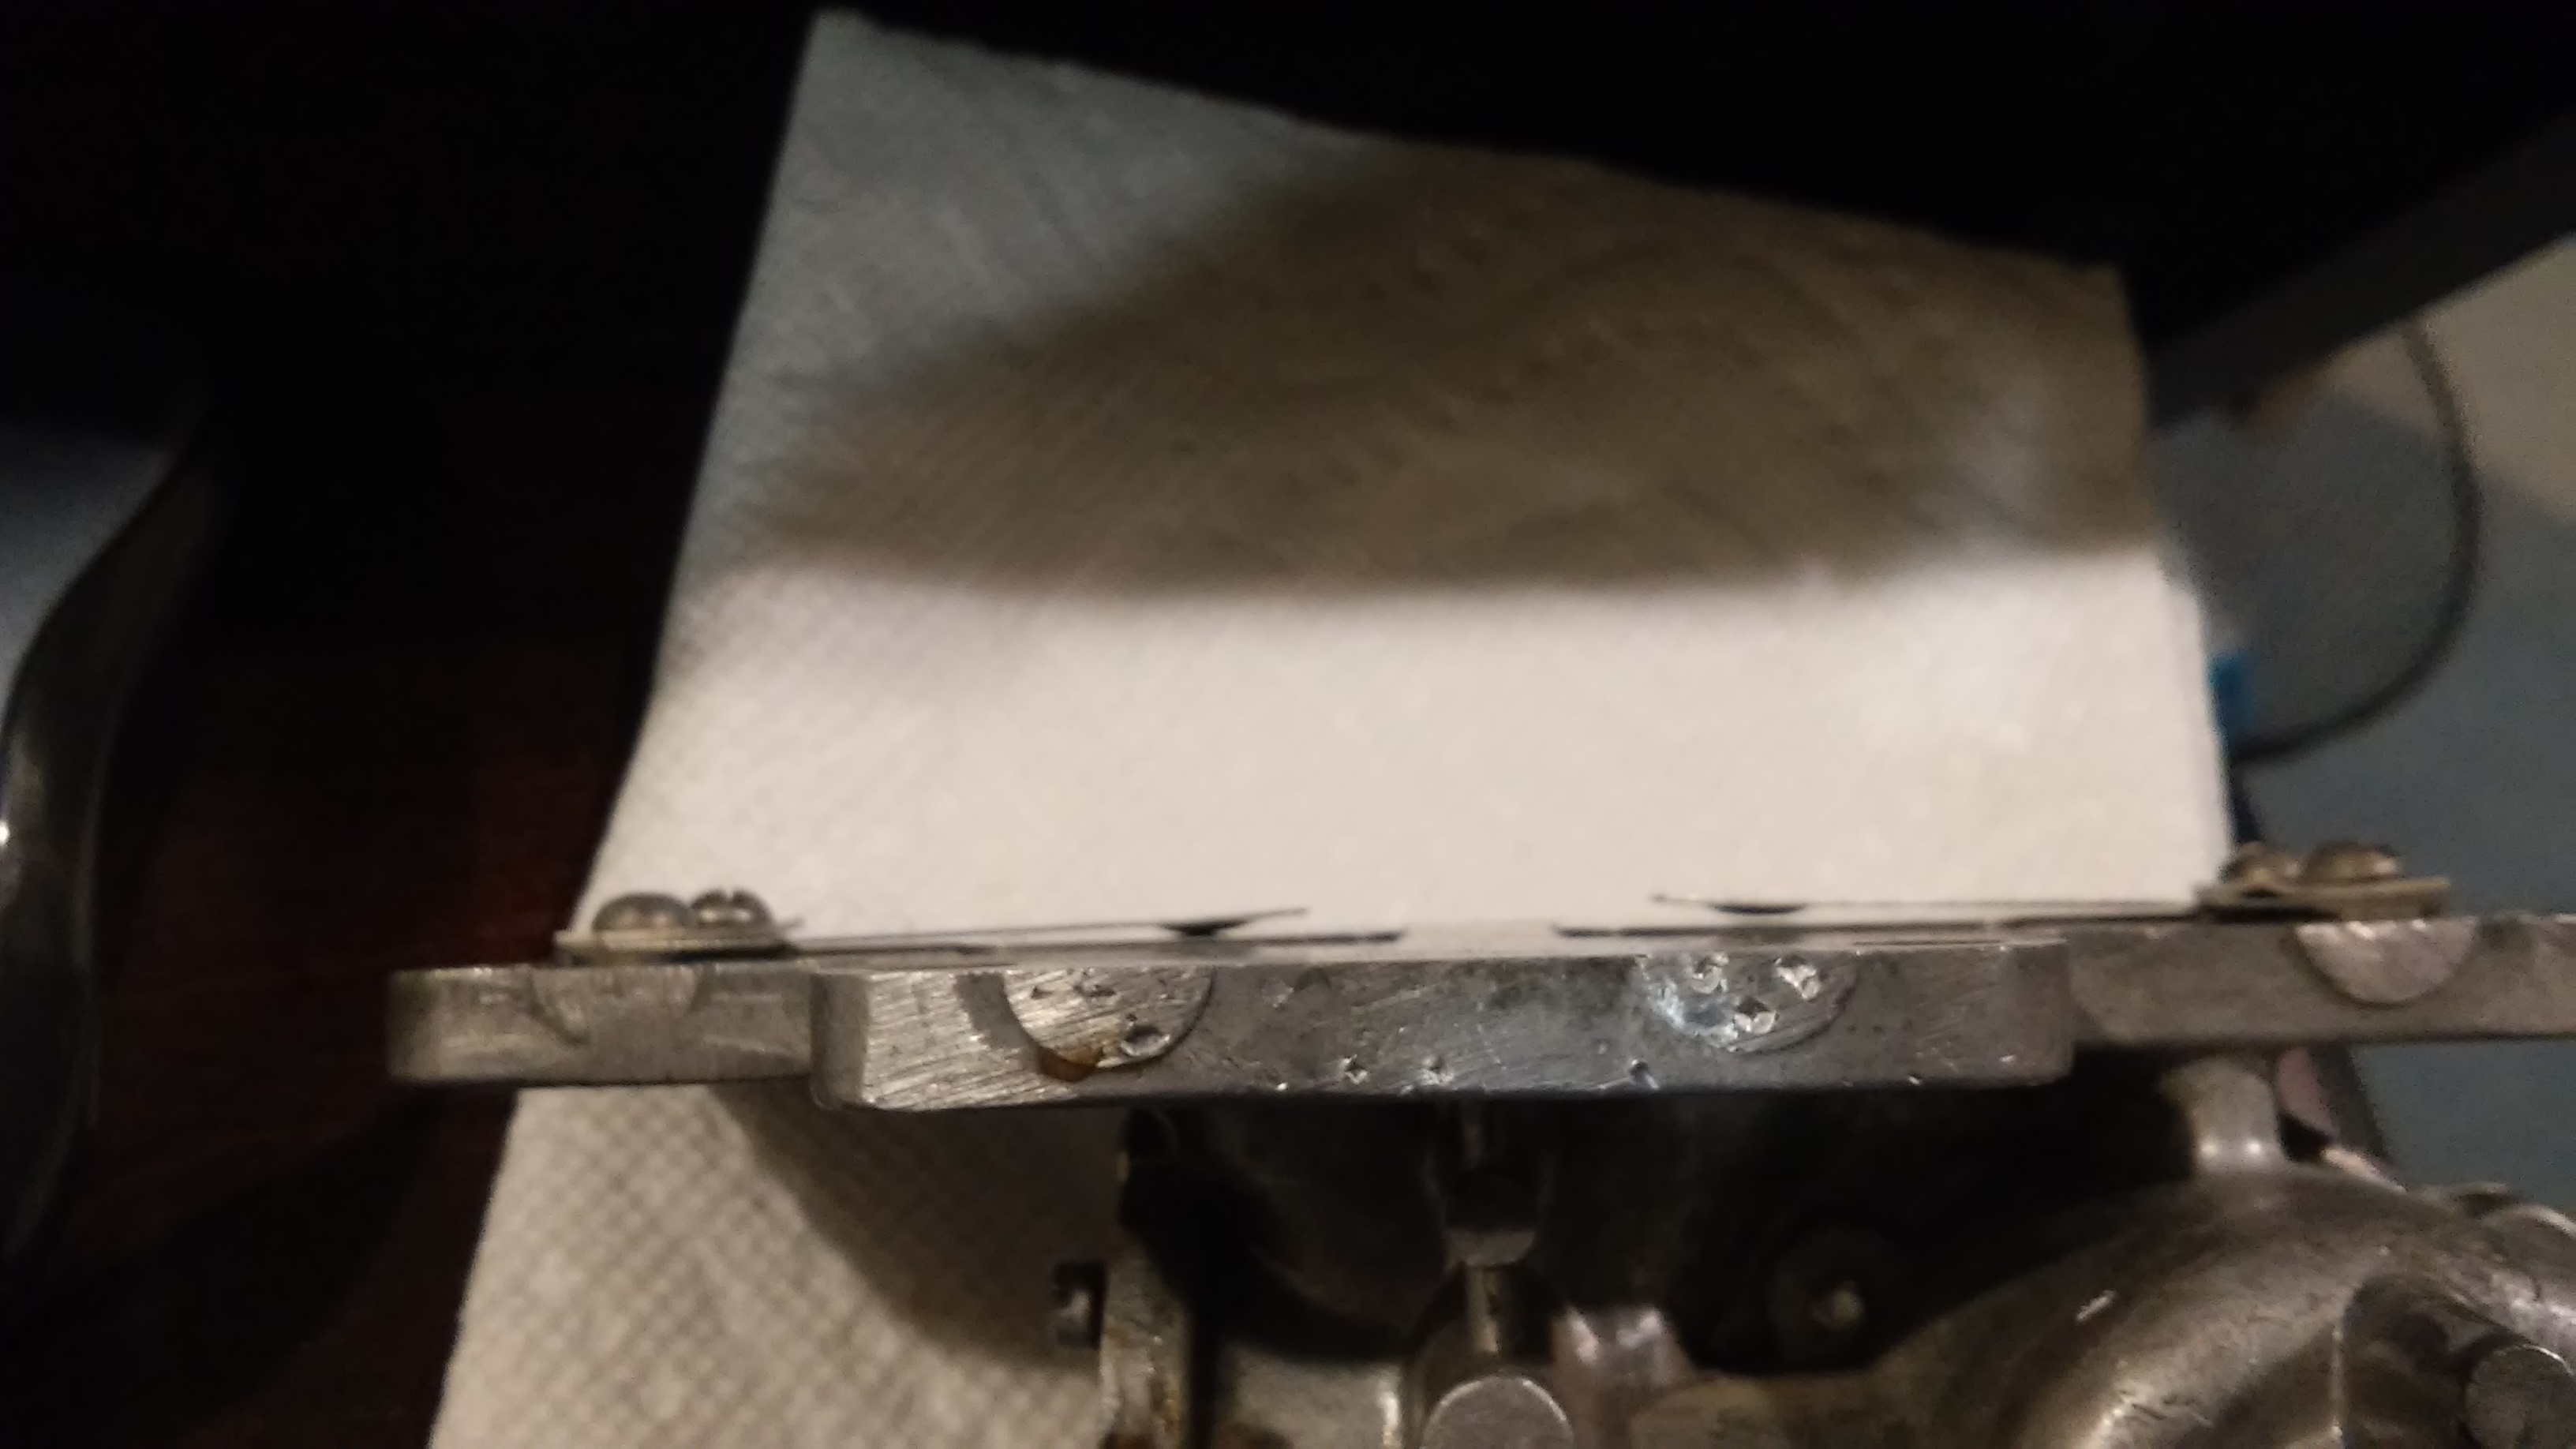
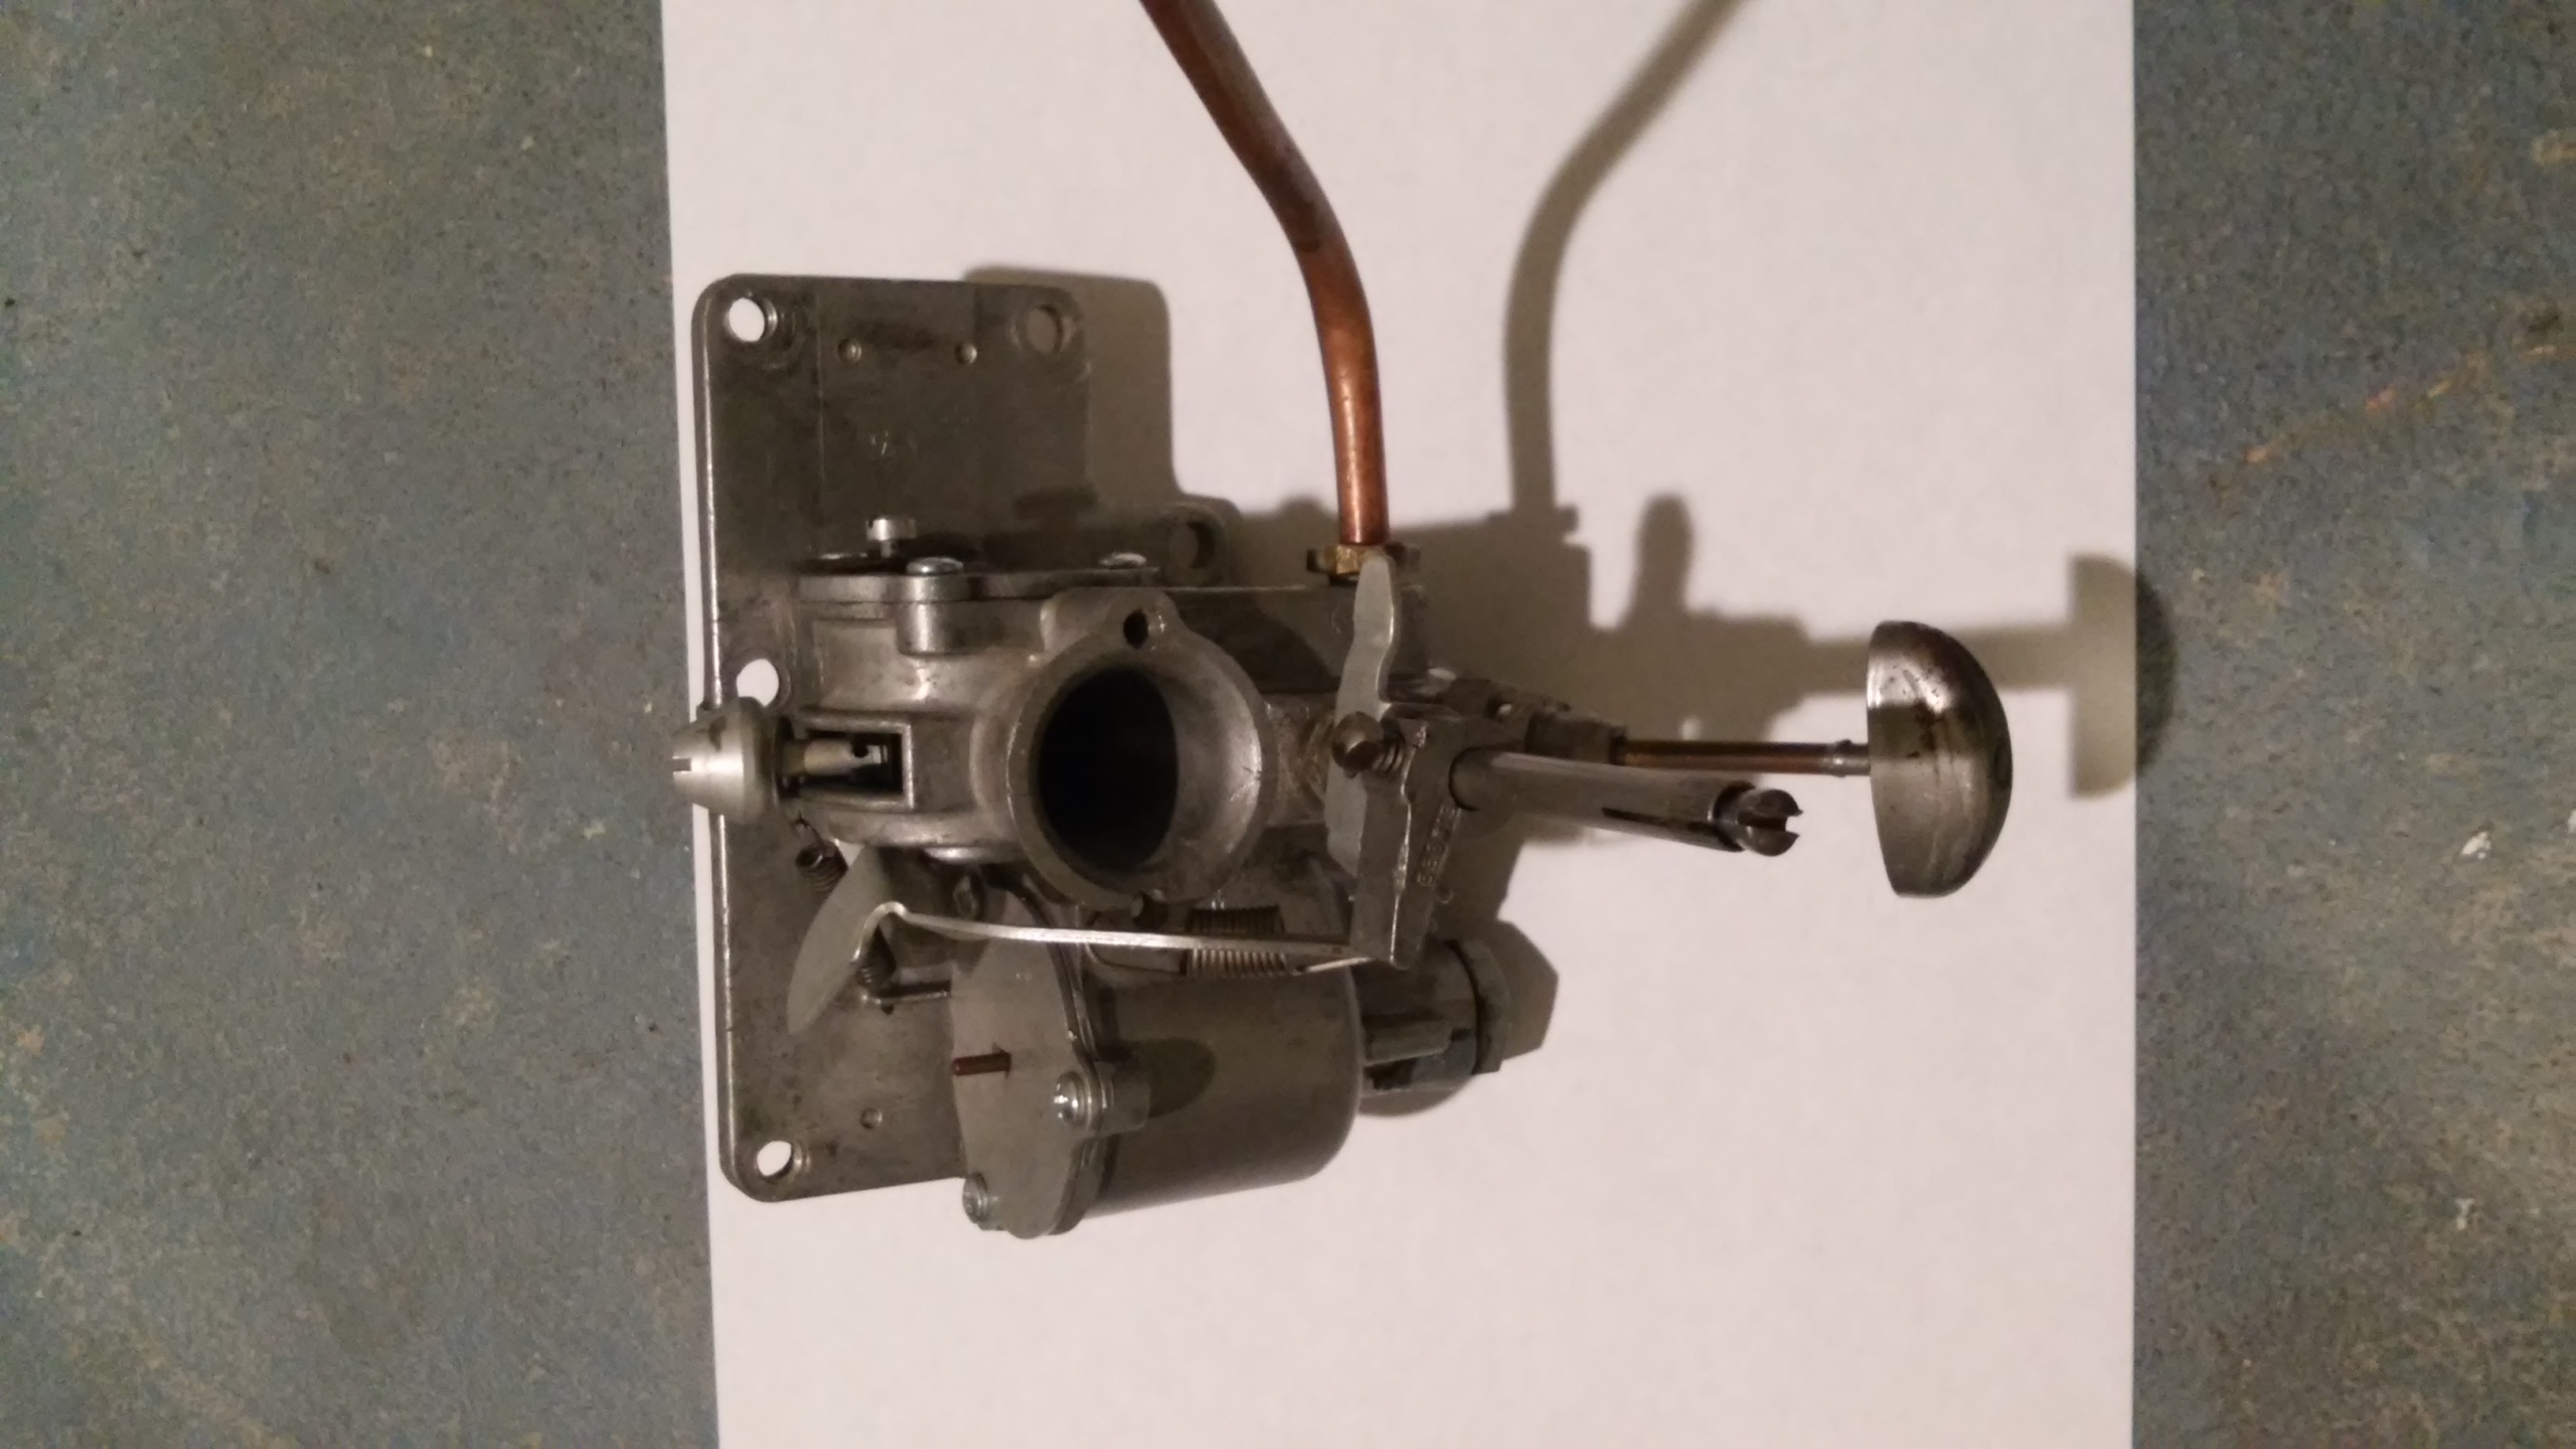
’79’ 12′ Blue Fin semi-VeeSeptember 22, 2018 at 3:13 pm #83360Oh, here’s a pic of the Reeds and the Carb I’m working on.
The Reeds on the right have a gap.
Attachments:
 September 22, 2018 at 4:02 pm #83362
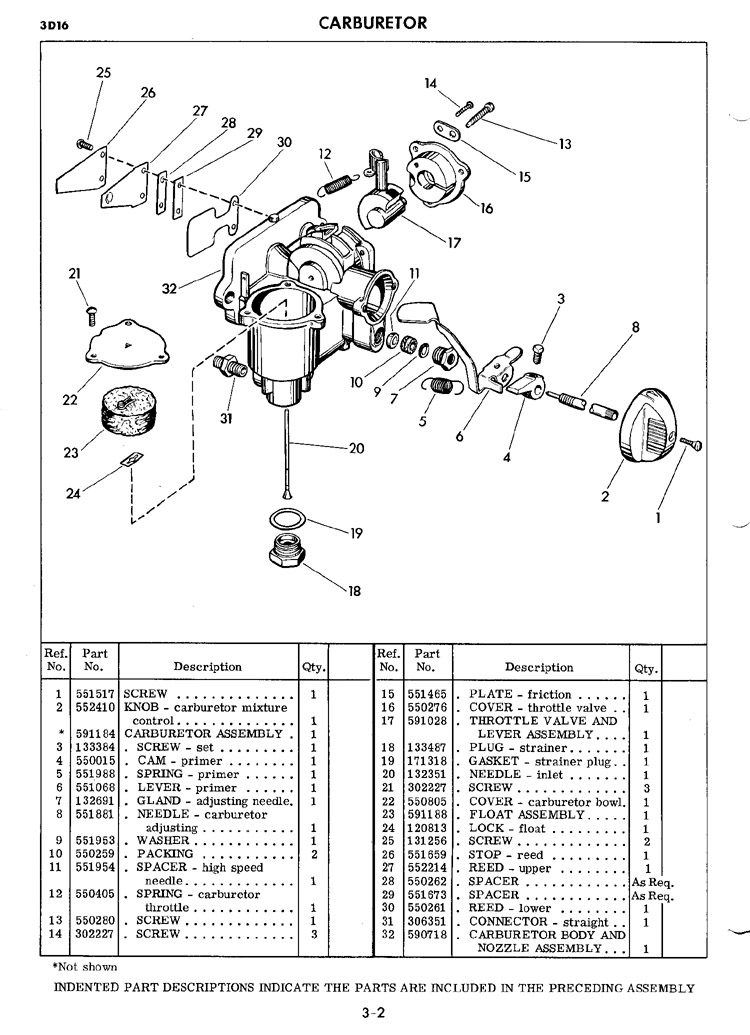
Good question, and one that I have not been able to find an official answer to. Except the Gale service manual says the reed tension was adjusted at the factory (which I doubt).
Anyhoo, what we have there is a upper "reed" which I would prefer to think of as a "spring", on top of the actual or lower reed. In between the upper and lower reed is a spacer, which modifies the amount of pressure the upper (spring) exerts against the lower reed. Simple, but then comes the confusion. Most parts lists show one spacer between the reeds, but some show two spacers on which are virtually the same carb on the same motor. So, I dunno how they decided on that except if it actually was adjusted at the factory. I have seen them both ways on actual carburetors.
As for my own thoughts, I think the upper one should press against the lower one with the slightest of touch. Your opinion may vary.
 September 22, 2018 at 4:22 pm #83364
To make it even more interesting, starting with the 1960 3hp models, they show two spacers of different part numbers (thickness) and a quantity of "as required". That certainly smacks of "adjustment".
Note the 3hps also use a reed stop to limit how far they can open. But the earlier twins such as yours do not have the stop.
 September 22, 2018 at 9:12 pm #83377
Frank is correct, But to check easy is hold the reed block up to a light to look for excess clearance between the block & reed it’self. If it is leaking light it is too loose to use. Keep in mind a small clearance is sealed by the oil/gas mix. The upper reed is also a stop keeping the reed valve from opening too much & breaking. Been out of touch but hope this helps.
September 24, 2018 at 1:14 am #83436Going to try switching the spacer and binding plate tomorrow or switch spacers between the #1 and #2 Reeds tomorrow.
Possibly a P.O. switched them by mistake. I took measures to know which set came from which cylinder.
You can see the space against the white paper towel in the second picture in my first post.
Slimbob
September 24, 2018 at 12:33 pm #83448Just checked a spare carb I have and both upper reeds are touching the lower reeds. There is one spacer between them.
September 24, 2018 at 12:40 pm #83449Thanks Lindy46,
Will let you know how it goes this morning.Slimbob
September 24, 2018 at 6:57 pm #83468Gap problem solved. 1 down, ? to go.
OK, so I removed the set of reeds in question. On inspection I noticed a small dig or something on the spacer. I rubbed it on some fine sandpaper to smooth it out. Also straightened the binding plate with hammer on anvil. Re-assembled and it is now together proper. No spaces.
Need to install the carb and finish the ignition updates. Then the "Lower Unit". Can’t wait to see this engine run.
Thanks for the inputs everyone.
Slimbob
September 25, 2018 at 1:37 pm #83513Make sure when you install the carb that you tighten all those bolts a little at a time – almost like installing a head gasket. I had to play with them, loosening and tightening several times, to eliminate air leaks.
-
AuthorPosts
- You must be logged in to reply to this topic.