Home › Forum › Ask A Member › Help desperately needed with 1950 Chris Craft Challenger
- This topic has 11 replies, 5 voices, and was last updated 5 years, 6 months ago by
joemallon.
-
AuthorPosts
-
October 5, 2018 at 1:05 am #11446
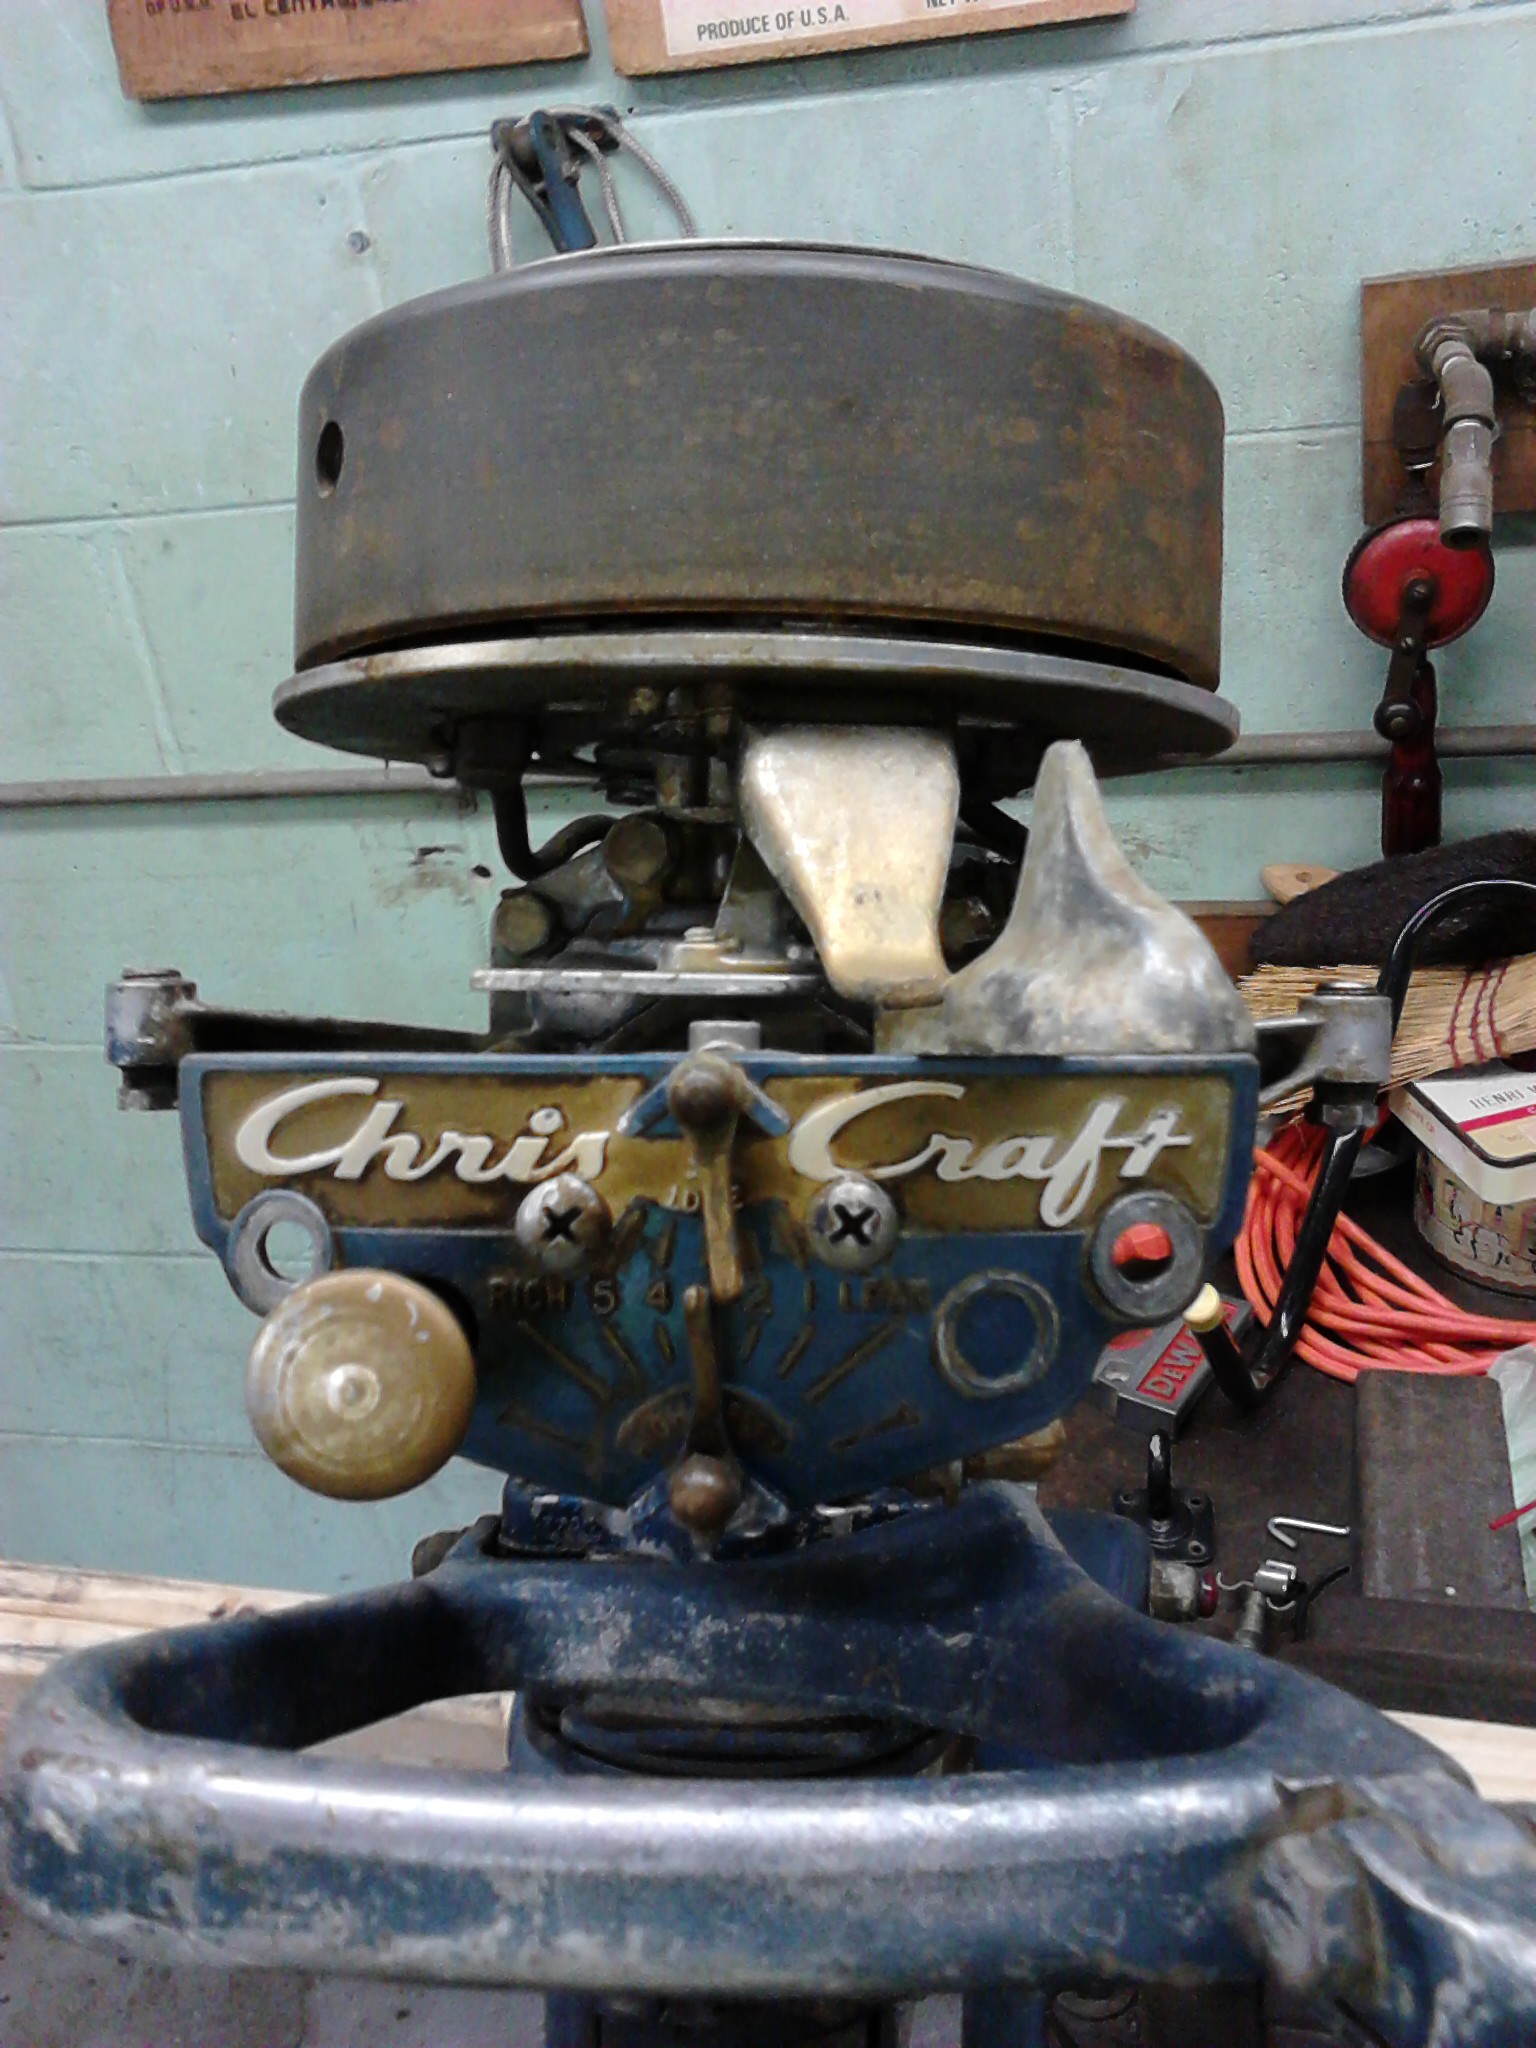
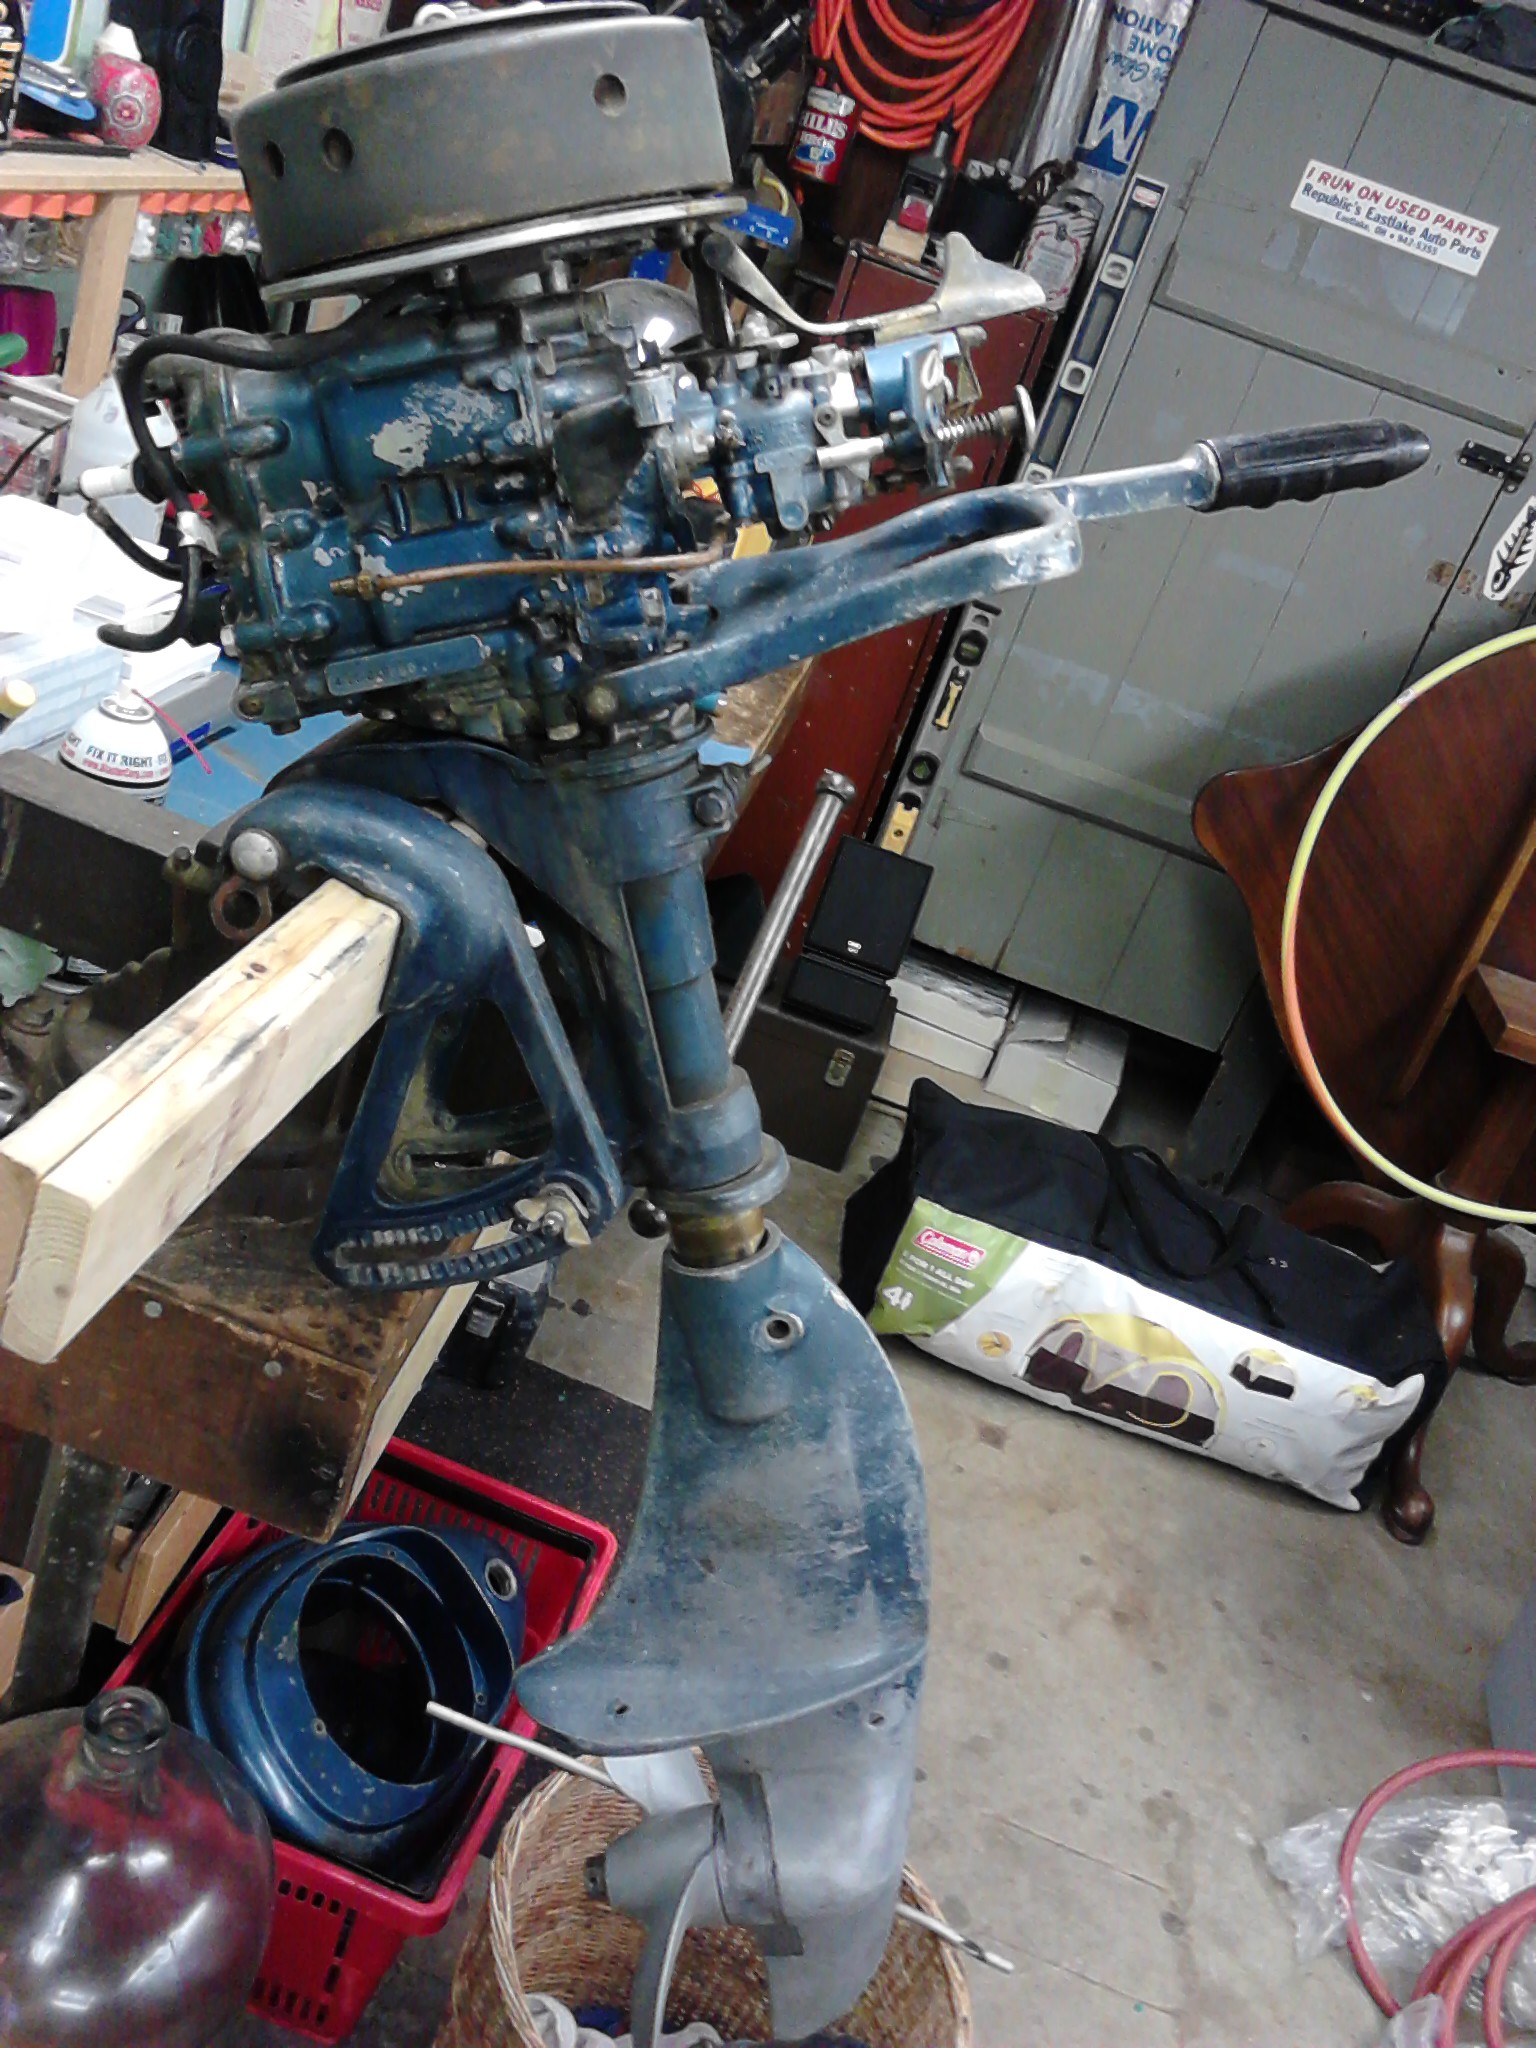
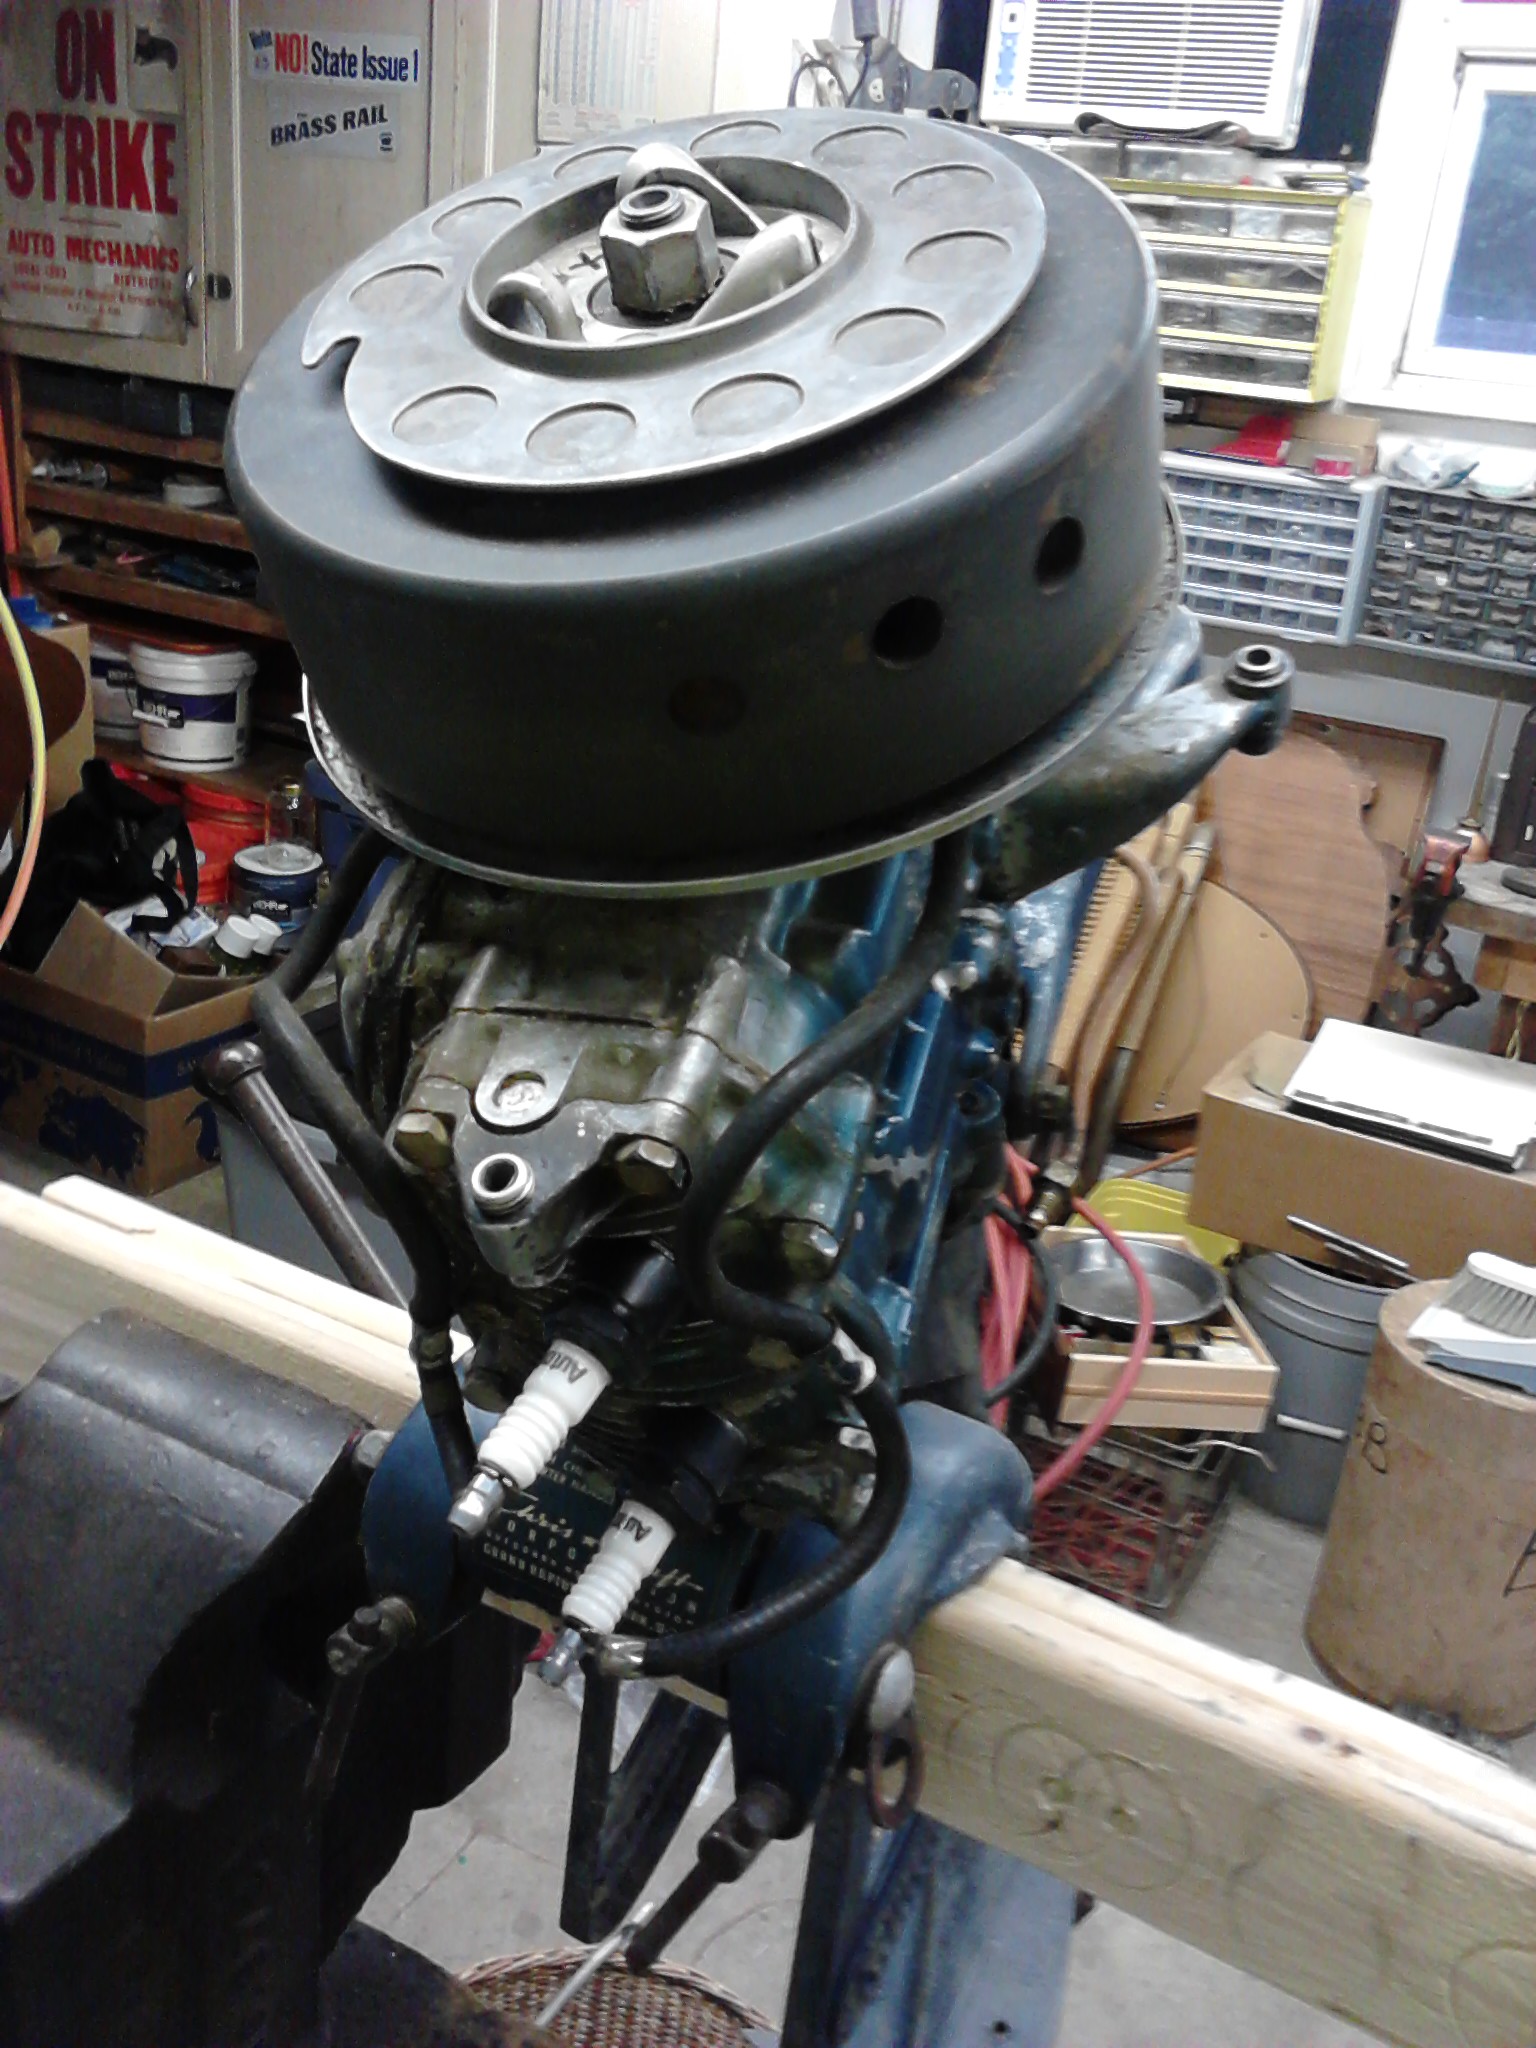
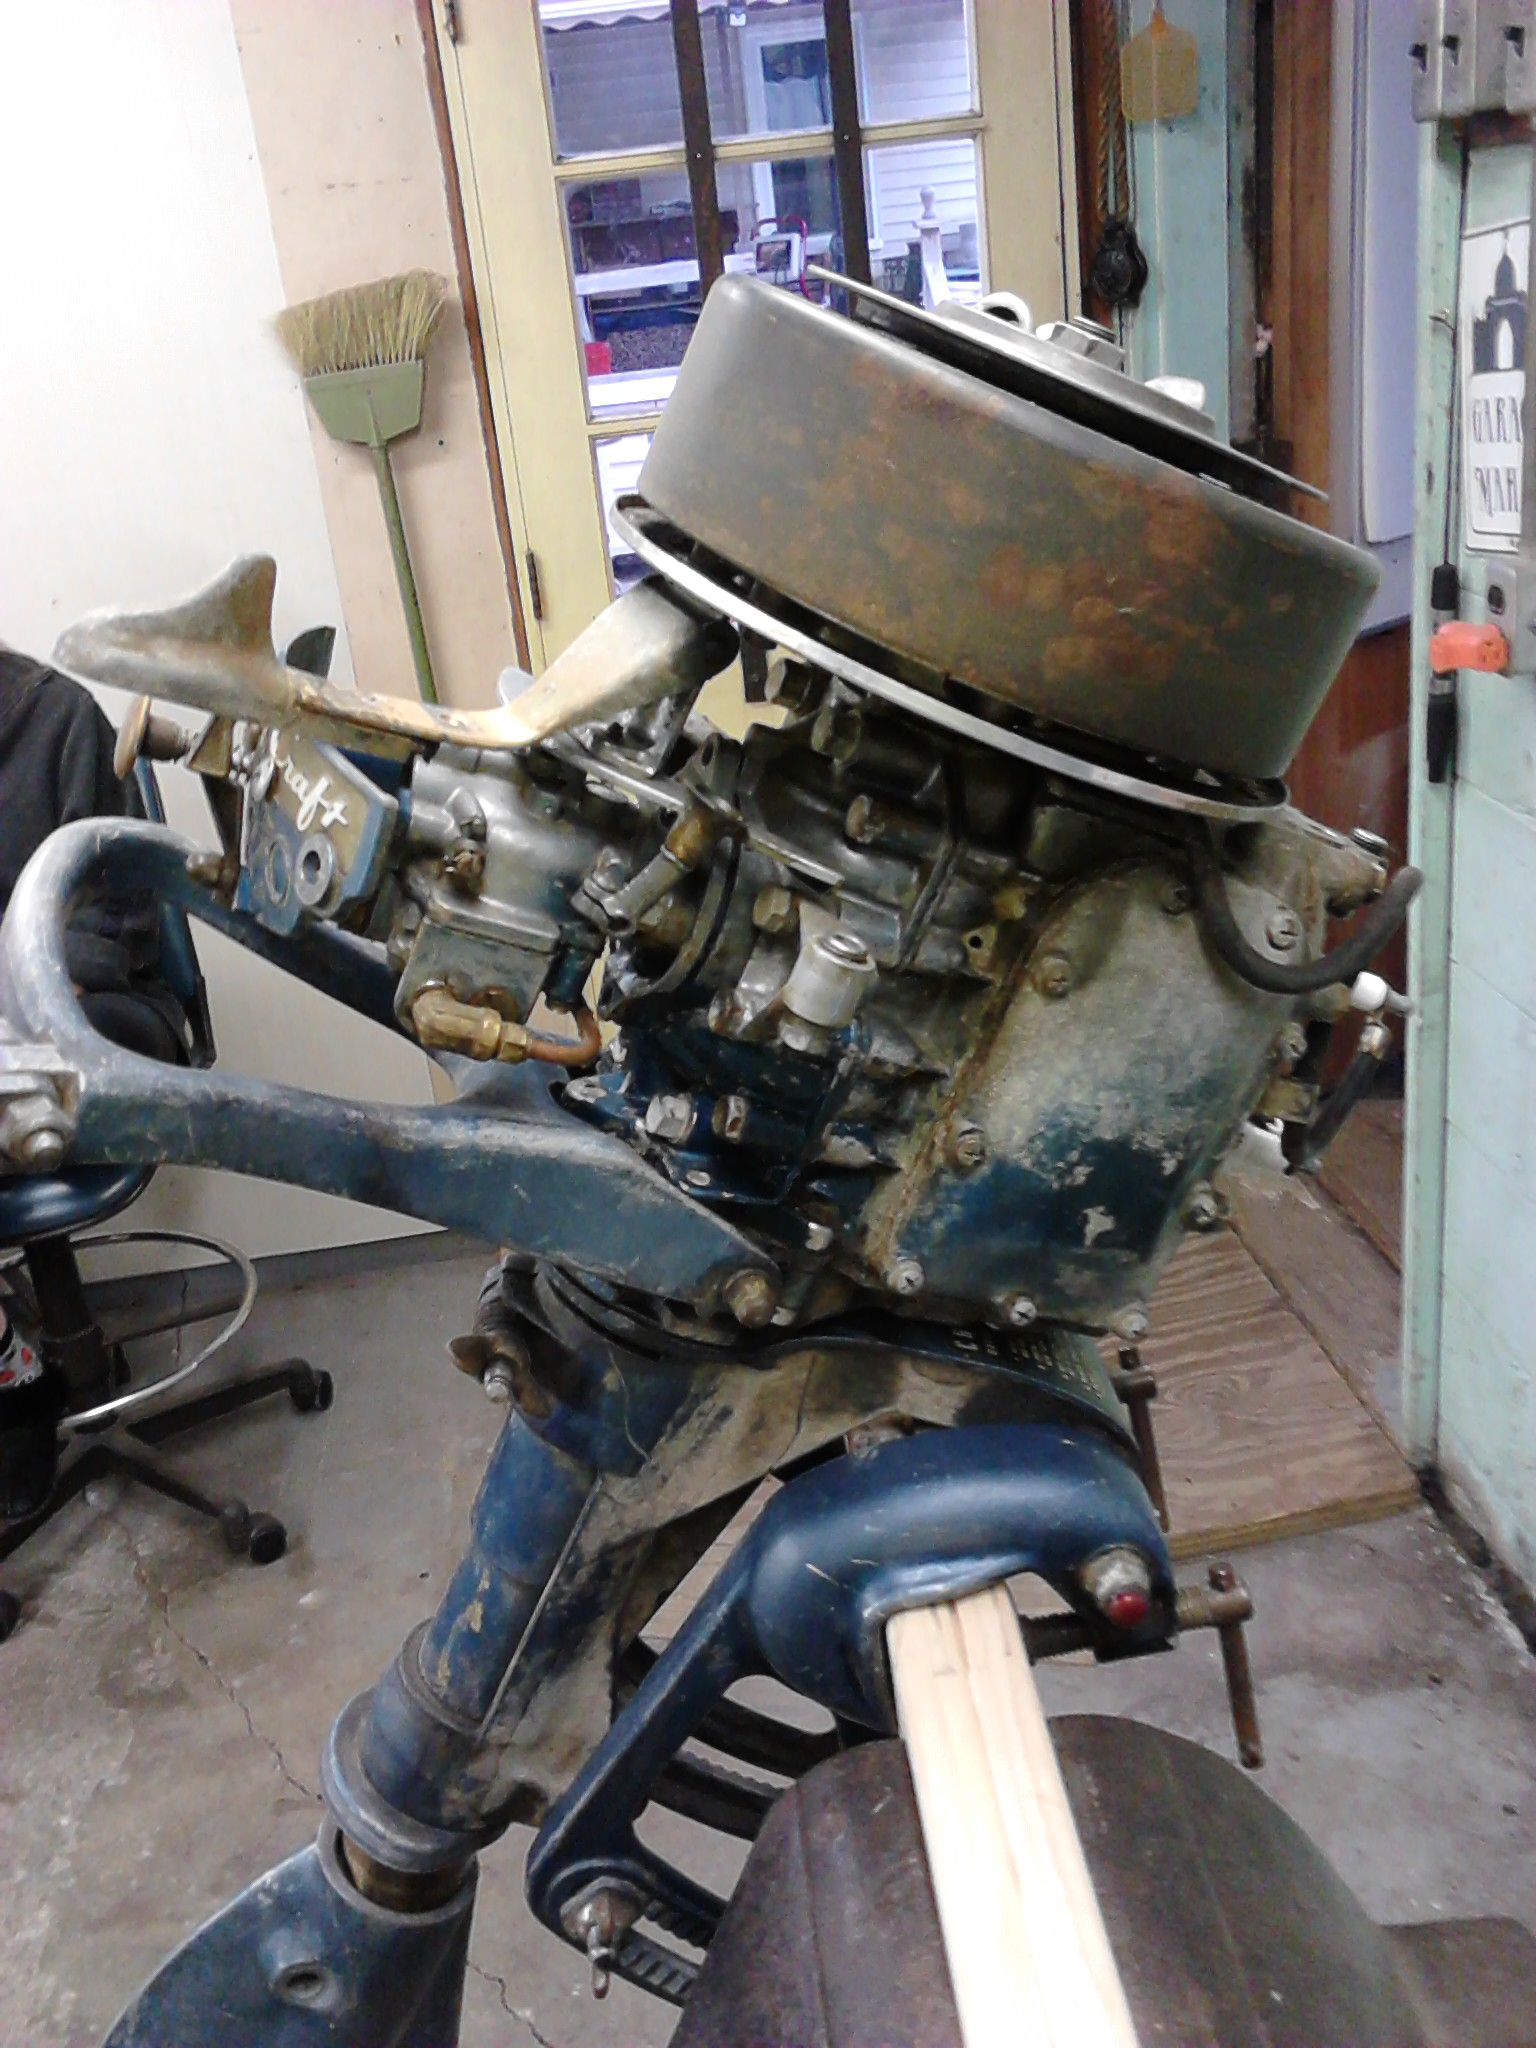
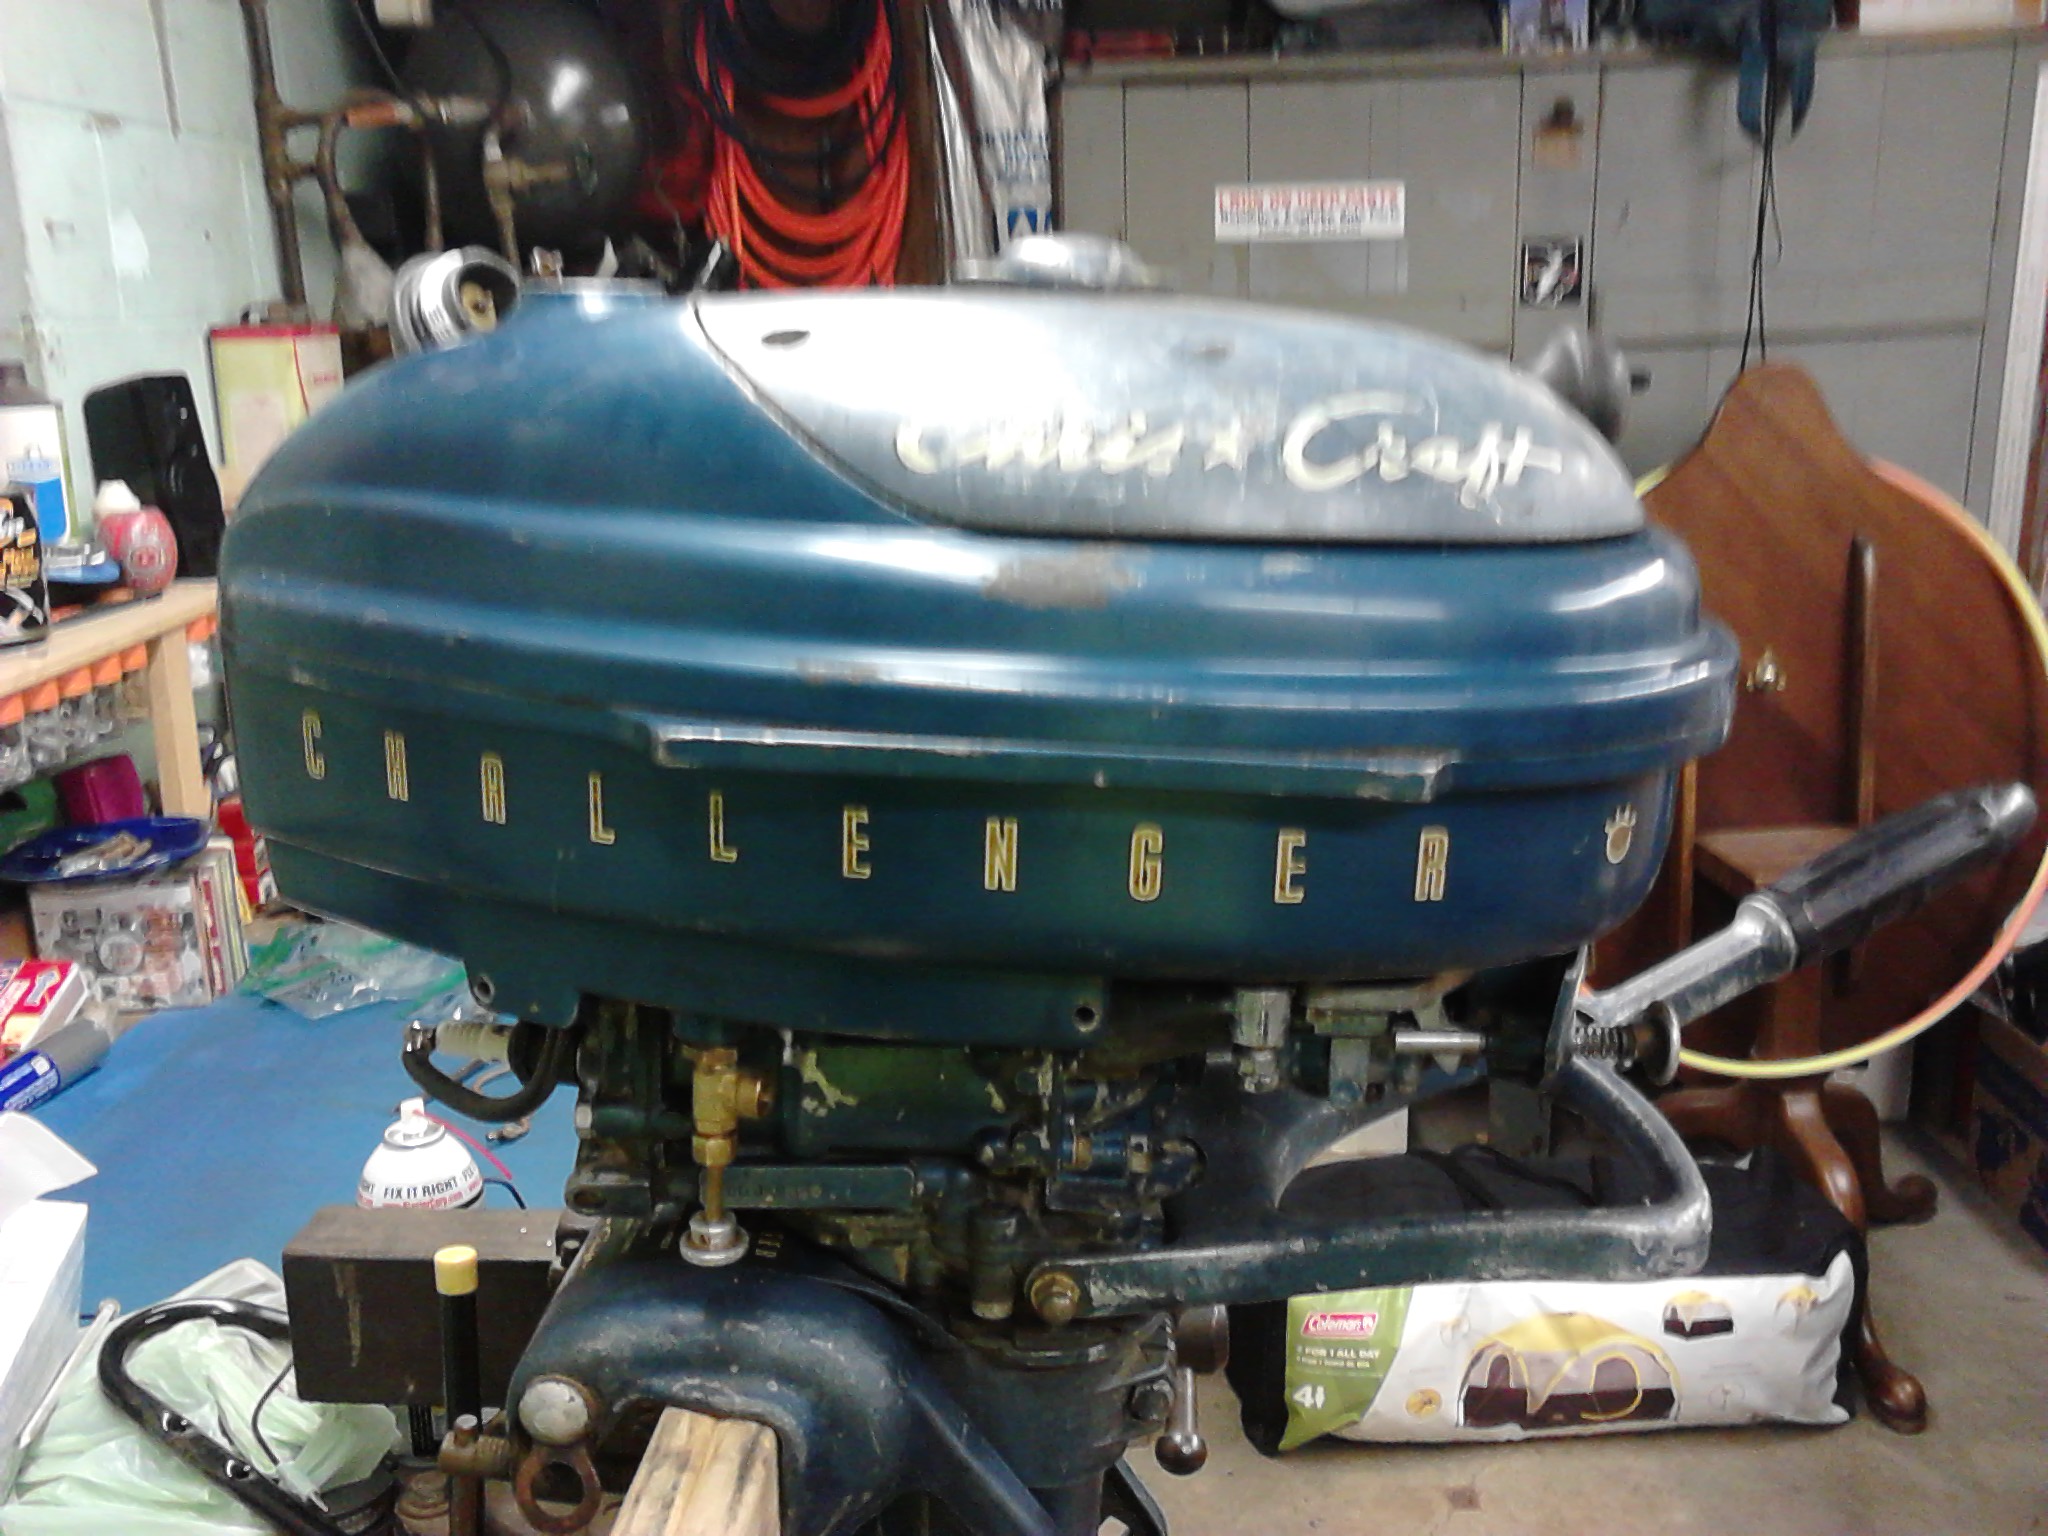
Hi all, I have been working on rehabbing a 1950 Chris Craft Challenger 5.5 that i saved from a scrap pile in Painesville Ohio, and am having a huge amount of trouble getting the lower unit back onto the motor. I can get the drive shaft engaged but for I cant figure out how to get the water tube lined back up to the engine and get the lower unit to go the last bit of the way up so that I can put the locking bolt back in. Any advice would be greatly appreciated and I look forward to hearing back from you!
Thanks,
Joe
Attachments:

 October 5, 2018 at 2:46 am #84015
I had mine 100% apart, but really can’t find any photos to jog my memory
on the process with getting the water tube lined up.
On one outboard, I put it all back together starting with the
power head upside down on the work bench, installing the water tube,
drive shaft, slid the swivel tube over them, and continued working my
way to the gear case.Prepare to be boarded!
October 5, 2018 at 9:34 am #84021I had one and it was a great running motor. Congrats on saving it! I never had mine apart in the same way you did, though. Having a look at a parts diagram:
http://www.chriscraftoutboards.com/chal … ssion.html
It looks like the water tube is retained from above and slides into the lower housing without a grommet, much like old K-model Mercurys did. In the case of Mercury, the tube would often get stuck in the lower housing, sometimes requiring you to cut it off, to remove the lower unit.
My question is this: When you took off the lower housing, was the water tube retained in the lower housing or up somewhere under the power head? If your tube stayed in the lower housing, I am guessing that’s not right; and thus your problem might be getting the tube back in to the upper gland, in a way that was not intended. Let us know if that’s the case?
Long live American manufacturing!
October 5, 2018 at 11:30 pm #84049In my limited experience I’ve learned instaling a l/u with a water tube can be a real pita. And if the job goes smooth you still don’t know if the upper grommet is cracked, melted or restricted. So now I just pull the powerhead first and inspect the grommet. Install the l/u and then p/h. In your case the parts list shows there are 3 parts to look at. Just my 2 cents. Hope this helps.
October 7, 2018 at 2:31 pm #84099Ok, Thank you for your advice! I recently heard back from Lee Holland about my request for parts so I will have to add the grommet to the list and remove the power head before I start re-assembling it. And to answer your question, yes, the water tube was utterly stuck in the lower unit when I pulled it off. This engine is helping me learn ALOT about these old motors. It was frozen up on the lower cylinder when I found it and I have not had the head off after getting it unstuck to inspect the cylinder walls or the piston. I suppose I should just plan to completely tear it down and completely rebuild it at this point, I had just been trying to avoid it as it seems that things like head gaskets and such are impossible to find. Also, does anybody here know if this L/U is supposed to get oil or grease once I get it all back together???
I will keep you posted as the project progresses as it doesnt seem that there are many threads on here about rebuilding these old Chris Craft Challengers.
Thanks again,
JoeOctober 7, 2018 at 3:39 pm #84108I just started getting the power head torn down again and I thought of a few more questions, the first of which being what spark plug was originally recommended for this engine and what should I gap them to? Secondly, what type and thickness of gasket material should I use for the power head base gasket and also for the head gasket? And lastly, does anybody here happen to have a 1950 Chris Craft Challenger Owners Manual and/or a Service Manual. Any advice would be greatly appreciated as usual, I look forward to hearing back from you!
Thanks,
JoeOctober 7, 2018 at 4:46 pm #84112I’m not recommending this site as I have no idea what your $1.99 will actually end up purchasing:
http://www.classicboatwork.com/manuals/ … nuals.html
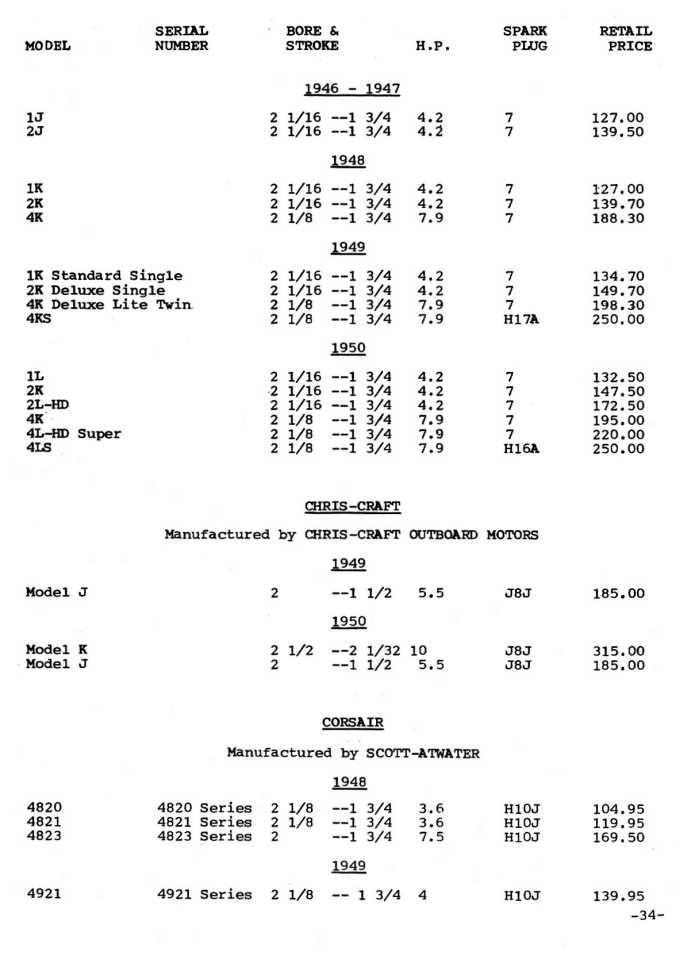
October 7, 2018 at 4:50 pm #84113The chart says J8J, but you’ll have to use J8C instead.
Gap, probably .030.
Attachments:
Prepare to be boarded!
October 7, 2018 at 8:41 pm #84128Man, I wouldn’t take off the head unless I was SURE it needed to come off….Head gaskets usually have a metal fire ring that you can’t really reproduce in the basement….
As for plug gap, my Challenger had a Bendix magneto. They usually can’t take a joke; so my two cents would be .025", like many old Mercs with Bendix mags used to call for. And in order to make them run without skipping occasionally, I have closed them down to .020 and even .015!
Long live American manufacturing!
October 9, 2018 at 9:05 pm #84203Thank you guys very much for your help and advice! I decided to tear the motor back down and I am glad that I did, When I pulled the exhaust manifold/water jacket (correct me if my terminology is off) I found that it was utterly caked and clogged up with 60 years worth of carbon buildup and sludge. I honed the gasket surfaces back to true flat as they were pretty warped and gave it all a good thorough cleaning with a toothbrush, some B-12 ChemTool and good old fashioned elbow grease. Luckily, with the exhaust manifold plate off there is a clear and open passage to the bottom of the powerhead that should make it a piece of cake to line up the water tube with a curved pick and some patience. I am going to use a mechanics scope to check the water tube grommet before I install the lower unit. I will post some pictures of my progress shortly.
Thanks,
Joe -
AuthorPosts
- You must be logged in to reply to this topic.