

Home › Forum › Ask A Member › SOLVED – 1957 RDE-19 35hp. Belly pan / exhaust cover.
- This topic has 28 replies, 8 voices, and was last updated 1 month ago by
JACQUES.
-
AuthorPosts
-
July 23, 2026 at 2:21 pm #325034
Good day folks!
To remove the exhaust cover on the side of the power head of my 1957 RDE-19 35hp, is it necessary to remove the belly pan?When looking at it, I see there several screws at an impossible area (pretty much touch the side / curve of the belly pan), so I figured I’d come here and ask for tips and tricks, while I fully suspect I’ll just need to remove the belly pan anyway.
July 23, 2026 at 5:18 pm #325039Yes, it would be best to remove the belly pan to remove the exhaust cover. The belly pan is easily removed with just a few screws holding it in place. Note that exhaust cover screws are sometime notorious for being stuck and difficult to remove so go easy and don’t be afraid to apply some heat to the screws if they don’t back out easily.
Bob
1937 Champion D2C Deluxe Lite Twin
1954 Johnson CD-11
1955 Johnson QD-16
1957 Evinrude Fastwin 18
1957 Evinrude 3022
1958 Johnson QD-19
1958 Johnson FD-12
1959 Johnson QD-20
1982 Evinrude 25hp“Every 20 minute job is only a broken bolt away from a 3-day project.”
"Every time you remove a broken or seized bolt an angel gets his wings."July 23, 2026 at 7:01 pm #325044Yes, it would be best to remove the belly pan to remove the exhaust cover. The belly pan is easily removed with just a few screws holding it in place. Note that exhaust cover screws are sometime notorious for being stuck and difficult to remove so go easy and don’t be afraid to apply some heat to the screws if they don’t back out easily.
Ok, that’s what I suspected.
Does the belly pan come off in two pieces?
July 23, 2026 at 11:31 pm #325050Yes two pieces, front and rear half. You only need to remove the rear piece to get full access to the lower exhaust cover screws. Here’s a link to the parts diagram and list for the entire shroud assembly of your motor. Referring to the diagram, you’ll need to remove screw #30 and #41 to remove the rear pan section. You can also find the rest of the parts diagrams for the other assemblies for your motor on this same site.
Bob
1937 Champion D2C Deluxe Lite Twin
1954 Johnson CD-11
1955 Johnson QD-16
1957 Evinrude Fastwin 18
1957 Evinrude 3022
1958 Johnson QD-19
1958 Johnson FD-12
1959 Johnson QD-20
1982 Evinrude 25hp“Every 20 minute job is only a broken bolt away from a 3-day project.”
"Every time you remove a broken or seized bolt an angel gets his wings."1 user thanked author for this post.
July 24, 2026 at 6:25 pm #325082Yes two pieces, front and rear half. You only need to remove the rear piece to get full access to the lower exhaust cover screws. Here’s a link to the parts diagram and list for the entire shroud assembly of your motor. Referring to the diagram, you’ll need to remove screw #30 and #41 to remove the rear pan section. You can also find the rest of the parts diagrams for the other assemblies for your motor on this same site.
Worked. Very easy to remove.
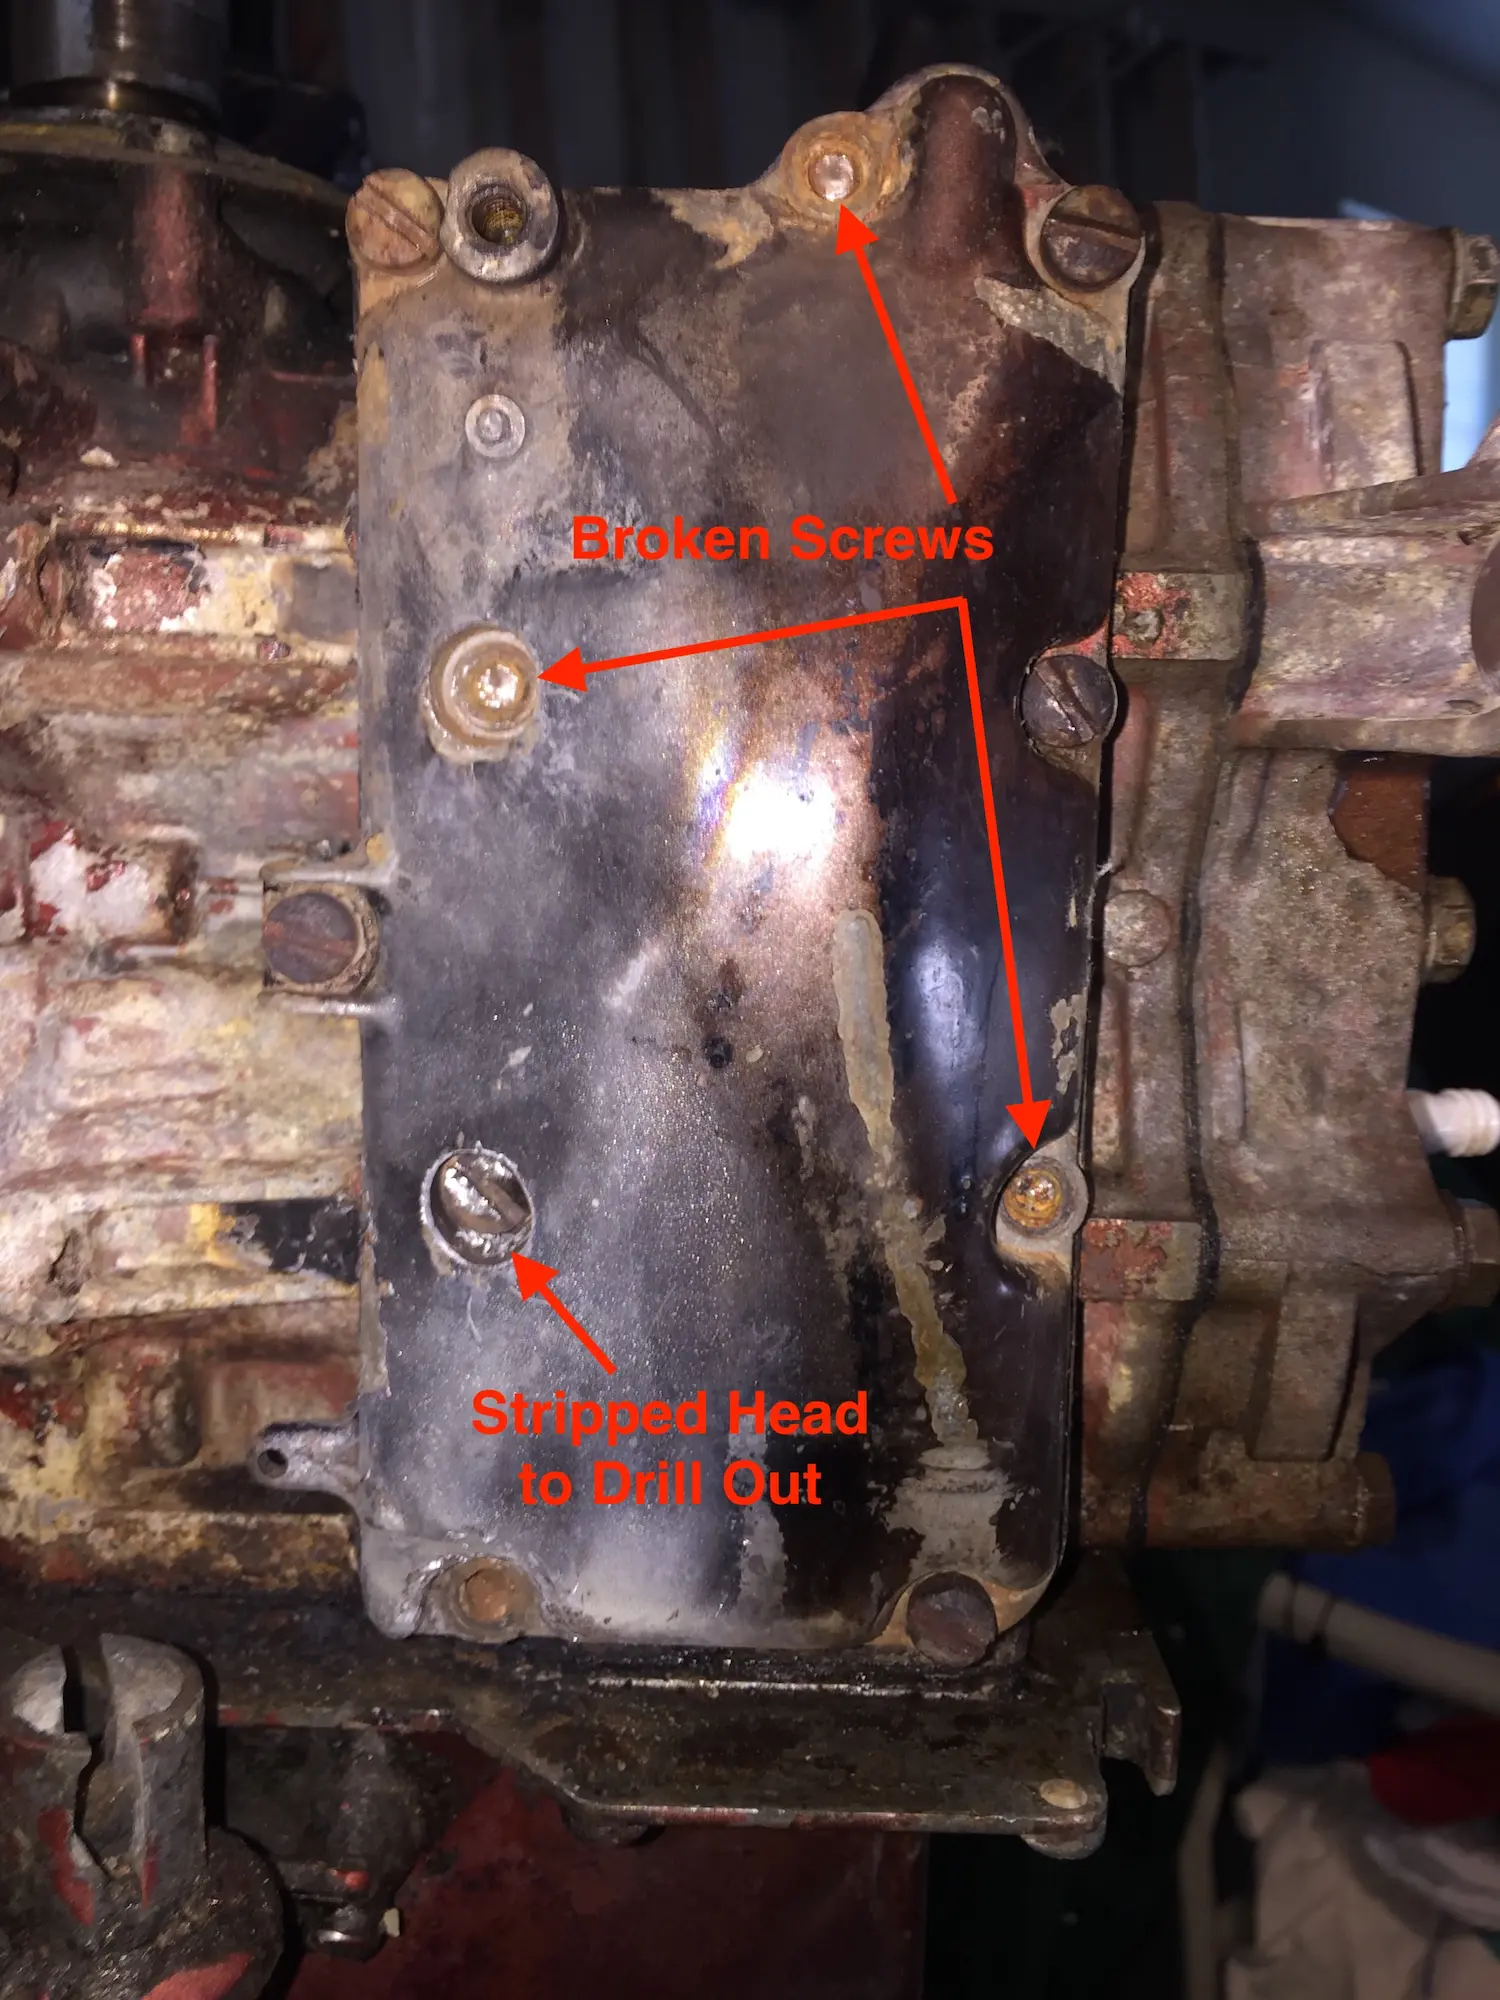
July 24, 2026 at 7:40 pm #325083Let us know how you make out on removing the exhaust cover screws. There are usually a few of them that will present a challenge. Here’s a pic of a real crusty one I had a few years ago – even using the torch I had 3 break off and 1 had a boogered up head on the screw I had to drill off. Once I got the cover off, I got them all removed with the torch, penetrating oil and lots of patience. Yours look like they should be much easier to get out.
Bob
1937 Champion D2C Deluxe Lite Twin
1954 Johnson CD-11
1955 Johnson QD-16
1957 Evinrude Fastwin 18
1957 Evinrude 3022
1958 Johnson QD-19
1958 Johnson FD-12
1959 Johnson QD-20
1982 Evinrude 25hp“Every 20 minute job is only a broken bolt away from a 3-day project.”
"Every time you remove a broken or seized bolt an angel gets his wings."July 25, 2026 at 7:45 am #325096Let us know how you make out on removing the exhaust cover screws. There are usually a few of them that will present a challenge. Here’s a pic of a real crusty one I had a few years ago – even using the torch I had 3 break off and 1 had a boogered up head on the screw I had to drill off. Once I got the cover off, I got them all removed with the torch, penetrating oil and lots of patience. Yours look like they should be much easier to get out.
Ooooh, that’s a crusty one for sure… Glad it seems like the screw heads snapped off leaving exposed shanks once the exhaust cover was removed. Removing that cover must have been a chore in itself, the salt locked it in place I’m sure. I would have had no problem just “wasting” that cover with an air hammer/chisel to expose the studs so you can have round two with the vise grips and torch. Hope it worked out finally.
July 25, 2026 at 9:02 am #325099Don – It wasn’t too bad getting the cover off once I drilled the head off the one screw with the broken head on it. I just worked a putty knife all around the edge of the cover and moved it enough to get a small wedge under it and work the wedge all around. And yes, the screws all broke off with enough of the shank exposed I could grab 2 of them with vise grips and the other 2 I put a double jam nut on them. They were all seized up tight and it took about 3 days working off and on with the torch and penetrating oil to finally get them all out.
Bob
1937 Champion D2C Deluxe Lite Twin
1954 Johnson CD-11
1955 Johnson QD-16
1957 Evinrude Fastwin 18
1957 Evinrude 3022
1958 Johnson QD-19
1958 Johnson FD-12
1959 Johnson QD-20
1982 Evinrude 25hp“Every 20 minute job is only a broken bolt away from a 3-day project.”
"Every time you remove a broken or seized bolt an angel gets his wings."July 25, 2026 at 3:29 pm #325116Don – It wasn’t too bad getting the cover off once I drilled the head off the one screw with the broken head on it. I just worked a putty knife all around the edge of the cover and moved it enough to get a small wedge under it and work the wedge all around. And yes, the screws all broke off with enough of the shank exposed I could grab 2 of them with vise grips and the other 2 I put a double jam nut on them. They were all seized up tight and it took about 3 days working off and on with the torch and penetrating oil to finally get them all out.
Patience is key for sure.
July 25, 2026 at 11:18 pm #325129I have three screws that won’t budge.
The rest came out with minimal effort.The top two screws are in little recessed slots, so I have them soaking in penetrating oil. The third is a free floater, so I spray it through out the day.
I ordered a manual impact driver tool to hopefully jar them loose.
For your screws – were you able to extract the shanks? Did you need to tap and die new holes?
-
AuthorPosts


- You must be logged in to reply to this topic.