Home › Forum › Ask A Member › Johnson CD-14 Frozen Pinion Gear-Shock Absorber
- This topic has 44 replies, 11 voices, and was last updated 6 years, 3 months ago by
Don.
-
AuthorPosts
-
January 11, 2020 at 12:22 pm #191616
Success!! Screwdrivers didn’t work, but punch got it out. Not as rusty as I thought. I guess running it dry of oil overheated it and the heat caused everything to seize up. Will soak all parts for another day and start cleaning up and order gaskets etc. Drive shaft and shift rod bearings look ok. I’d rather not replace them unless one of you experts insists otherwise. Once this one is back running I have similar vintage Johnson 10, Evinrude 15, E 18, E 3 and an old old Johnson 1.5, all in need of various repairs. Should keep me busy for a few years!
Thanks again.Jim
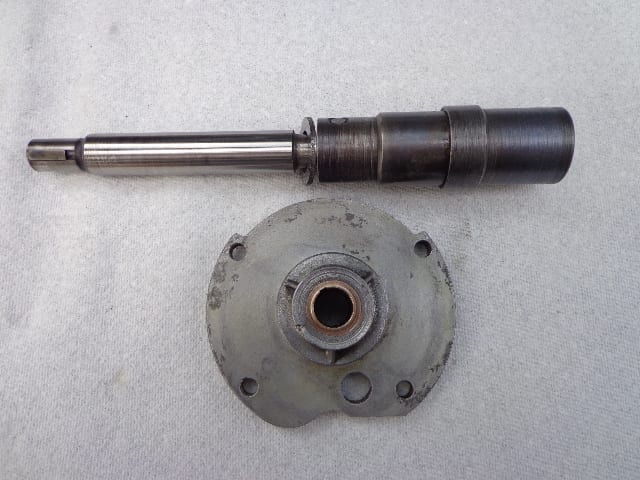
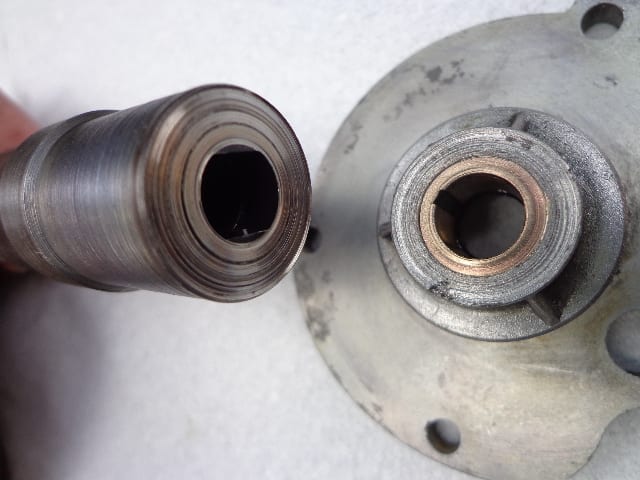
I know we have mentioned it, but worth repeating…Check the length of the lower driveshaft/shock absorber before reassembly. Oftentimes the shock will “expand/break” pushing the two parts of the lower driveshaft apart extending its length….The result is that the top of the lower driveshaft will rub/bind on the upper bushing/seal assembly, this will cause the driveshaft to bind. Look on the bottom of the upper seal/bushing housing, rubbing will be evident if there is a problem
On to your other issue, whether or not to reseal this gearcase completely. There are definitely two schools of thought on this. One opinion is that the unit should be completely resealed before reassembly to avoid water intrusion/damage after assembly. You can’t really make the comparison between a slightly leaky gearcase and an old car engine that leaks oil slightly. In most cases, you would not bother to reseal an old car engine, not worth the money. In addition, the engine’s oil level can be monitored easily, and oil added as necessary….
The outboard gearcase is another story. These units really have pretty much a zero tolerance for lube leakage, why is that you ask….First of all, as the oil leaks out, raw water is likely to leak back into the gearcase which will destroy it eventually. Furthermore, gearcase oil level is not that easy to check…Even if the gearcase appears to be full of “lube”, all the water is probably at the bottom of the gearcase. Trying to “top off” the outboard gearcase is difficult as well…Probably easier to just drain and refill it.
The other argument is “why go through the trouble of replacing seals and orings that appear to be OK”. I can understand this argument if you know for a fact that the gearcase was recently resealed. The part you mentioned, the shift rod oring, is a common source of leakage on these gearcases, and the oring on the prop shaft bushing/seal housing should be discarded during every repair job.
It is tough for me to make a recommendation here. I get frustrated when resealing these gearcases is described as relatively simple, this is a tricky procedure that must be performed perfectly….Some special tools are required, and the parts are easy to damage while trying to remove/install seals and bushings. The one tool that is absolutely necessary is some sort of pressure tester to check your work once the gearcase is reassembled. Again, there is pretty much zero tolerance for any leakage. Even the best reseal job is useless if any of the castings are porous/cracked/distorted, there is no way to check this without a pressure test.
Ideally, it would be great if you could get together with a member that has experience with these gearcases…Again, removing the seals, shift rod bushing is tricky, and it is easy to damage the small aluminum pieces. If meeting up with a member is not an option, then I don’t recommend attacking the seals/shift rod oring. I would replace the large oring, and the spaghetti seal between the gearcase halves, along with the gasket under the upper bushing/seal assembly. Prior to reassembly, I would pump the shift rod bushing cavity/hole full of marine grease to help seal up any issues there, and perhaps loosen up the oring….
Once the unit is reassembled, gear lube should be changed frequently to ensure there are no major oil leaks….DJanuary 11, 2020 at 12:44 pm #1916196 11/16″ is a good overall measurement for the shock absorber. Any longer and you run the risk of it binding on the water pumps lower housing. If you decide to remove the lower housing, be careful as it can break easily and is expensive to replace.
Here’s a photo of one which was binding and causing a poor idle.
 January 12, 2020 at 1:26 pm #191797
Thanks Fleetwin and Mumbles. I think I’ll avoid replacing the bushings/seals for now, put it back together with new O-rings, spagetti seal etc. and do a pressure test. If test is bad then I’ll look for help. I’ve seen videos for removing those and I can tell its tricky as you mentioned. Any advise on what pressure tester to get?
January 12, 2020 at 5:13 pm #191870lot of home made stuff other stuff is expensive …pump wise I went half way for this to test pressure and…vacum based on a utube I looked at
haven’t tried it yet (chores… 🙁 )
simply attach a gears case fitting on the hose to test pressure or vacum
Joining AOMCI has priviledges 🙂
January 20, 2020 at 8:58 pm #192693Back at it here. Cleaned all parts and found a cracked skeg! I should have looked it over first. Anyway, can I fix it with J-B Weld, another epoxy or look for a replacement? Also, the shock absorber is 6 13/16″ so I assume it is sprung and I will hammer it back to 6 11/16″. I’m not a welder so I’ll reach out to my chapter (Yankee) for advice.
Thanks,Jim
January 21, 2020 at 11:07 am #192721James, I’m in the Yankee Chapter so hopefully this advice is OK. Your shock has either a broken spring or an expanded spring that has not returned to is normal position. If by chance it is not broken, then it can be simply pressed back to 6 11/16″ long and put back into service. Some will weld even unbroken shocks in order to prevent future breakage or expansion, but they can be fine as long as they are pressed to size.
If you clean up the inside of the shock well, then with a high intensity flashlight you can often see if the spring is broken inside. A dental pic can be used to run along questionable areas, and you will feel a snag at the break. Q-tips with carb cleaner are great for cleaning the inside spring area.
Improvise-Adapt-Overcome
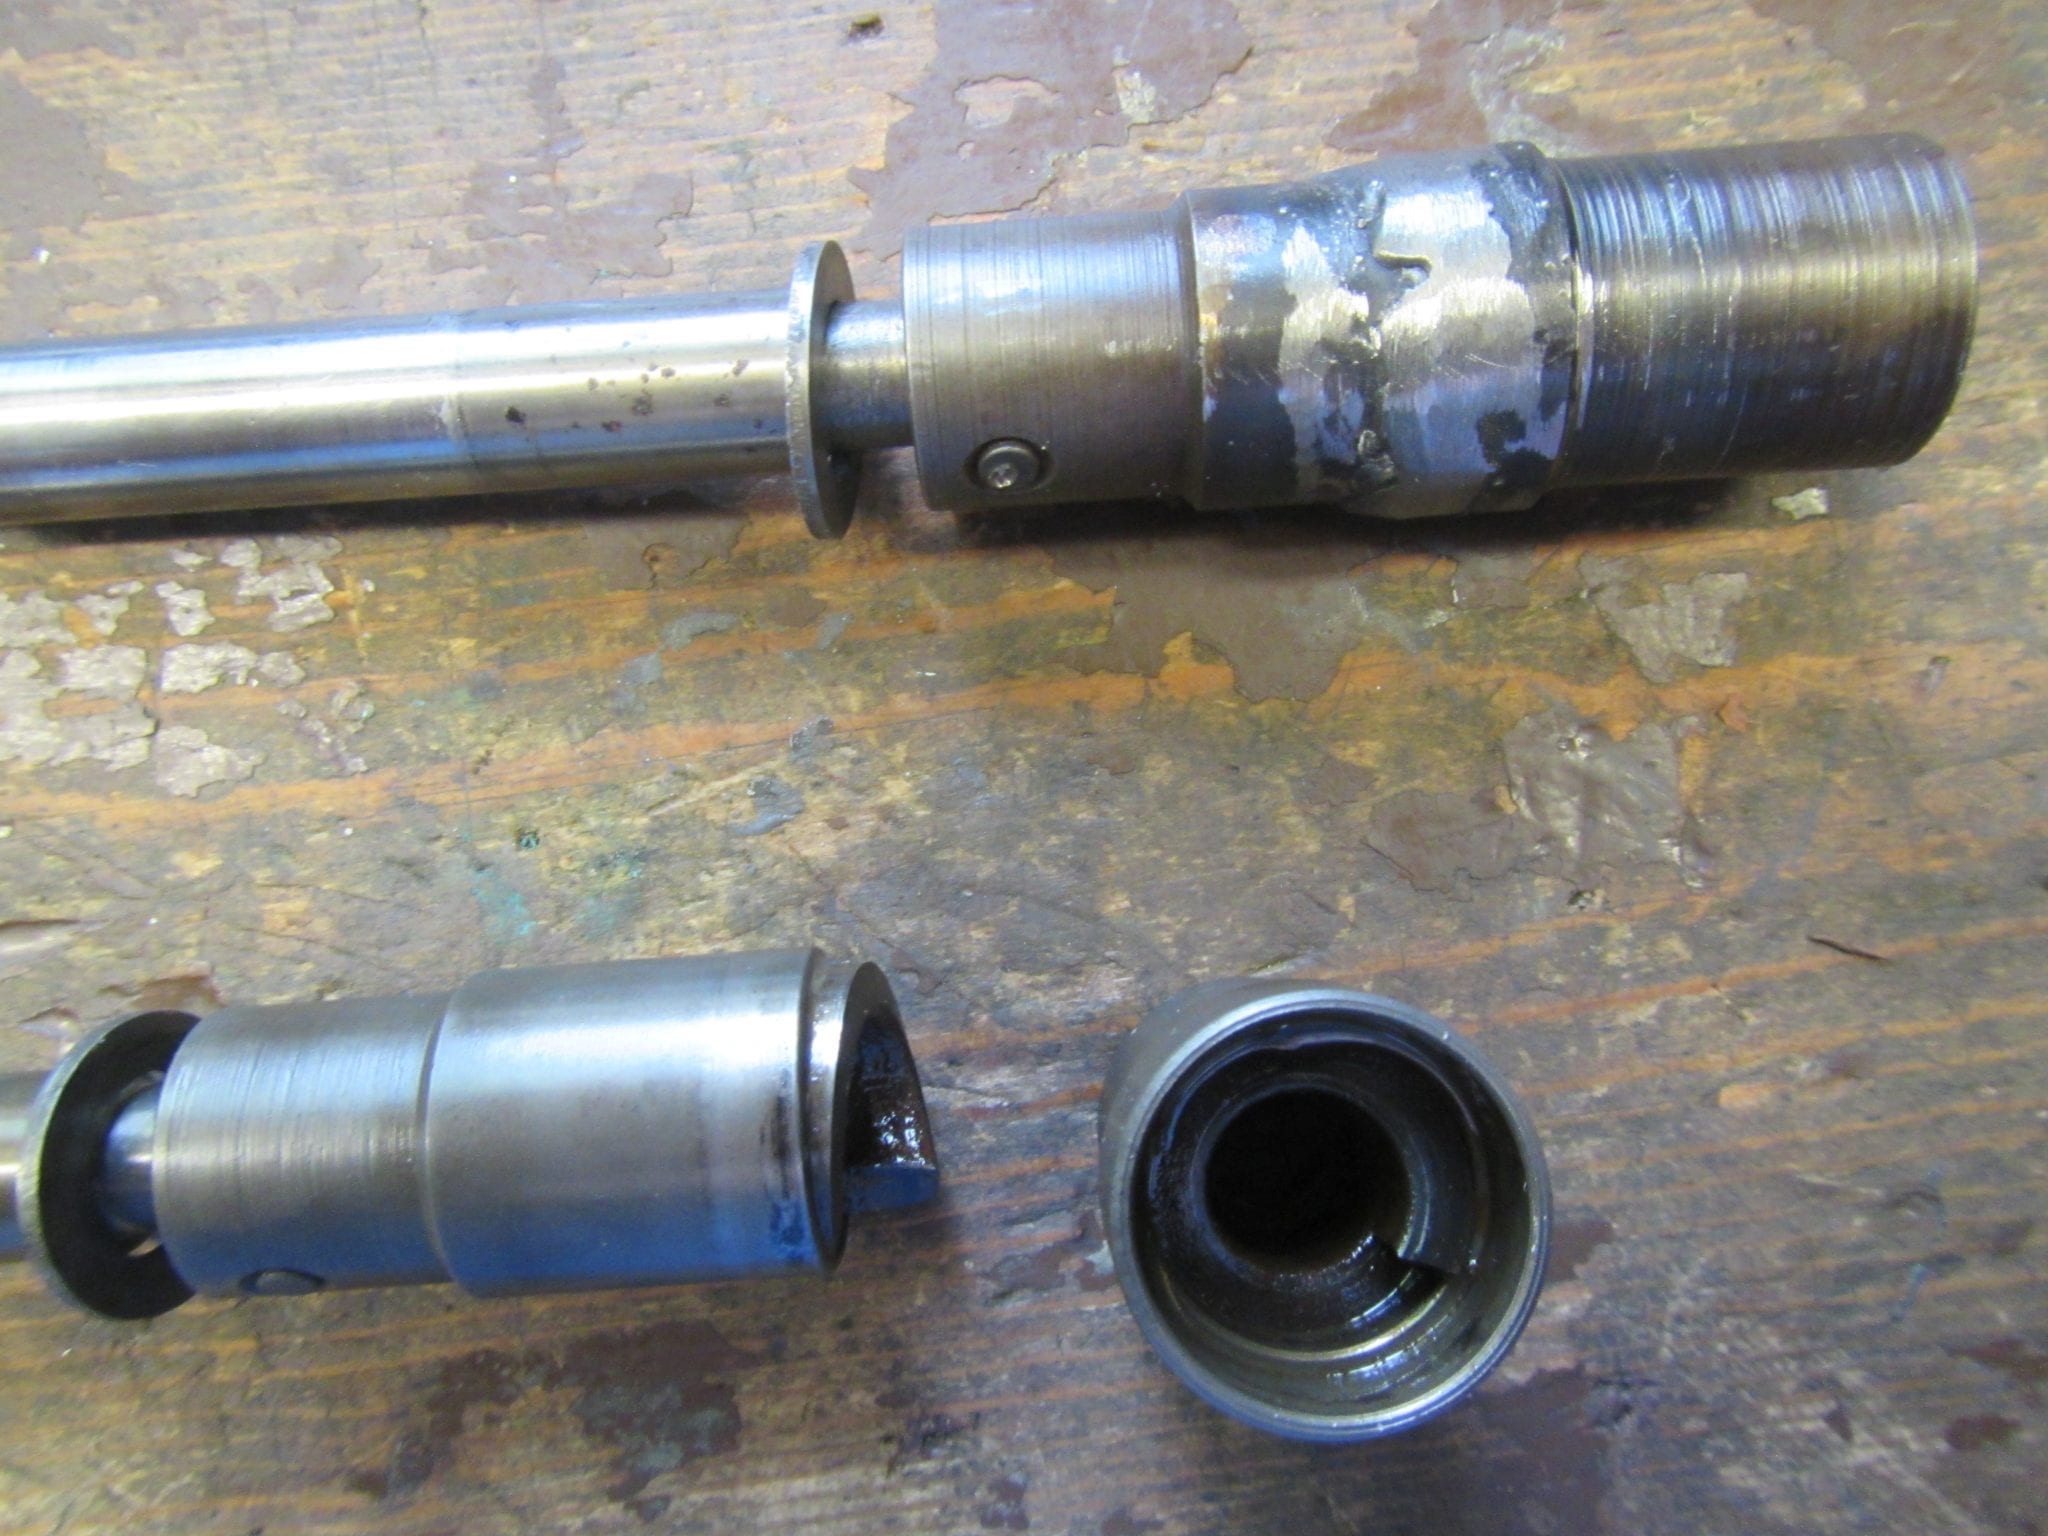
January 21, 2020 at 2:47 pm #192739James this is what a broken absorber looks like. There also is a welded one in the picture. If the spring breaks a slight slip in the upper and lower pieces causes it to get longer. Then it jams itself between the pinion and the water pump housing. Now that I know a little about these things I weld everyone I take apart. First one I ran into I had the power head off three times. The little 5 1/2 set all apart for a year before I figured it out.
dale
 January 22, 2020 at 7:17 am #192778
Use a brass drive pin if you end up welding it.
www.kenadianoutboards.com
January 22, 2020 at 1:34 pm #192799I tried a vice and whacked it with a mallet but it didn’t budge. I think I need a pro to look at it. When and where is the next Yankee chapter meeting? I need to get on the mailing list.
JimJanuary 22, 2020 at 4:46 pm #192807Jim
OK, so the skeg is cracked?? I’m guessing this is freeze damage. The driveshaft shock has expanded or perhaps broken as well. Any evidence of rubbing on the top of the driveshaft or underneath the upper bushing/seal assembly? So, you really don’t have much to work with here….Another judgement call for sure.
Theoretically, the skeg and the upper gearcase castings are a “matched pair”, and should not be mixed/matched with other units. ‘But, on the other hand, this is only a small engine, not a whole lot of power, so I’m guessing replacing the skeg will work out OK…. Do you know any aluminum welders? If so, I would just have your skeg welded up. Unfortunately, a leak is still possible, so you might want to add some JB weld on the inside of the skeg just to make sure. As for the driveshaft, I would try putting it in a press and driving it back down to its proper length. But, liike others have said, you have to be sure the shock spring is not broken. Welding the driveshaft in place is fine also. To me, that shock absorber mechanism is a bit of “over engineering”, the shear pin is all the protection you need.
Why don’t you post some pictures of the pieces you have. I surely would not spend much to “repair” this gearcase, look for a decent used replacement if you prefer not to weld the skeg and compress the shock. Again, swapping out the skeg with a used one will probably work out fine also, plenty of guys have done it. You are in the Yankee Chapter, were you able to attend the Framiingham meet last weekend…Where are you located, let me know if you need some parts….Don -
AuthorPosts
- You must be logged in to reply to this topic.