Home › Forum › Ask A Member › OMC vs HF flywheel puller
- This topic has 87 replies, 24 voices, and was last updated 9 years, 6 months ago by
johnyrude200.
-
AuthorPosts
-
July 31, 2016 at 4:40 pm #41311
The biggest advantage of the shoulder screws over the grade 8 hex heads is the shoulder screws square themselves to the surface when the shoulder is tightened firmly against the top of the flywheel. The distance between the shoulder and the head is also a held dimension on shoulder screws. That means when everything is tight it takes as much error out of the setup being square as possible with the least amount of effort.
Pulling any of the screws at an angle concentrates the load on one side of one of the threaded portions of the screws. That is want causes them to break.
Heavy hard washers are intended to support heavy loads without distorting. The thickness of them is a lot more consistent than your typical grade 8 hardware store washer too. The biggest problem with them is they just are not heavy of hard enough. They may work OK most of the time, but with as much force as this operation is requiring the heavy hard washers would be a much better option. I hope this helps explain the advantage of the shoulder screws in the puller.
-BenOldJohnnyRude on YouTube
July 31, 2016 at 5:16 pm #41314Okay Dan, you talked me out of the washer atop the flywheel nut idea. 😉
I understand and agree with everything you wrote, Ben. However, FWIW, I believe that the stress applied to a shoulder bolt is concentrated at the shoulder where there’s a change in diameter. What makes that change worse is that its a step and not a radius. The only downside IMHO is that its more likely to break there than elsewhere. When the OMC shoulder bolt broke, it did so at that location, just below the flywheel surface. The other bolt snapped slightly above the surface making extraction a lot easier.
Tomorrow, I’ll get some heavy hard washers and swap them for the thin washers I have on top of the OMC washers. I’m also giving serious thought to buying some hardened bolts IF I can find any.
This morning, I tried again. This time, I heated the area around the interface too hot to touch. I then cooled the nut down till it was literally frosted. That’s as close to the crankshaft as I could get because of the nut. I figured it would draw the heat out of the crank end. I then gave it several good whacks with a 3 lb hammer. GOOD whacks!
It’s STILL on there! 🙁July 31, 2016 at 5:36 pm #41316I hate to be a Debbie Downer but how much do you "love" that motor?
July 31, 2016 at 5:50 pm #41320Well, "Debbie", at what point do I have nothing to lose and really lay in to that puller bolt?
July 31, 2016 at 7:17 pm #41330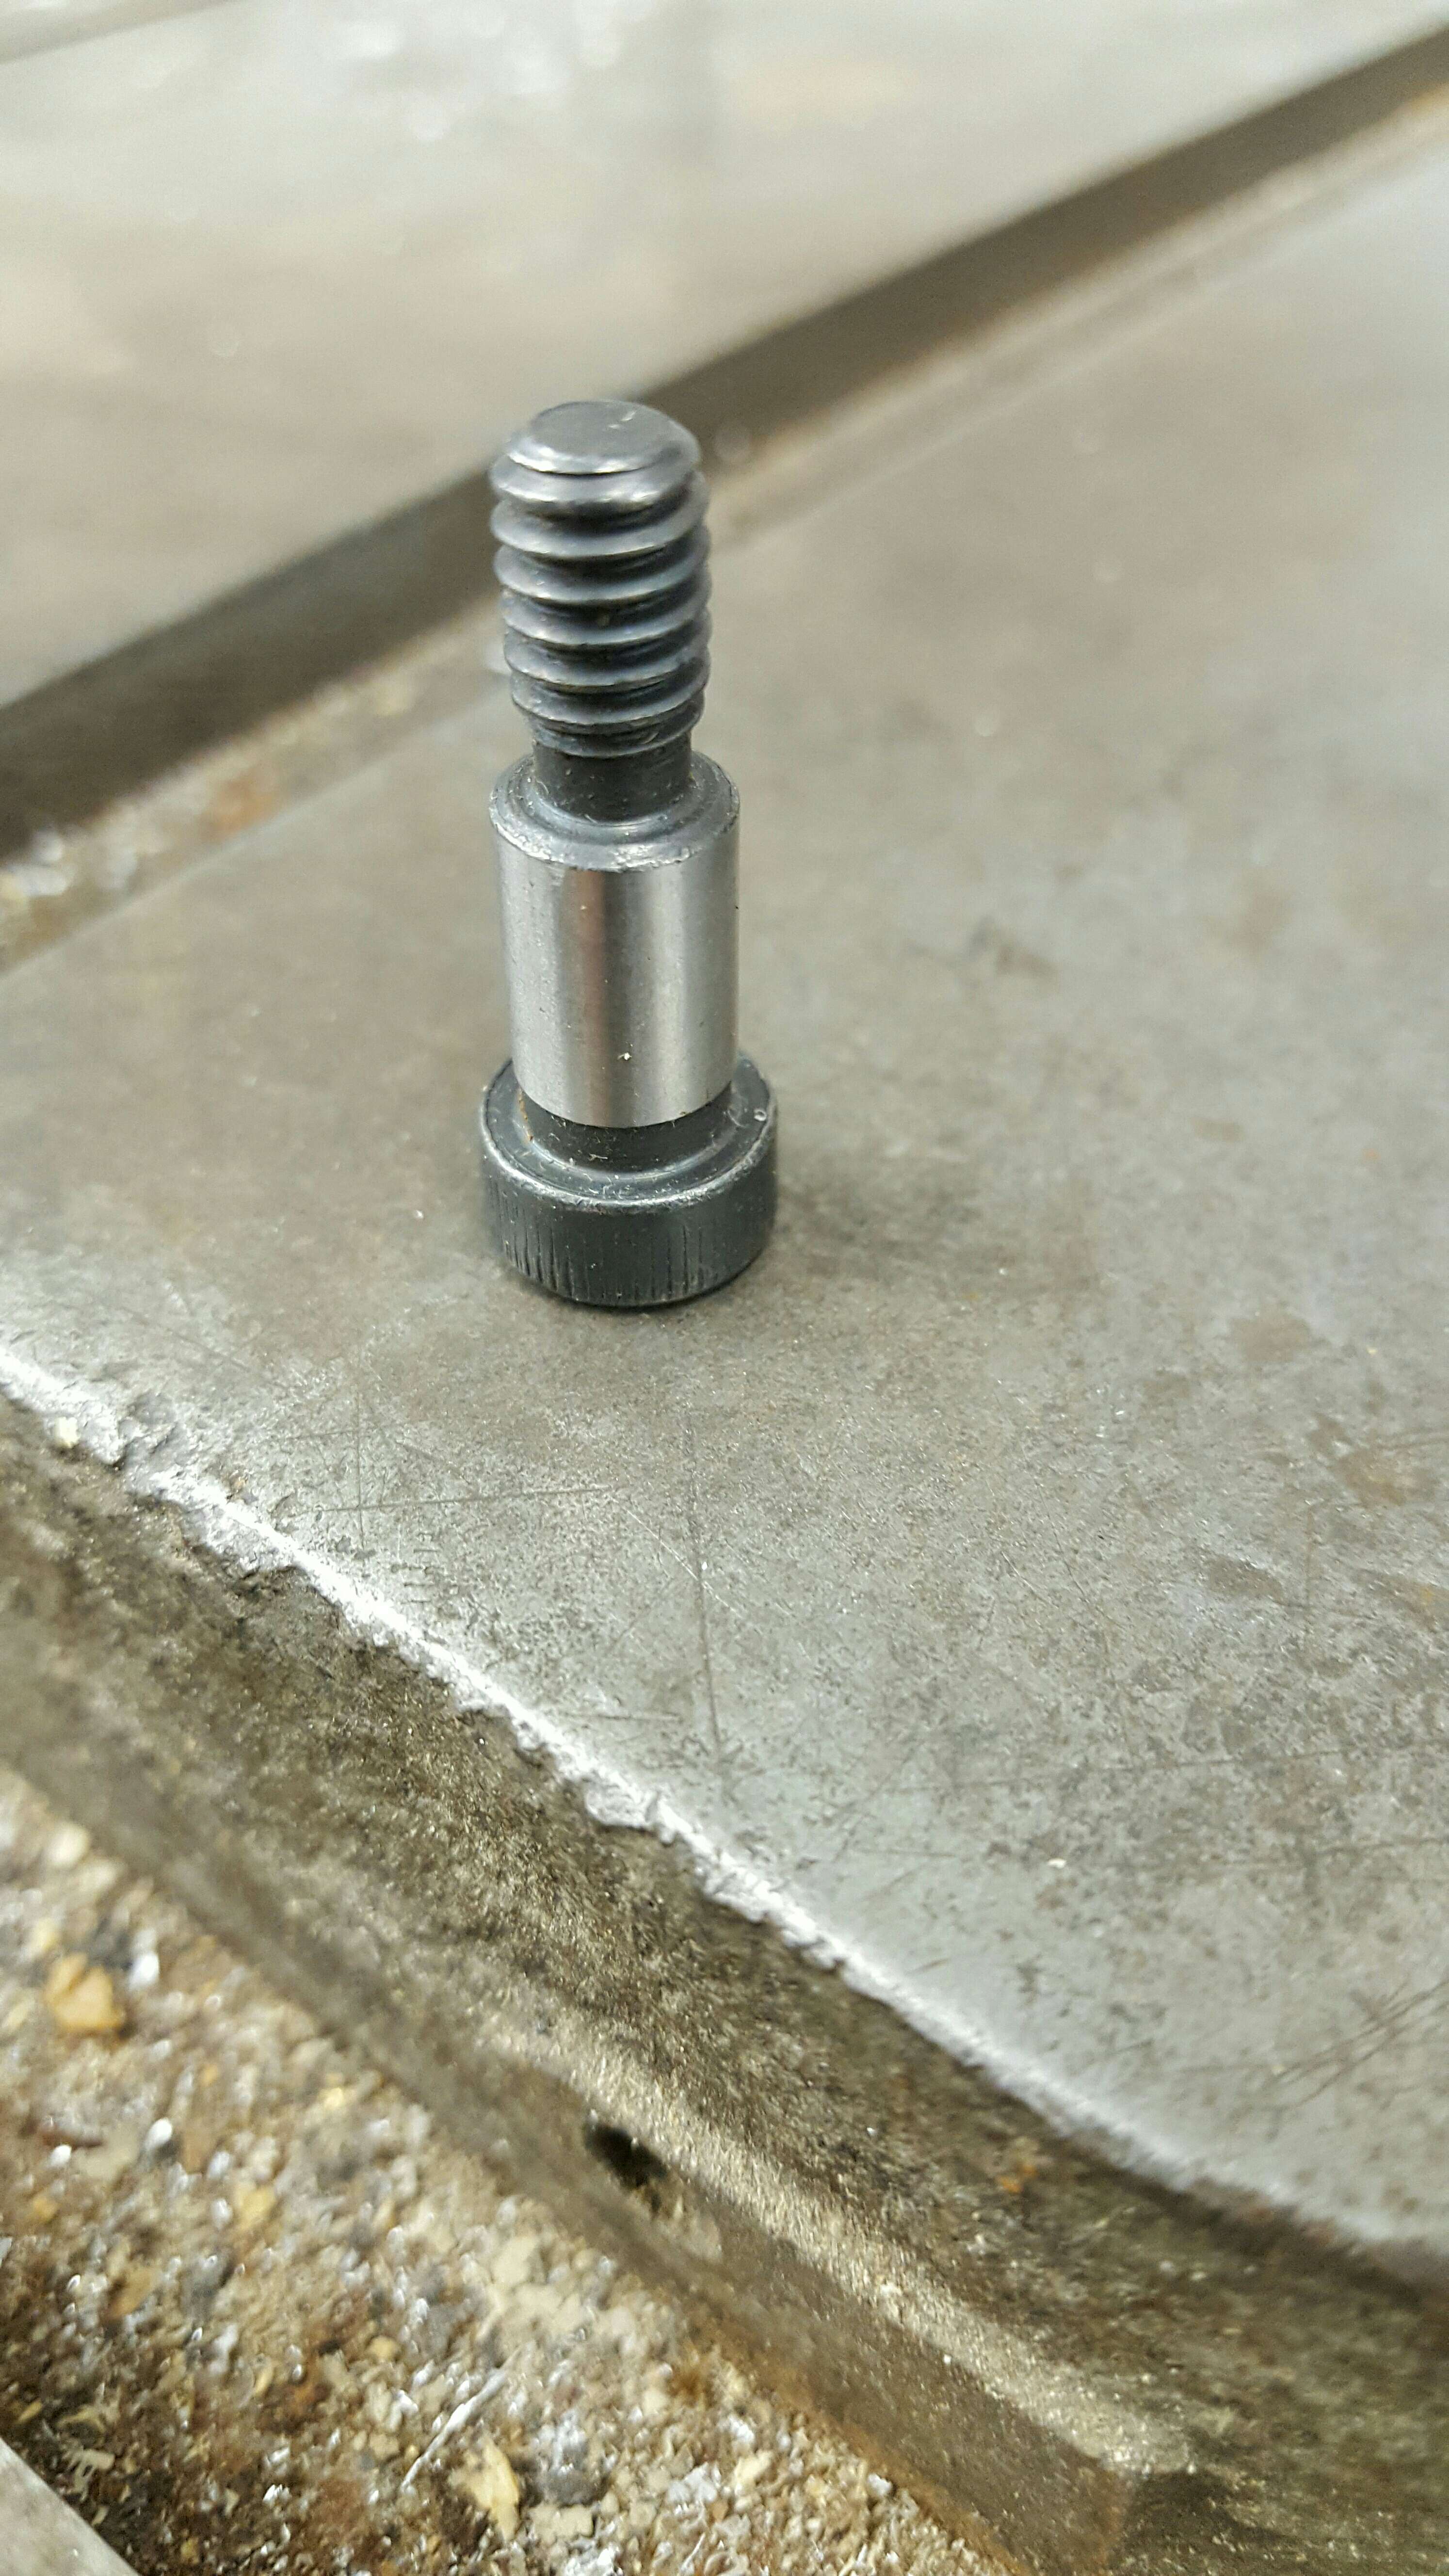
Here is a photo of the shoulder of a shoulder screw. I will not argue the fact that the shoulder IS the weak spot of a shoulder screw. The step DOES however have a radius inside. That radius is a lot bigger than the one at the root of the threads. The shoulder screws do need to be firmly seated against the top of the flywheel or the shoulder becomes a lever and WORSENS the condition.
Ultimately it is up to you what you use and how you do it. I’m just trying to do my best to clarify the reason for the shoulder screws. All that said, I probably would have beat the dogsnot outta the thing by now after hitting the center bolt with an impact. I probably would have broken something by now more than once. I’m not saying that’s right, but I know me. 😯
-BenOldJohnnyRude on YouTube
July 31, 2016 at 8:22 pm #41337LOL Ben. I stand corrected re: there not being a radius. The shouldered bolt that I snapped was definitely seated against the top as I remember thinking how it went in farther than 7/16".
I realize that the final decision as to how to proceed is up to me and, in all honesty, I forgot about resorting to the impact gun. I now consider doing so my last card up my sleeve. Thanks for the reminder. I plan to pull that card out this evening and, if the bolts hold, lay into it with the 3lb’er again. I’ll be sure to be wearing safety goggles. 😉
To be contd.July 31, 2016 at 8:56 pm #41342Be safe and keep us updated.
OldJohnnyRude on YouTube
July 31, 2016 at 11:53 pm #41358Well, I heated the area up so hot this evening that the entire flywheel was hot to the touch. I then kept blasting the flywheel nut with liquid air until the nut was literally frosty. I then used my impact gun to back the puller bolt out before taking a running start at tightening it down. LOL One of the 3 bolts
holding the puller to the flywheel snapped. 🙁
I guess I have a trip to Fastenal in my future. I’ll get a set of shoulder screws and/or hardened bolts ASAP and give it another try. I filled the recessed area around the crankshaft flywheel with penetrating oil. Can’t hurt.August 1, 2016 at 12:35 am #41361Dang it! That one is definitely stuck on the there. Thanks for the update. If I was going to Fastenal for new screws I’d get both kinds just so I had a backups for future breakages. You probably already had the same idea. 😉
-BenOldJohnnyRude on YouTube
August 1, 2016 at 1:27 am #41372quote WetWillie:Well, I heated the area up so hot this evening that the entire flywheel was hot to the touch. I then kept blasting the flywheel nut with liquid air until the nut was literally frosty. I then used my impact gun to back the puller bolt out before taking a running start at tightening it down. LOL One of the 3 bolts
holding the puller to the flywheel snapped. 🙁
I guess I have a trip to Fastenal in my future. I’ll get a set of shoulder screws and/or hardened bolts ASAP and give it another try. I filled the recessed area around the crankshaft flywheel with penetrating oil. Can’t hurt.Was the broken bolt Grade 8?
One of the OEM bolts?
Above all in your venture it’s important to not damage the crankshaft.
You can get a replacement flywheel but if you damage that crank you’re in trouble.
If you have to eventually start weakening the flywheel to get it off I’m sure some on here will have some tips.
-
AuthorPosts
- You must be logged in to reply to this topic.