Home › Forum › Ask A Member › Mercury KD4
- This topic has 139 replies, 16 voices, and was last updated 5 years, 1 month ago by
Boonie.
-
AuthorPosts
-
February 3, 2021 at 2:02 pm #229389
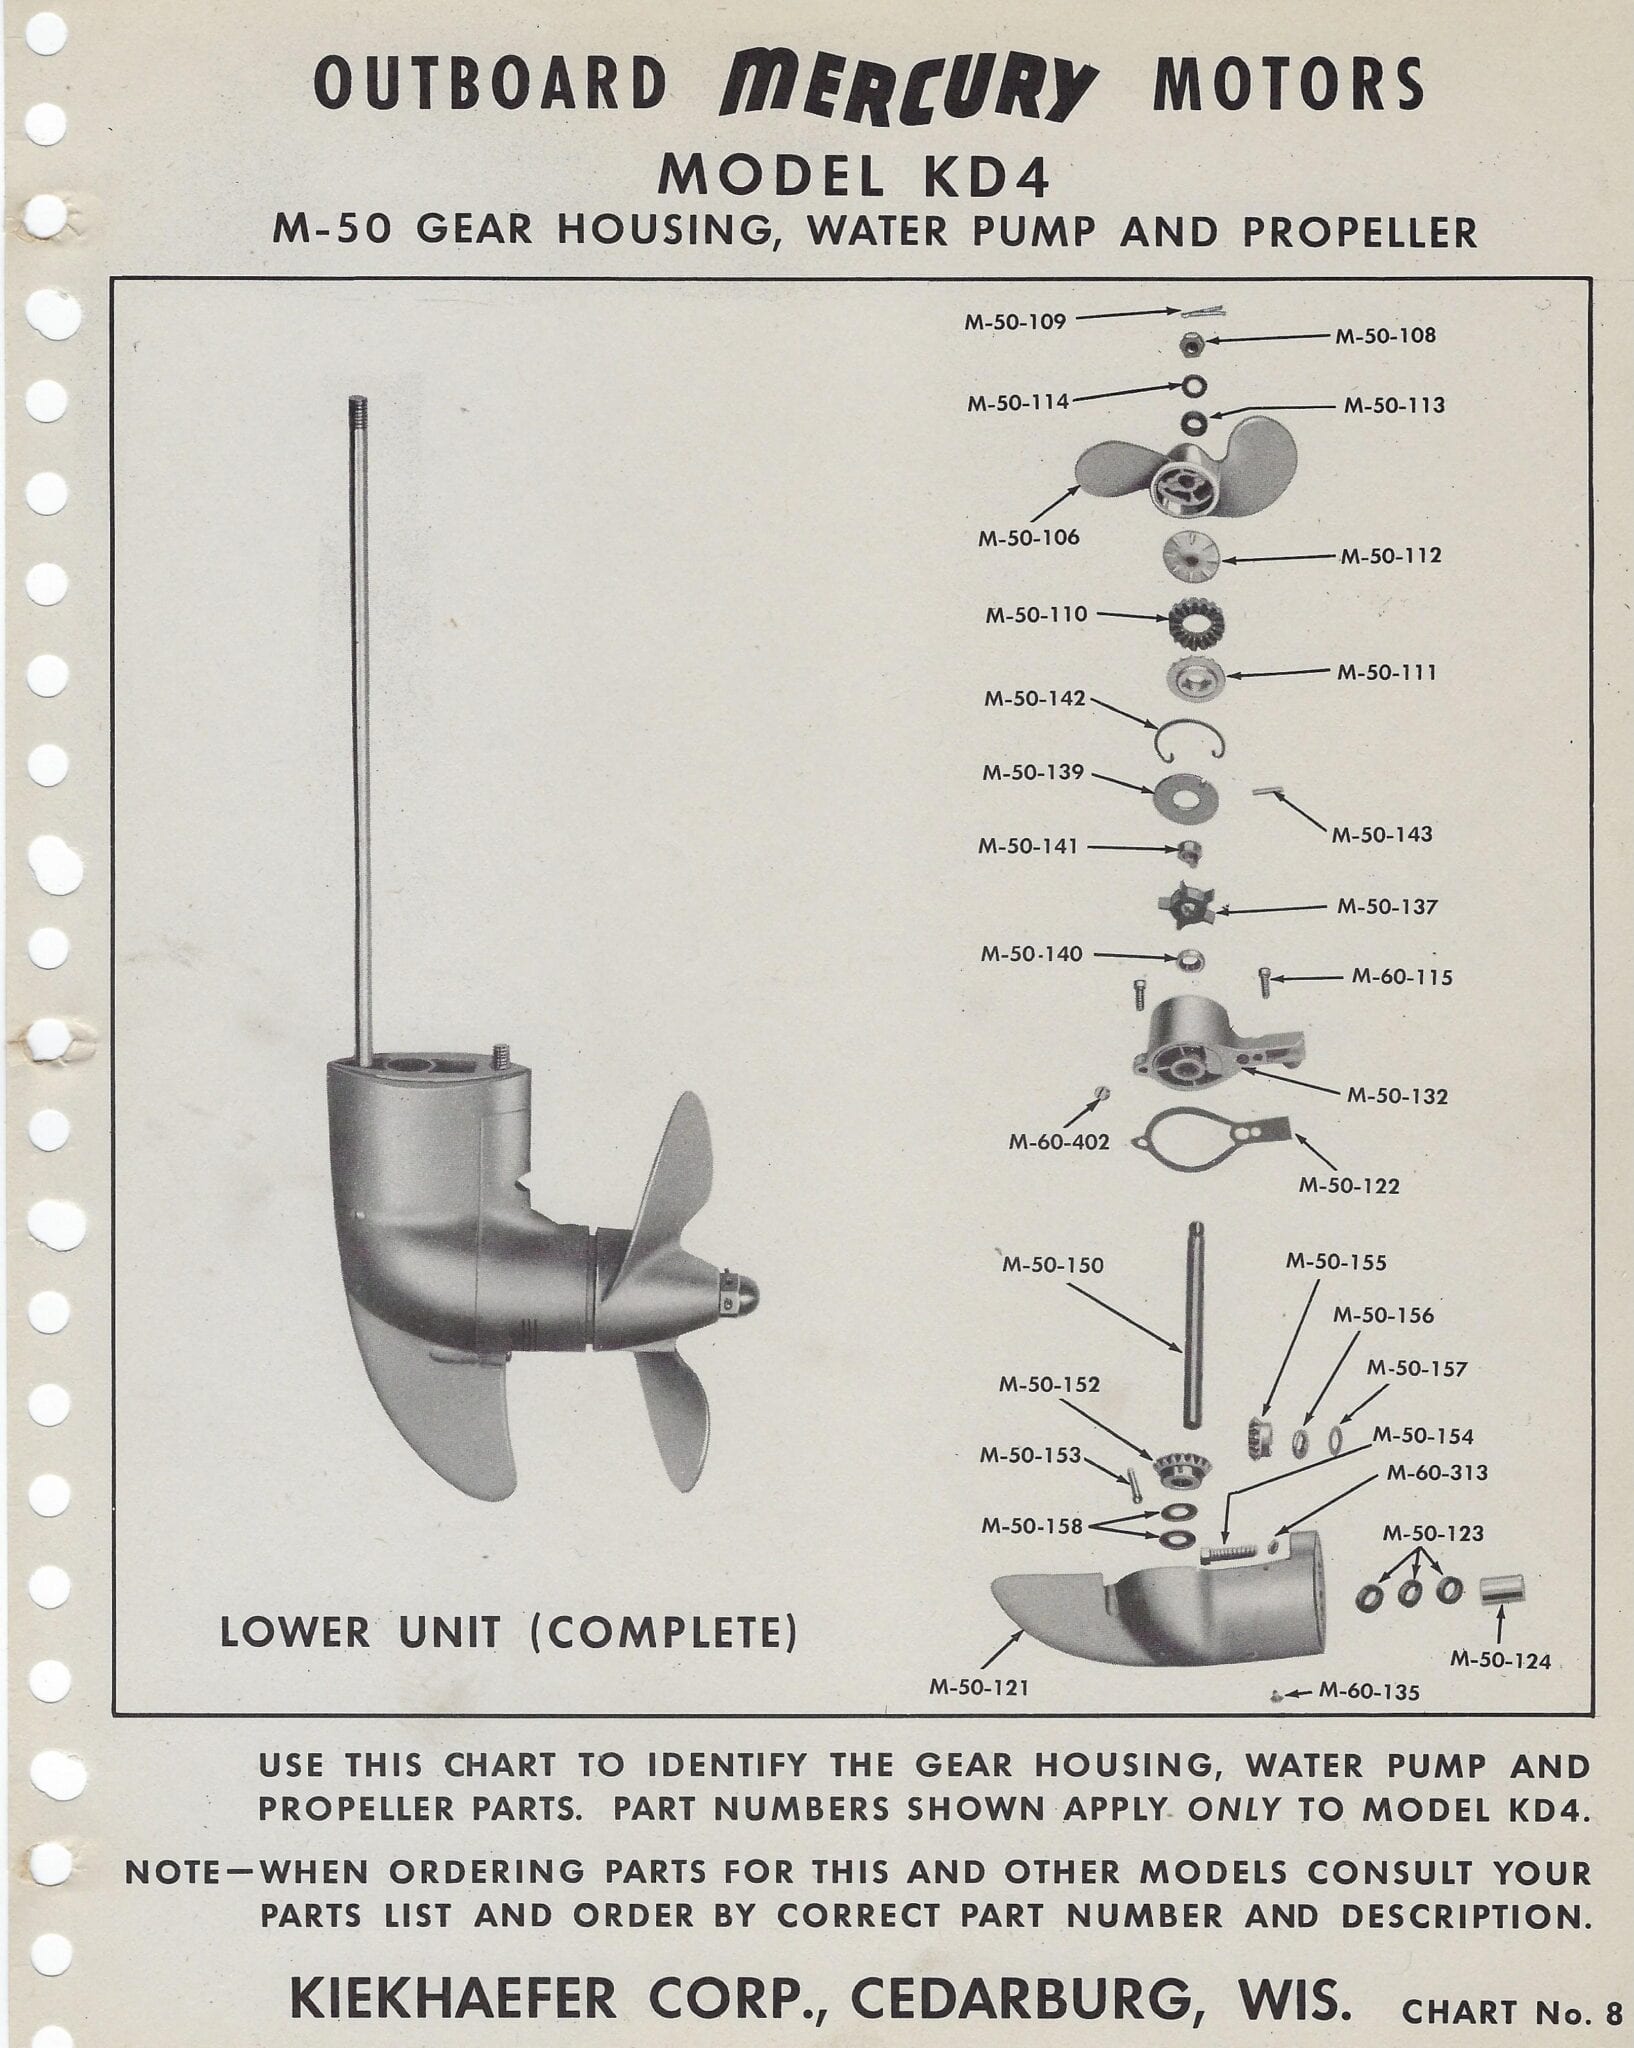
KD-4 Chart
 February 3, 2021 at 7:01 pm #229445
Bill the clutch is not driven by the impeller pin the 2 holes are outside the pump.. one for the clutch and one for prop without clutch as I have said ..
This is a KD3S. If I am not mistaken, the KD4 is the same?
Long live American manufacturing!
February 4, 2021 at 10:54 am #229481Parts Illustration above shows only 1 pin. Which is correct for those
models that have the rubber biscuit clutch.Certain models did not have the clutch. They used a shar pin in the
rear hole in the prop shaft and a short pin in the impeller drive hub
that was held in by a circular spring in the groove around the
impeller drive hub or eccentric cam.Note that the clutch can be left out and a sheer pin used
on all models IF a short pin and spring are used to drive hub or cam
That requires the spring to retain the pin.Simple ingenious either or design provided all the right parts are
in place. It is worth noting that prop shaft is same for all modes
from `940 K1 thrue WG4…regardless of brand, single or twin, clutch
or shear pin or whichever water pump.Louis
Note: the 1940 16 square hole water pump had a more complex way
to drive and retain the water pump oscillator cam. Used same prop shaft. 1941 7 slit design was modified as above. Propeller was
changed to allow for either clutch or shear pin drive..-
This reply was modified 5 years, 4 months ago by
green-thumbs.
February 4, 2021 at 3:58 pm #229500Good information. Thanks
What’s the call on the flywheel? I’m not painting the flywheel but what about the, well not sure what it’s called. The pull rope goes around it. Paint it dull aluminum? I’ll post a pic.February 4, 2021 at 3:59 pm #229502Thinking on polishing the flywheel and painting this part?
February 8, 2021 at 5:36 pm #229926All cleaned and primed ready to paint!
February 8, 2021 at 5:53 pm #229930Loo-ken good! Now the fun part starts. When the nice clean parts go together maybe some new parts you can see some progress being made. Don’t forget to make the screw heads look good.
Love it!dale
You don’t need a parachute to skydive. You only need a parachute to skydive twice!
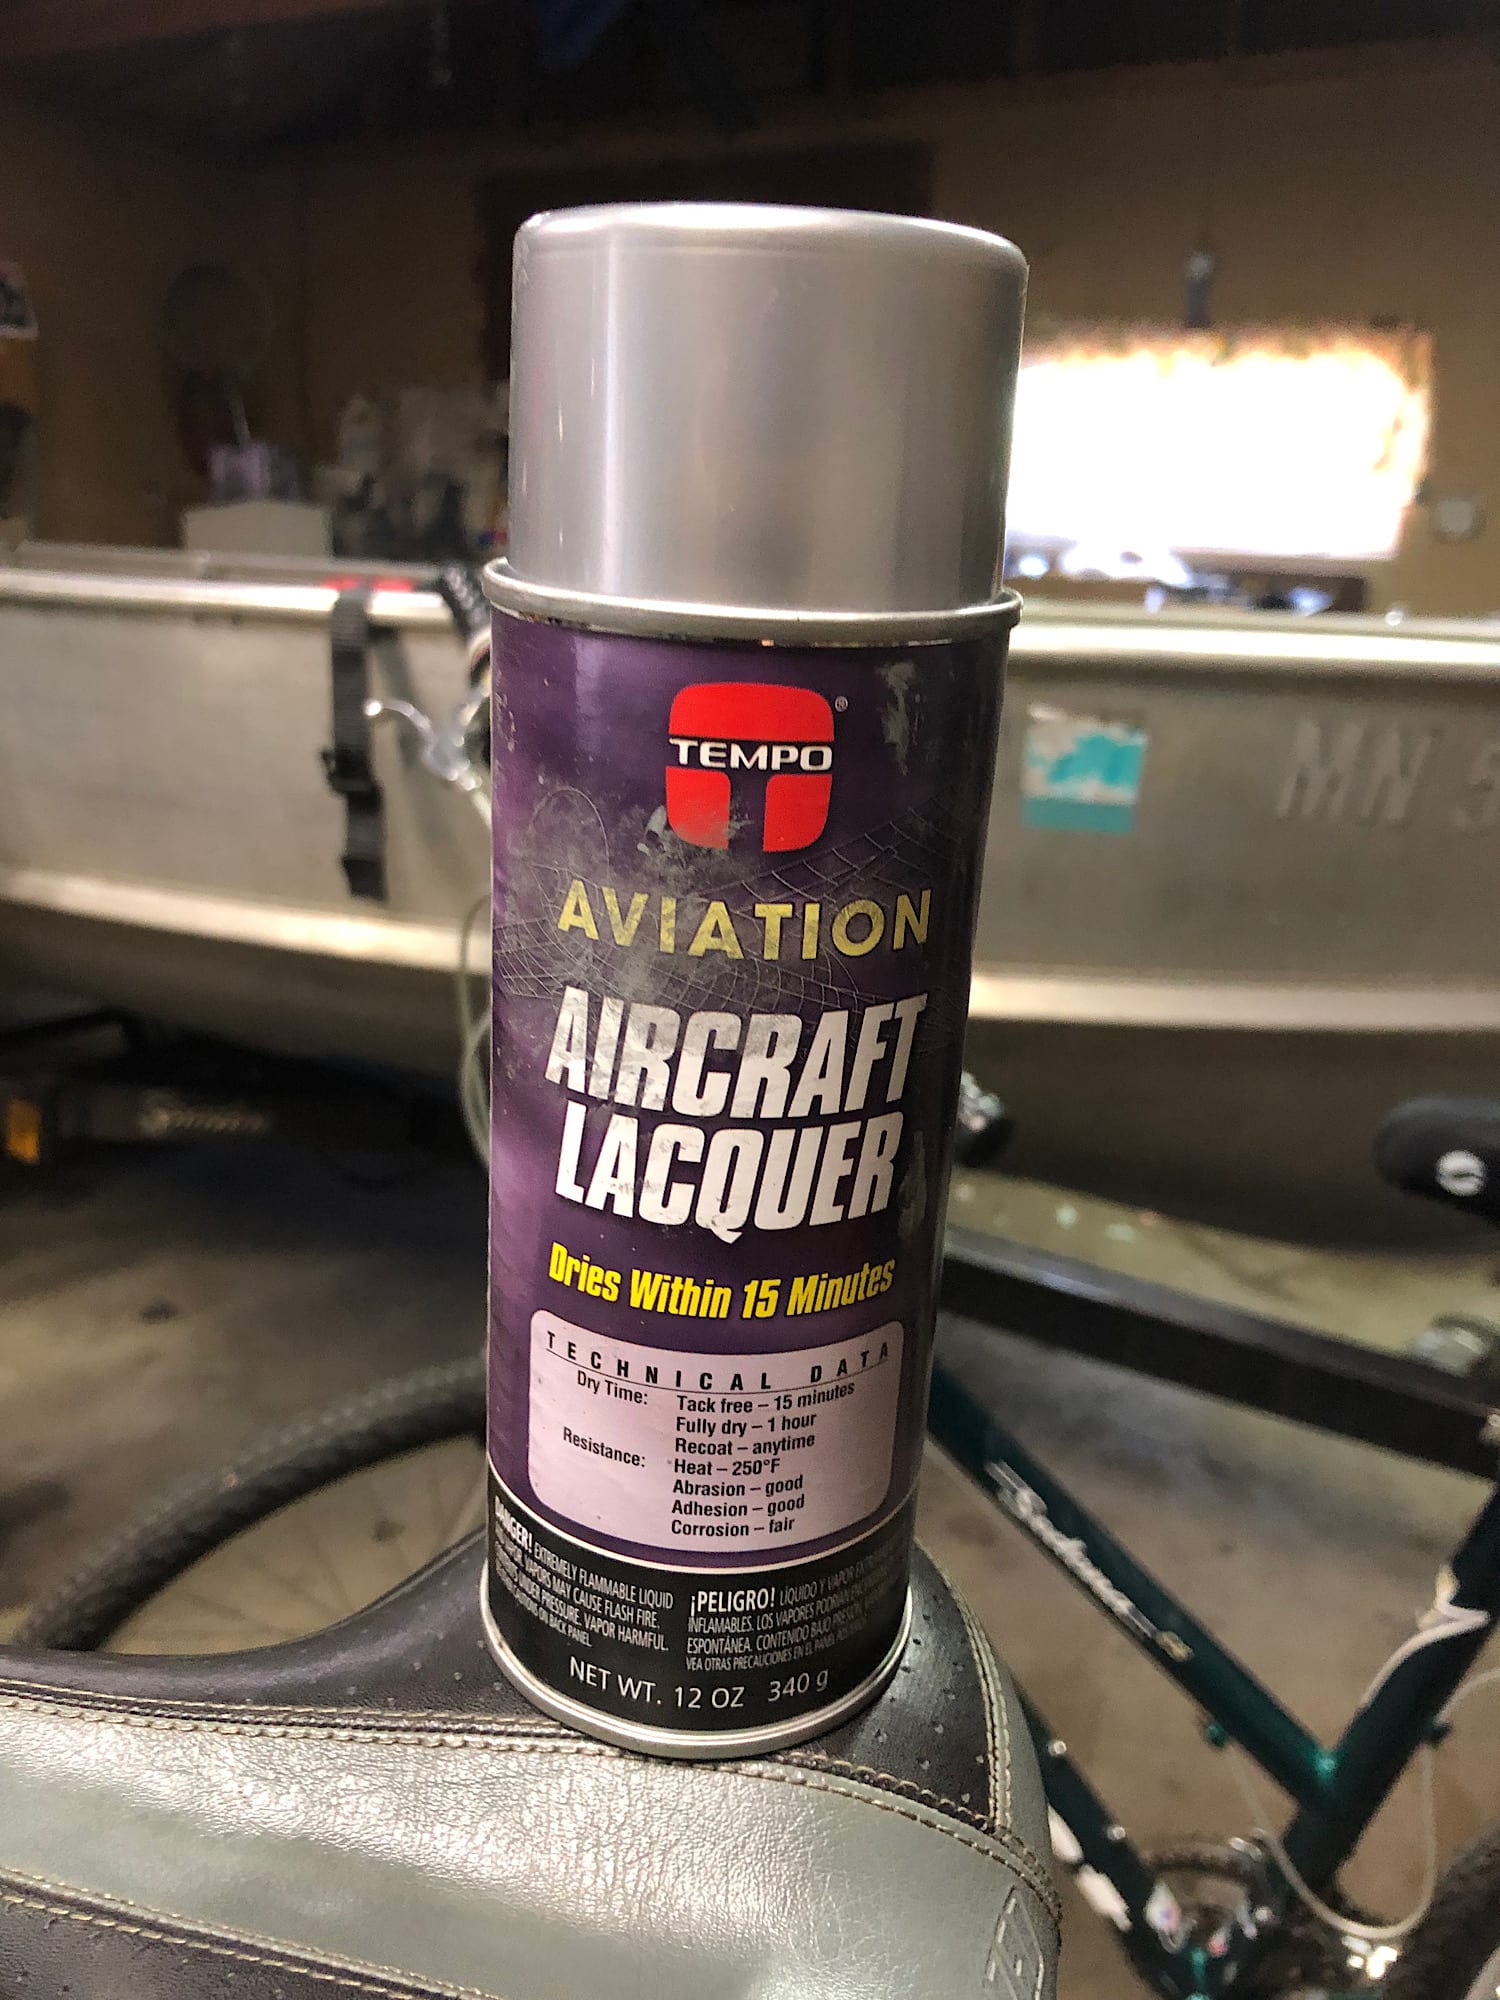
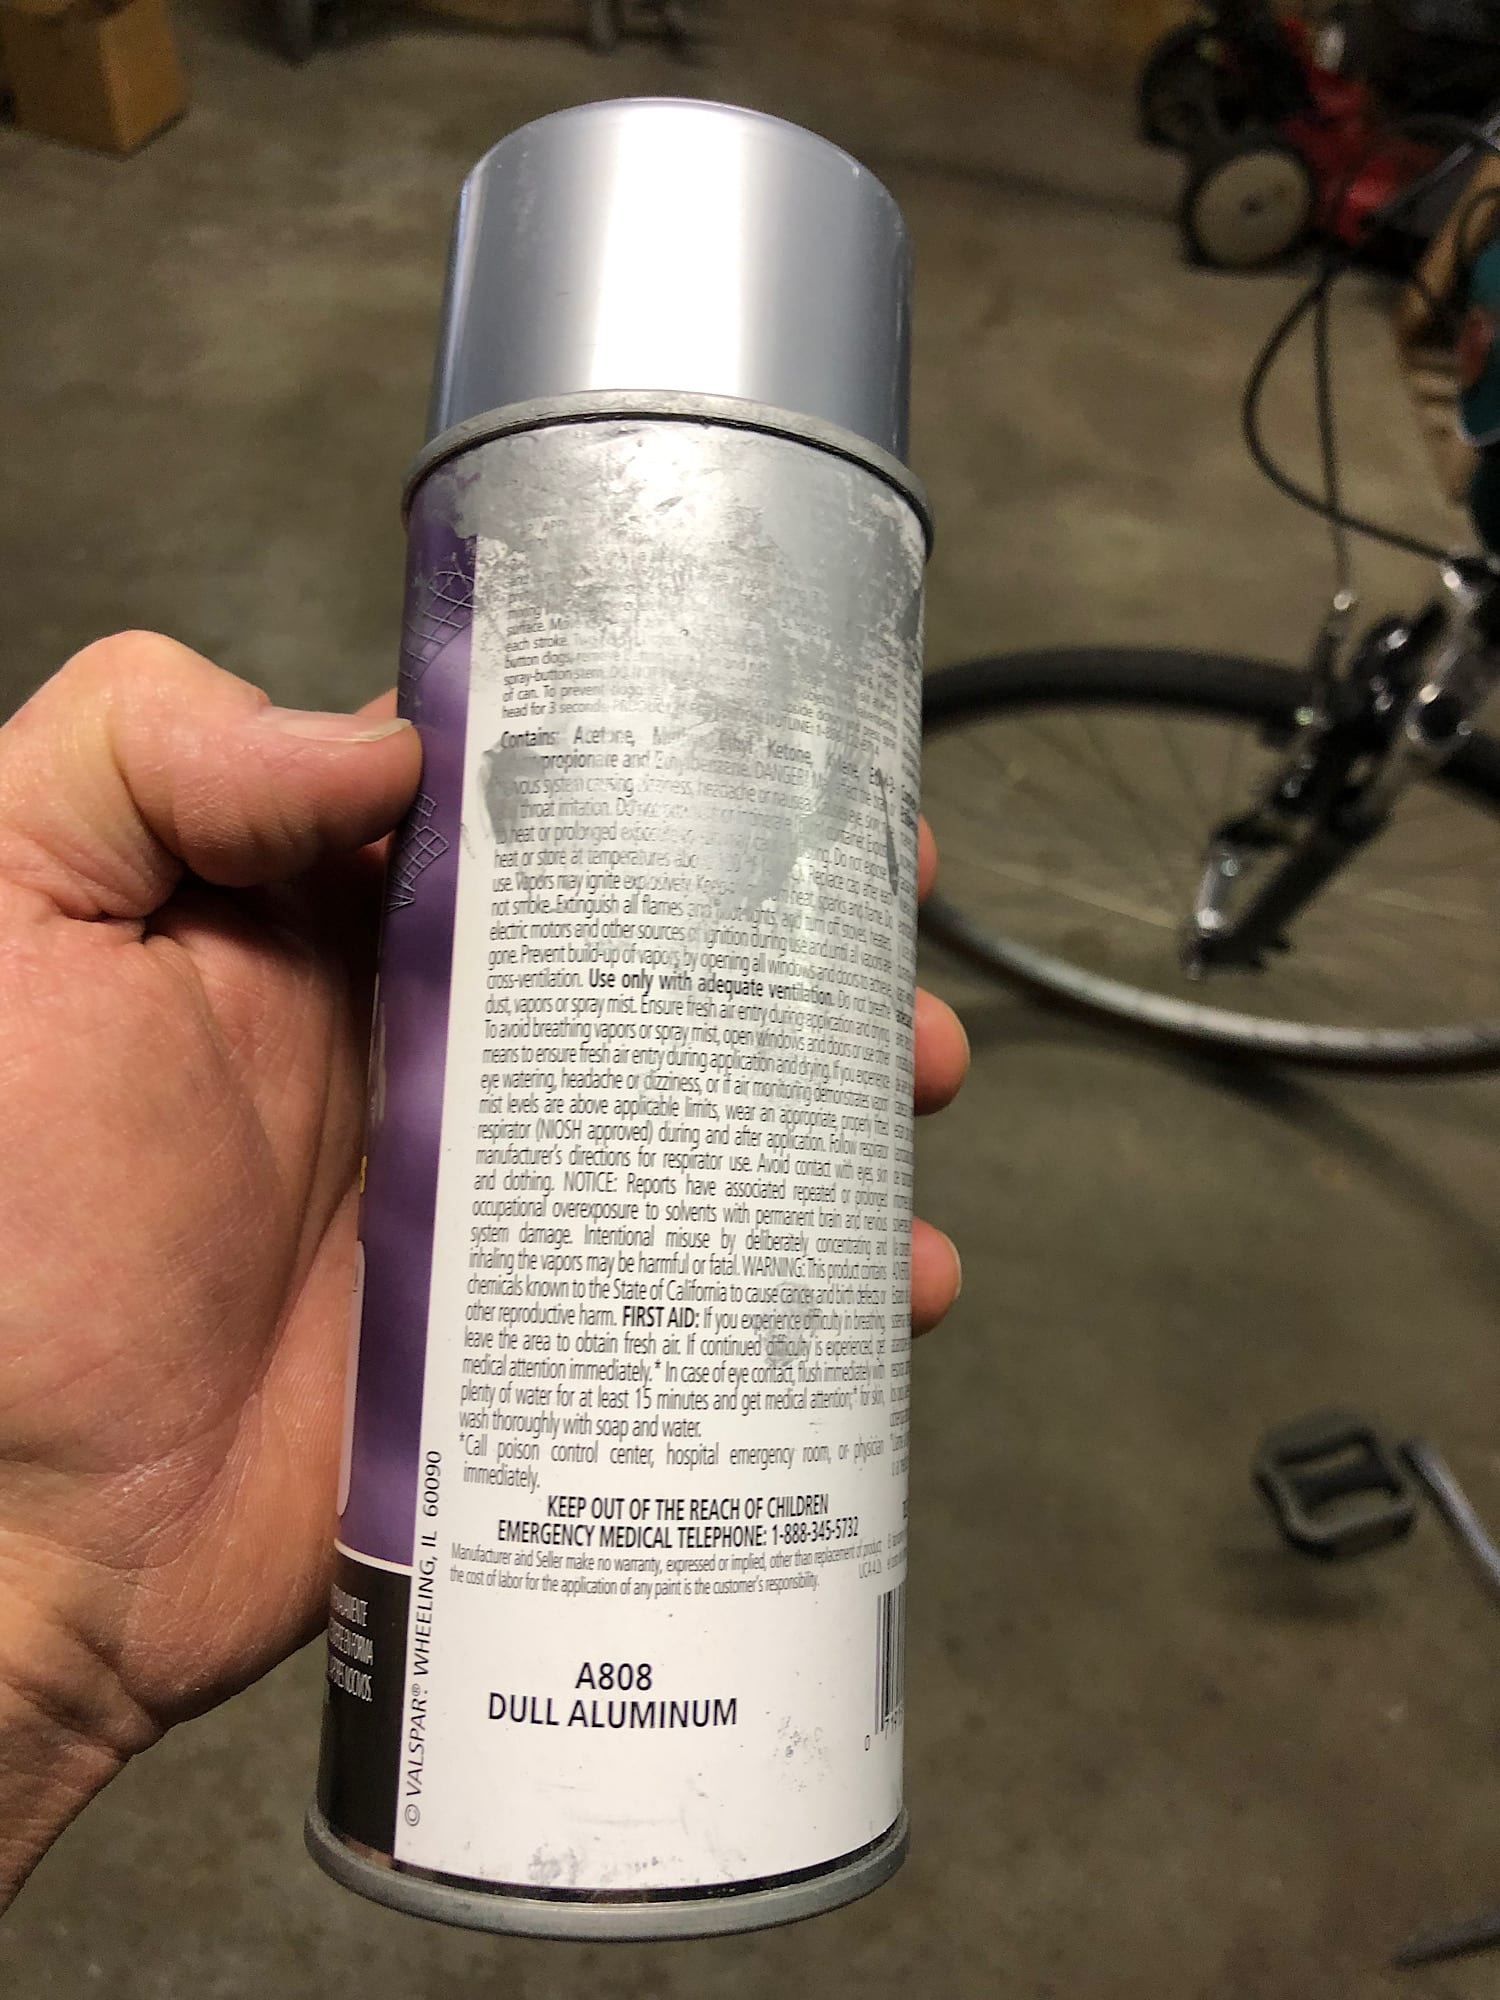
February 8, 2021 at 6:10 pm #229933Screws are already polished. Just trying to decide on a paint. I have some dull aluminum from NY marine. Doesn’t match the original. My plan is to leave the prop in original condition which is pretty good. Maybe I should try to match that paint? Any input is appreciated.
DanFebruary 8, 2021 at 7:35 pm #229938Here is the paint many have used with good results!
 February 17, 2021 at 12:28 pm #231108
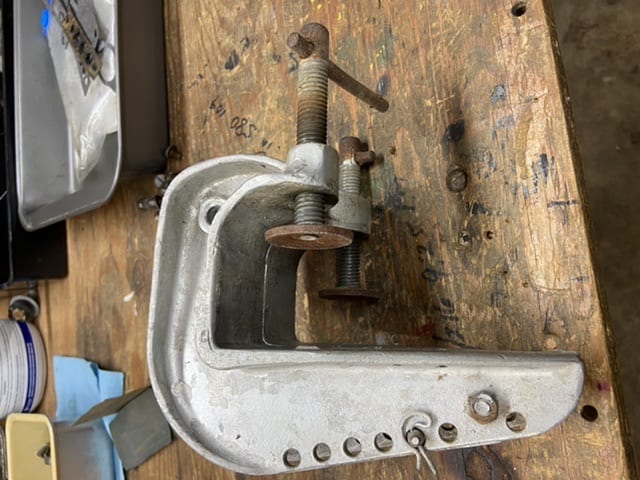
I would like to remove the screw portion of this clamp to blast and paint. How can it be removed and replaced?
-
This reply was modified 5 years, 4 months ago by
-
AuthorPosts
- You must be logged in to reply to this topic.