Home › Forum › Ask A Member › Caille Neptune Gas Tank Repair?
- This topic has 94 replies, 15 voices, and was last updated 3 years, 4 months ago by
 Buccaneer.
-
AuthorPosts
-
December 1, 2020 at 12:18 pm #224040
Joe, the sheet metal is not galvanized. It has a little flash rust on it, and I scrubbed
it with phosphoric acid and wiped it down with some WD40.
Thanks for the reminder to clean it shiny before soldering.If I end up using these practice pieces for a tank, I was toying with the idea
of putting gas tank sealer in it when I’m done. Pretty sure this plain
sheet metal won’t hold together 100 years like the original Terne stuff.Prepare to be boarded!
December 1, 2020 at 7:01 pm #224062Today I made the top gas tank panel, so that means I just have the side bands
to do. I’m afraid the top and bottom panels were the “easy” part.I cut a piece of metal for the small side panel. There must be an easier
way to fold over the “S” lips on the side panel that the top and bottom fit
into. Evidently the Caille factory figured it out over 100 years ago.
I have a sheet metal hand folder which is ill suited for these short bends.
Not sure how it would even be done if one had a sheet metal brake.
I did one side of a little scrap first, and even that was somewhat of a pain.
The short side panel is 15″ long, and the one side side I formed with
a lot of manual manipulation was a “big” pain.
Any idea what magic tool they used at the factory for these short folds?
Thanks.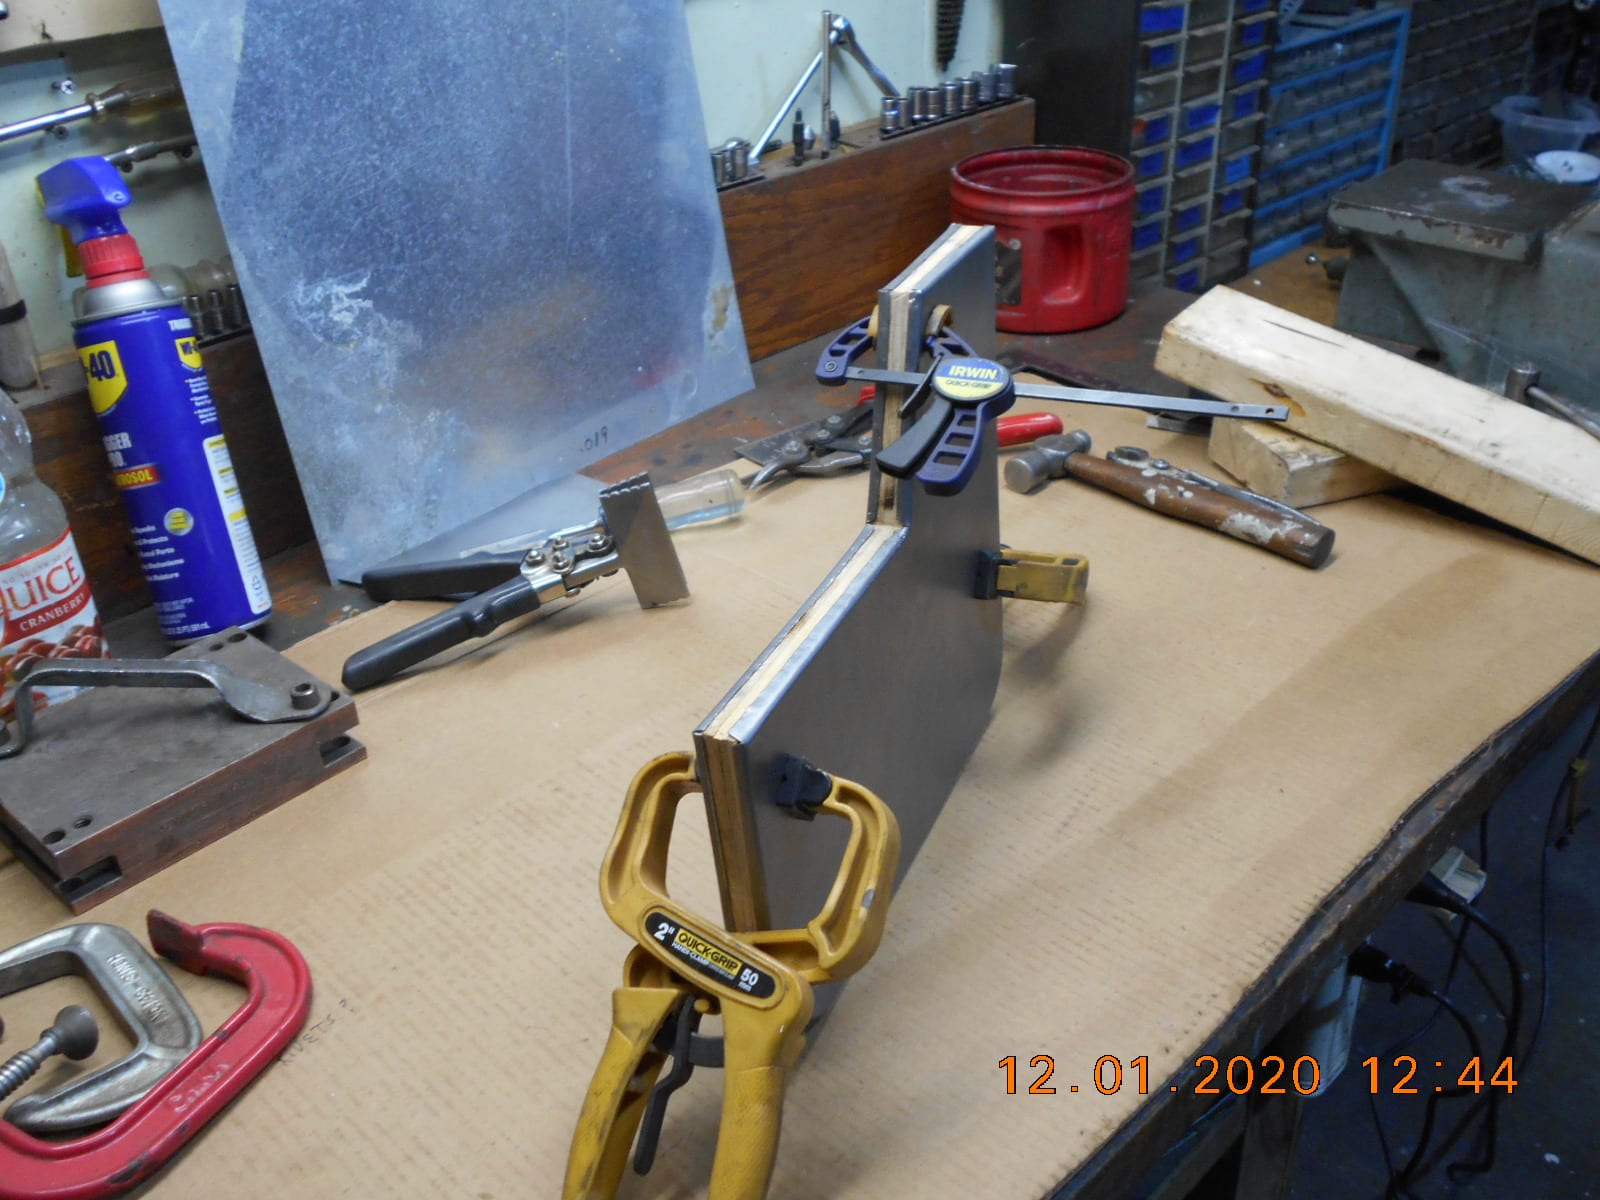
Prepare to be boarded!
December 1, 2020 at 11:22 pm #224081That “S” bend is looking pretty good. When I did my back panel, which had to be 28 ” long, I used a matched pair of 1/2 X 1- 1/2″ cold rolled steel bars 30″ long to sandwich the sheet metal strip. The bars were drilled and bolted at each end to keep them matched. Insert the sheet metal , clamp in vice and add a couple of C clamps to ensure nothing moves. Cold rolled steel bar is best because it has sharp square edges for making the bend. Form the “S” step by step… one flange at a time. Inner bend first, then the back side of the 180*. Flatten the 180 *, last using a spacer strip to control the gap, close the “S”. Now turn the strip over and do the same on the other edge. Note that your steel bars have to be narrow enough to fit between the two “S” edges. Hope that this makes sense.
Joe B
December 1, 2020 at 11:41 pm #224082Joe, thanks for the help. Just going to bed, and too tired to think now,
but I think I get the idea. Will see what I might have around to
make a fixture like you suggest!
Thanks.Prepare to be boarded!
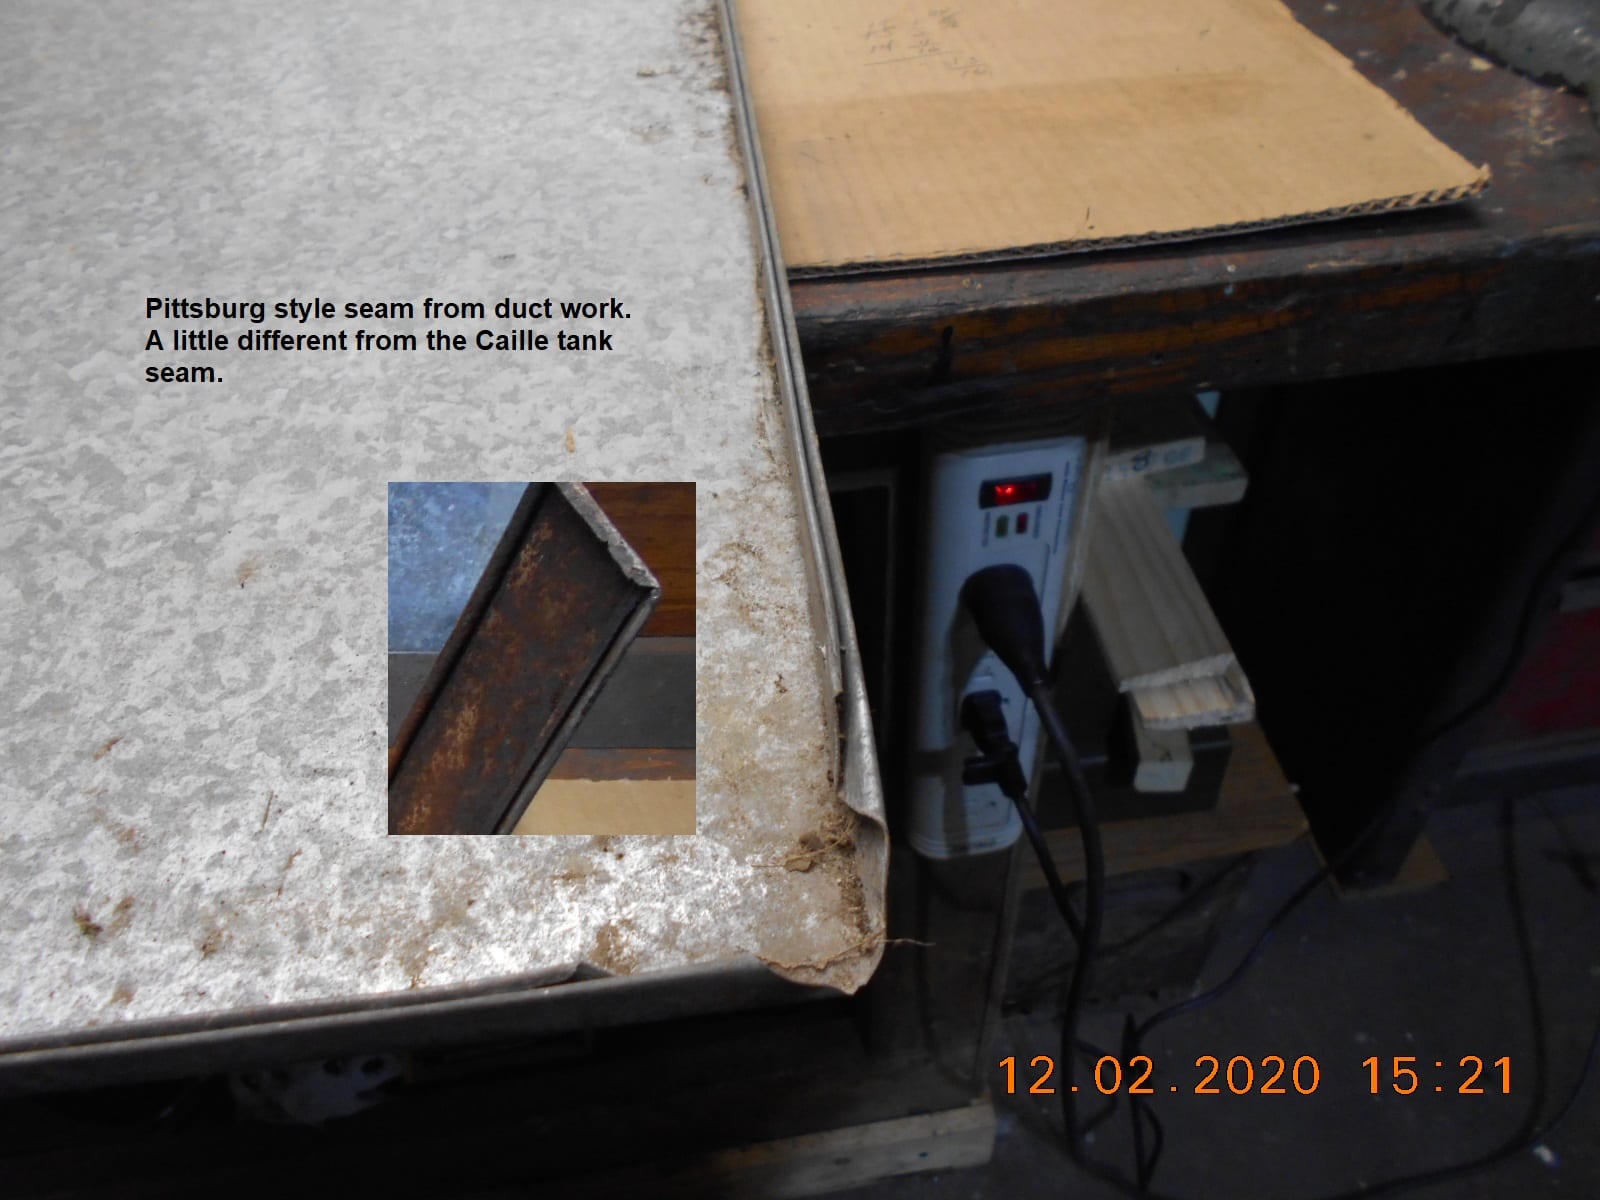
December 2, 2020 at 8:39 am #224084I think that is called a “Pittsburgh” seam????
http://www.richardsoutboardtools.com
classicomctools@gmail.comDecember 2, 2020 at 8:58 am #224085Richard, from watching YouTube, Pittsburgh seams are very similar,
other than the overlap of the folds.Prepare to be boarded!
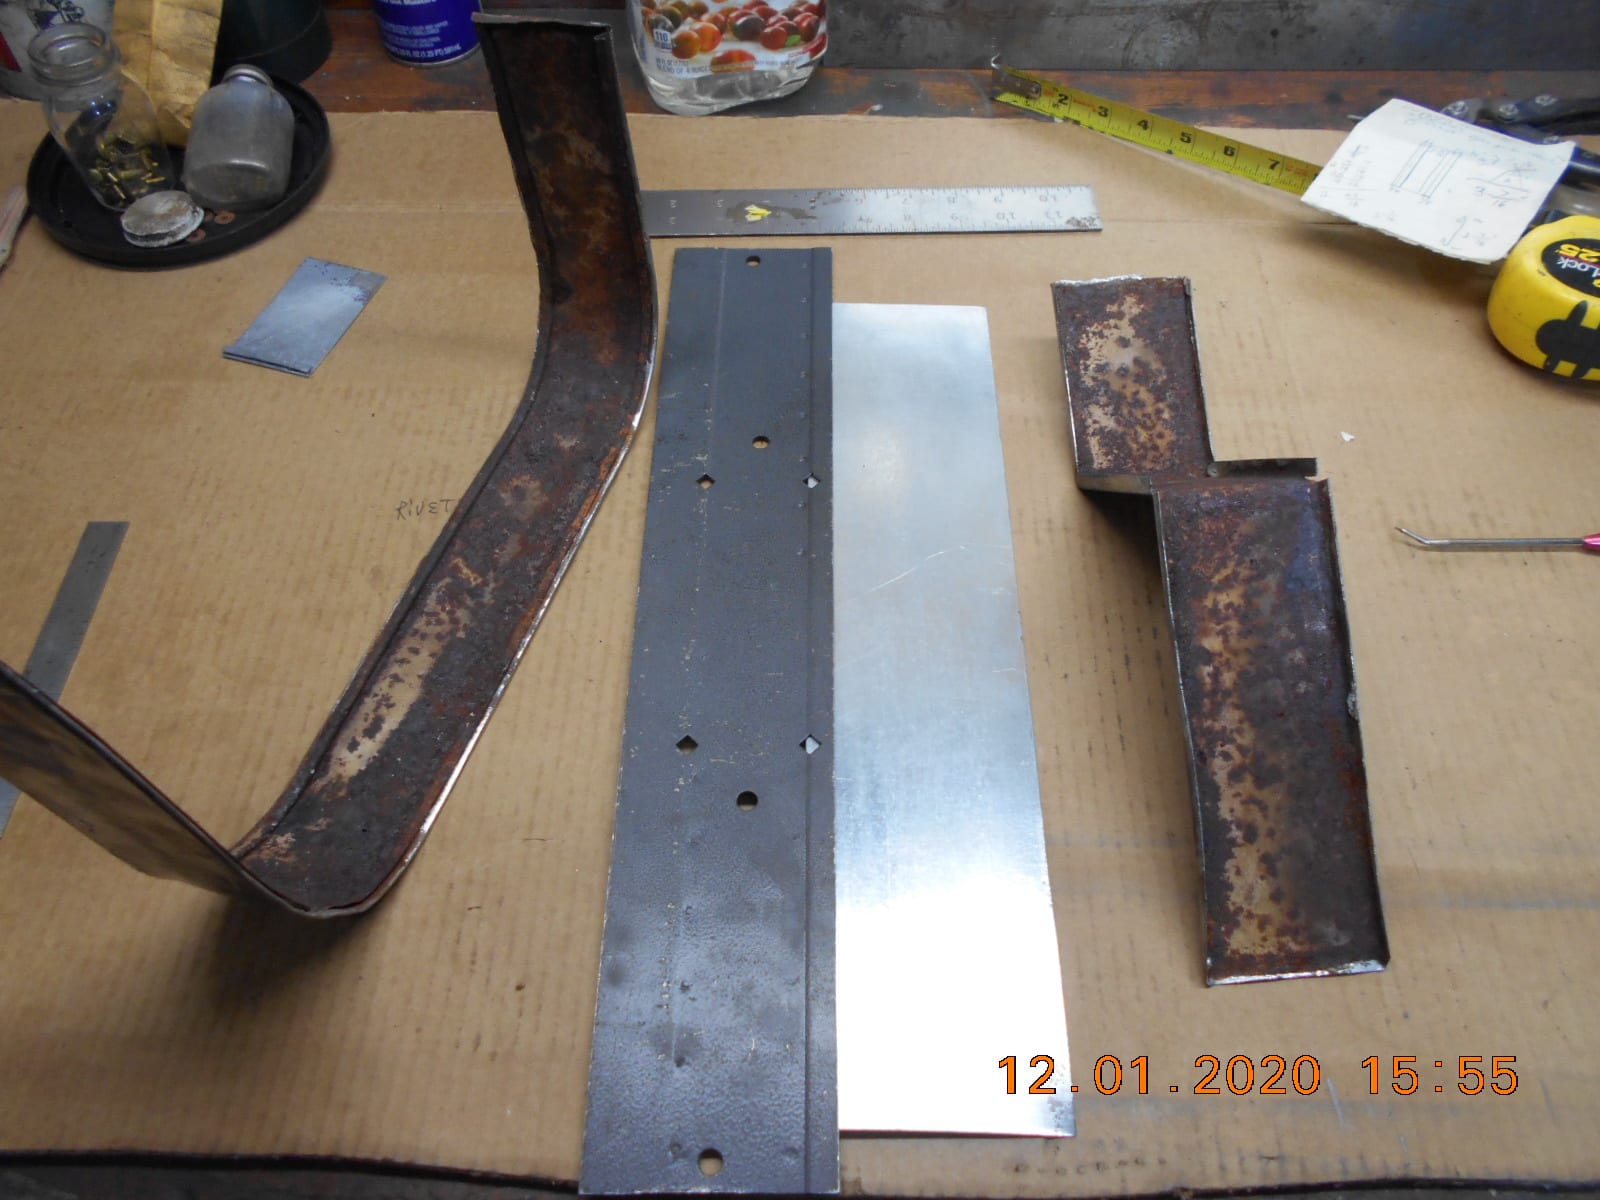
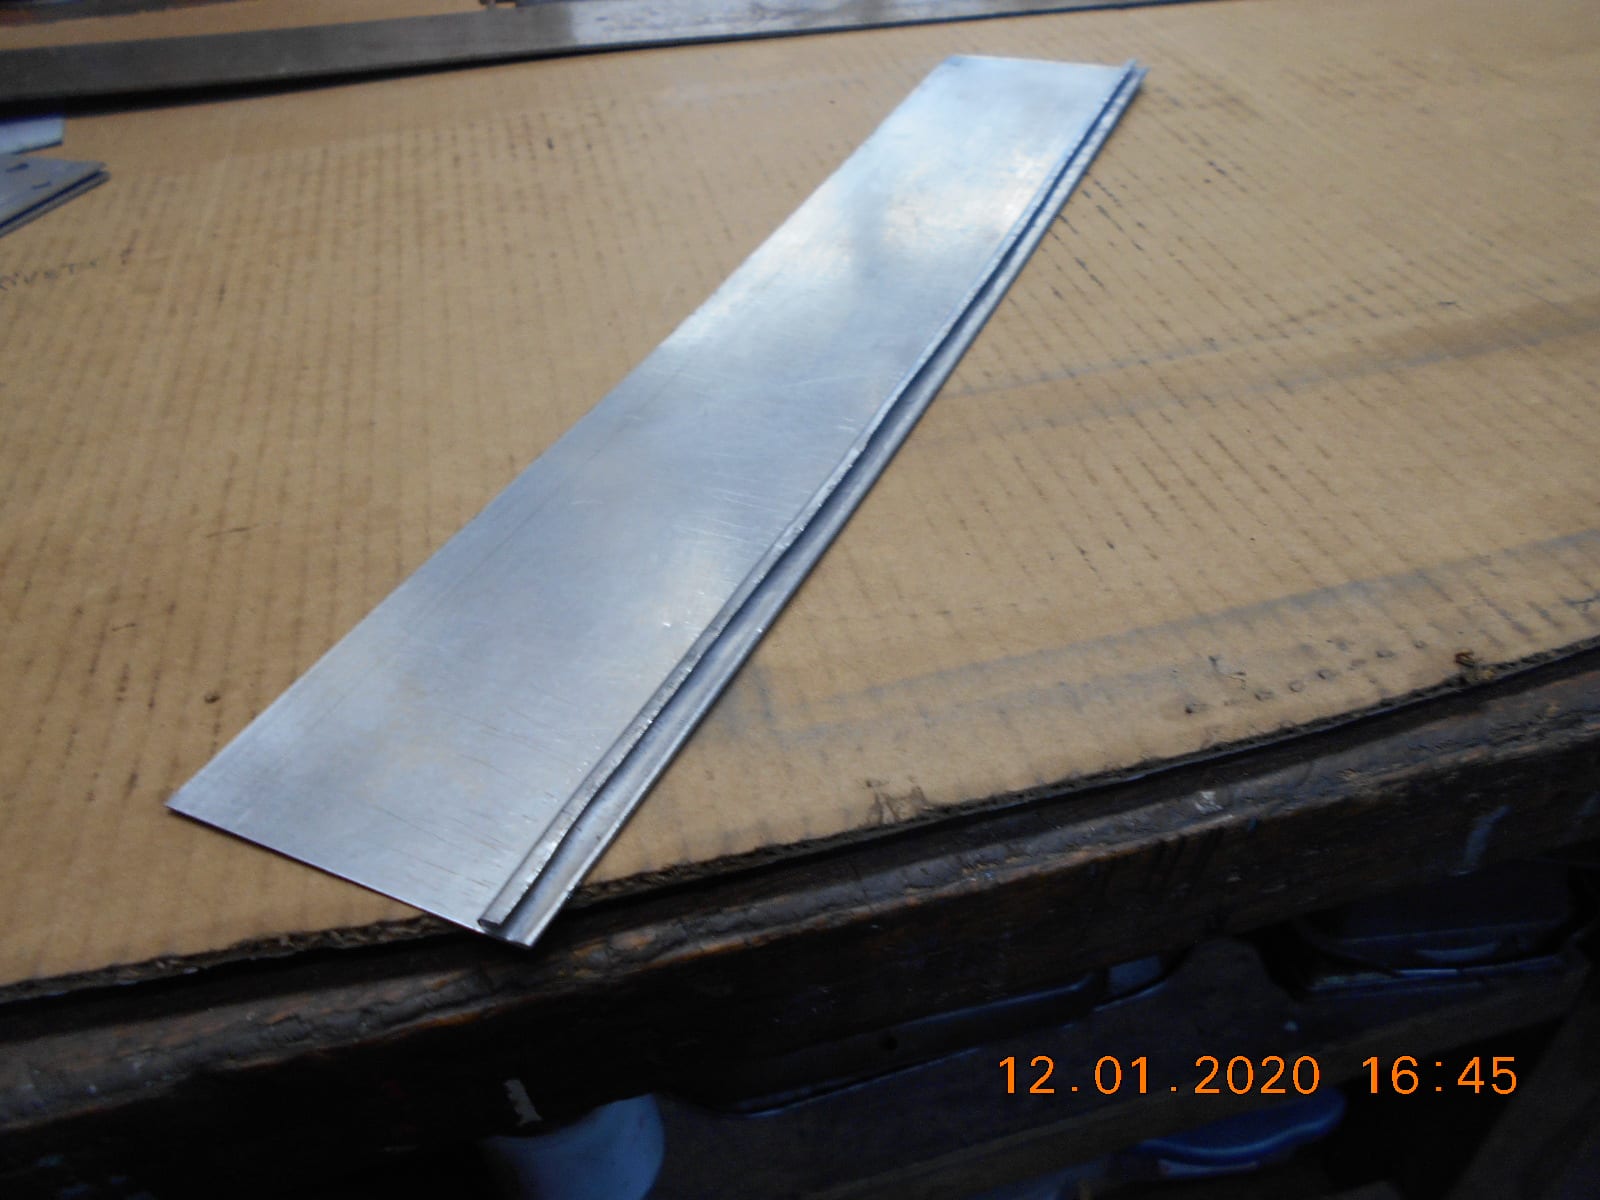
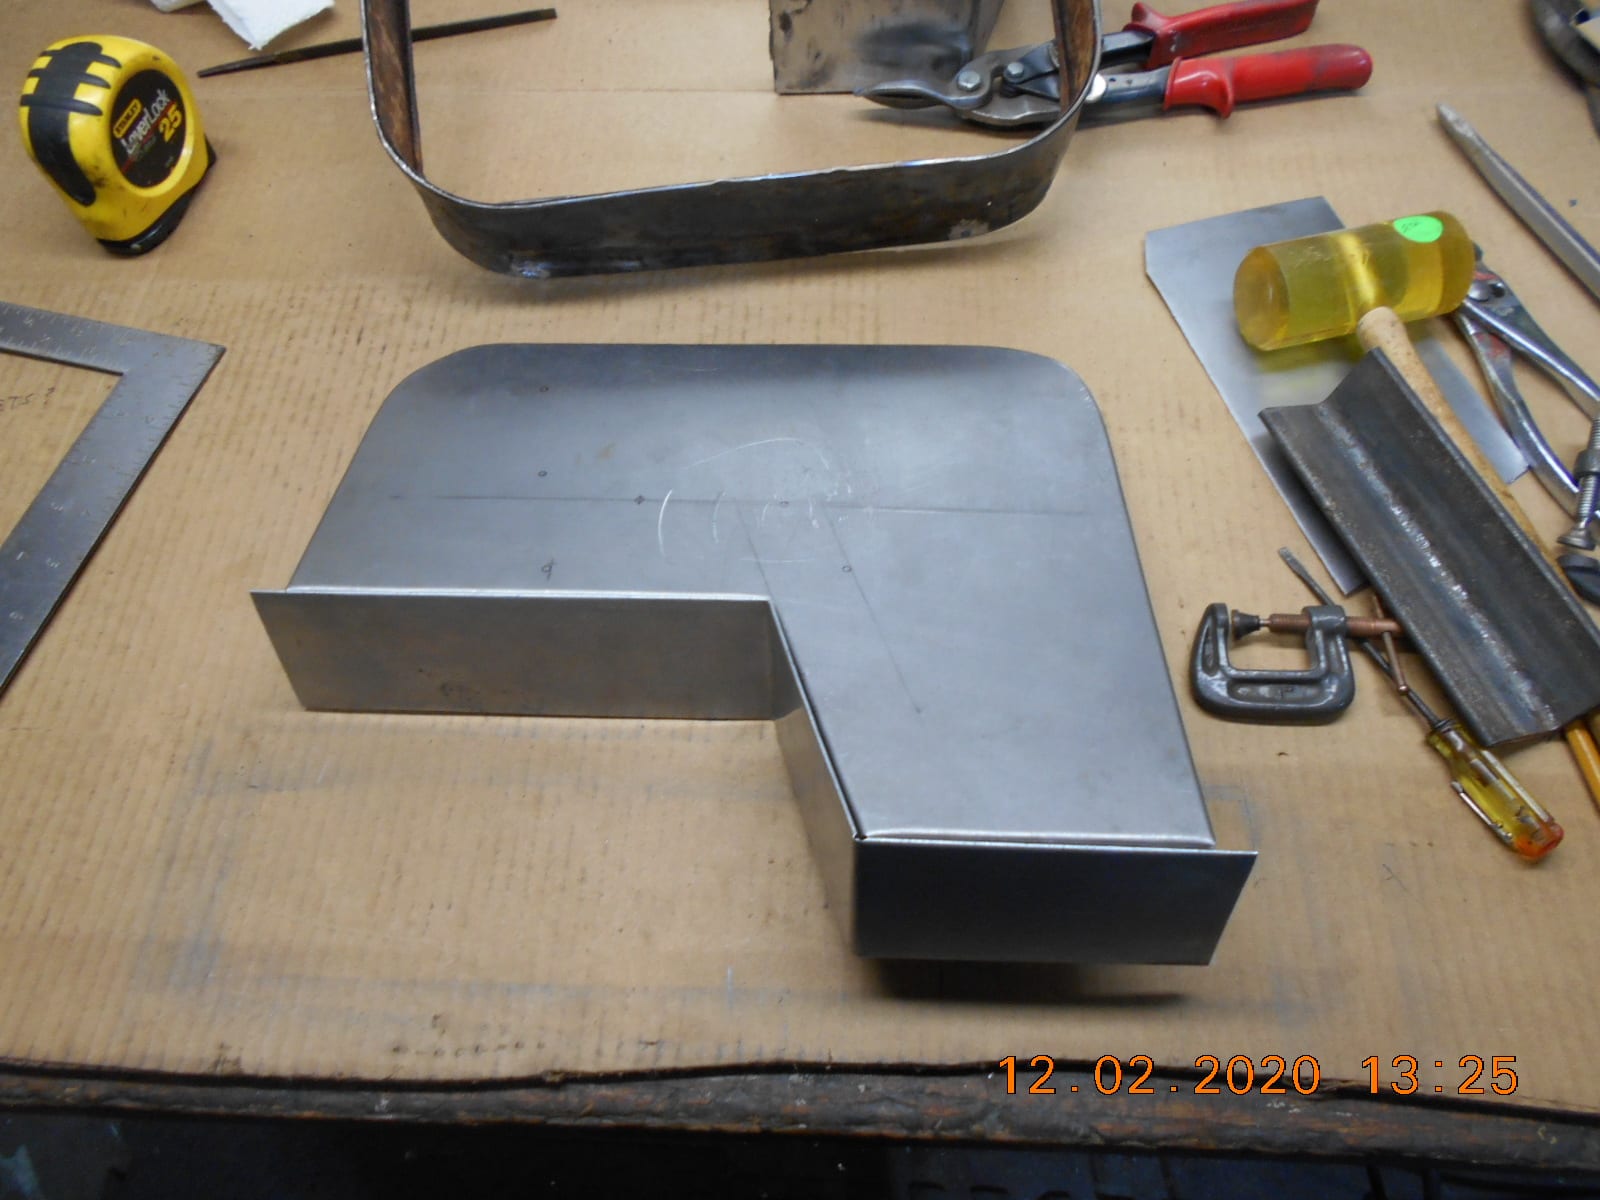
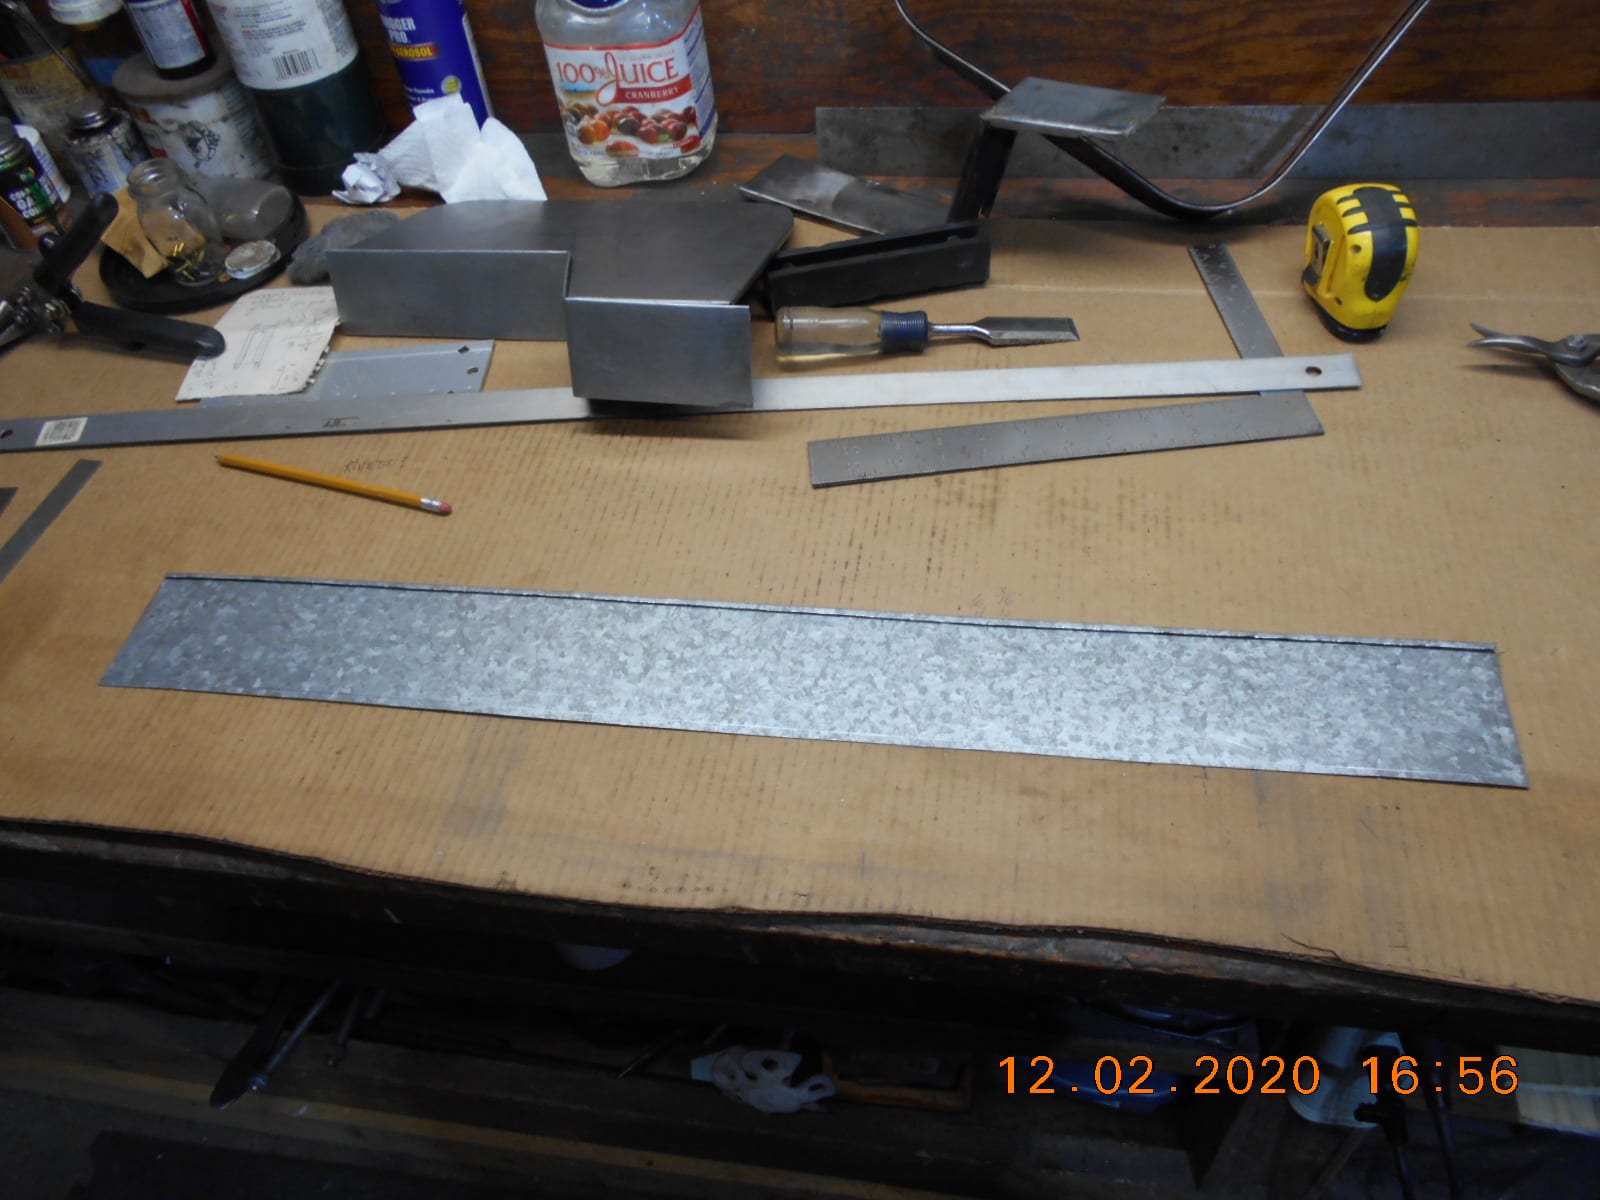
December 2, 2020 at 6:38 pm #224138I finished the smallest side panel today, and started on the long, 28″ one.
The original small side panel simply had 90 degree folded edges
that went over the top and bottom panels and were soldered.
The longer side panel has the Pittsburg style crimps that the top
and bottom panels “set into”.
It was one of these simple folded seams on the original small
panel that was “popped open” when I got it.
Joe B. mentioned that he did both panels with the Pittsburg style
joints.
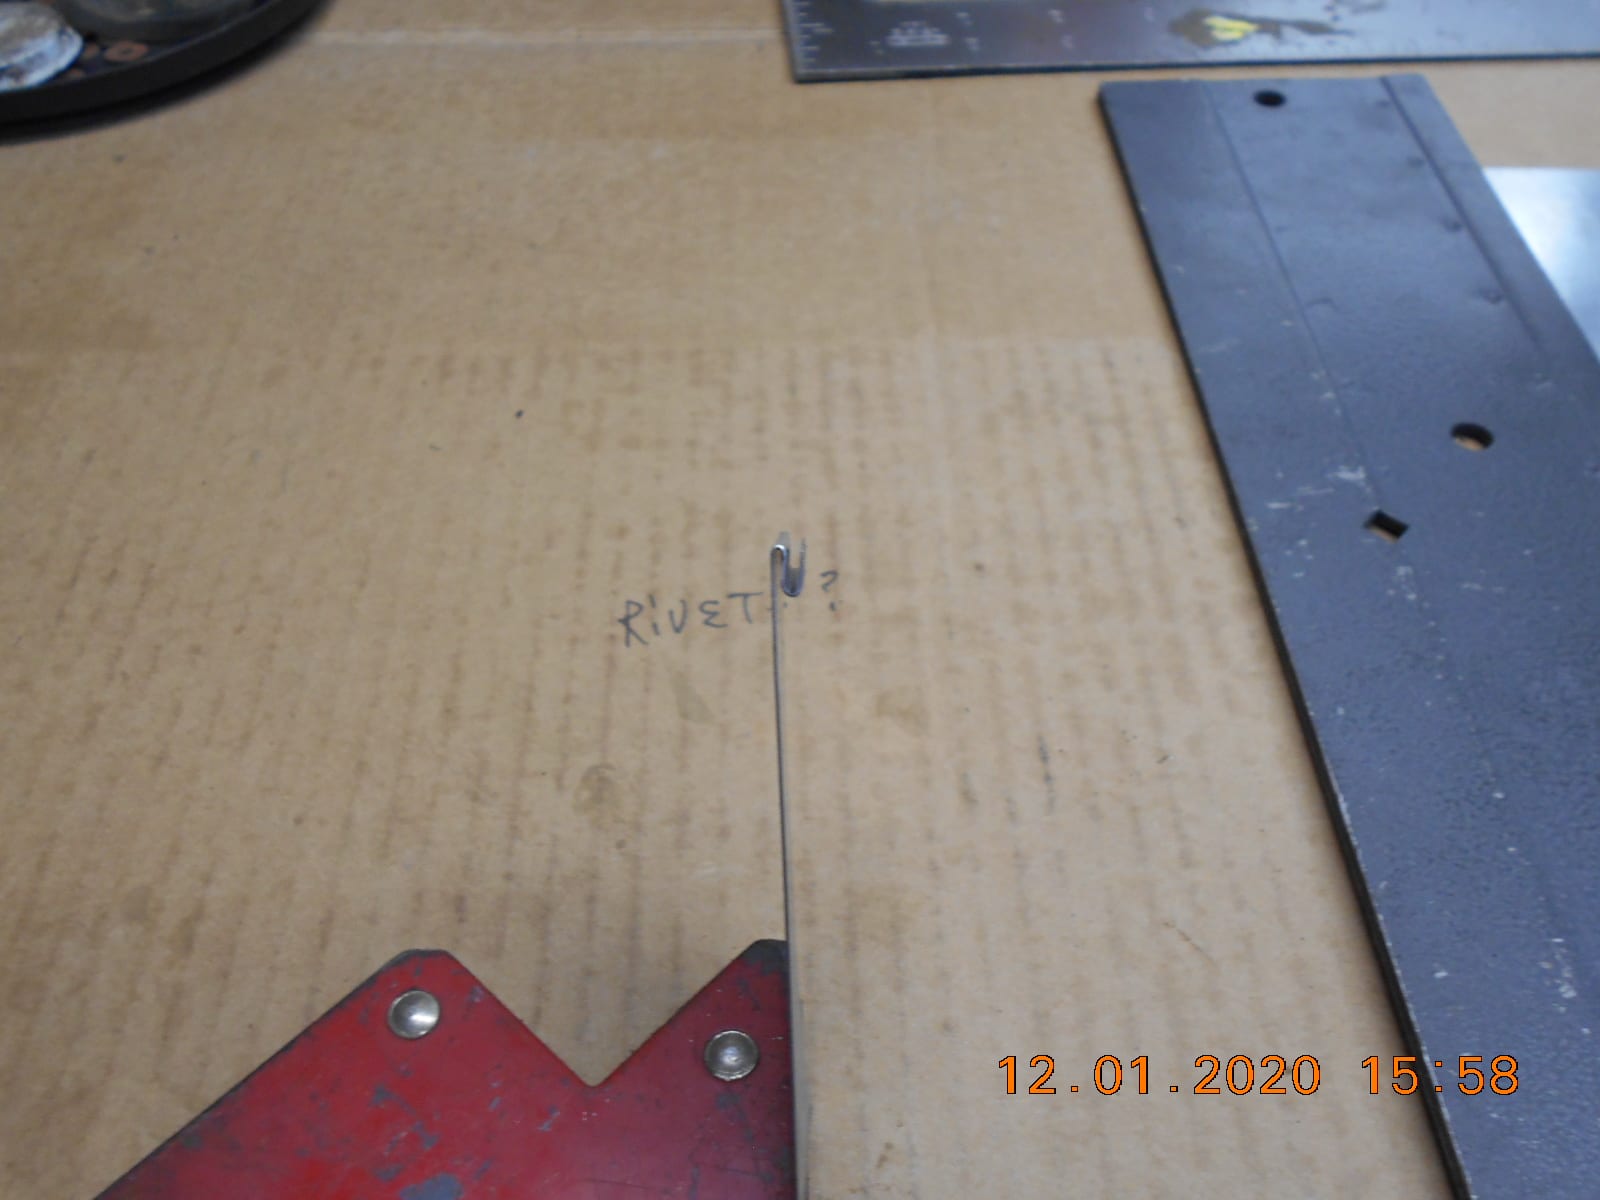
I’m not sure how to best join the small and long end panels together
at their two end joints.
Joe, did you join the side panels with any kind of locking joint,
or overlapping 90 degree flanges, or ??
Thanks!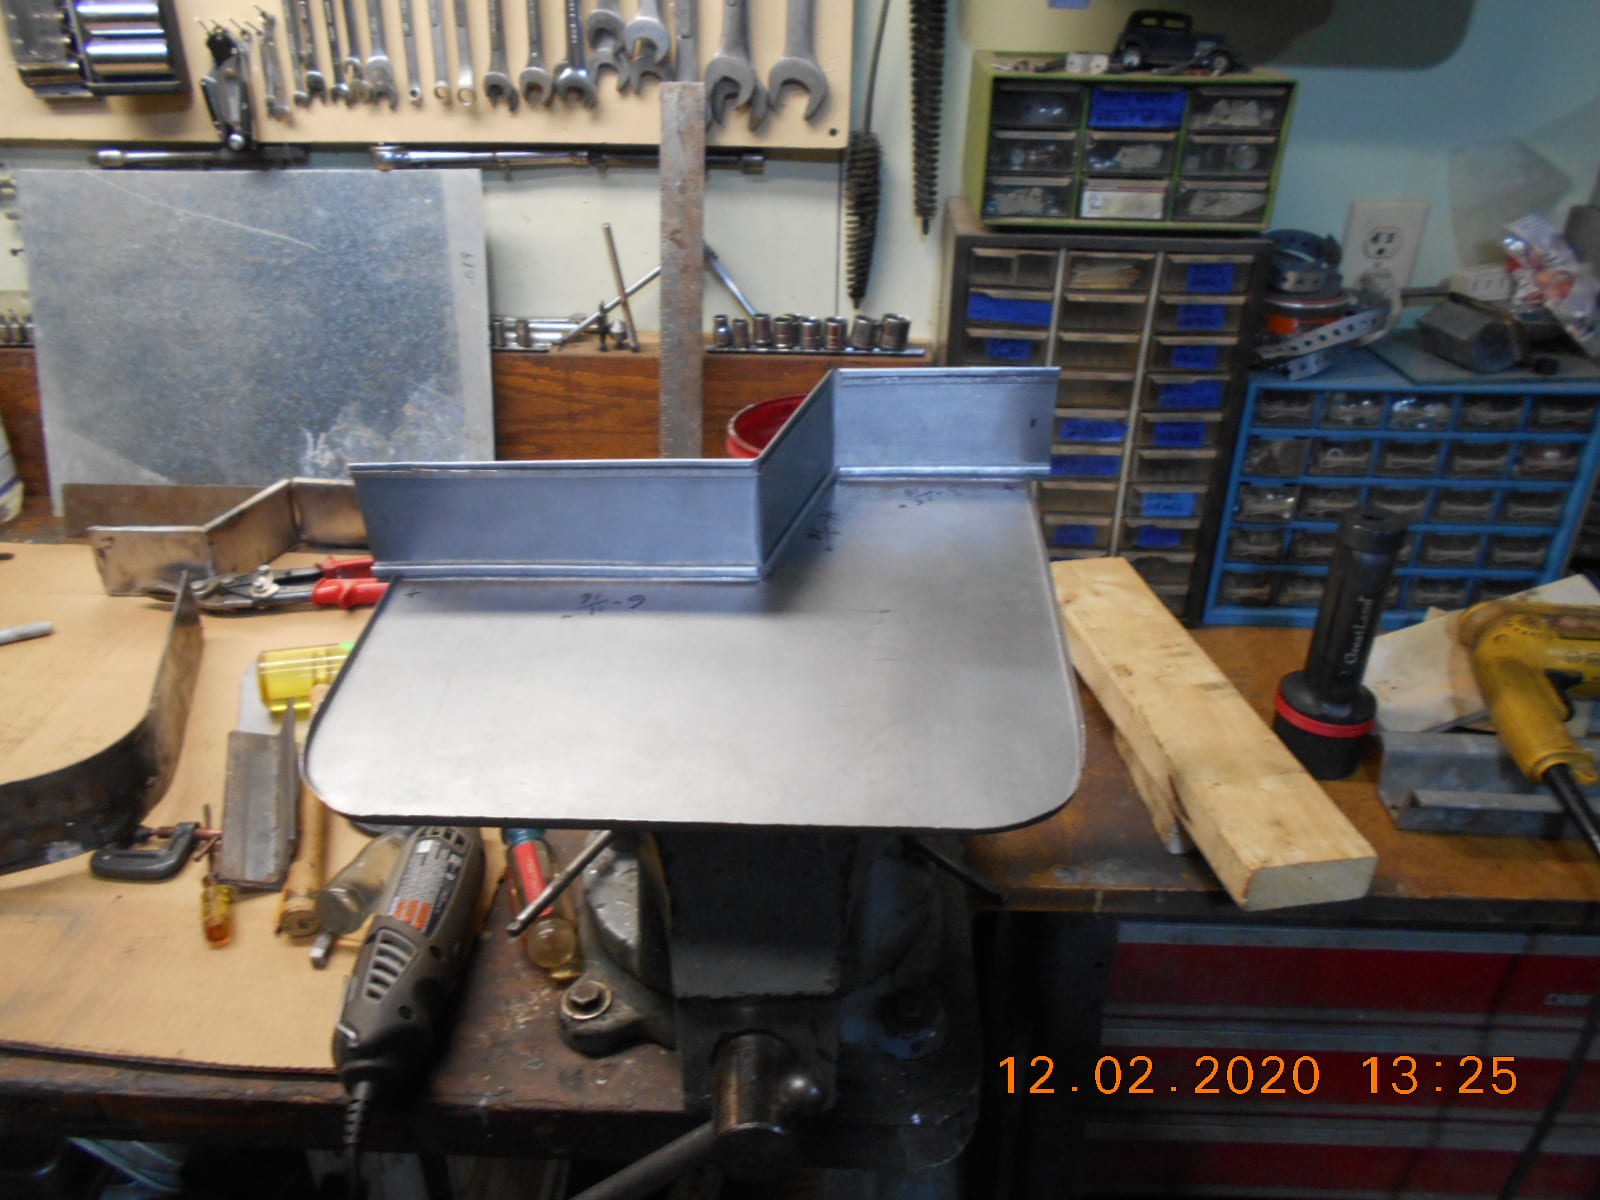
Prepare to be boarded!
December 2, 2020 at 8:53 pm #224147Buc, that job is coming right along…. looking read nice. Joints for the ends of the side panels…. I formed the same “S” on the ends of the long panel and just a 90* flange on the ends of the short panel to fit into the “S”.
Noe your job is coming along so well that you deserve a reward. Did you find any bras rivets yet? if not, I have a few left that I’ll send.Joe B
December 2, 2020 at 8:54 pm #224148Buc – that kind of work is way beyond my skill set but it sure looks like it’s going to turn out really nice! Can’t wait to see the finished project!
Bob
1937 Champion D2C Deluxe Lite Twin
1954 Johnson CD-11
1957 Evinrude Fastwin 18
1958 Johnson QD-19
1958 Johnson FD-12
1959 Johnson QD-20“Every 20 minute job is only a broken bolt away from a 3-day project.”
"Every time you remove a broken or seized bolt an angel gets his wings."December 2, 2020 at 10:00 pm #224154Buc, that job is coming right along…. looking read nice. Joints for the ends of the side panels…. I formed the same “S” on the ends of the long panel and just a 90* flange on the ends of the short panel to fit into the “S”.
Noe your job is coming along so well that you deserve a reward. Did you find any bras rivets yet? if not, I have a few left that I’ll send.Joe B
Thanks Joe! That should make for a stronger joint than it was before.
It would be a fun project “if” I had the proper tools, like a sheet
metal brake. I’d like to spend a day in the Caille factory watching
them make those tanks!I found some rivets, but none perfect. Some are steel, some may
be too long, or too short. I think there were some brass ones
the right size, but they have the hollow end, not sure about
the length. I need to make a specialty punch for peening
the hollow ended rivets, and do a little practicing on some scrap
before I know if any of my rivets will work.
Thanks!Prepare to be boarded!
-
AuthorPosts
- You must be logged in to reply to this topic.